Our content is reader supported, which means when you buy from links you click on, we may earn a commission.
Screencasting 101: How to Screencast
Videos are perhaps the best source of content for online viewers. They allow creators to compress huge amounts of information into a few minutes.
Moreover, the medium is flexible enough to include a diverse range of audio-visual tools. This allows content creators room to exhibit creativity. As a result, video hosting platforms are so popular online. Just look at YouTube and its 2 Billion active monthly users.
However, it can cost a fortune to develop high-quality live videos. You may require actors, lighting equipment, expensive cameras and microphones, and more just to compete.
One way to make videos painlessly and quickly is through the use of screencasting. Screencasts make it easier to step into video production, requiring only limited video editing skills. And often, screen recording is the best format for learning as it mimics conventional classroom learning environments but with added functionality.
What is a Screencast?
A screencast is simply video footage of your computer’s screen. You can add narration to it via text and captions or embed audio narration within it using your microphone. It’s one of the simplest ways to provide tutorials or explanations on how to use a particular software program, troubleshooting, or making lectures on specific subjects. You can record the contents of your screen or the onscreen process you want to show your viewers. Then you share them with other people by posting your screencast online on video streaming platforms.
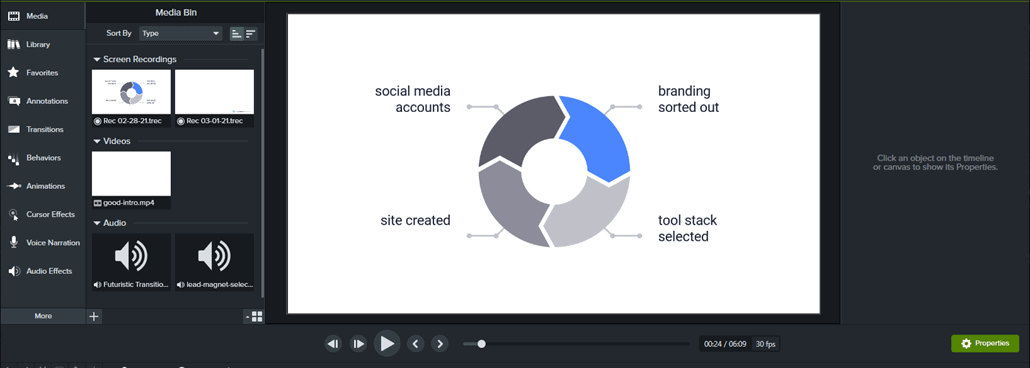
Here’s an example image of a screencast from my training. This one walks you through researching your topic. I walk the viewers through a spreadsheet template I made to help them figure out their course topic. So the screencast video is me showing them my spreadsheet with a voice over walking them through the steps.
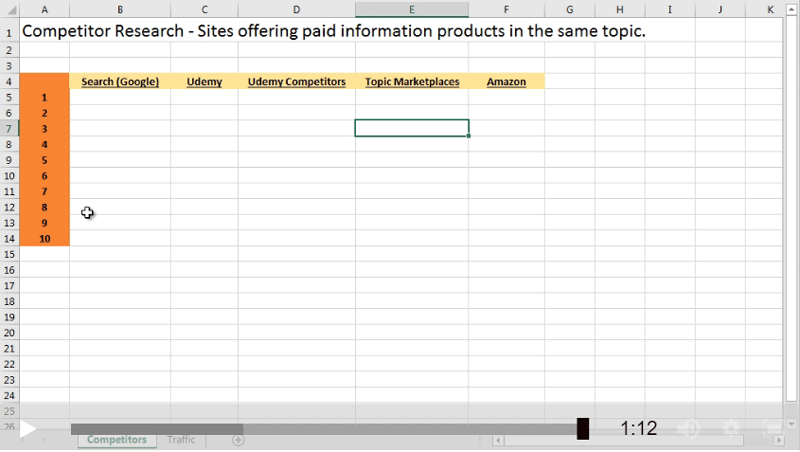
The incredible thing about screencasting is that there are really no limits to what you can record. Your computer can likely run just about any software application. That means you can record PowerPoint presentations and other slide media, programming environments, gameplay, and many other options.
Screen captures, like those above, feel more like a polished form of training as you’re essentially showing your viewers a presentation. Instead of having to give it once a week, you can record that presentation one time, allowing users to replay it hundreds, thousands, or even more times without effort.
Scale Your Time and Energy
In addition to a full presentation, you can walk your viewers through your screen as you navigate a website. This is a very easy mode of conveying information. You don’t have to dwell on making complicated documentation like taking screenshots, organizing information, typing out steps, and correcting errors. This saves you time and energy when producing content.
Additionally, information in video format is easier to digest. Your viewers can likely recall instances from a video faster and for longer than text-based information.
Plus, narration gives you room to personalize your mode of teaching. You can choose the tone, add stress to important parts of the video, or answer frequently asked questions when a topic springs up. Ultimately, the content in the screencast becomes more engaging for viewers, and you gain a reputation for producing quality content.
Why Try Screencasting?
There are a few reasons you should consider using screencasting, especially if you’re new to the world of video content creation.
First, it allows your audience to learn by watching and interacting with the contents on your screen.
We’ve all seen talking head videos with a close-up of a person who explains the material. But the problem with those videos is that they aren’t showing you anything; instead, they’re narrating information that is otherwise easily available. It gets boring pretty quickly, and viewers lose attention.
A lot of people are visual learners and screen captures typically work well for conveying information to them. As you can imagine, teaching through visual cues offers far better learning and retention than conventional modes of learning.
Screen captures are a perfect way to teach people coding, critique online sites, show people the steps to using an application, marketing your products and services, and much more.
You can show viewers the application itself instead of talking them through it. This encourages a learn-as-you-go methodology. Viewers can adapt to this quickly, enabling a faster rate for eating up information. This comes in handy when your viewers are students, for your professional career, or if they just want to learn an emerging skill.
Screencasting Makes it Extremely Easy to Create Videos
Second, these videos are extremely convenient for you to create. Just press the record button to start creating. You don’t need fancy peripheral video equipment like stands, lighting, or lenses. Often, you’ll only need to install screencast software on your computer and a microphone to get started.
Most of the paid screen capture options are reasonably priced, and there are even a few free options (these do have limited capability). This helps you create content quickly to keep up with your viewers’ demands. It can help you churn out content much faster than with other methods.
In addition to the screen recording tool you choose, you may need to upgrade your stock microphone. You can choose a USB microphone that plugs right into your machine or invest in a fancy home recording studio package.
There’s a lot of variety between recording equipment, but the important thing to remember is that you won’t need expensive equipment from the get-go. Just scale as you create. Once you start generating a decent amount of revenue, you can invest further into the content you create.
You just need two tools for creating screencasts; the microphone and screencasting software. This cuts down drastically on what you’d need for creating live videos. Or if you want to make use of additional functionality, overlay a live video of you talking as you show your screen recording. Many screen capture software programs come with this feature, allowing you to make content that serves a wider viewing audience.
Videos are among the most powerful ways to communicate information. They allow you to get a message across more quickly, more effectively, and with greater impact than any other medium.
Let’s take a closer look at everything you’ll need to know about creating engaging, informative, and professional-looking screencasts! There are a few steps, so let’s go through them, starting with the specific tool you’ll use.
Find Good Screencasting Software
When learning how to screencast, the most important elements to look out for in screencasting software are ease of use, functionality, and price. Most apps have free versions, but they’re usually limited in features. However, free versions are a good place to start if one is available.
Try different tools to figure out the kind of features you require, how easy it is to perform the intended function, and the quality of the content it enables you to produce.
If it’s important for you to add photos from your devices or images, then make sure those features are available.
Below are some of the most widely used software tools you can start with. Each has its pros and cons, but none of them have much of a learning curve associated with them. Stick with the one you’re most comfortable with when starting out.
Jing
Jing is free software that lets you capture your screen and add annotations to it. It allows you to capture the desktop and webcam at the same time. It’s easy to use but does have some limits, like no audio recording and limited output file size (10MB). The software provides online storage (2GB); however, the trial version only lets you save files in limited formats, like .swf, that are not as widely applicable as other formats.
You can capture your screen and share your recordings using Jing. Most users find it easy to use, making it a great software for beginners. Just click the record button, do what you want as you show your device screen, and hit stop when you’re done. It is the ideal platform for one-time users or those who don’t have the time to learn different settings with a new app.
Screenflow
Screenflow is a premium screencasting tool. This is a paid option, but there are no size or length limits when using this software. Screenflow is a great tool for capturing your screen and creating high-quality recordings. It has huge potential for you to become a video producer and is very easy to use.
This tool makes it easy to create professional screencasts. It records the audio from your computer and the professional video editor allows you to easily add photos from your device, annotations, highlights, and captions.
Essentially, it has all the bells and whistles you need to make impressive screen captures. A few drawbacks when using Screenflow are the pricey updates and features that come with it and the troubles with uploading and exporting content.
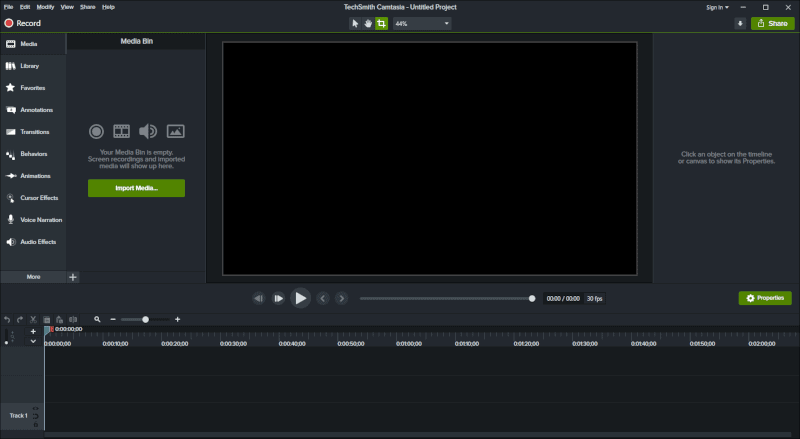
Camtasia
The screencasting tool I’ve used for over a decade is Camtasia from Techsmith corporation. Camtasia is a great program that will allow you to create a high-quality screencast. It’s easy to use and has lots of features to help you create videos that will engage your audience. It has a great one-click recording feature that makes the process quick and painless.
Camtasia is a great program for recording your screen as well as any other kind of video editing, whether it is shot through a webcam, mobile device, or professional video camera.
You can even overlay a live video of yourself talking while you show your screen or add in music and images. Moreover, it’s pretty affordable and has many tools that will help you create high-quality videos quickly. You might encounter trouble when rendering a large video file, but in most cases, it works flawlessly.
QuickTime Pro
Another option for Mac users is QuickTime Pro. It’s easy to use, plus it allows you to record audio from your microphone as well as webcam video. There is a free version as well that has enough features for you to create impressive screencast videos so try it out! It is quite fast at rendering videos but doesn’t provide the flexibility and functionality as other software in this list.
Note that QuickTime for Windows does not have a recording function; hence, Windows users will definitely miss out on this option.
Things to Look Out for When Screencasting
Once you select your screencasting tool, you need to get organized. Otherwise, you might wind up scrolling through web pages or alternating between tabs.
Prepare Your Screen
The first thing you need to do is prepare your entire screen. You don’t want irrelevant content to grab your viewers’ attention. Make sure that any other tabs remain closed while your screen continues recording. Other than being a distraction, it can lead to embarrassing situations as well.
Chalking out a script beforehand comes in handy. Scripts not only tell you what to say but also map out a plan for how you’re going to go about your recording. The only downside with a word-for-word script is that some people will read it and it will come out very monotonous.
If you’re going to read a script you need to read it in a conversational tone. So it’s best to make sure it’s written in a conversational tone to start with. Even though you may be reading, you can still pause and look away, things that are natural.
Or you can create an outline and work through that instead. Whatever you are most comfortable with. Once you’ve figured that out, you can start recording.
In most cases, it’s as simple as pressing a play button.
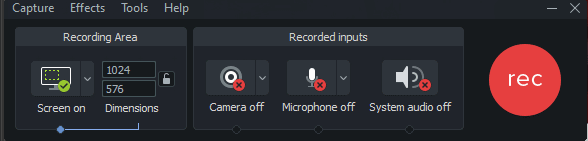
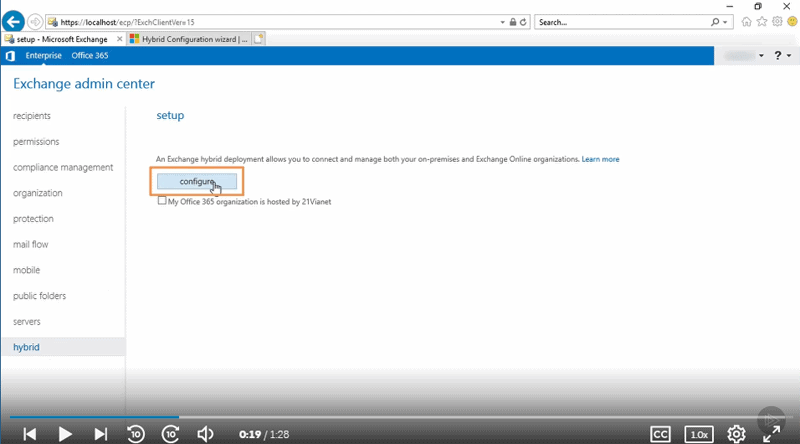
You do need to be mindful if you’re using something like Camtasia as to where the recorder is placed on the screen.
In the example below, we’ve got a browser window space shown within the Camtasia recorder. Make sure you’re only recording the area you want your viewers to see. You can also hide your mouse cursor or make it front and center if it’s part of the screencast.

Live Video Recording
If you want to be on the screen too then you will also have to create a video recording with your computer’s built-in camera or an external camera. In most cases, your built-in camera won’t provide you with sufficient quality. You might want to experiment with the camera types available to you (this includes your Smartphone). See which one gives you good enough results.
Record yourself speaking and moving around the screen, using a microphone if necessary. Just as picture quality is important, so is audio quality. This is especially true when narrating.
Very short videos normally don’t require narration, and you can go with embedded captions or subtitles instead. However, you may want to consider adding narration if you’re making instructional videos where the subtleties of what you’re trying to impart come into play.
Edit Your Recordings
If you’re only using screencasting to showcase walkthrough videos or navigation videos, then you probably won’t need to edit anything. But, if you want to make your content even more engaging, then editing is a skill that goes a long way. This enables you to control and exert your creative expression tailored to the needs of your audience.
You can include additional sound recordings, add background music, add pictures, and clips to enhance viewers’ learning experience. All this may add more clarity to your video recording. Moreover, editing enables you to correct any errors, adjust sound quality, and make use of all the features at your disposal.
You can play around with the software and cut out segments to adjust transitioning and control flow. In addition to this, it may allow you to make basic audio adjustments like volume control, equalization, noise-canceling, and many more.
Yes, there’s a learning curve, but the professional content quality it enables you to produce makes it a worthy investment.
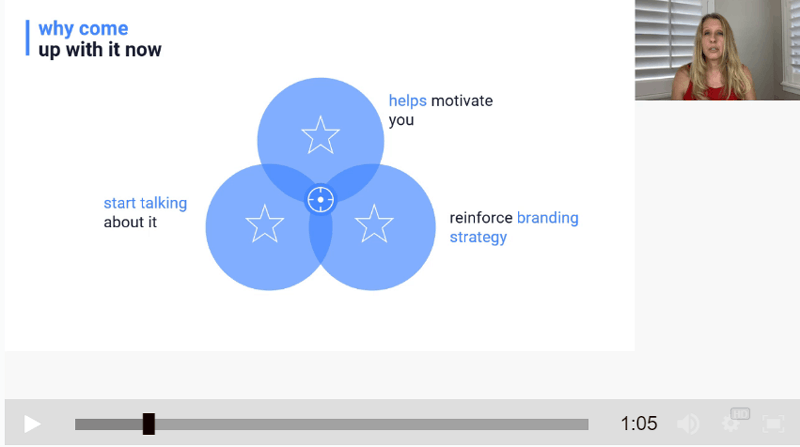
With some tools, you can even add captions to different video footage within the same timeline. With Camtasia, you can overlay a live video file to your recording, if desired. Here’s one where I’ve added myself next to my PowerPoint presentation.
Share Your Screencast
Once your screen recording is perfect (and you’re happy with it), you need to share it on platforms that allow video content uploads. This means you need to export it into a format that is accepted by your intended video streaming site. In most cases, converting it to an mp4 file will allow you to upload it to almost any video hosting solution you may be using, including allowing viewers to watch your screencast free on social accounts like YouTube or Facebook.
If you’re creating an online course, you can upload the recording within your learning management system or online course platform. Here’s an example of mine within the Teachable platform:
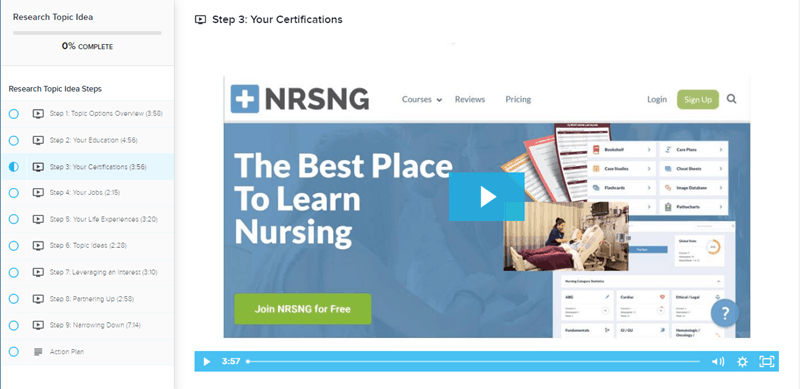
Uploading to my learning management system means only people with access to it can watch my video recordings.
Summary
All you need to do is follow the steps below:
- To get started, decide on the software you’re going to use for your screen recordings.
- Prepare yourself and your computer screen for recording. Close additional tabs, present yourself in an orderly fashion (if you’ll also be on camera), and check your microphone.
- Press the relevant play button on your screencasting software to record.
- Make adjustments to your recording. Adjust the size and location of your tabs as you go along. Pause if necessary.
- Press the stop button on your software and save your screencast in an appropriate media format.
- Share your screencast online. It may take a few minutes to produce, depending on how long the screencast is, but then it’s ready to upload.
Frequently Asked Questions on Screencasting
What are the common desktop recording tools?
If you’ve ever wanted to record what’s happening on your desktop, there are a few different tools you can use. The most well-known screen capture software is Snagit and Camtasia. Camtasia lets you record your screen as a video. This can be useful for creating tutorials or demo videos.
Or, you can use a screen recorder like QuickTime Player or VLC Media Player. These programs record whatever is happening on your screen, without any extra features.
Finally, if you want to record only audio, you can use a program like Audacity or GarageBand.
How do I edit my screencasts?
Whether you’re looking to remove bloopers or add some polish, there are a few ways to edit your screencasts. If you’re using a Mac, the QuickTime Player app has some basic editing features built in. You can trim unwanted footage, mute audio, and even split clips.
For more advanced editing, you’ll need to use a dedicated video editing app like iMovie or Final Cut Pro. These apps offer a wider range of features. Features include the ability to add transitions, titles, and music.
If you’re using Windows, there are many video editing apps available. These include Camtasia and Adobe Premiere Elements.
How do I make a screencast on my phone?
Making a screencast on your phone is easy.
First, you need to download and open a screen recording app.
Then, select the “Start Recording” button. A 3-second countdown will begin, giving you time to get your screen situated.
Once the recording starts, everything that happens on your screen will be captured.
To stop recording, press the “Stop Recording” button.
Your screencast will then be saved to your camera roll! From there, you can share it with whoever you’d like.
How do I screencast for free?
One option is to use screencasting software already installed on your computer. For example, Mac computers come with QuickTime Player. QuickTime has a screen recording feature. Or, you can use screen recording capabilities built into your web browser. For example, the Firefox browser has a screen recorder extension that you can add for free.
Another option is to use a free screencasting service. These services allow you to record your screen and share the resulting video with others. Some popular free screencasting services include Screencastify and Loom.
Finally, you could also use a free video editing program to record your screen. Then edit the resulting footage into a finished video. This option requires a bit more work, but it gives you more control over the final product.
Conclusion
The market for providing content is ever-increasing. This holds even more true for video media of all types, including screencasts. More and more people are joining the lucrative content industry, especially given the potential for rewards it can generate for the creator.
An added benefit is the diverse range of content you can create. You can use multiple channels to convey information, provide video entertainment, or display your products. Hence, screencasting is a great way to save time when creating video content, enabling you to share ideas quickly. It lets you keep up with emerging trends and allows you to adapt to a changing viewer base.
Remember, video content isn’t just about the content itself. You may have expertise in what you want to convey to your audience, but production quality also matters.
Think about the kind of viewers your content will attract and make it such that they respond to it. Ultimately, you’ll be left with prime content, making you or your channel a trusted source of information.
