Our content is reader supported, which means when you buy from links you click on, we may earn a commission.
Best Practices for Visual Cues in eLearning

Not all learners are the same. Some learners grasp concepts simply by listening; however, visual learners might need alternative means to study. As the name implies, visual learners are those who respond better to visual cues.
It helps them connect better to visual cues because seeing information presented in visual form provides a holistic view of the curriculum. They usually struggle when it comes to remembering instructions when those instructions are verbally communicated.
If your learners are struggling to understand the materials in your digital training or online courses, chances are they might be visual learners. Let’s take a look at how you can incorporate visual cues in your training and improve your learners’ educational experience, helping them learn more effectively, without distractions.
What are Visual Cues?
When designing any curriculum, one has to compress a lot of information concisely to avoid overwhelm. Most course creators forget that their prowess might blind them to the challenges learners might face. As a result, many learners may become confused or stuck as they go along and lose interest if they don’t know how to proceed.
Here’s when visual cues come in. They are essentially visual aids that help govern the flow of content absorption. Some concepts, like those of geometry, are difficult to explain and may require visual representation to give a better idea of what is being discussed.

Instead of long paragraphs describing a phenomenon, you get to compress the information into visual forms like images, infographics, tables, gifs, and much more. Learners inadvertently direct their attention towards a visual cue, enabling them to consume information faster.
Why do Visual Cues Work?
It was a previously incorrectly held notion that perceptual learning happened during the development phase of childhood but halted after this phase had passed. It is true that human minds are much more moldable to cognitive processes during this time and cognitive mechanisms build up at an accelerated rate.
However, the perceptual learning process is much more complex than we thought. As a result, subsequent experimentation showed that human adult brains could be rewired to accept information more readily by perceptual learning. This phenomenon is called neuroplasticity – a process allowing neural networks to re-organize in certain parts of the brain in response to external stimuli, including visual cues.
Sometimes, all you need is a gentle push when learning something. A visual cue works in a similar way.
Since they are hard to miss and willfully placed to attract the learner’s attention, they are picked up easily by our vision. Hence, all learners need to do is connect the dots to whatever they’ve previously learned, making it a guide for the perceptual learning process. Granted, they need to have the capacity to understand the flow of where the instructor is leading them while taking a mental note of what’s being delivered. Nevertheless, it is an effective tool for subconsciously implanting learning direction.
Objectives of Visual Cues
The objective of a visual cue is to showcase a repetitive display of visual aids that have a lasting impression on one’s perception. The end result is stimulus-based learning instead of experiential-based.
In a study conducted by teachers, visual cues were tested in developing prediction-making skills of third and ninth-grade English language learners. They found that teachers who employed the use of graphic organizers in their teaching methodology resulted in students enjoying the learning process, making better predictions, and incorporating visual techniques themselves. As a result, these students were able to outperform students who only relied on reading and writing their responses.
This study focused on prediction making, an essential factor for learning. It helps build comprehension by practicing inference. That way, students are more aware of where they are being led. This allows for a better understanding of the study material and preventing loss of interest.
Next, we explore the kinds of visual cues you can use and what benefits they offer, as well as how to use them and what to avoid.
Examples of Visual Cues
There is a multitude of media you can include in your eLearning courses. Just make sure that you use a variety of them and format them professionally.
Videos
Videos are an excellent medium to impart information to visual learners. Video allows learners to take charge by allowing them more control of how the lecture progresses.
Incorporate multiple sources, anything that gives your students the incentive to remain engaged during eLearning. Ultimately, your study material will become more vibrant.
Common use cases for video include:
- Animations: Some ideas are difficult to conceptualize owing to their complex or abstract nature. Using animations gives you the freedom to personalize ideas and thoughts. It allows a simplistic explanation of otherwise obscure concepts. And, they let you exhibit your creative freedom when customized for an audience.
- Tutorials: Tutorials are essential to the learning process and provide a much more engaging learning atmosphere. Video tutorials are easily accessible and have the same objective as classroom tutorials. They have the added advantage for students to skip to the necessary parts and focus on the learning outcomes.
- Demonstrations: Your students may come across some concepts that are difficult to grasp and require a more hands-on approach to problem-solving. Again, this forms a subset of perceptual learning. For example, showing how a problem is solved ingrains the approach to take for future problems.
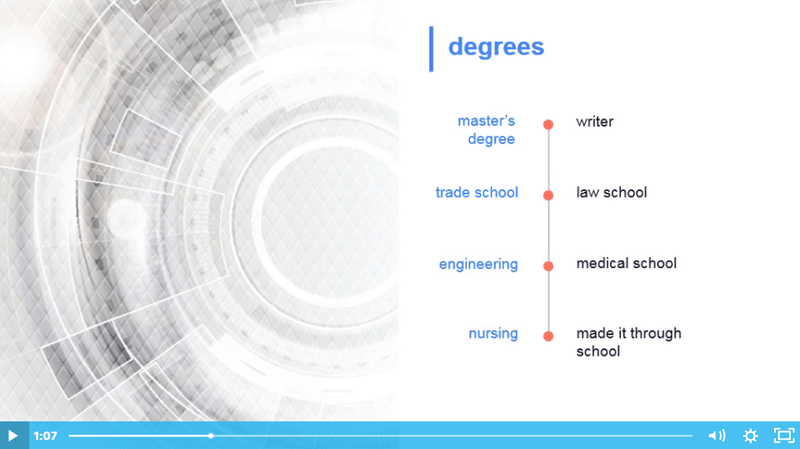
Images
Images are the next best thing to video incorporate in your eLearning courses. They are abundantly available and if you’re creating your own, they don’t require extensive skills to make.
The objective is the same as that of videos. They help you compress information in a form that’s more easily digestible for audiences. They can also be used as placeholders for diverting attention when stressing a few learning outcomes. This leads to a more engaging and proactive learning approach.
Below are the most common ways you can use images to enhance your eLearning courses:
- Using high-resolution imagery, captivating images can be used to showcase examples. Link them with the study material and use them as needed.
- They can be incorporated in a tutorial to highlight steps leading up to an outcome. For example, showing how to set up laboratory equipment.
- Images displaying actions in sequence can be used to drive a point. Like, how to do a handstand. Labeling them gives additional visual cues to the learner enabling them to stay clear of common pitfalls.
- You can fashion images any way you like. You can make them into a series of pseudo animations, make them into flashcards for practicing memorization techniques, or infographics that summarize information and key facts.
The versatility of images doesn’t end here. Look for ways you can incorporate images to customize your curriculum so that it appeals to a broader audience.
Gifs
Gifs are an image format that allows you to host short animations. They have become increasingly popular over the years, owing to meme culture and their small file size. Other than being a source of comic relief, they can be used in your eLearning platforms.
The good thing about gifs is that they loop over and over again. That means they can be used to animate concepts that repeat. Gifs can help you illustrate the following concepts; how the planets move across the solar system, how an internal combustion engine works, or how DNA makes proteins.
All these cyclical processes can be incorporated in gifs that keep on looping within your text. Users don’t have to press pause or play, and you get to save on data transfer rates given the small file size.
Gifs also exhibit character, making a more personalized experience for the learner. There are many different gifs out there that can be used for exhibiting emotional behavior like emoticons:
- Salutations
- Greetings
- Endnotes
- Comic reliefs
- Reactions
Since most of these stem from pop culture, you can use them to retain user attention as a means to make your eLearning content more relatable.
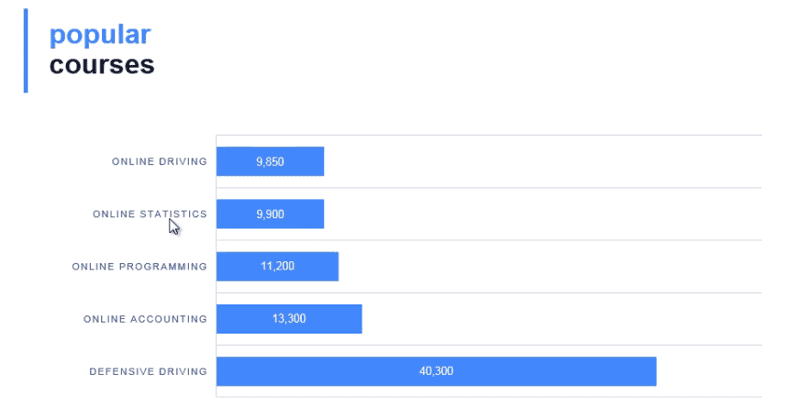
Graphs and Charts
Some courses require vast amounts of data representation. For better illustration, you can employ the use of graphs and charts as visual cues and make it easier to absorb information for the user. They help recognize discernable patterns in continuous or discrete data streams, allowing learners to quickly obtain the lesson takeaway. And, otherwise, large amounts of data can be neatly organized.
There are many ways you can go about this:
- Bar Graphs: Used to represent the frequency of categories as bars. They can be used to represent stock data, that is, how many trades happened in a given or time interval. The data can be extrapolated over time to show a trend.
- Line Graphs: They are most commonly used to show a trend in a variable and change over time. However, generally, they can be used to show the relationship between two or more variables.
- Pie charts: They are a visual representation of percentages segmented into arcs of a circle. A pie chart can help show the learner information as a whole and its proportions in relation to other segments.
- Histograms: Like bar graphs, histograms represent frequency; however, it has mutable intervals. It’s great for representing information that remains between two thresholds like image pixel data.
- Tables: For smaller data sets, tables provide the easiest form of data representation. Information can be neatly arranged in rows and columns when you have to deal with only a few variables. Additionally, cells can be highlighted, merged, sorted, filtered, and many more for data cleaning and processing.
The above are the most common ways to represent data visually. But, don’t forget to annotate data so that it’s easier for your students to know what the data signifies. Make sure it has legends, labels, and indicators to stress crucial learning objectives.
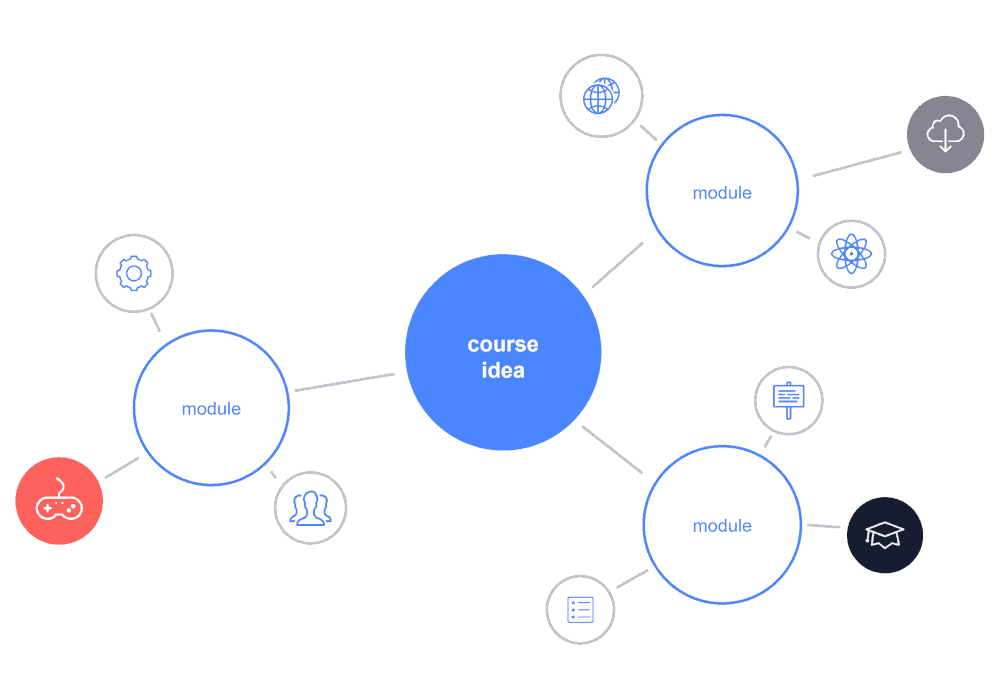
Organize
When designing an eLearning course, you have to look at how information is presented as a whole. You can incorporate the above elements or include other visual cues; just make sure that the information has a consistent flow and connects with what has been presented before it.
Information that is organized, structured and systematic is much easier to follow and understand for anyone. Go over your curriculum with a fine-tooth comb and look at how it emanates information to your students. Ask for feedback to identify any bottlenecks your students face and see if any of the above visual cue tools can help.
Benefits of Visual Cues in eLearning
Now that we’ve gone over the kind of visual cues you can use, let’s take a look at how you can use them effectively when designing your eLearning platform and how they help educate your learners.
Guide Attention
Our vision is probably the most important of our senses and helps us interact with the environment around us. It is perhaps the only sense that we rely on to study effectively.
A study on tracking students’ eye movement while reading found a couple of insights. Among them included diminishing attention spans as they progressed through the material. Fixation on the text decreased with a harder cognitive load, and students tend to fixate more on visual cues than words.
Hence, having distributed visual cues can give students time to process information while they go through long passages. It lets them replenish their attention levels, allowing them to better search for their learning outcomes.
Increase Time Learning
Challenging concepts require more time than others. Having a visual cue guiding through the content while focusing on key aspects of the learning objectives can help retain students at a specific topic for a longer time.
The goal here is to make the process faster by making it go slower. Students will respond to visual cues better once they connect them with what they’ve read. They extract the useful information out of the visual cue presented to them; if unsuccessful, they’ll have to revise.
Increase Learning and Retention
The objective of effective learning is to impart knowledge so that an individual has a deep understanding of the underlying principles. You want concepts to ingrain in their minds. That way future concepts build up upon previous ones become easier to adapt to.
Since visual cues are easier to interpret, they give the viewer the ability to retain them in their minds like a mental picture. In turn, knowledge is gained more effectively than if it was simply written as text.
Increase Memory
When displaying a visual cue, you are inadvertently reshaping how students perceive information.
However, it largely depends on students and their cognitive abilities.
A good student will take them as an example and incorporate them into what they learn. It can give them the motivation to come up with their own visual cues.
For example, they can formulate their own flashcards, come up with their mnemonic devices, make drawings and illustrations, label and highlight text as they go. Ultimately, this affects their memory as they attain the tools to govern their own learning.
Designing eLearning Courses with Visual Cues
There are many tools out there that can help you design visual cues for your curriculum, but you need to be wary of the common pitfalls when incorporating them.
Here are a few common pitfalls:
- Take your audience into account before formulating visuals. Not all students are familiar with the cues you’ve used. This becomes particularly apparent in younger audiences who might not be familiar with data representation or any symbols you use. They might require explicit attention diverting tactics with the use of arrows or notices.
- Colors used for highlighting may limit a viewer’s ability to grasp information. Some viewers who experience visual impairments, like blindness, may feel excluded and lose interest. Instead, couple explicit markings to highlight important information with color to cater to a wider audience.
- At the beginning of your course, you can include a legend or a section that identifies the visual cues used and how to read them. Just make sure that the cues highlighted remain consistent throughout the material.
- Relate voiceovers in videos to the pre-existing text in your curriculum. This helps give an indication and triggers attention towards a topic, aligning students with what they’ve learned.
What to Avoid
- Don’t overuse images, videos, and gifs. They are hard to fit into pages and can make navigation tricky. Reserve them as addendums to challenging topics.
- Don’t use small intricate fonts. They make it difficult to read the text and may introduce errors.
- Pick a color scheme and stick to it. Variations in color may confuse viewers, and they may mistake the importance it’s trying to imply.
- Don’t use a layout that’s hard to navigate. Place visual cues appropriately. Depending on their size, keeping text placement in consideration as well.
- Use high-quality images. Grainy and pixelated images may distract users from your visual cue.
FAQs on Visual Cues in eLearning
What are examples of visual cues?
Some examples of visual cues include color, light, shadow, height, and texture. Each of these cues can give us important information about the objects in our environment. For instance, color can help us to identify different types of objects, while shadow can help us to understand the three-dimensional shape of an object.
What are visual prompts and cues?
Visual prompts and cues are visual aids that help remind us of what we need to do or where we need to be. They can be as simple as a picture of a toothbrush next to the sink to remind us to brush our teeth, or a Post-It Note on the fridge with a shopping list written on it.
For people with visual impairments, visual cues can be essential for completing everyday tasks. For example, raised dots on a keypad can help a blind person find the right button, while Braille labels can help them identify everyday items.
Visual prompts and cues can also be used in educational settings, such as when a teacher places an object on a student’s desk to remind them to raise their hand before speaking.
What are visual cues in the classroom?
Visual cues can help to focus students’ attention, cue them to participate in activities, and provide visual support for concepts being taught.
Common visual cues used in the classroom include raised hands, posters and charts, visual timers, and stop-and-go signals. Each of these visual cues can be helpful in different ways. For example, raising hands is a way for students to signal that they have something to contribute to the lesson, while visual timers can help to keep students on track during independent work time.
Why are visual cues important?
By providing information about distance, size, and shape, visual cues help us to make sense of our surroundings. They also play an important role in communication, providing a way for us to share our thoughts and feelings with others. For example, when we see a smile, we know that the person is happy. When we see a sad face, we know that the person is upset.
Conclusion
Visual cues are extremely helpful when it comes to solidifying information for your learners. You can use them throughout your eLearning curriculum to draw attention to important points and keep learners focused on the material. Start implementing more visuals in your eLearning material to keep your learners on track to reach their goals.
