Our content is reader supported, which means when you buy from links you click on, we may earn a commission.
I started my first course in 2001 and transitioned it to online around 2004. Throughout all years I’ve run that online course, it helped thousands of people reach their goal of passing an exam. It’s a pretty successful course in that way plus I’ve earned multiple 7-figures from it over the years.
Due to online technology, it’s just as easy to help someone in New York along with someone in California, to everyone in between. I’ve even had clients from all over the world.
With an online course, learners can usually get the materials in minutes. They don’t have to wait for a live seminar; they can take the course when it’s convenient for them. Plus students can take online courses from the comfort of their own homes. Convenience is part of the reason why eLearning has become so popular.
Benefits of Offering Online Courses
Online courses fit under the category of info products (or at least that’s what we used to call them before watching videos online was even possible). Back then, you could choose from ebooks, big-box items, or live seminars.
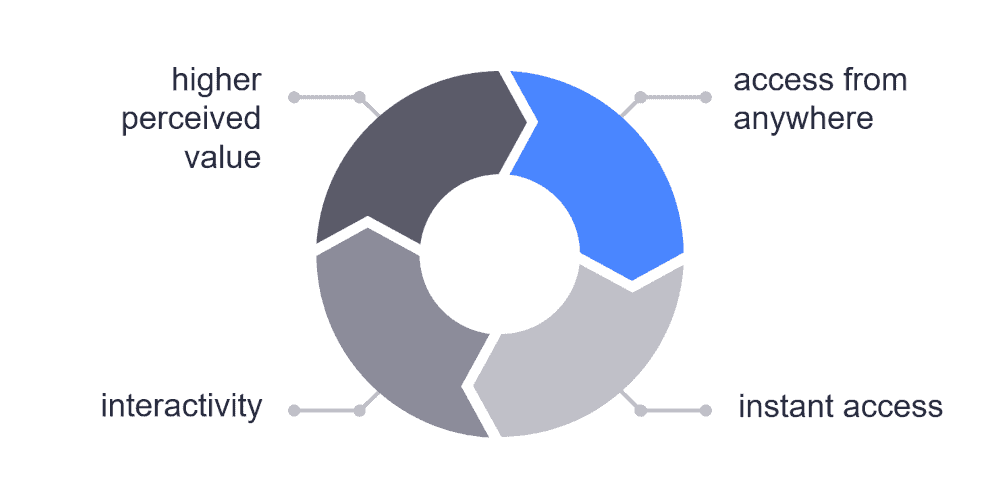
Your learners have a better chance of getting the transformation from an online course than from an ebook. In part, that’s because you can use interactive technology like videos to show them exactly what to do. You can also offer a community. There are also opportunities for one on one coaching via conferencing software.
You can send emails to help walk them through your online course.
There’s also gamification and microlearning to add to the mix. Then there’s adaptive learning, which meets your learner where they are on day one. Plus, with mobile learning, they can learn on the go. There’s practically limitless technology to help learners achieve their goals.
And this leads to my next point. Due to all this interactivity and the expectation of better results, you can charge more for an online course than you can for an ebook. Most people are going to max out at a $100 price tag for an ebook if they are even willing to spend that much. The typical price tag for an ebook is about $27 or less.
Online courses can range anywhere from $30 to $50 on the low end up to thousands of dollars. There’s a big difference between earning $27 per sale and $1,000 per transaction or even something in between.
Due to these benefits, online courses are the defacto standard anymore. So let’s learn how to create an online course.
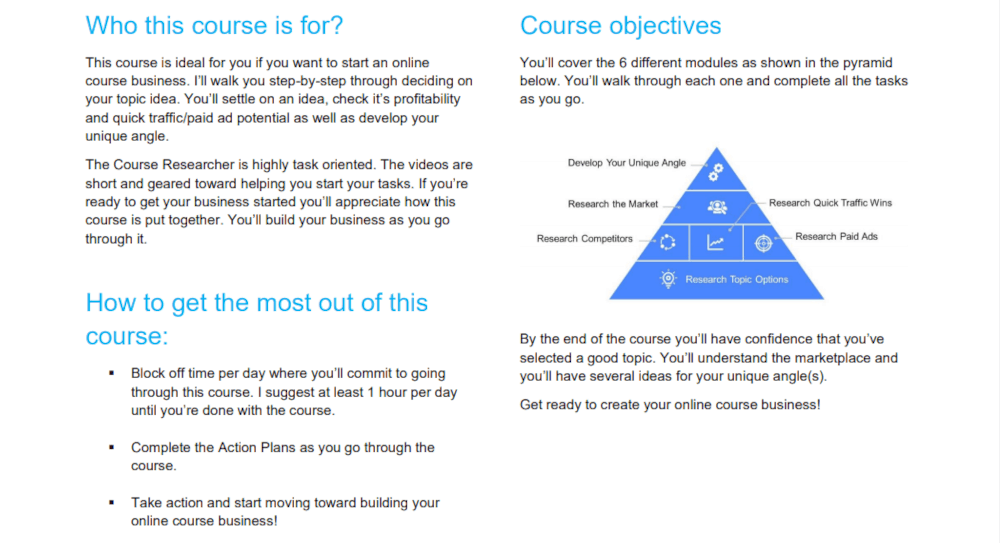
In this first section, you’re going to conduct some market research to help you with your course topic. You’ll do it from the perspective of finding the unique angle for your online course in the marketplace.
Validation
The first step in creating online courses is to come up with your course idea. Then you need to validate that idea as best you can.
I created a guide for you on finding a profitable online course idea, where I talk about validation in detail if you need more information.
Validation is critical. Creating an online course usually takes weeks or several months, so you want to make sure you’re setting yourself up for success with a profitable course idea. Validation is one step you do not want to miss if you’re hoping to create a successful online course.
Convince yourself your course will sell. Then consider the right place for you to be in the market. Figure out how broad or narrow you will go with your online course idea.
Format of Course
The next step is to figure out the format of your online course. If you spent the time researching your competition, then this will be easier to do. There are three ways to go about this.
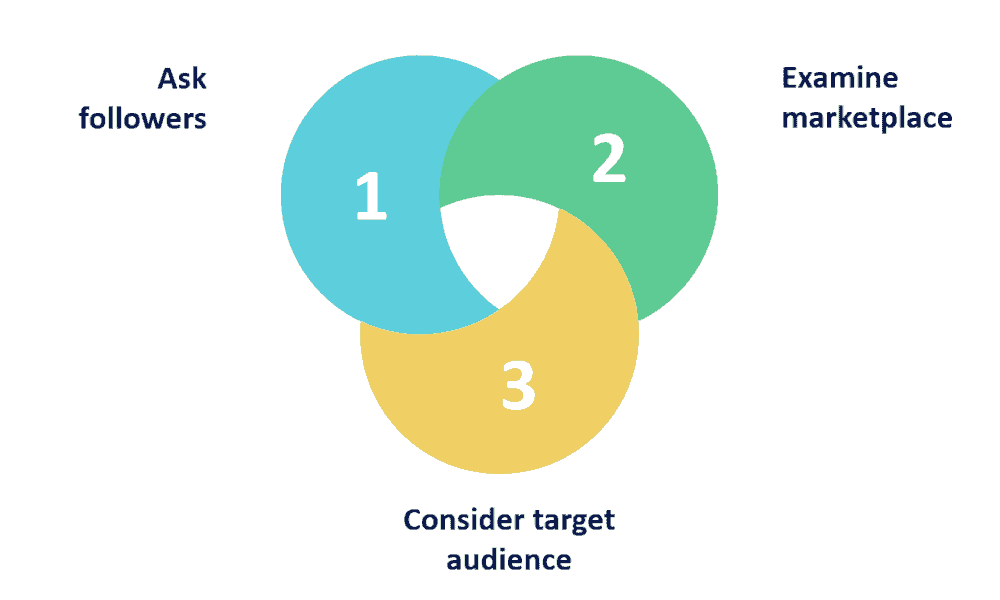
1. See what others offer and offer something similar or try to find a gap in the marketplace to fill it.
For instance, if several businesses in your market offer one-on-one coaching at a high price, then you can be different. You can offer an online course where learners do it on their own and save a lot of money in the process. Keep your product affordable and straightforward.
You can also look at what your competitors offer and then offer everything they have plus more. Differentiation from the competition is a trait most successful online courses have in common.
Looking at what competitors offer will help you see how others are being served in your market. You decide what fits best for you and your business.
It’s really up to you. There is no best format.
2. Look at it from your target audience’s point of view and provide them with the format they need.
Do they need coaching? Can they get to the transformation or end goal the online course promises without it?
How can they best see the result?
In this case, you will likely need to start out with the most intensive version of the course for a higher price. If you think you can offer less and still provide the transformation then you can reduce your offer over time.
In reality, you are probably going to be a higher-end, premium provider if you put yourself on this path (which is fine, just make sure not to undercharge).
3. If you have subscribers or followers, ask them what type of format works best for them. Have one on one conversations with them to see how you can best serve them.
What do they think is missing from the marketplace?
Check out forums and see if you can get ideas from people online there. Ask them what they would like to see in a training program to help them achieve their goals.
Here in this step, make sure to determine your offer.
Are you going to offer a community? Are they getting access to you? Will you coach them?
Realize that the format you offer will factor into your price. If you want to charge $2000 for your course, then you probably need to offer access to an expert.
Make sure you have this figured out before you move forward.
Medium
When it comes to your medium you want to be clear on how your online course materials will be delivered. Here are some questions to ask yourself:
- Will you create videos or a text-based course?
- Will you drip-feed it?
- Will you produce videos?
- How will they look?
- Are you going to stand there and talk, or will there be diagrams?
- How long will your videos be?
- Are you going to take advantage of microlearning trends and keep your videos short and goal-oriented?
- How long will each lesson be?
- Will you create a community?
I interviewed Leah Remillet, and for her first business in photography, she knew her audience was busy moms. So she offered audio training. That way, her learners could listen as they did other things. This may seem simple, but it was one of the reasons she attributed to earning 7-figures from that particular course.
Make sure you are clear on what your training medium will be. You should try to base it on who your target audience is and what will serve them best.
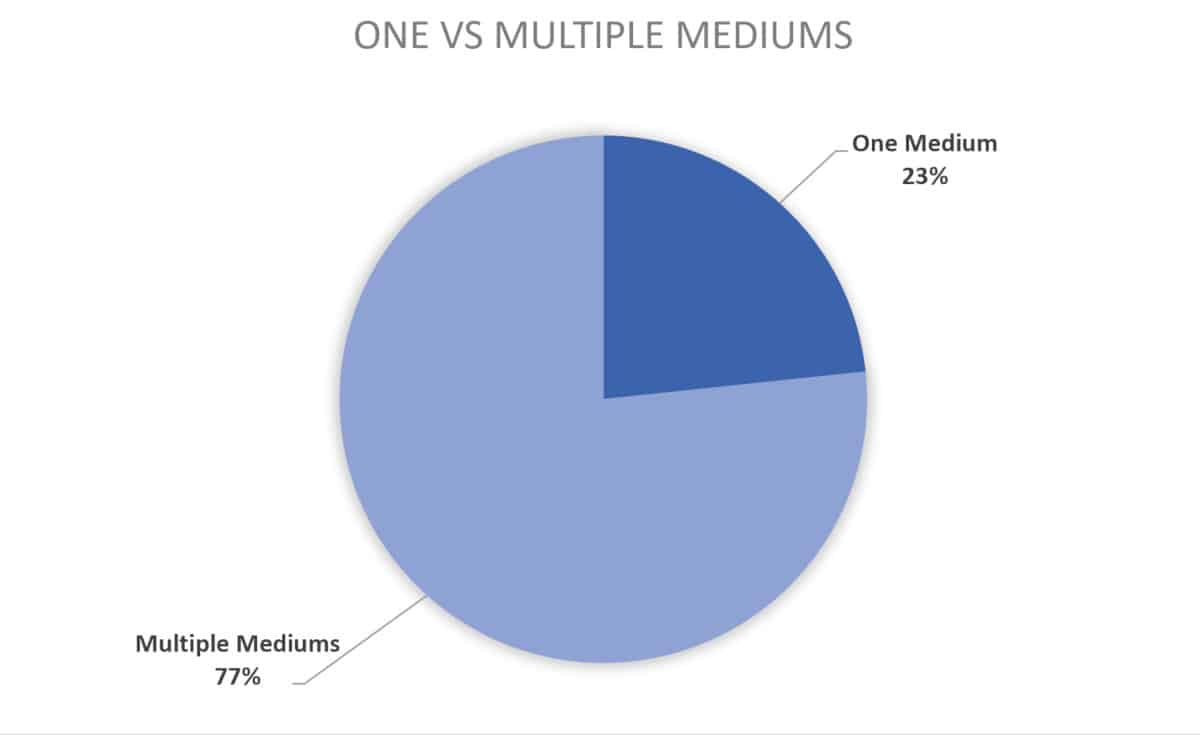
As shown in the chart above, 77% of the course creators I interviewed in 2019 used multiple mediums. Here are the mediums they used:
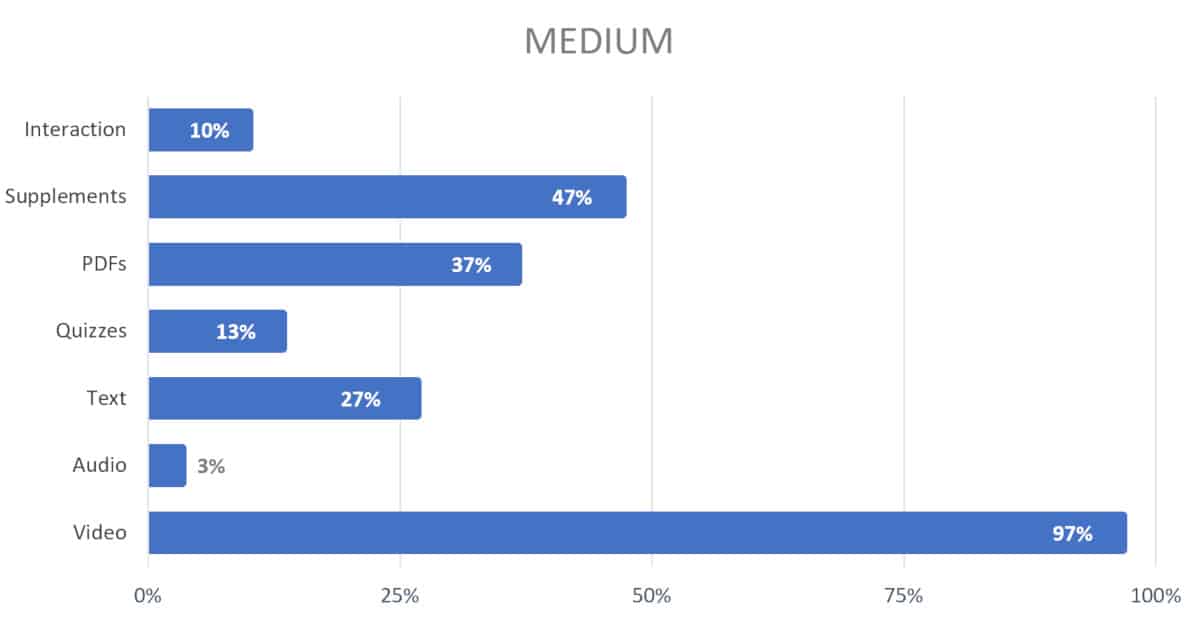
As you can see, 97% of course creators used video; supplements came in at 47%, and 27% used text in their courses. PDFs (37%), quizzes (13%), interaction (10%), and audio (3%) were also incorporated into their online courses.
It would help if you got clear on what your course will be like and exactly what it will include. Not just the format, but the specific medium you will use.
Use a combination of the following; reviewing competitors, researching your audience, thinking about how you can best serve them, and whether or not you can realistically offer it. Sort this out now.
Boundaries of the Online Course
What will your course cover? What won’t it cover?
There may be things you don’t plan to cover in your course content. And that’s what you need to figure out now.
If you’re creating a blogging course, do you need to go through how to install WordPress? You might. But you also don’t want your SEO blogging course to turn into a how-to-use WordPress course.

So decide what to include and what you’re not planning to cover. If you’re getting into strength training, are you going to help pick out weights and set up their weight room, or will you assume they already have their materials?
Set out your course boundaries now.
Some information might be better as a supplement or as a bonus to your training. You could also even partner or become an affiliate with someone who offers that step-by-step WordPress course.
If the content is something that will be vital to a learner getting the result, then you will need to include it. However, it still may not have to be in your current course. You could create it as a separate course.
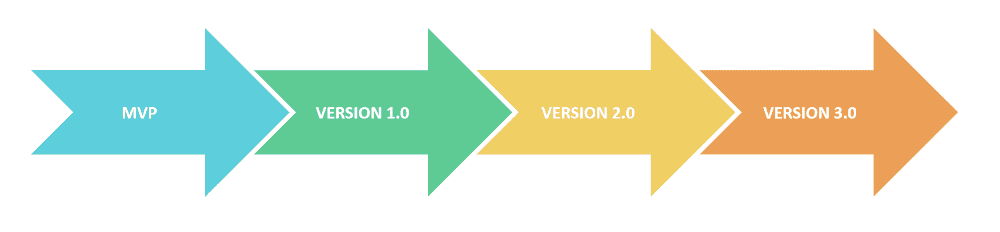
And the first version of your course may include less. Often, a course creator will start with a minimum viable product (or MVP) as their first version. This is the bare minimum course that they add to once they see that it’s profitable. You still need to create a viable course, but you can add in all the extras later.
So consider what you need to include. Base that off what if will take for your target audience to succeed.
And if your course covers one part of a more significant task, then make sure you spell it out precisely. You can list out the main objective on the sales page, include it in the training program name, and in the course description.
You don’t want anyone to mislead anyone. Also, make sure if you’re covering one part of a bigger concept that you think about what your learners need to get the result. You can’t skip out on something just because you’re not comfortable with it. You must have all the steps necessary for your learners to reach the end goal.
Figure out where your course starts and where it ends. Those are your course boundaries.
As an example, with coursemethod.com, I’m covering starting and running an online course business. This is an enormous topic. So I broke my first course down into finding a course topic. With other training companies I started, every last thing I had was included in a single course.
Again, there’s no right way of doing this, but it’s worth it to spend the time now to decide on your course boundaries.
You may already know enough about the topic for your online course that you don’t need to do any research. If so, then that’s great. But after reviewing the boundaries of your course, you may find that you have gaps you need to fill. You may need to research specific topics.
Alternatively, if your topic is just an interest area for you, you may have a lot of gaps to fill (possibly all). And that’s OK too. I love doing research.
My first course was one where I leveraged an interest. I did all the research for the first version of the course for myself as I created it. So even if you’re figuring it all out as you’re going along, it’s OK.
Sources
When researching your topic or a section that you’re not as familiar with you need to figure out which resources you’ll use.
For starters, you might need to read some books. You can become an expert on a topic by reading five or so books on it. Take notes and organize the material.
An essential part of all this is that you pick the right books. You may need help with this, so research online for the most influential books in your topic area. You can ask people on Facebook or Twitter. You can read reviews and look at star ratings on Amazon and Goodreads.
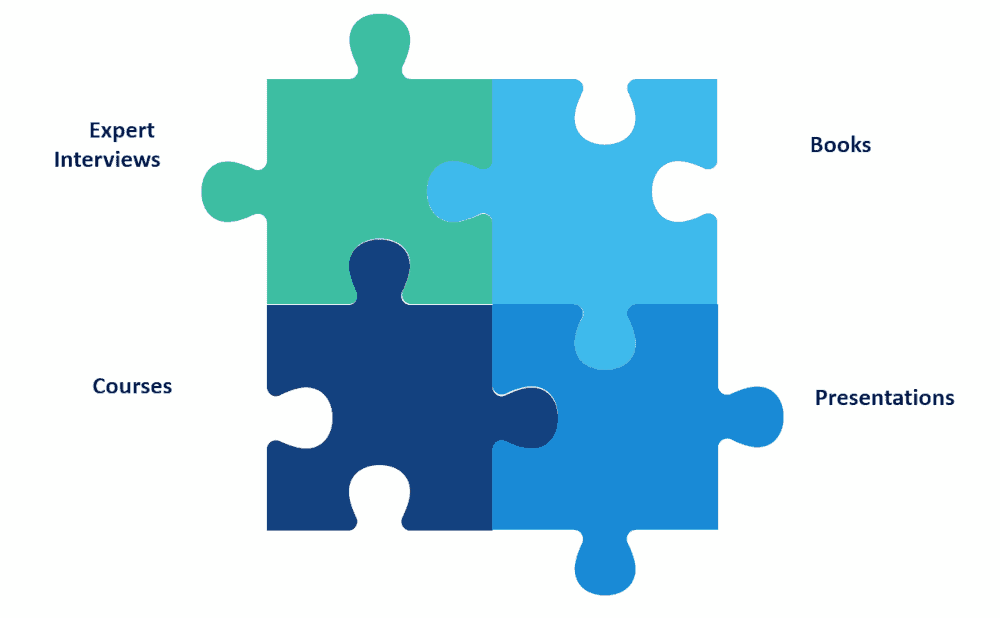
Evaluate your options and select up to five books you’re planning to read. Sometimes your sources may not only be books but presentations or other courses. Another resource option includes expert interviews.
You can formally or even informally talk to people. If you’re going to include input from a live source, then figure out who those sources will be. Select the five resources you’re going to use (whether you’re mixing and matching or just using one type of resource).
In the end, your training is a mixture of several different sources.
Remember, with both books and other training, you’re not looking to copy. You’re going to assimilate it and come up with something even better than what’s already out there. This is a key to creating an awesome online course. One that stands out (and then make sure you convey the unique selling point in your landing pages).
What you don’t want is to take a book, look at the chapters, and then create modules out of them, including every point they cover within them. That’s way too much copying, even if you change up all the words.
Mix and match from your resources as well as your own input. Add in your own take based on reflection.
So now that you’ve figured out your sources, you need to take notes. And again, if you don’t need sources, if all of it comes from you, then that’s great. You may not need to do any of this.
But you may be an expert on 80% of what you’ll teach in your course and need to refer to other sources for the remaining 20%. Or again, you may be leveraging an interest and need to take notes on your entire topic. That’s OK.
Going in prepared will help you plan out the next step, which is developing your course structure as well as creating your course.
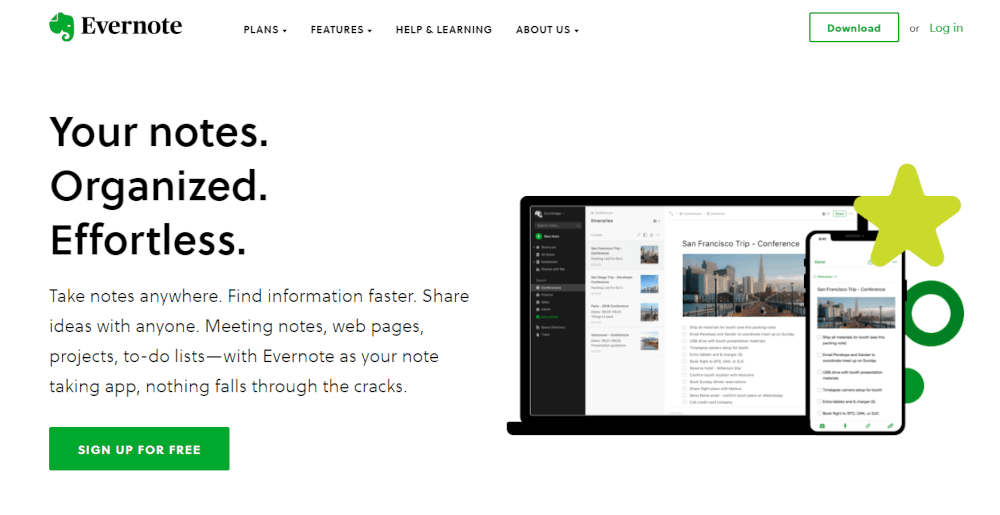
Notes can include highlighting in a book, jotting down information from a live interview or presentation, or creating a quick outline or mind map from another course. You might write it on paper or on your computer. Whatever is most comfortable for you.
Evernote is one of the most used tools for note-taking. You can do everything right in Evernote. From note-taking to outlining, to writing your script.
If you’re following along, then at this point, you’ve learned a lot about your topic and are ready to go. The next section covers ideas for where to find the SME in case you’re not planning on creating the material for your course.
Ideas for Where to Find the Subject Matter Experts
If you’re looking for a subject matter expert (or SME) to help you with the online course creation process, then know that many people are waiting to help you for the right price.
I’ve needed help from time to time because often online courses need to be updated. I didn’t always have time to review the updates and make the changes. So I do have experience finding SME’s to help me.
In order to find my SME’s I looked around the top outsourcing sites. In my case, I used guru.com. They have actual experts, and I needed people who were experts in my topic.
There are many other expert freelancer sites you can use. Just be sure you find an actual expert and not just someone who claims to be one. Review their references, check their work, and plan to write a detailed specification of what you need from them.
Also, make sure to have them send you the course material in small chunks so you can be sure to review each piece and make adjustments before they do too much work (and possibly don’t get it quite right).
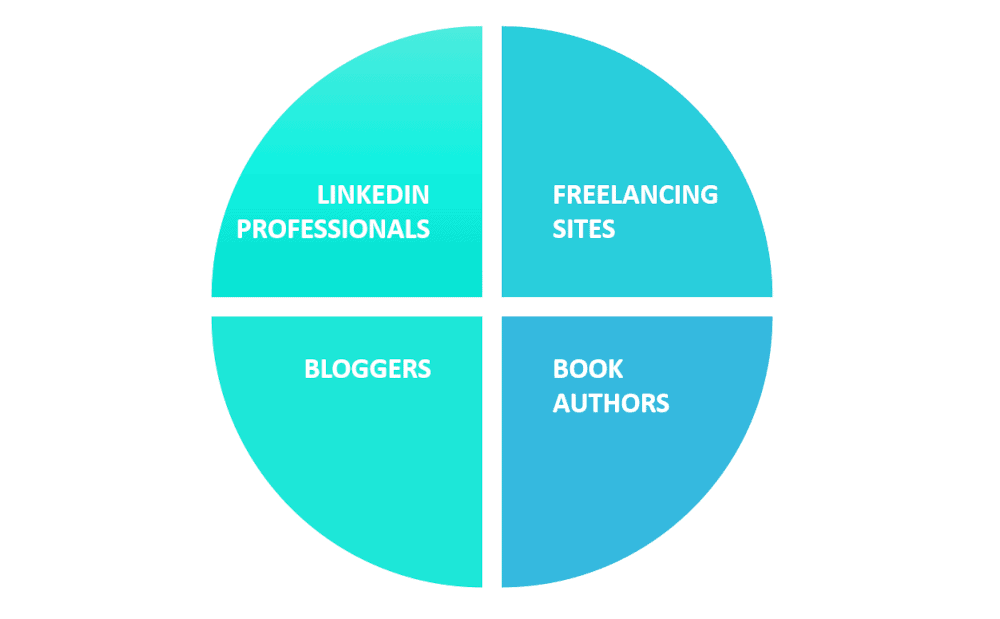
Other experts include book authors, bloggers, and professionals on LinkedIn. Find a few options and just ask. You may be surprised who is willing to help when you present them with a fair offer.
Now you’re ready to start moving forward with the online course creation process. Obviously, there’s a lot of research involved. At this point, you should have a course topic and know exactly what your course will cover.
Goals and Objectives
Successful online courses all have concise goals and objectives. I have a guide dedicated to goals and learning objectives if you want more information.
Briefly, you need to figure out what the end goal of the learner is.
What is the transformation? If they are starting at baseline, what will taking your course add to their life?
Is it to lose 10 pounds? Can you make this more precise, like to lose 10 pounds in 4 weeks?
You want precise, realistic goals.
If the goal is to help them pass an exam, can you also add in how long it will take? For example, you could go with a goal of passing the NCLEX, but passing the NCLEX in 12 weeks is better.
You may be able to use the goal as the headline or at least a top benefit when it comes time to sell your online course. So think about the ultimate goal or learning outcome now.
And really, why do they want to meet that goal?
Is it to advance themselves professionally? To make more money? To be healthier?
Figure out all the reasons why prospects may want to meet that goal and you’ll be ahead when it comes time to market your course.
All this will help keep you on track when you start creating your course. Use this as a blueprint and make sure you are clear on the goals and objectives of your course.
Outline Your Course
I have a great guide on creating a course outline all put together for you. But I’ll sum up my online course outline process for you here.
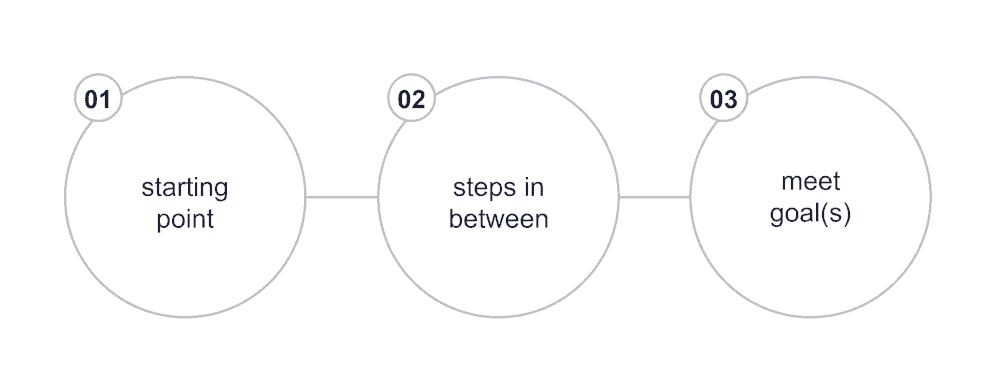
Start by figuring out the steps needed to get to the transformation or the end goal.
Work backward from that end goal.
What is the action they need to take right before it? And before that?
And so on until you get to the starting point.
From there, you need to fill in the significant steps with smaller pieces.
You can group each major step into a module. The modules are like the headings or a group of videos. Some people say they are like chapters.
That’s probably the best description, although it’s not entirely accurate. Modules should help your learners understand where they are within the course.
They help break the online course up into big chunks. Modules help learners figure out what the section will cover. With the lose 10 lbs in 4 weeks example, each module could be one week.
Another option is to break the modules up into main topics like; nutrition, exercise, recipes, or whatever makes sense for your course.
One important point to make is that no one cares if there are 30 chapters in a book. But that’s way too many modules for an online course. You don’t want to have too many, or it’ll look overwhelming to your learners. Six modules is a good number to keep in mind. I have gone with as many as 10 to 12 before when it just couldn’t be helped.
Thirty is way too many and may keep people from enrolling in your course. You will need to break that up into different courses or different materials within a course. At that point, you could have step 1, step 2, etc.… within your training and then the various steps could each be a full course.
Take the steps from your online course outline and start to group them together. Assign steps to the right module. These steps will become tasks or lessons within each module.
Review your outline several times. Again, make sure you are working backward.
Eventually, you will have your outline developed with modules and the lessons that you organize under the modules.
Next, figure out how long your online course will be. If you want to conform with the microlearning trend, then each video will stay under 10 minutes and have a specific goal in mind.
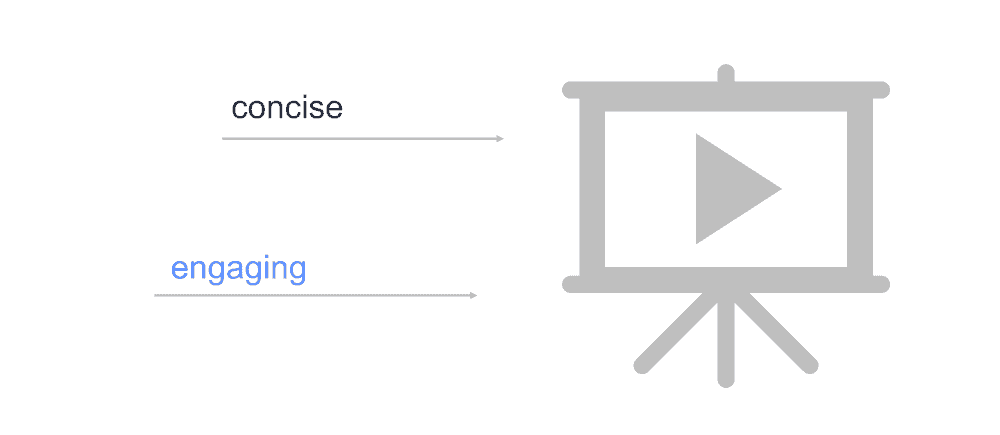
I’d highly recommend you don’t create 1-hour videos. Twenty minutes should be your absolute maximum.
Short videos and short lessons are helpful because learners start to get fatigued when there’s too much information. Short videos help you get higher completion rates because even if the topic is boring, logging in to watch a 5 to 10-minute video seems reasonable. People can fit that into their schedules. But if you’ve got a bunch of 1-hour videos, it gets harder for them to want to log in and watch them.
What’s also nice is to have a goal for each module and even each lesson. That way, your learners know what to expect from each lesson. Again, this helps with completion rates, frustration, and just the urge to start skipping ahead. If you can tie in why they need to complete each lesson, then that’s even better.
Creating smaller lessons may mean you need more videos within each module. That’s OK. If you can keep it to under 12 lessons per module, then that’s still very reasonable. Even more is OK if that’s what it takes to complete the module.
Here’s where you finally do the actual online course creation. You may still need a script, diagrams, and live-action shots figured out. I will walk you through all this as well as recording your audio and video material.
Script Creation
At this point, you have a very detailed outline. Now in many cases, it’s going to make the most sense to fill in the blanks with the online course outline and possibly even have a full script ready to go.
It’s really up to you and whatever your preference is.
While an outline is enough for some, others need an entire script. A script will keep you from constantly saying Ummm and pausing while you’re thinking. If you’re new to this, then you may want to start with a script.
I know I would rather watch polished videos and a script will help you accomplish that. If you’re going to have text-based lessons, then you have no choice but to create a script. The script will become your lessons.
Even if you’re not going to write out a word-for-word script, start filling in the blanks with some extra details. These details might include stories, steps, information about each topic, and examples.
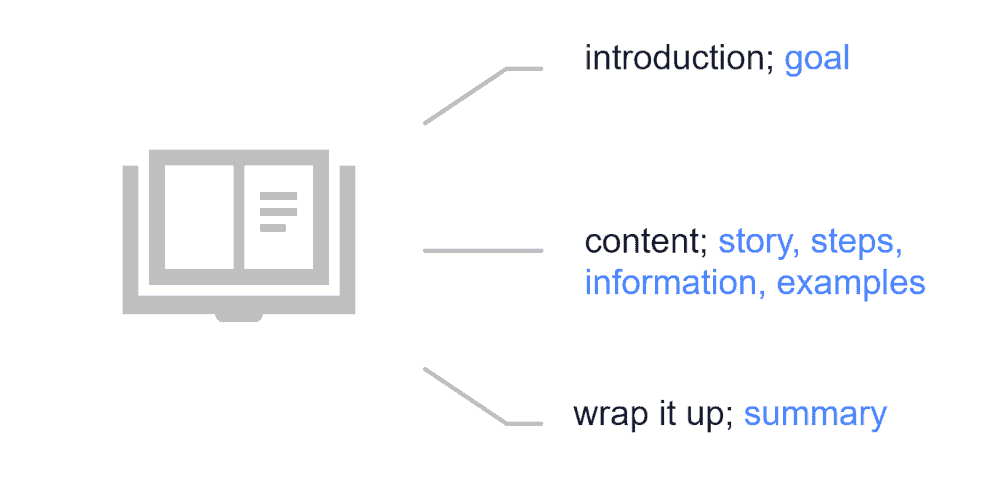
Sum up the information your learners need for each video. Just write it out like you’re explaining it to someone. Keeping it conversational is fine. Look at each lesson topic and come up with the main theme for each.
You will also want an intro and an ending for each lesson.
If you’ve got 40 videos planned and need a script for each, ultimately, you need 40 scripts written out. Stop at a rough draft for now and move on to the next stage which involves figuring out your visuals.
Visuals & Diagrams
Now start thinking about the visuals you will need to make your lessons come alive.
If you’re showing people how to exercise, you need visuals, whether you or a subject matter expert show them how to do the moves or you use diagrams. If you’re developing text-based lessons, then your learners will appreciate images and even diagrams.
Some topics don’t lend well to visuals, or it’s difficult to figure out how to design them, but I work hard at creating them for most of my videos.
Sometimes even when you think there are no diagrams, pay attention to when you’re talking about different options, like two choices, or three things, etc. You can turn these into beautiful slides with visuals of the various options.

People like these more than bullets. It breaks up the monotony. Since you stopped at a rough draft you may need to re-word your script to fit the diagram.
One thing to keep in mind is how you will handle talking head videos. Talking head videos are those where someone is on screen talking for the entire video. While there are benefits to them, these are not always very compelling to watch.
Think about how you can add in visuals even if you plan to film yourself talking. This might include a whiteboard, post-it notes, diagrams, text overlay, or presentations or screenshots mixed in. Just standing there talking is not very interactive.
It creates a better bond to have actual live video. However, you can limit your live videos to your introductions to help create that bond. Then you can provide your learners with videos complete with diagrams to help them understand the material.
It depends on the complexity of your topic.
Relationship advice and motivational material are two topics where a live video of you talking right into the camera may make the most sense.
What you don’t want is to take a complex topic and talk into the camera without visuals. A competitor in my field gave recorded seminars with no visuals. I happened to get a copy and it was just a guy shot from the same angle in a chair talking for about 40 hours! The content was way too complex to gain much of anything from this type of video.
This can create a massive opportunity for you. If your industry consists of boring videos, then doing something different and interesting fills a gap.
I urge you to have at least some visuals in any videos you’re creating. I know that’s not how a lot of people do it, but what some people are doing is pretty close to unwatchable for most of us visual learners.
If you’ve already decided to create talking head videos, then a few text overlays can help lower fatigue and keep your learners engaged. Text overlays are where you film yourself speaking, and then you add in the main points in text over the live-action shots.
This is one way to get around creating diagrams, but still offer something interesting to help your learners sort through the information.
Another option, as mentioned earlier, is to offer shorter videos. That will also help break the videos up and lower fatigue, especially if you plan to talk straight into the camera without props.
Video Type Selection
As mentioned in the last section, what you show in your videos is essential. Figure this out now while you’re still working on the rough draft of your script. You base it on the rough draft because including visuals can easily change a script.
Here are the main types of videos; slide presentation, animation, screen capture, and live video.
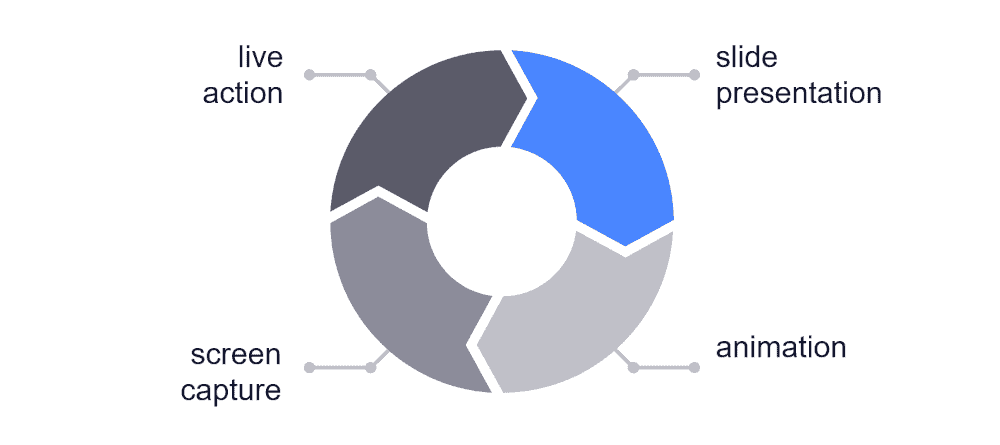
Each lesson or topic within your modules will likely become its own video if you’re creating a video course. Go through each script draft and figure out what type of video will work best.
Think about it from the viewpoint of your learners.
If you were them, what would help you best understand the material?
It’s OK if not every video is the same. My courses are often a combination of screen capture, live-action, and PowerPoint presentations. Live-action works great for introductions because if nothing else, learners can at least see who you are. They’ll also help you create at least a little bit of a bond.
It is helpful if there’s a visual consistency to your course. So of the four types of videos, you don’t want to pick them all and swap them randomly throughout your course to add variety.
I would pick one or two main types. Then do a live video for your main introduction or even to introduce each module.
Be careful with animations and the slide presentation style. Pick one or the other. You need to have a nice flow. Use similar graphical elements through each.
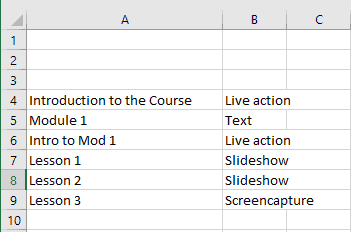
Make sure you match each video with the type of video you will create. You can use a spreadsheet like what I’ve shown below:
You also need all the visuals and any diagrams you’re using planned out and created.
And if you’re doing text lessons, make sure you have these visuals all ready to go so you can insert them into your text.
You can skip the next section if you’re offering only text-based lessons. Otherwise, you’ll create your multimedia next.
Multimedia Creation
Although it’s taken a long time to get here, recording your material will be a lot quicker now that you’ve done all this planning.
You’ll use a voice-over for animations, slide presentations, and screen capture video types. Even if you’re going to insert yourself into a screen within a screen, the process is the same except you’ll record yourself as you record your voice.
To create your voice-over, you’ll need home voice-over equipment. This typically includes a microphone, recording and editing software, and a preamp.
- I suggest first recording the voice-over and then editing it.
- From there, use your computer to record the screen, which will be your presentation, animation, or screen capture. So essentially, each one becomes a screen capture.
- Then make sure the voice-over and the screen capture fit together. That requires going through it and editing it one final time.
You can do both the audio and the screen capture at once if you’re able. However, you may struggle to do it all at once (again, this will likely result in pauses and Umms). It’s pretty easy to do it separately.
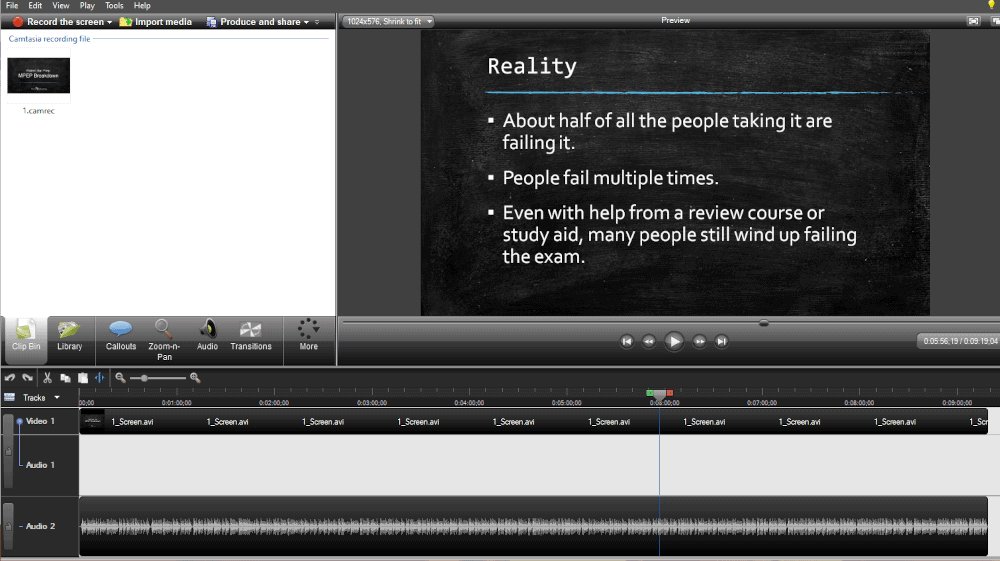
I use Camtasia for my voice-over videos. Most people would agree that it’s the gold standard for any type of screen capture video. It will also allow you to insert a video of yourself talking in the screen capture if you’d like to add that.
Live-Action
I’ll briefly go through the steps for a live-action video here.
You’ll need a video camera to film these. Alternatively, a higher-end smartphone will work.
Make sure you are recording with the camera or phone set up horizontally. All online video players work as widescreen.

Additional Equipment
You’ll also need a tripod for your camera or phone.
If you’re on a tight budget, it’s possible to use sunlight from a window and a smartphone to make decent videos without lighting equipment.
If you want a more pro setup, then you need to consider purchasing lighting, a professional background, and probably at least a lapel mic for your video camera or phone.
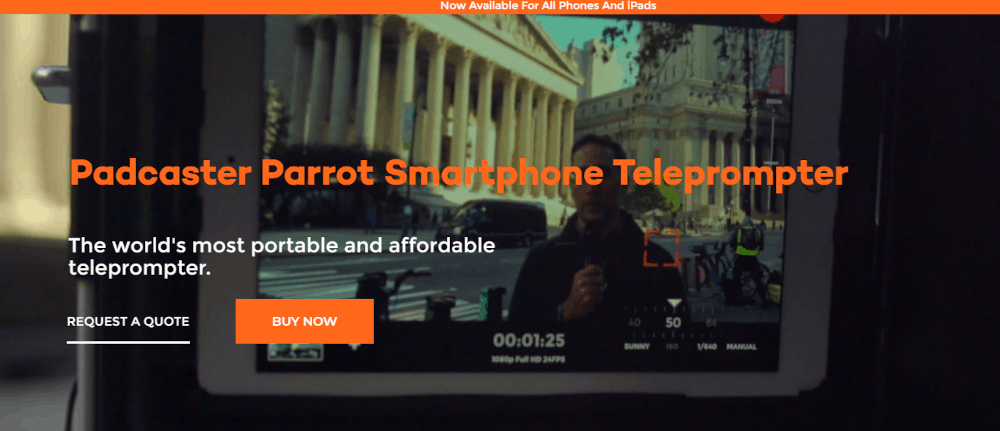
You can also consider using a teleprompter, which can add another layer of complexity since you will need a teleprompter, another phone or tablet to run the script, and a teleprompter app.
If you cannot memorize your script or go off an outline, then a teleprompter will turn out to be a necessity for you. With enough practice, you can probably ween yourself off the teleprompter, but you may need it for your first course.
I’ve invested in a basic home studio that’s in our basement, but depending on your needs you can even rent out a location to film your course or hire a videographer. The main point is that you can make this work with whatever equipment level you are at.
And again, remember that your first online course can be a minimum viable product (MVP). You don’t have to break the bank before you see if you can build up an audience and sell your course.
When doing live videos, it’s better if you can record the entire video in one shot, which can be very difficult. Unfortunately, piecing it together afterward and cutting out sections results in a jarring video after production.
On a positive note, your learners will likely prefer shorter videos that are easier to do in one take. So keep them shorter and practice doing them in one take or a couple if that’s more realistic for you.
If you’re going to add in text overlay, you can use Camtasia, or you can get even more advanced with Adobe After Effects. There are a ton of video editing programs to choose from.
Video Intro
Once you have your videos created, consider adding in a video intro. You can use your logo along with a sound effect or music. The music should fade into your recording (and you can create this effect with Camtasia). Your intro should be short.
People don’t want to watch a 20-second intro. I have a recurring problem with making intros too long. When you offer shorter videos, the intro needs to be even quicker. Try to keep intros at 5 seconds or less.
If you want to get advanced, the intro can show learners where they’re at within your course. You can accomplish this by including the Module number along with the name of the lesson. Don’t number your lessons if you’re doing this because you could add in a video later on, and it’ll make a huge mess.
So don’t label your video; Module 1, Lesson 1. Instead, you might label it Module 1 (since that’s less likely to change) and then use the name of the exact topic you’re covering in lesson 1.
At this point, you’ll have all your videos assembled.
Supplemental Materials
Supplemental materials include items like bonuses, action plans, workbooks, quizzes, and any other content you add to your course.
These are easy to create. If there’s something you didn’t cover in your main course, but know it would be helpful for your learners, then you can quickly put a short PDF together at any time.
For example, if you’re in the weight loss market, then including recipes works well.
If you’re creating a test prep course for a job, then covering details about the job could make a valuable PDF.
Supplemental materials should complement your main course. If your course offers a complete transformation, then the supplemental materials can often help learners reach the transformation or even go further with it.
You want your course to be user-friendly for every learner. Supplemental materials can help address the fact that not every learner starts in the same place.
For instance, if you’ve put together a course on doing voiceovers, you could offer a PDF with a list of recording materials they need. Some of your learners may already have their equipment, but others may be starting further behind.
PDF transcripts of a video course can be a nice touch too. If you have dense material that’s difficult to consume, transcripts will be appreciated.
You can also offer PDFs of your slides, especially if the material is dense. Learners like to follow along and print these out to mark up.
Quizzes & Assessments
Including quizzes and assessments can be a nice touch for many online courses.
For some course topics, quizzes won’t make a whole lot of sense, while for others, learners will see them as integral. You want to use them when your material is dense, and your learners must understand it.
For instance, any test prep course or difficult subject matter (like statistics or social studies) should include quizzes. If you’re offering a certification, then you also need to include quizzes.
Quizzes can be an excellent way for learners to check and see if they understand the material. You can even set up your learning management system to prevent learners from moving forward until they get a high enough score. Limiting course progression like this makes sense for a driver’s education or licensing course.
Instead of quizzes, you can offer assessments where learners are reviewing something about themselves. That way, they can see how they fit into a specific model. Or maybe they’re talking about a 4-week program and need to do a before and after assessment. Assessments like these can help them track their progress.
Consider any supplement materials and bonuses you need for your course and create them before you move on.
Your Decision
At this point, you have all your course material completed. If you’ve been putting off the decision to choose an online course platform, you must finally make the choice now. I offer a guide on the best online course platforms to help you figure out the best option for you.
There are a lot of choices and even different types of learning management systems (LMS) along with online course marketplaces. If you’re planning to create an online school, then you will need the ability to add multiple courses as well as a course landing page for each.
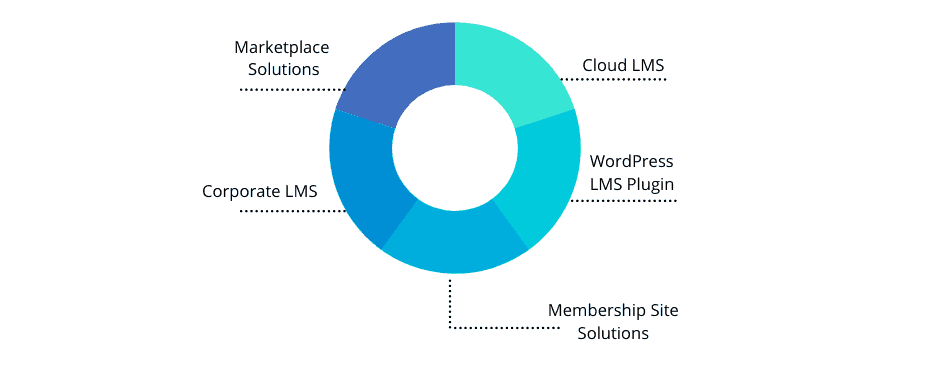
Some offer better quiz features if that’s important to you. Others offer better integrations with email marketing tools.
You can also get into a full platform that provides marketing tools geared toward helping you sell online courses. Many also offer hosting and all the bells and whistles.
These include Kajabi, Teachable, Thinkific, LearnWorlds, and many others.
A semi-custom solution is to use WordPress along with LearnDash, a learning management plugin that allows you to offer a virtually limitless platform.
Instead of getting too caught up in what is available, you should consider the features you need and choose an option now.
Upload Your Materials
Once you’ve decided on your online course platform, the next step is to start uploading your course materials.
You might want to create a quick outline with the title of each video, all ready to go. Then you can start at the first video, add in the title, upload the video or multimedia, and move down the list. This will help keep you organized
Most course platforms will let you organize your lessons by module, so make sure to enter all the modules first. If there’s space, it’s nice to include the module number plus the module title, so your learners know what they’ll learn in each one.
Avoid just using numbers for your lessons and use the actual title of the lesson along with the number. All this will show up in the navigation menu. Your learners like to see what they’re learning now and what comes next when possible.
It’s also helpful to include a summary of the module. Many course platforms will offer space where you can include a summary of what each module covers.
Also, there may be space before or after each piece of multimedia you upload on a lesson page for a description. If you’re doing a text-based lesson, then this is not as important since you already have the lesson in text format. But people often want to know what they’ll learn about before they watch a video. So summing it up in text format (even in a sentence or two) helps create a better user experience.
With most course platforms, progress tracking is built-in. Progress tracking is another user-friendly feature. Often users will need to click off after a lesson is completed.
Here’s where you can also think about course progression, which is a feature built into many platforms. With course progression limited, the learner can’t advance until they complete specific lessons or quizzes.
It’s a nice feature, but learners may get upset about not being able to access all the material. It just depends on the course and what its goal is.
You can also enable comments, sometimes for each lesson, or offer a community right within your platform.
A lot of learners like this better than sending them over to another system. It provides a better user experience when they can interact with you or other learners right within the course platform. Otherwise, they may need to log into something else (like Facebook), and it can seem disjointed.
Depending on the learning management system you choose, you may also have the ability to add in badges, gamification, and certificates. You’ll have to explore your LMS and decide on what makes sense for your training.
Another nice touch is to offer a course email sequence. With the higher-end course platforms, you can trigger an email to be sent out to a learner when they complete something, like a module.
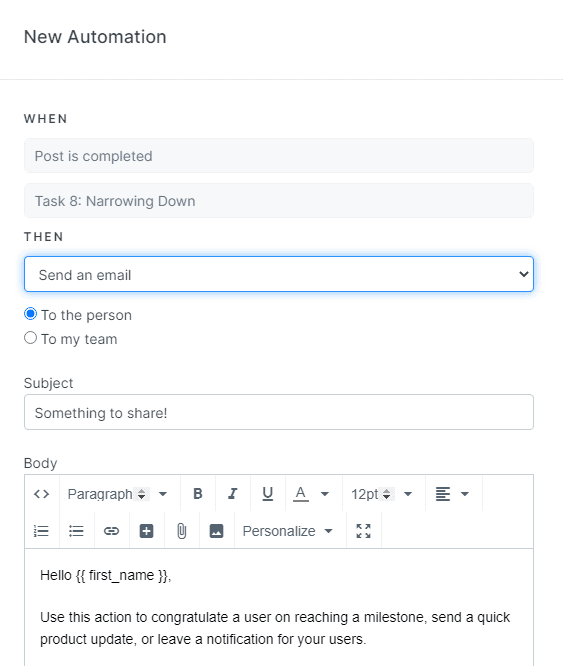
You can congratulate them on finishing that module or getting a passing score on a quiz and then walk them through the next module. Although it’s a small thing, encouragement helps people complete their training. They also feel less alone in the process.
Depending on how sophisticated your course platform is, you may want to offer video tutorials showing your learners how to navigate through it. You can send a video like this embedded in an onboarding email or have it within your course (or both).
Anything you can do to make the user experience better is well worth the time.
I know you’ve put a lot of work into your course, but there’s always more to do to successfully sell online courses. Over time, it’s well worth it to add in improvements.
If you started with a minimum viable product (MVP), then you’ll definitely have plans to upgrade it once you see that clients are interested in it and you’ve figured out your traffic channels.
A typical MVP roadmap might include a launch with less course content, or you could start with text-based lessons and then upgrade to video lessons. Once you get some clients, you can ask them what improvements they would like to see in the next version.
My first training product was a giant outline in a 3-ring binder. Then I quickly added in a workbook as a supplement and sent it out to everyone who ordered too.
From there, I realized people who ordered wanted their materials sooner than they could be shipped out. So I ended up putting a summary of the content online in a password-protected area. That way, they could start reviewing this immediately after they ordered.
It took a few days for my learners to go through that, and by then, their books had usually arrived. From there, I just kept enhancing the course. A full assessment software, then it all went online.
Videos replaced the text summaries, and eventually, quizzes and exams could run online too. As you can imagine, technology limited my first versions (this was back in the early 2000s), but you can still choose to pare back on what you offer.
There’s no reason to spend a year creating the absolute best course possible and launch with that. You can add to it over time.
Basing your upgrades on feedback from your first batch of clients is smart. If you enable a community or comments on your platform, then you’ll likely get a lot of feedback. You can also offer one-on-one time with your earlier buyers to get more detailed feedback on what would make the course better.
You might also want to take a look at agile learning design for tips on how to iterate as you move forward on the course creation process. There are a lot of different ways to go about this. There’s no right way.
To stay on track, you can put together a simple document that serves as a roadmap for your course.
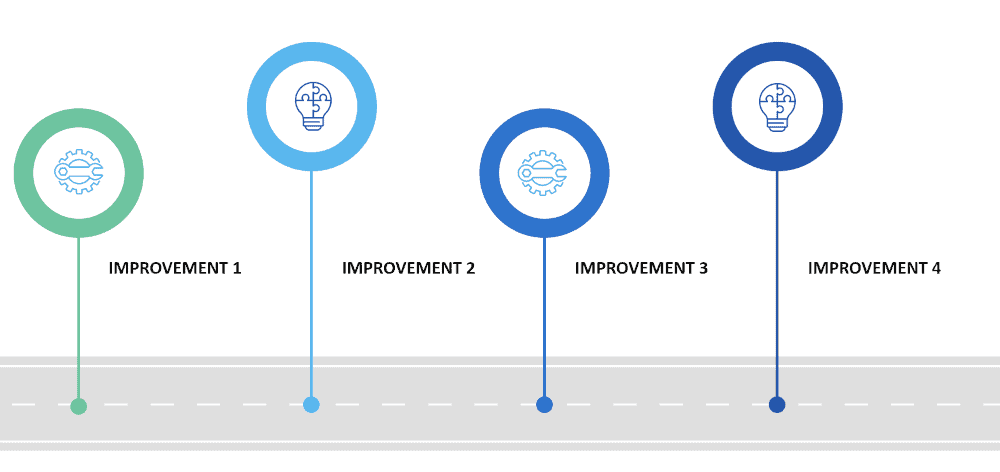
Jot down all the ideas you have for improvements and a timeline for when you plan to implement them. Material like this is great for your email newsletter or blog posts; your clients and prospects will see how dedicated you are to helping them.
I hope you found this guide to online course creation useful as you create your online course. Small businesses across the globe are creating digital products to maximize their profits. There’s no reason for you to think you can’t create an online course too!
If you need some help selling your online course, take a look at the next guide in the series. If you need more information on generating your course idea, there’s a guide on that too!

Lisa Parmley is the founder of coursemethod.com. After gaining a Master’s degree in Biology, she worked in research for about 7 years.
Lisa decided to start her own training company in 2001, helping people pass a professional exam. In that time, she created online courses as well as books, DVD’s, CD’s, and testing software. That course has earned multiple 7-figures throughout the years.
She created SEO and authority site building training around 2007 which went on to earn well into the 6-figure mark.
She has 21+ years of experience in the trenches doing both creating and selling online courses. Download her 7-figure Online Course Success Blueprint here.