Our content is reader supported, which means when you buy from links you click on, we may earn a commission.
How to Create a Course Outline for Your Online Training

Staring at a blank screen watching the cursor blink repeatedly isn’t exclusively a writer’s problem. Online course creators and course instructors experience this too.
Starting your online course is challenging. But there are a few tricks to the trade.
One of the number one secrets to beating writer’s block is to create a course outline first.
Let’s go through how to put together a course outline for your online training. That way you can overcome writer’s block and get your course created as quickly as possible. In addition, a course outline will help improve learning outcomes for your students.
What is a Course Outline?
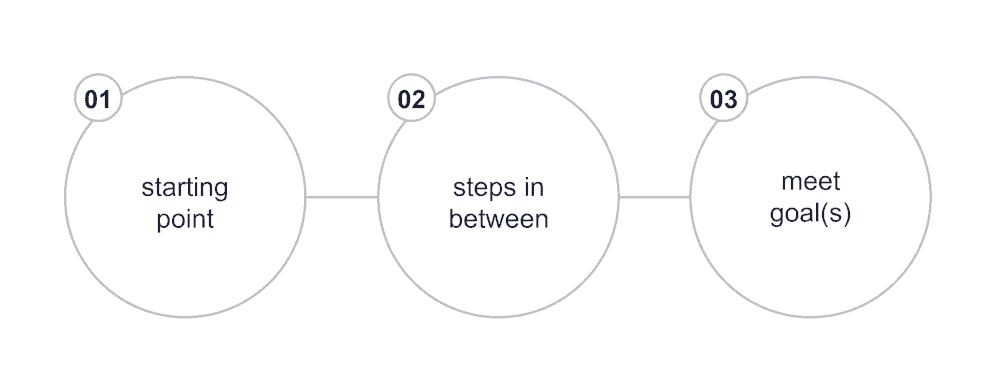
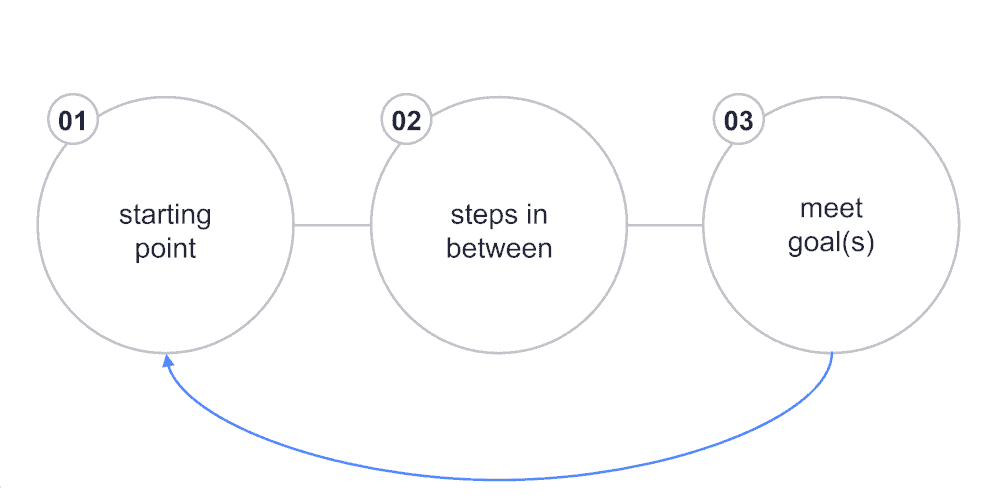
To put it quite simply, a course outline is a map of the knowledge you’ll include in your course. It shows where you will begin and where you will end. It also lists out all the major steps you will take in between.
Most course outlines contain a few standard components.
The main structure of your outline will consist of modules, lessons, and topics since these are the basic building blocks of your online course.
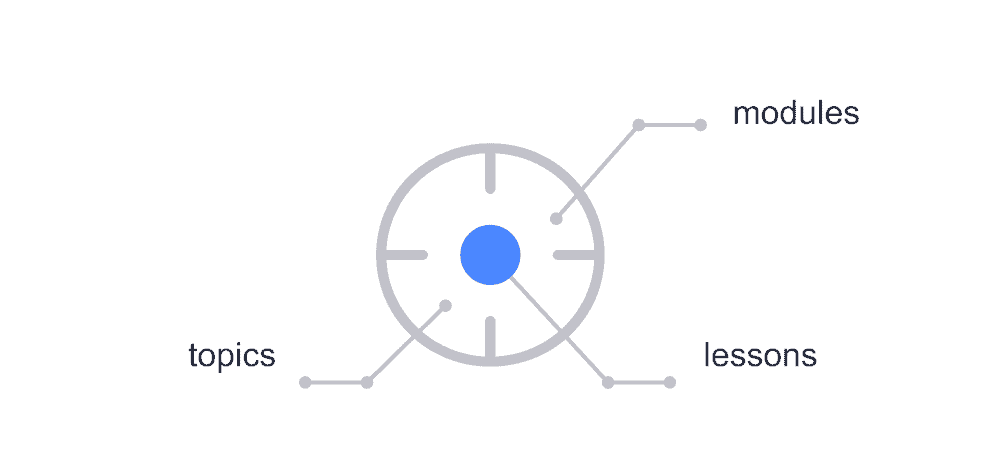
You can use these as your basic building blocks and expand beneath them to dig deeper into each topic.
This course outline is also where you start to develop your framework for success. The best eLearning courses follow a system or conceptual framework that helps learners see where they’re going and is easy to follow. At each level, the framework contains more information about the topic at hand.
An example of this is as follows:
Module 1: Marketing
- Lesson 1: How to choose the right marketing strategy for your business.
- Topic 1: Why choose Facebook marketing?
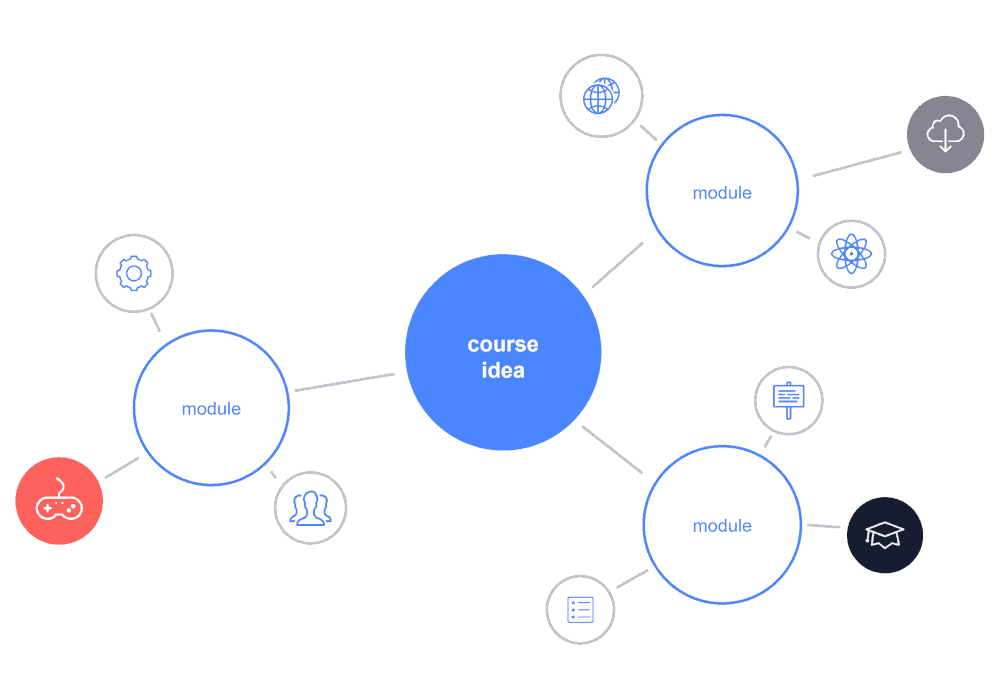
By using the modules, lessons, and topics for each new idea, you will develop a framework that is simple for your learner to follow.
Alternatively, you can use modules and lessons if you don’t need the topics. I’ve created many courses this way, but there are some topics that have required all three components.
Modules, lessons, and topics (if needed) break up the content into easily digestible sections. They make the course easier to follow and allow learners to quickly refer back to specific parts of the course if they need to. Breaking up the content also helps learners determine the expectations for each section.
Breaking up your content into smaller bites also makes instruction easier especially if you’re considering utilizing microlearning. Students appreciate smaller bites of content. Ultimately, they will be more likely to consume your content which will increase the learning outcomes for your course.
Why Create a Course Outline?
Creating a course outline helps you organize your ideas. Putting an outline together first allows you to create a much more effective course. See more on why you should create a course outline in this short video …
There may be many topics you want to cover. An outline allows you to organize these topics in a way that makes sense to your students. In addition, it prevents you from forgetting to add critical information that is relevant to the topic.
Writing out what you plan to cover will also help you generate ideas. One idea leads to another which leads to another, providing you with deeper and more information-rich content.
By taking the time to write out the structure, you can be assured that you will always include the necessary information and not leave out crucial details vital to the lesson.
Lastly, writing an outline first will make developing your course a much faster process.
Other Factors to Consider When Planning Your Course Outline
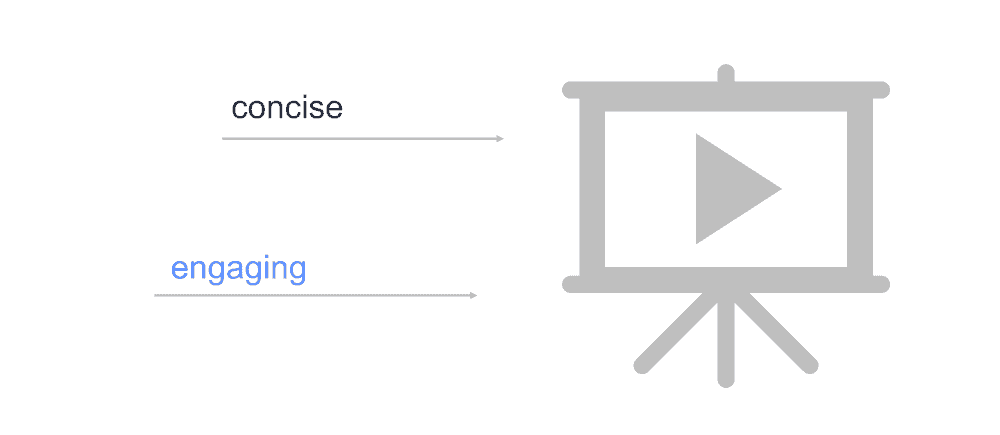
Outlines are especially critical if you are creating video-based lessons. Video lessons need to be concise. A written script makes it easy for you to create a concise and engaging video.
You don’t want to lose your audience because you are rambling from topic to topic with no clear direction.
Outlining will also help with lesson planning. As you outline your course, the subject matter will naturally lend itself to questions like:
- What questions will arise as a result of the topic?
- Are there issues that learners might find relatable to the content?
- What would learners need to do before they get to the current step?
There are some elements you may not have considered before your lesson planning, so starting with an outline is the best way to dig deeper into the topic and make it more exciting and informative to your learners.
You can also use your outline in your marketing materials, as a sneak preview of what you will be presenting. Your prospective learners will see what will be offered in the course, which will make them more likely to enroll.
Rules for Creating a Course Outline
1. Start With the End in Mind.
Begin with the solution and work backward from there.
What does your online training aim to solve? What is the transformation it will provide to your learners?
In other words, you need to first get clear on your learning goals and objectives.
If you’re developing a course teaching people conversational English, you need to come up with precisely what they will know after they take your course.
Maybe your course will help them learn enough English to get through a trip to the U.S.
In that case, the goal is for them to learn enough English that they can ask people for directions, place an order in a restaurant, book sightseeing trips throughout the country, and do other tourist-related activities.
A specific goal will help you determine the boundaries. They also help make the rest of your outline easy to put together because all the content within the course must lead to that specific goal. See more about figuring out your course boundaries in this short video …
Now that you know your learning goals, you need to work backward from them.
If the goal is to get a result in a certain amount of weeks, then you can break your course up into the exact steps to take for week 1, week 2, and so on.
If the goal is to go from A to Z, then you need all the steps in between; like b, c, d, etc … You know that Z is your end goal or transformation. So what is Y?
Write out all the steps to get to your transformation.
For example, if the transformation is to do well on an exam, then you know the end goal is passing or scoring high on that exam. Often you can work backward from there.
What would the last thing a learner would do before they passed that exam or scored well on it?
Watch this video to gain more tips on working backward to create your outline …
2. Structure Your Content So You Can Deliver it in the Fewest Steps Possible.
From these steps, organize modules that will function as higher-level topics that you can break down into smaller lessons. Break those topics down into mini-steps, which will serve as your lessons.
Back to our example, you can organize your main themes into modules; phrases related to asking for directions, phrases related to dining, phrases related to booking sightseeing trips, and more.
So those become your modules and the top level of your outline.
You’ll want to limit the number of modules and lessons you present to your students. In general, sticking to six or fewer modules is ideal. This way, your students can break down the information into manageable chunks that make learning simple. Otherwise, the course can look overwhelming. From those six modules, break them down into smaller lessons.
So for the navigation phrases, you can probably come up with 10 phrases that will come in handy for getting around. Each one can be its own lesson. So ‘how can I get to the restaurant’ might be one. You break that down into ‘how can I get to.’ That’s a whole lesson. Then come up with a few more.
These will become the next level in your outline.
Aim for three to 12 lessons per module. By doing this, you can determine exactly what topics you will be covering and how you will dig deeper into the information through each individual lesson.
If you need a third level, then use topics. Highly complex subjects or very comprehensive courses may require a third level. A third level probably wouldn’t fit the example I just gave.
You can learn more about structuring modules in this short video …
Detailed Outline Example
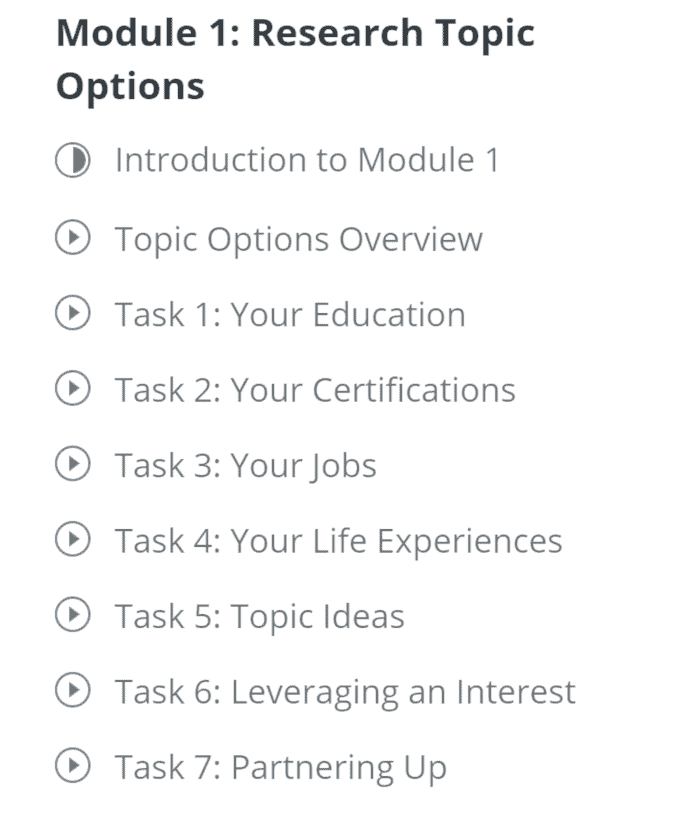
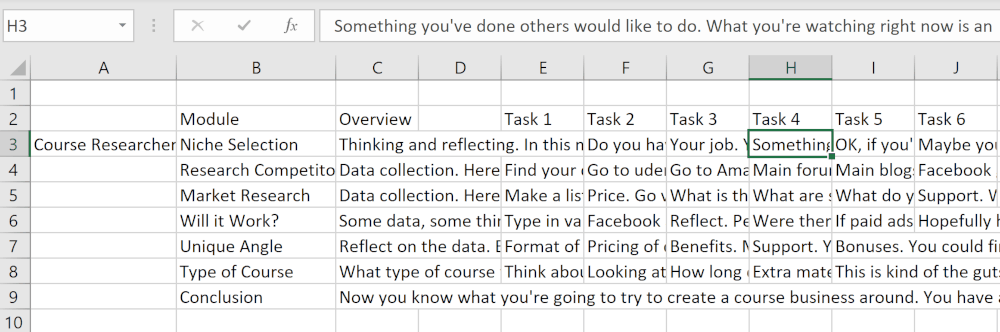
Here’s an example outline that is taken from my Course Researcher program. The program helps people come up with a good topic to create a course around.
Notice that instead of using lessons, I’m using tasks. That’s because my training is very task-based. Depending on what you’re trying to cover in your course you can use action-oriented tasks or may need to stick with lessons.
Module 1: Research Topic Options
- Introduction to Module 1
- Topic Options Overview
- 1: Your Education
- 2: Your Certifications
- 3: Your Jobs
- 4: Your Life Experiences
- 5: Topic Ideas
- 6: Leveraging an Interest
- 7: Partnering Up
- 8: Narrowing Down
Module 2: Research Competitors
- Introduction to Module 2
- Competition Overview
- 1: Google Search
- 2: Search Udemy
- 3: Search Udemy Competitors
- 4: Search Amazon
- 5: Competitor Reflection
There are 6 modules in the course, so this is just a tiny portion of the outline.
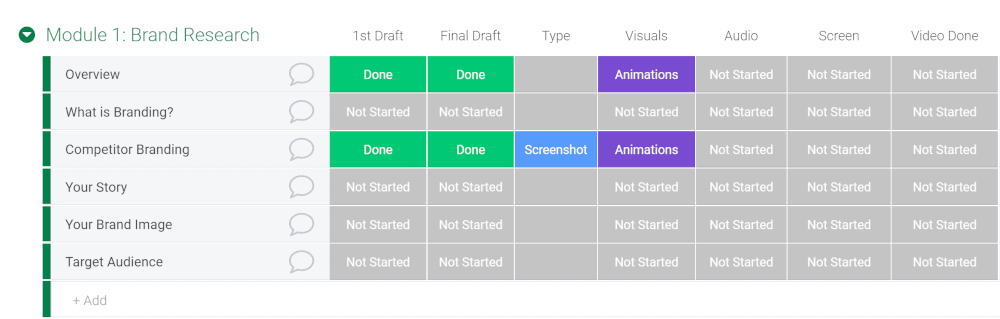
These were all part of my original outline. Later, they also translated over into the navigation menu in my online course platform, as shown below:
Outlining the Lessons
Once you have the modules, lessons, and topics (if you’re using them) then you have the bare-bones structure of your course. Make sure to review those and put them in the proper order.
Is there anything missing?
Are there steps that should come before others?
Also, make sure your lessons are within the correct modules. You also want to check that they are action-oriented steps if possible.
From there, you can outline each individual lesson. Outlining your lessons can save you a lot of time later on.
Here’s a short video on outlining the lessons that you may find helpful as you go through the rest of this section:
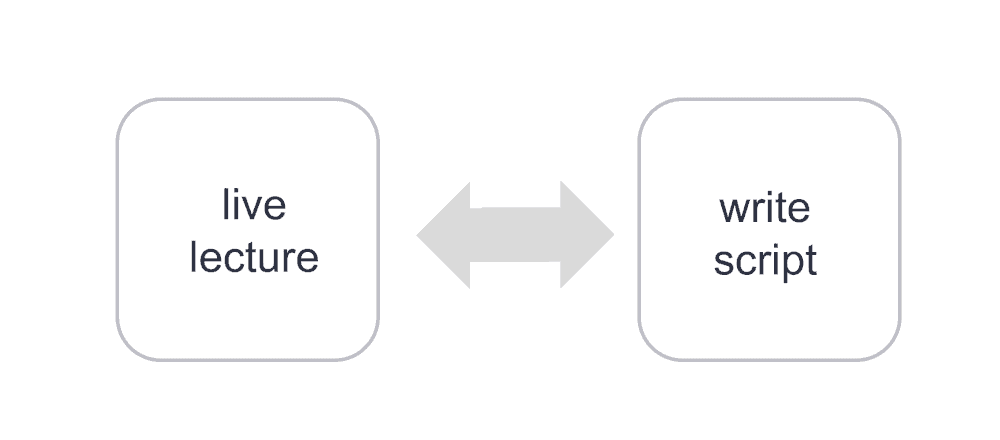
If you’re doing a live lecture, the outline may be enough for you to review before you give the lecture. Otherwise, if you’re creating a full script, having that outline first will save you a lot of time when writing that script.
All these are shortcuts that lead to rapid eLearning. The idea behind rapid eLearning is that you use every tool and strategy you can to potentially complete the course development in 2 to 3 weeks instead of taking several months.
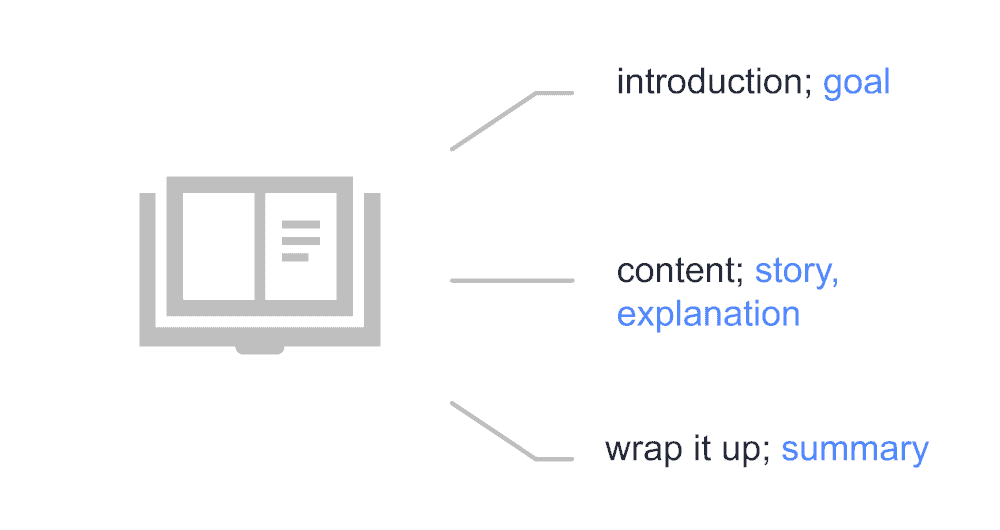
So within your lessons, outline the exact content you will cover.
- Each lesson should include a short introduction (this can consist of why you’re covering it, what they’ll learn, a learning goal, etc…).
- Then you’ll get into the content. You might want to include a story to help learners cement the content (rote repetition vs. meaningful learning).
- Finally, you’ll wrap it up and include a summary of what they just learned.
You don’t need too many background facts in your lessons. Remember, you’re not creating a textbook!
The best lessons show students how to do something and move them forward.
Depending on how far down the path of microlearning you are going, lessons might only need to be a couple of minutes up to 10 to 15 minutes in length.
There’s not too much content you can pack into 2-minutes, so you need to get at the heart of the topic and do so quickly if you’re going that route. A good outline will help you get there.
Finally, it’s best to review your outline. We’ve put this short video together to help you review your outline here …
Tools to Help you Outline
Like with everything, there are tools you can use to help you outline your course. You can use a pen and paper for this exercise, but it’s nice if your outline is already on a device where you can work later. That way, you can expand on it from the outline to your actual content.
Microsoft Word or some other application for documentation, like Google Docs, works great for outlining.
Excel also works well. When using Excel, you will want a column for the modules, and then next to each module, include the lessons or tasks that go within the module. Here’s a screenshot of one of my Excel outlines:
If you’re hard-core, you can use mind-mapping tools. These are great, but with most, you will have to manually re-type your ideas into other software to use them later on. However, mind mapping is probably the best tool for you if you’re a visual learner.
You can also use Trello or other productivity software to outline and manage your projects. Monday.com is a productivity tool I use and recommend.
Once I plan out my outline in Word or Excel, I import it into Monday.com. I use Monday.com to keep track of all the different stages, starting from my outline to the actual course. Using this tool, I can mark off what I’ve completed and what I still need to work on, including due dates. Here’s a screenshot of how Monday.com works:
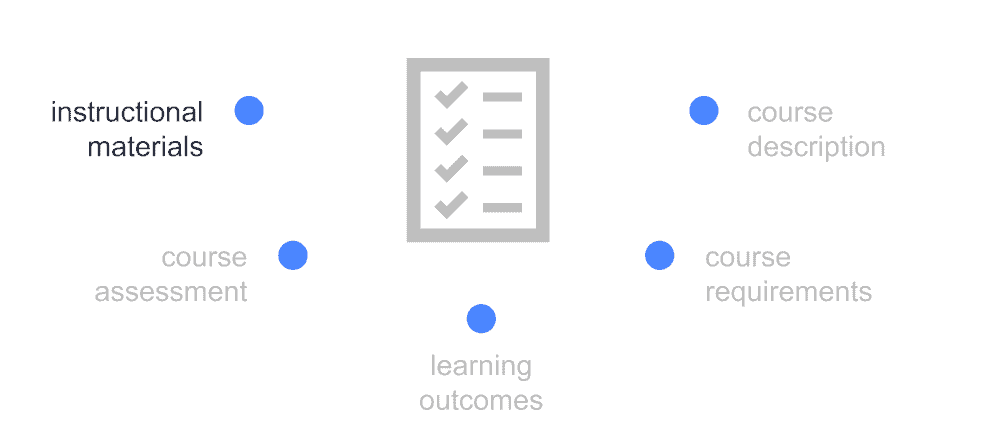
Important Components You Can Add to Your Outline
In addition to your outline, you might want to consider adding a few components while you’re in the planning stage.
These components are beneficial to explain your course and its details to a student. You might even use them on your sales page. But even before that, they are useful to help you stay on track.
You don’t want to drift from the core goals of your course. Putting all these down in writing and revisiting them throughout the course creation process will help keep you on track.
Course Description
Your course description is your opportunity both to sell the course to prospective students and to give registered students an idea of what to expect. You will likely find more engaged learners with a complete course description.
For instance … What is the course about? What problem does it solve for your learners? Why should your learners take this course? What topics will you cover?
Here are a couple of example course descriptions you can model:
- This course provides an introduction to the basics of marketing, both digital and offline.
- This course will analyze how they apply to the economy and individual businesses. Through real-world cases, learners can address common marketing problems, develop marketing plans, and understand how marketing drives business.

Course Requirements
What prior knowledge do your students need for success in the course? What will be required of your students to pass the course? Do they need to spend a set amount of time working on the topic, or are there quantitative requirements such as passing a certain percentage of quizzes? Is there a final assessment that they must pass to complete the course?
When students know exactly what is required of them, they can better navigate your course and meet class expectations. Here’s an example:
Students in this course are expected to attend two one-hour lectures each week starting in Week 1. Between weeks 2 and 4, students will attend an additional online study session of one hour weekly. Weeks 5 and 6 will be devoted to working on the final project and studying for the exam. The final exam will last for three sessions in week 7.
Learning Outcomes
Designing the outcomes of your course is a crucial step. You can either add this to your notes or include it for review by your students (or both). Use action statements to describe what it is your student will achieve.
For example:
“Students will be able to analyze marketing data and trends and identify which strategies work best based on the business type.”
This will help both learners and you as it identifies a clear learning outcome that will signal whether the learner has grasped the material.

Course Assessment Plans
Assessment plans should fall in line with learning objectives. While your learning objectives identify what the student will learn, the assessment allows you and the student to clearly understand how well they have mastered the objectives. Your outline will identify the types and frequency of assessments.
Will there be a weekly quiz? Assessments at the end of each module? Written essays? Group projects?
The assessment part of the outline will specify the frequency and type of assessment and how these will be used as an overall metric of student learning. Here’s an example:
Assessments will consist of three weekly tests and a final exam. There will also be additional pop quizzes to assess learning and measure progress.
Instructional Materials
Another important component of your outline is listing the instructional materials you will use to deliver the course.
Will you be using the classroom whiteboard only? Video lessons? Audio files? Printable handouts? Will the students be required to purchase a textbook to complete the class?
Outlining instructional materials will be used in the class is a vital part of the planning process. Here’s an example you can model:
In addition to the required texts, students will be provided with helpful, peer-reviewed studies, real-world case studies, and other online reading to accompany the course materials.
Conclusion
Developing a course that will deliver the correct information and produce a high-quality learning experience is no easy feat. The creation of an outline that serves as a guide to the course is helpful for both student learning as well as for you so you can develop a more practical course.
By outlining the most essential components—the main modules, lessons, topics, and learning objectives, you can deliver a highly effective, high-quality course in no time.
