Our content is reader supported, which means when you buy from links you click on, we may earn a commission.
How to Add Subtitles to MP4 Files
Did you know that adding subtitles to your mp4 videos can help you attract more viewers?
A 2015 study conducted by 3Play Media and Oregon State University revealed more than 88% of respondents using subtitles found them moderately helpful up to extremely helpful.
Subtitles also have other benefits, such as improving comprehension for non-native speakers and making videos accessible to those who are deaf or hard of hearing.
If you’re looking to create more engaging online videos, adding subtitles is definitely something you should consider. In this blog post, we’ll show you how to add subtitles to your MP4 videos.
First, let’s start from the beginning!
What are Common Subtitle Formats?
Subtitles are the string of text shown at the bottom of the screen when you are watching a lecture, course, TV program, movie, or video game.
The most common types of subtitles format are SRT, SUB, IDX, ASS, and SSA, with SRT or SubRip format being the most popular of them all.
Hard Subtitles vs. Soft Subtitles
Hard subtitles are subtitles that are hard-coded or burnt into the video permanently. This means you cannot remove them from the video, and every time you watch the video, you will see the subtitles as well.
Hard subtitles become a part of your video so you cannot hide them with a video player or edit them. These subtitles offer various benefits as they are precisely timed and accurate and will not disappear at any time.
Soft subtitles are subtitles that are placed in a different file from the video files. This gives you the option to play the subtitles with the video or turn them off when you feel they are a distraction.
You can also edit soft subtitles independent of the video since they are hosted in a separate file.
How to Embed SRT to MP4 Permanently
With good-quality software, you can easily encode hard subtitles to your MP4 videos. Let’s take a look at how it is done:
Automatically Generate Subtitles
As a content creator or an instructor, you might not have time to create extensive text files by manually typing down everything you have said in a video. Fortunately, there are various apps that are designed to automatically generate subtitles for your MP4 recording.
All you need to do is to upload your video file on the app and follow simple instructions that can convert your audio into text format. In this phase, you also have the option of manually editing and adjusting your subtitle in the video.
Manually Add and Edit Subtitles
Once the subtitle file has been generated, you can download it into an SRT format.
Depending on the software you are using, you will find an option that will allow you to hard-code subtitles to your video or audio recording, which will embed the subtitles into the file permanently.
You also have the option of choosing soft subtitles by selecting the “closed captioning” option for your video.
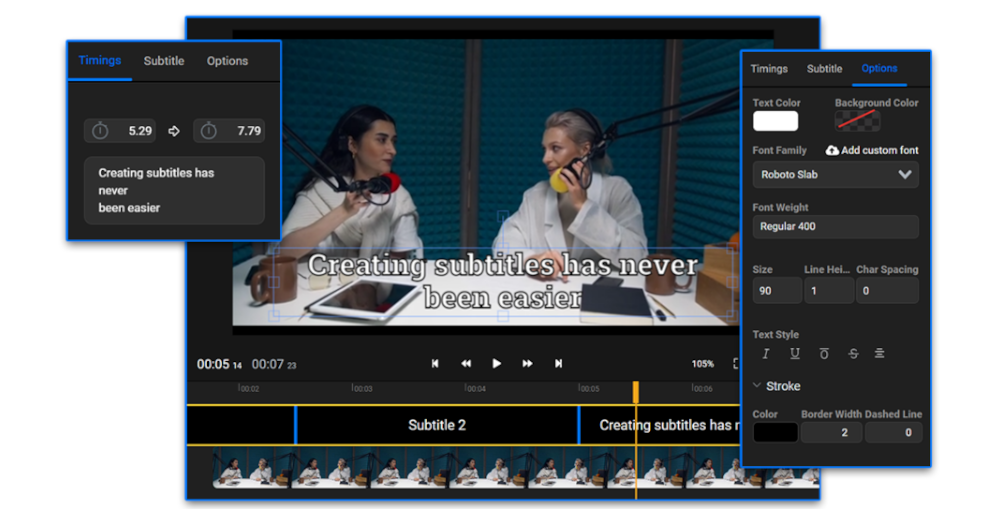
If you would like to manually add the subtitle, you can go to the subtitle editor and start typing.
The software will also give you the option to arrange the text in small lines for increased readability and to prevent the audience’s eyes from moving too far across the screen.
If you need to adjust the time the subtitle is displayed, you also have the option of changing the start and end time through the subtitle editor, which you can easily access from below the audio track.
Once you’ve created a subtitle, you can rinse and repeat until you have the entire subtitles for your video. Make sure to play the video with the subtitles you have already created from time to time to ensure the captioning is precise.
Save Your File as an MP4
Once you’ve subtitled your entire video file, you should save it for later use. Click on the Save icon, which you can find on the menu bar in most subtitling software, to save the changes.
Your app will offer you several video formats for your file like MP4, AVI, MOV, etc. You can choose the MP4 format for this file as it offers you a wonderful visual experience and a smaller file size, which does not take up so much space on your computer.
The Most Popular Subtitle Tools
Now let’s take a look at some of the best tools in the market that can help you add subtitles to your video files free of charge or in a very low-cost way.
VEED
VEED is a professional video creation software that offers an intuitive way to create videos.
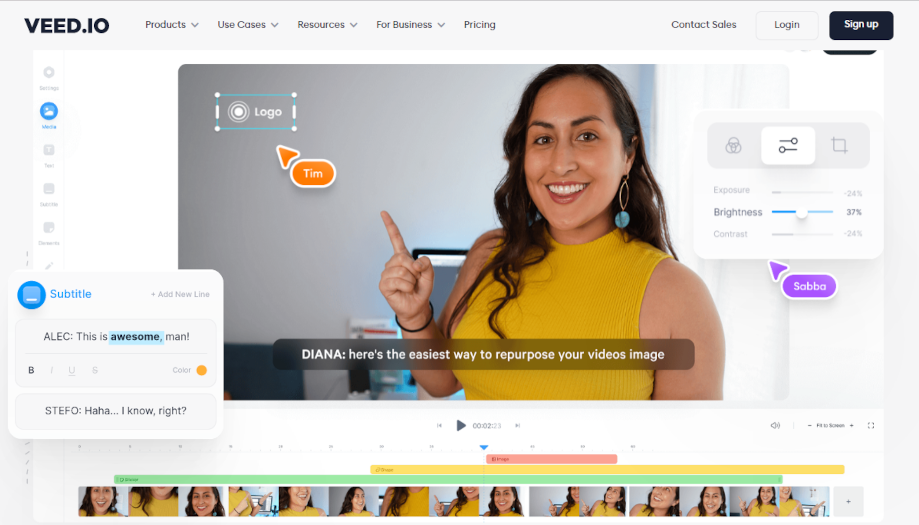
Key features include:
- Robust online video editing, recording, sharing, and hosting features.
- One-click subtitling and translation options.
- One-click video editing, including noise reduction, transitions, cropping, custom branding, compression, and formatting.
- A cloud-based app ideal for classroom management, professional learning, special needs students, and instructional design.
- Allows quick file transfers and consumes small storage space.
- All projects are online and accessible.
- Gives permission for multiple creators to work on the same project.
- Allows sharing of videos via URL.
- Very intuitive software for beginner users.
Flixier
Flixier is a cloud-based, collaborative video editing software designed for expediting video creation workflow.
Key features include:
- 1-minute export on any device.
- Optimized real-time collaboration and social sharing across any platform to keep everyone in the loop.
- Advanced features include cloud storage, detailed version history, email notifications, advanced exports, and feedback comment options.
- Compatible with Mac, Windows, Chromebook, and Linux.
- A wide array of editing features including video capture, video stabilization, text overlay, audio tools, video speed controlling, merge and split video options, media library, and more.
- 4x faster upload than Dropbox.
- Multi-team management capabilities, priority support, and HD resolution support.
AegiSub
AegiSub is a free, open-source, cross-platform tool with various customization options for creating and editing subtitles.
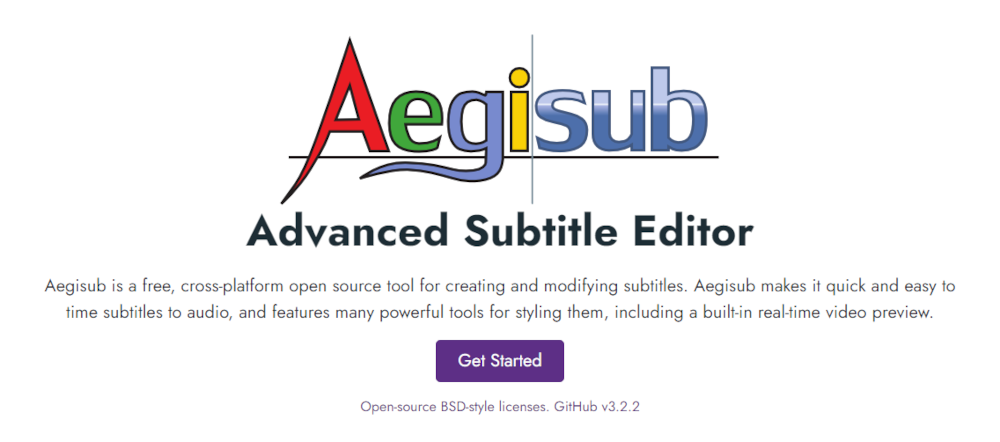
The tool makes it very simple and intuitive to time subtitle audio and comes with various features and options:
- Advanced options for styling subtitles, including timing, editing, typesetting, and translating subtitles.
- Fully scriptable via a robust scripting environment known as Automation that can create macros, karaoke timing, karaoke effecting, and more.
- The default subtitle format is ASS, which offers superior support for subtitle styling and positioning. Also offers other popular formats like SRT.
- A powerful video mode and excellent video typesetting tools.
- A customizable and easy-to-use audio timing mode.
Kapwing
Kapwing is a digital content creation platform and video editor tool that can be used by people of any skill level.
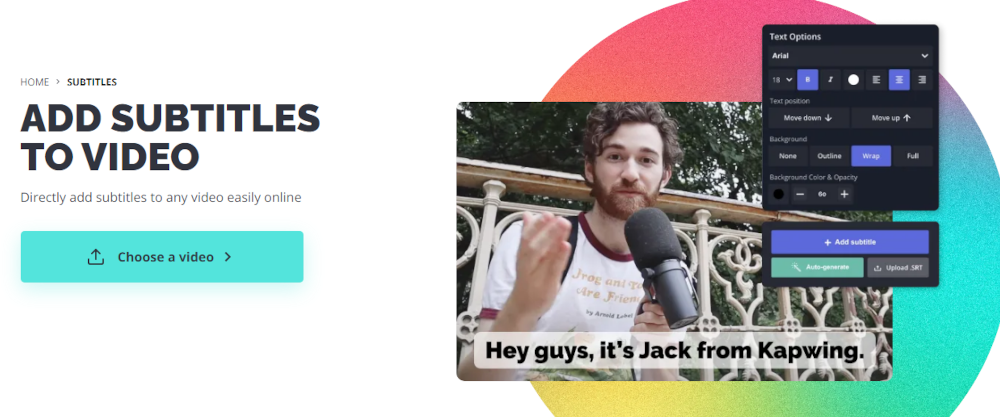
The platform offers various features, including:
- Creating videos, exporting images, adding music, editing content, and so much more.
- Directly adds subtitles to any video online and is compatible with all major video formats.
- An intuitive format that allows you to resize 16:9 format videos into short videos quickly.
- Offers integration with Google and Automation.
- Offers hundreds of great templates to create professionally designed videos.
- A Smart Cut feature that detects and removes awkward silences from videos.
- A Clean Audio feature that removes background noises, adjusts loudness, and eliminates plosives from your audio.
- Adjust your video size in seconds to be compatible with all types of platforms.
- Allows you to create, edit, and share content with the team for collaboration.
FAQs on Adding Subtitles to Video
How do I export Camtasia video to MP4 with subtitles?
When you’re finished editing your video in Camtasia, you may want to export it as an MP4 with subtitles. Here’s how to do that:
- Click the Share button in the top-right corner of the Camtasia interface.
- Select Export > export as MP4.
- In the Export Settings window, select Subtitles/Captions from the menu.
- Choose whether you want to export your subtitles as a separate file or embed them in the video file.
- Click Export.
That’s all there is to it! Once your video export is complete, you can upload it to YouTube or another video-sharing site with your subtitles intact.
What does MKV stand for?
MKV is a very popular video format that many people use. These files are usually high quality and can be played on most video players. MKV stands for Matroska Video.
Matroska is a container format, which means that it can store multiple video and audio tracks in one file. MKV files are often used to store HD videos. It’s a great format for storing HD videos because it preserves the quality of the video while keeping the file size small. MKV files can also be streamed over the internet. Many online streaming services use MKV files because they provide high-quality video without taking up too much bandwidth.
Does converting MKV to MP4 lose quality?
The quick answer is that, in most cases, converting MKV to MP4 will not result in any noticeable loss of quality. This is because both MKV and MP4 are what are known as “lossless” file formats, which means that they retain all the original data from the source file.
However, there are some exceptions to this rule. For example, if the source file is already highly compressed, converting it to MP4 may result in a slight loss of quality. Additionally, if you’re using software that doesn’t support MKV files, converting them to MP4 may be your only option. In these cases, the quality loss may be more noticeable.
Why is MKV so popular?
MKV is a popular video file format for several reasons. First, it supports a wide range of video and audio codecs, which means that it can be used to play almost any type of video file. Second, it is very versatile and can be used on a variety of devices, including computers, smartphones, and tablets. Third, it is relatively easy to use and has a simple user interface. Finally, MKV files are generally smaller than other video file formats, which makes them easier to download and store.
Which is the highest-quality video format?
When it comes to video, there are a lot of different formats out there. Some are better suited for certain tasks than others. For example, MP4 is a good format for streaming video because it can be compressed to a smaller file size without sacrificing too much quality. However, if you’re looking for the highest quality video possible, you’ll want to go with a lossless format like PNG or TIFF. These formats don’t lose any quality when they’re compressed, so you’ll get the best possible image. Of course, that comes at the cost of file size, so you’ll need to have plenty of storage space if you want to use these formats.
The Bottom Line
Now that you know how to add subtitles to your MP4 videos, it’s time to go out and start doing it! The process is simple and can be done in a matter of minutes.
Plus, adding subtitles can help increase your video views and engagement rates. So what are you waiting for? Start subtitle-ing today!
