Our content is reader supported, which means when you buy from links you click on, we may earn a commission.
Teachable Tutorial: Using the Teachable LMS Platform to Create Your Online Course
Looking for a step-by-step Teachable tutorial? Then look no further. In case you’re not familiar with this platform, Teachable is a learning management system (or LMS). It’s just a fancy way of saying it’s an online course creation tool.
I recently used Teachable to set up a free course. It’s not as much a course as a membership area with a collection of checklists.
I used to run my checklist member’s area on a WordPress membership plugin but wanted to give a few cloud LMS platforms (also called hosted LMS platforms) a try. Teachable is the one I chose to start with and I also offer a Teachable review if you’re interested in seeing how this cloud LMS stacks-up.
This Teachable tutorial walks you through how to set-up your course through their online course platform. It covers each feature they offer from within the admin area of a Teachable account.
Teachable Tutorial Table of Contents
Getting Started
If you want to use Teachable the first thing you need to do is sign up for an account. You can do that by entering your email and clicking on ‘Get started’. It’s free.

Then you’ll be prompted to enter more information like your name, email address and a password.
A credit card is not required if you want to use Teachable’s free plan.
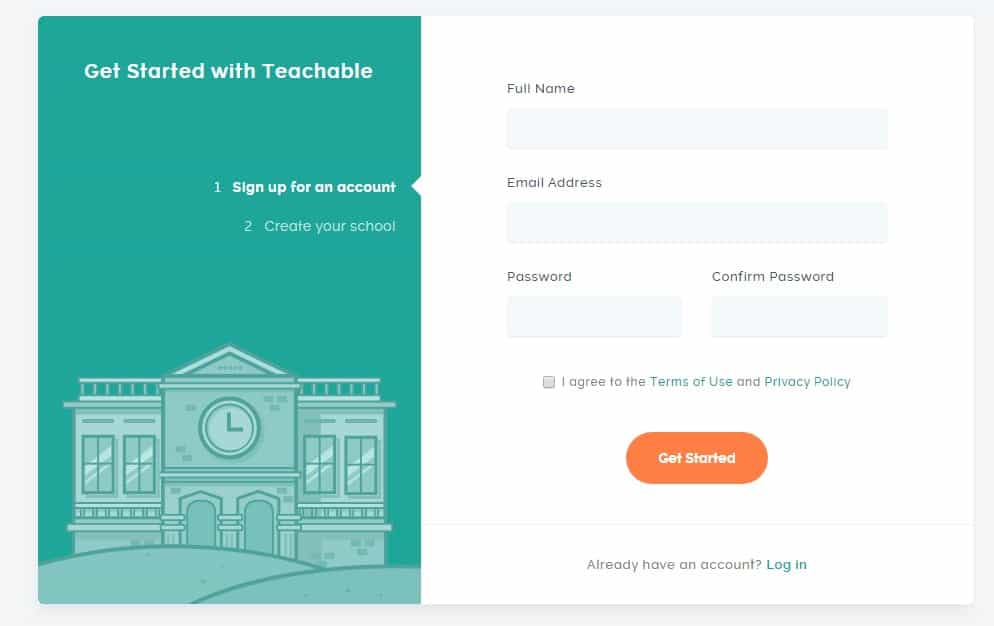
Next they ask you to name your school.

You may be thinking, “I’m not creating a school, I just want to have a course or some content behind a password protected area”.
The thing is, if you create more than one course, then you need a ‘school’. It’s your collection of courses. Even if you’ve just got one course, that course is in your school.
Don’t stress out about this, it’s best to just get it set-up for now. You can use your domain name or even your actual name as your school name for now and always change it later.
Once you’ve got the school name entered and the new school is set-up, you’ll be able to login to your Teachable admin at any time with your email address and password.
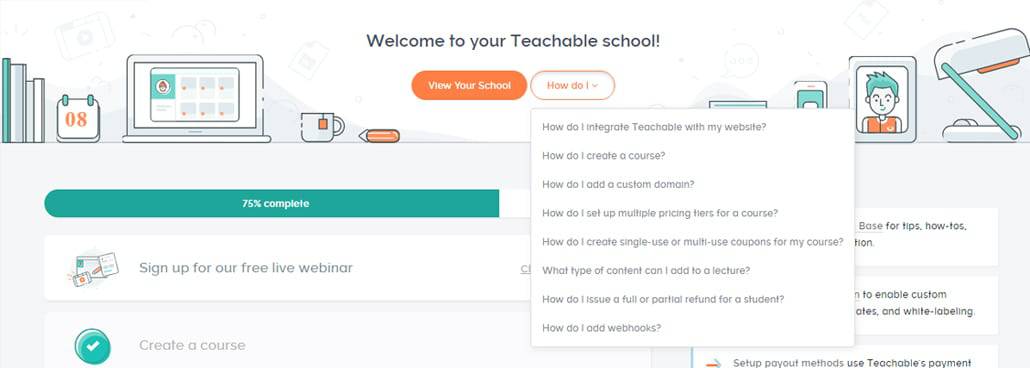
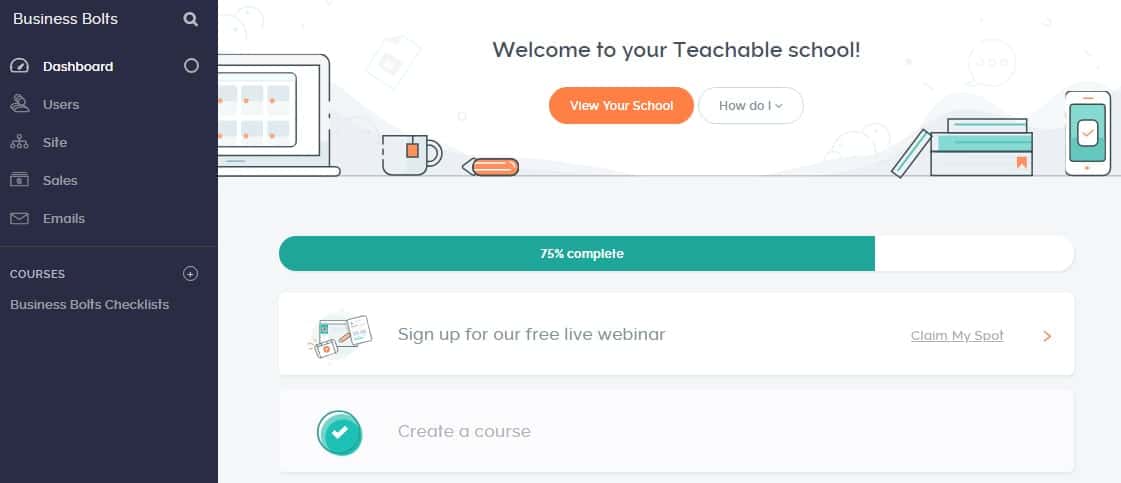
Once logged in you’ll be taken to your dashboard (shown below).
Create Your Course
The first thing to do once you login is create your course.
You can create a course by clicking on either ‘Create a course’ or by clicking on the + symbol under COURSES on the left menu.
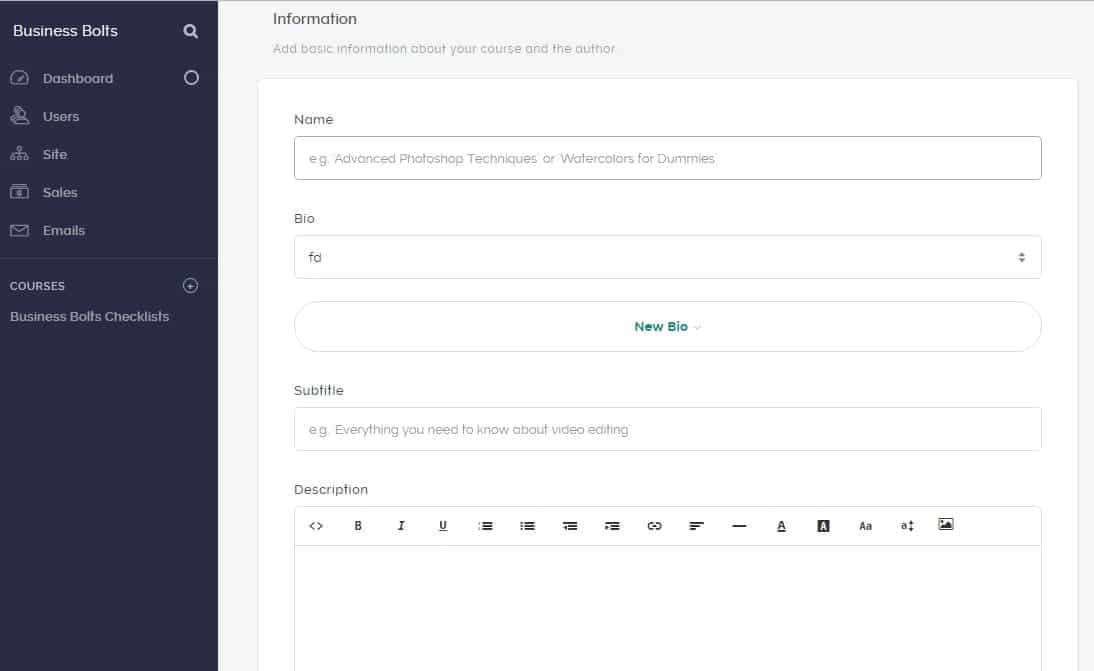
To create a course you need to enter in some information.
Like everything else, you can change all of this later on if you need to.
The first thing to do is enter a name for your course. Mine is Business Bolts Checklists. I know that’s kind of ‘meh’, but it conveys what it is to people.
You can also add in a bio where you talk about yourself.
Finally, you can add in a subtitle and a description for your course. Then click ‘Save’ at the bottom.
Once you’ve saved it, the course will show up under the admin menu on your dashboard. Anytime you want to work on that course, you just click on its name.
Course Information
Once I click on the Business Bolts Checklists link under ‘COURSES’, I’m taken to a page like this:
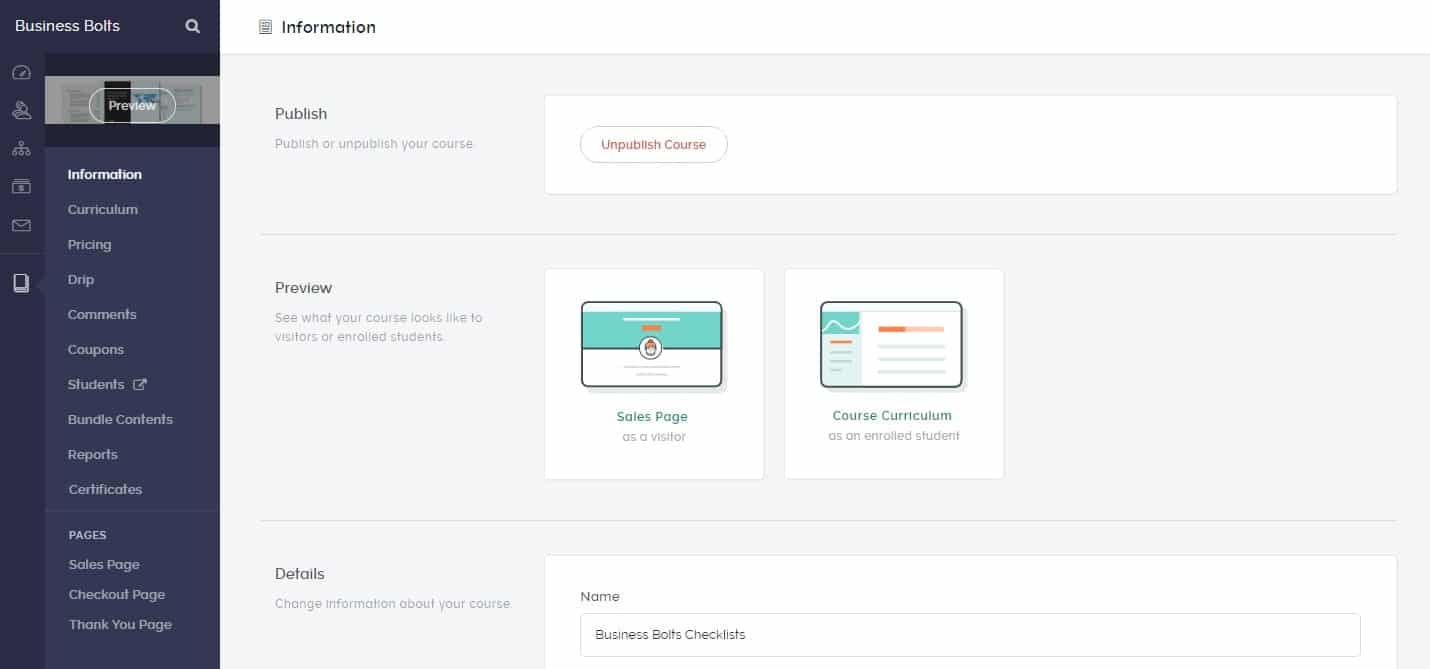
It’s got all the course information again along with preview links so you can see what your course looks like whenever you want.
If you’re following along with me, there’s nothing in there, so don’t bother previewing your stuff yet.
[elementor-template id=”22359″]
Course Curriculum
Under ‘Information’ which we just filled out is the ‘Curriculum’ menu link. That’s the page you’ll likely spend the most time on. Here’s what my curriculum page looks like after spending some time adding in the curriculum. The curriculum is just the content so don’t worry about how official sounding it is. Just load up your content.
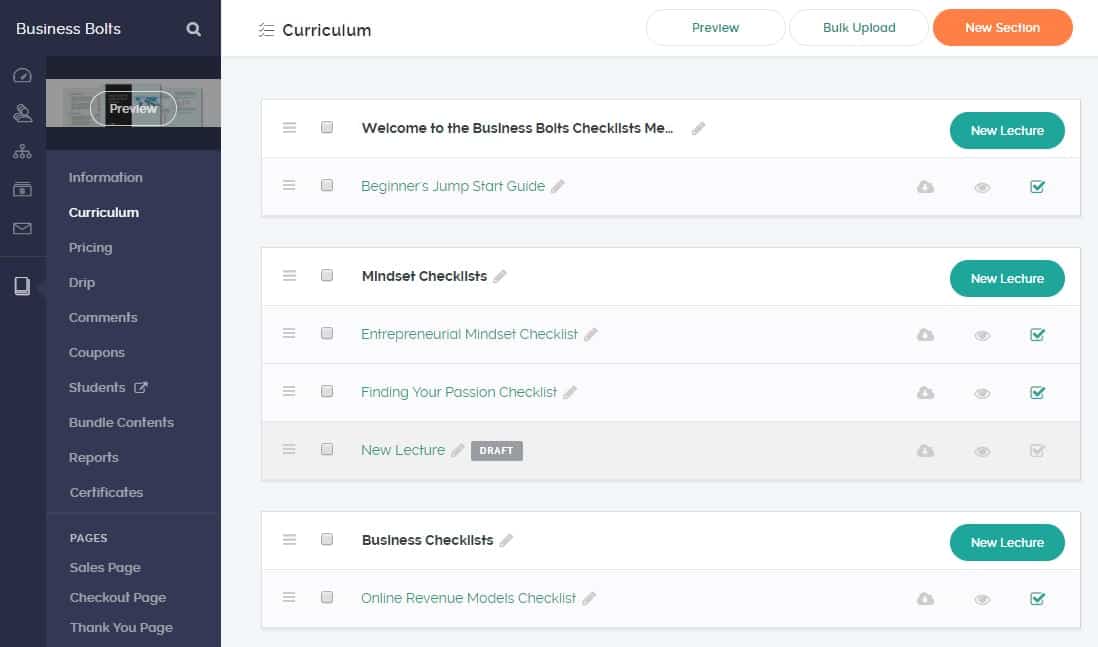
From this page, you can enter in your course content including text, videos, quizzes, and more. You are able to organize it to display the content in the order that will make the most sense for your students.
Get started adding in content by clicking on the orange ‘New Section’ button on the top-right.
A section is a main heading within your course. This could be your Introduction, Module I, Module II, etc … or something more meaningful.
I have a collection of checklists in my course that fit into a few different categories. I used the category names as my sections and then put the individual checklists under each section. In the screenshot above, you can see ‘Mindset Checklists’. That’s a section heading. So is ‘Business Checklists’.
You don’t do anything with the section other than give it a name (there’s no course content in there and it’s not clickable for your students).
Once you create a section, you’ll see a button that says ‘New Lecture’. Here’s where you’ll add your content.

If you’re creating modules with lessons within it, then the ‘New Lecture’ is your lesson.
Just click on the ‘New Lecture’ button and you’ll be taken to a page where you can add an audio file, a PDF, or a video file. In addition to the ‘Add File’ tab, you can also click on different tabs to add text, a quiz, or code.
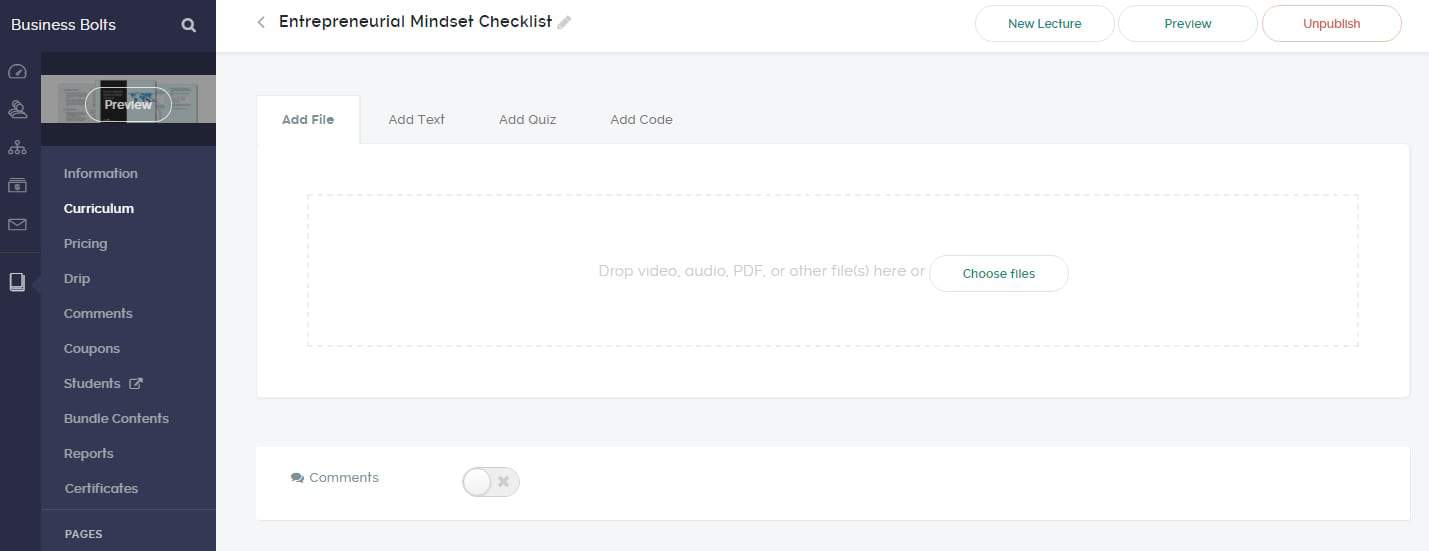
This is where teachable really stands out. I didn’t see the ability to add text to other cloud LMS platforms or to add code.
You can also enable comments right in that lesson/lecture (by clicking on that toggle) which also isn’t something every LMS can do. You’ll see the comments box at the bottom. I don’t have comments toggled on in this screenshot.
I want to give my customers the best user experience and these features really made Teachable stand out. In addition, it just looks nice (I’ll show you here in a sec).
Once you’ve got your content in there, you hit the ‘publish’ button.
You can always go back and edit the lecture or section name, delete lectures or sections, or move them around to make your course just right. Just click on those three lines to the left of the section or lecture name to drag your content and re-order it. Pay attention to the order your students progress through the material in order to make the most user friendly version of your course possible.
The curriculum builder in Teachable is really good. It’s especially easy to use.
Once you’re done, you can preview your course. Here’s the start to mine:
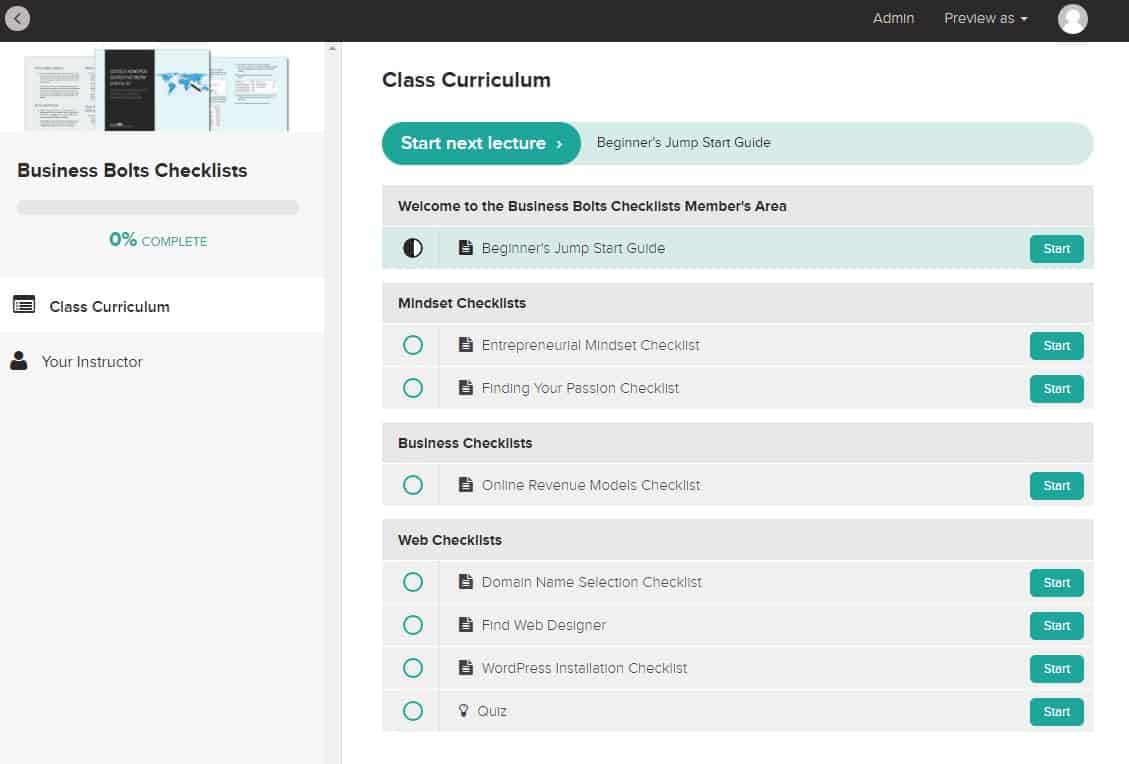
I think it looks nice. I’ll do a little more customizing and adding in content before it’s ready to go, but it’s looking good.
Here’s what happens when you click on a checklist. I clicked on the Domain Name Selection Checklist:
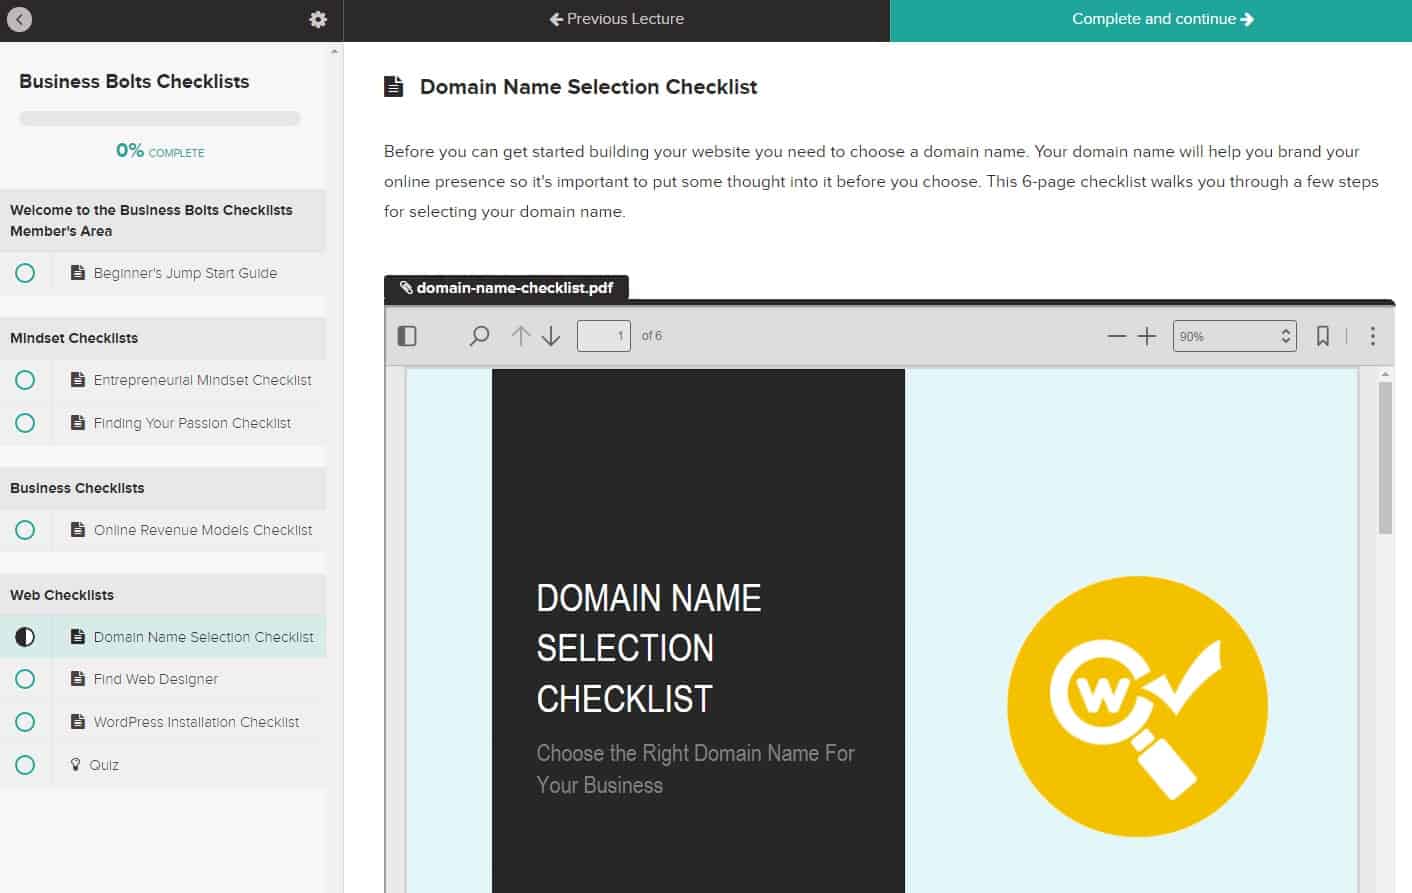
Since I’m offering a PDF, it’s embedded in the page. I also have the ability to make it downloadable. Since it’s a checklist I know it’ll be helpful for people if I allow them to print it out. That way they can check the boxes off. So that’s a handy feature.
I really like how in the menu on the left, the section is highlighted (it’s the bold ‘Web Checklists section’) and the lessons or lectures, or in my case the checklists are under it (in the screenshot above, it’s the ‘Domain Name Selection Checklist). Notice that the link has a half-filled circle in the left-hand menu above. That’s because you’re working on it.
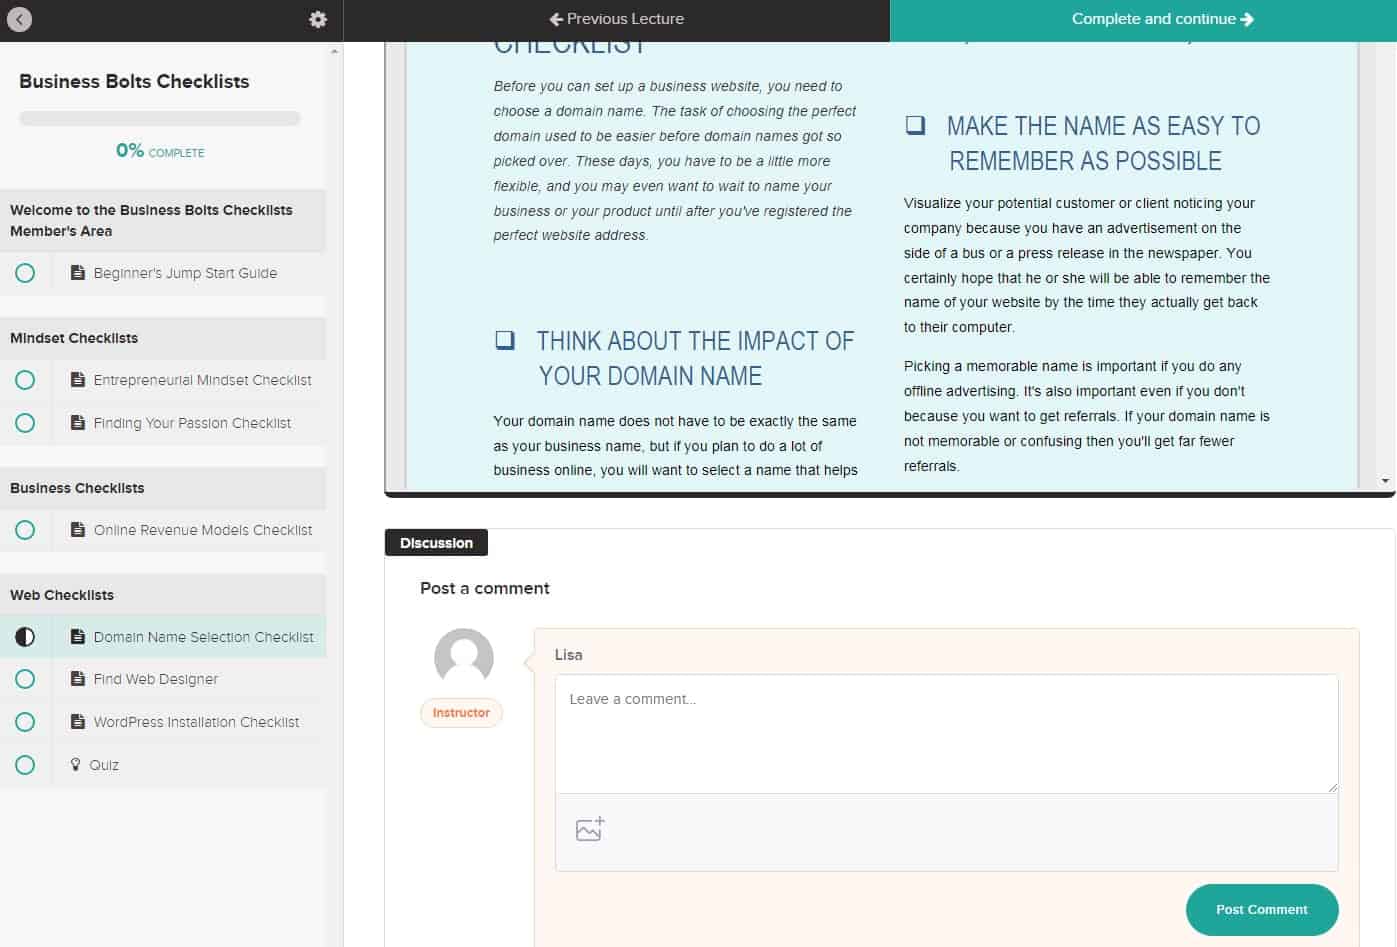
If you look up at the top of the screenshot, you’ll see a ‘Complete and continue’ button. If you click on that, then the lesson will be marked off. That way people can keep track of what they’ve already gone through. Plus they can see the percentage up top on the left. Right now I’ve got a 0% complete score, but if I go through and mark off these lessons, it’ll start to move. It’s pretty nice!
I also like how I was able to add text above the PDF. That helps walk people through my content. You can actually even put text under the PDF too.
And as mentioned, you can add in a discussion section. Here, I’ve scrolled down under my PDF embed and you can see the comment area:
It was very easy to do this from the curriculum builder in the admin.
All I did was toggle on discussion. You can re-order all this too. Here’s what the ‘Domain Name Selection Checklist’ admin area looks like:
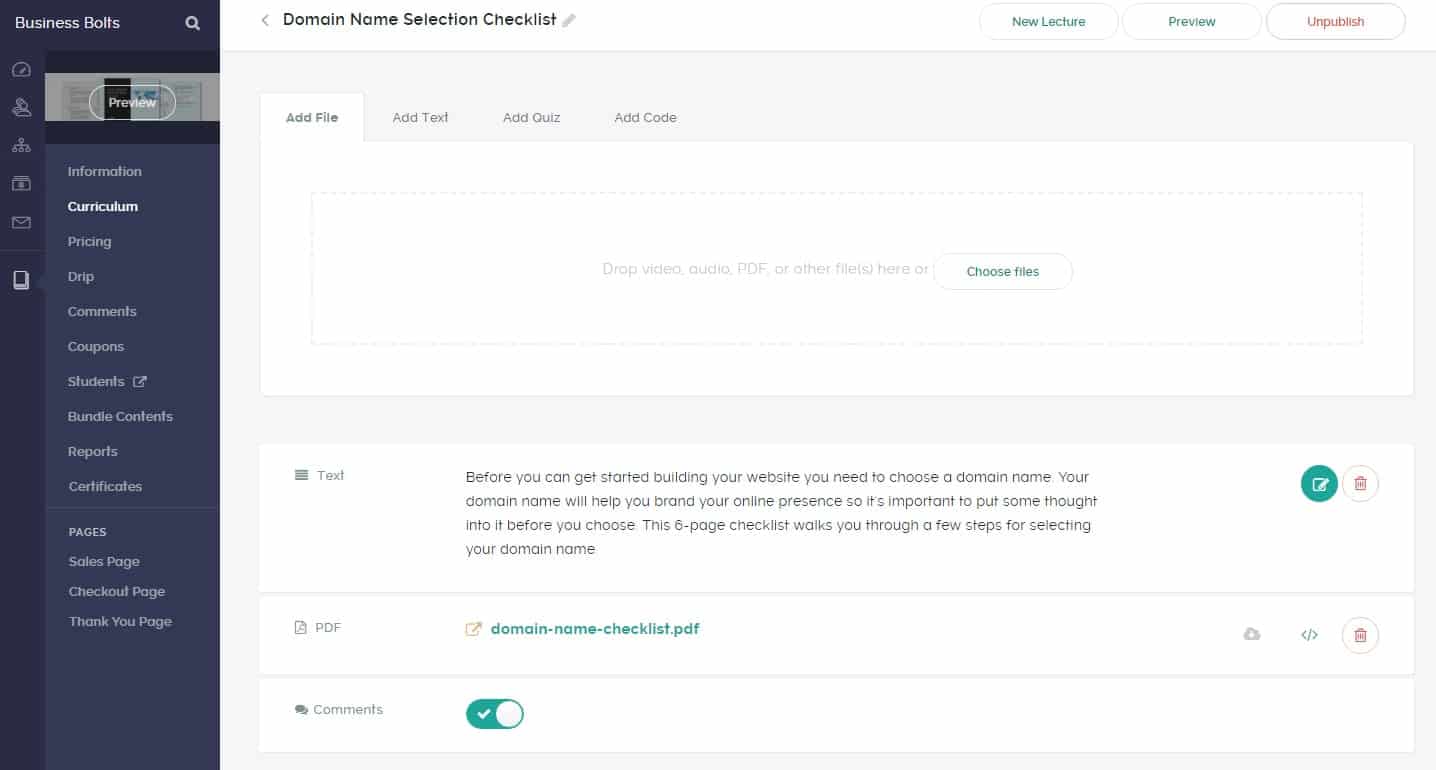
You have complete control over how each of your lessons (or in my case content pages) looks. Again, videos or other files along with text, quizzes, comments, and code can go on each of these pages.
Tips When Uploading Your Course Curriculum
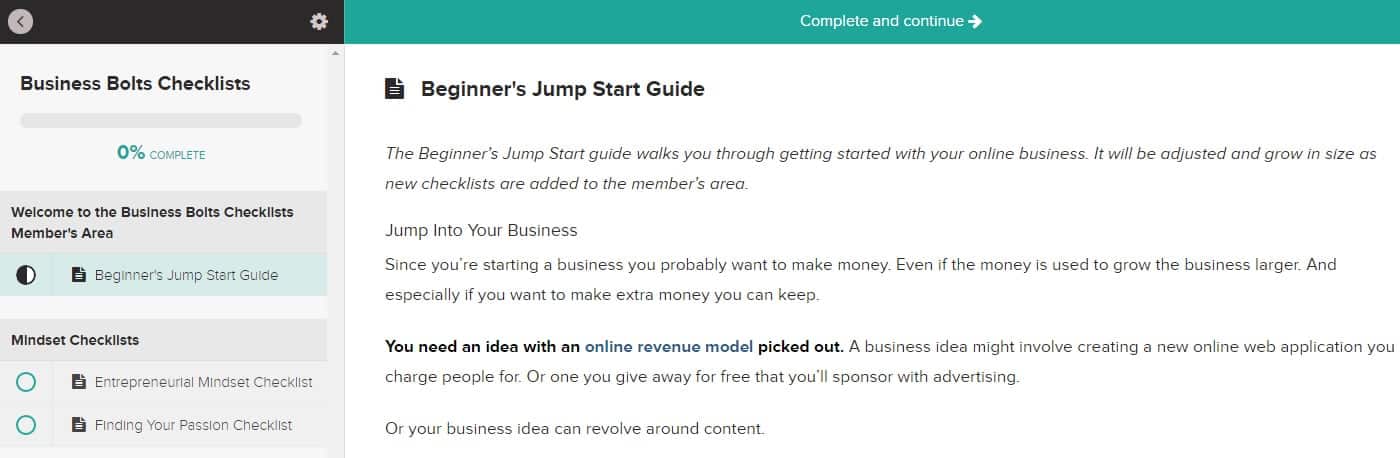
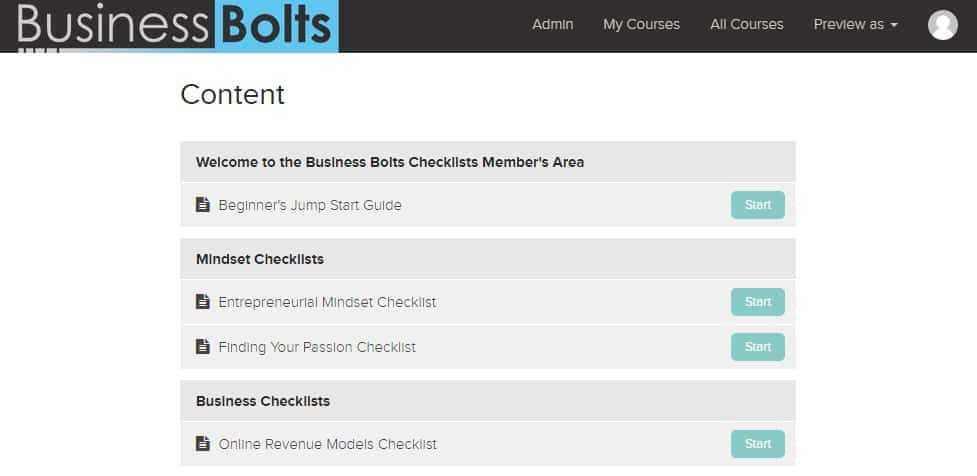
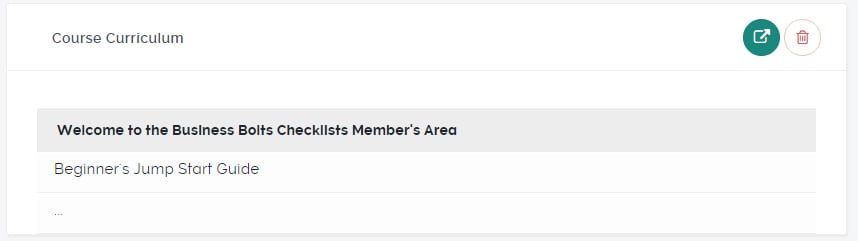
Make sure to have a welcome section. Even if it’s just text based content, it’s nice to be welcomed into a course or a member’s area and know what to expect. Mine’s just text, but it’s better than being hit with a random PDF checklist.
Here’s what’s shown when someone enters my course:
You can also include quizzes.
I don’t plan to have quizzes in my actual course, but I created one here so you can see what they look like:
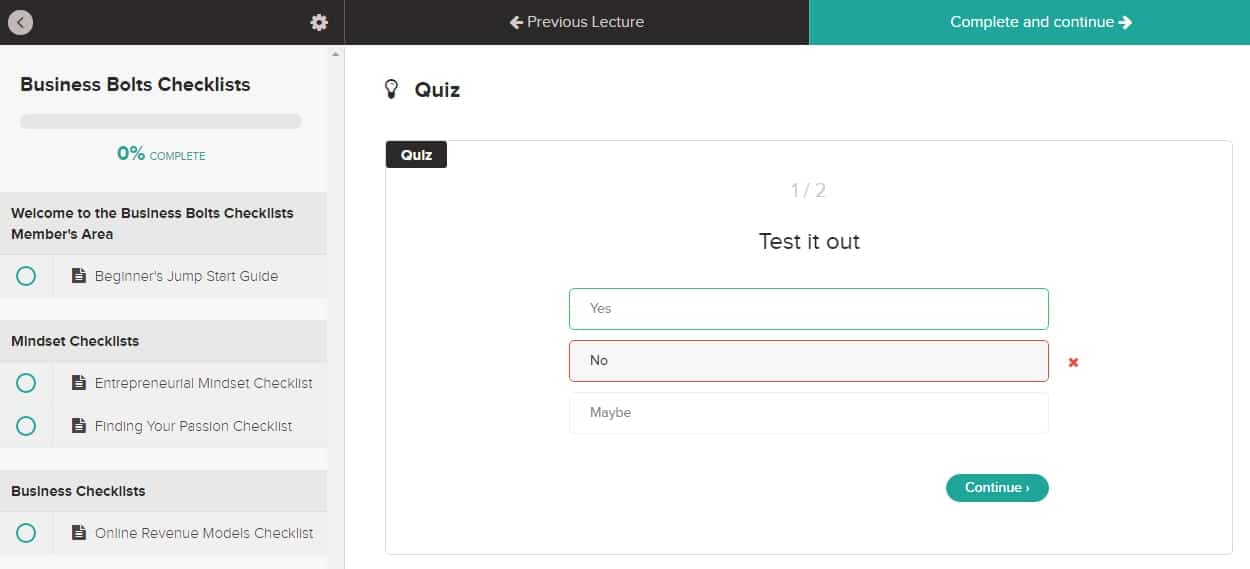
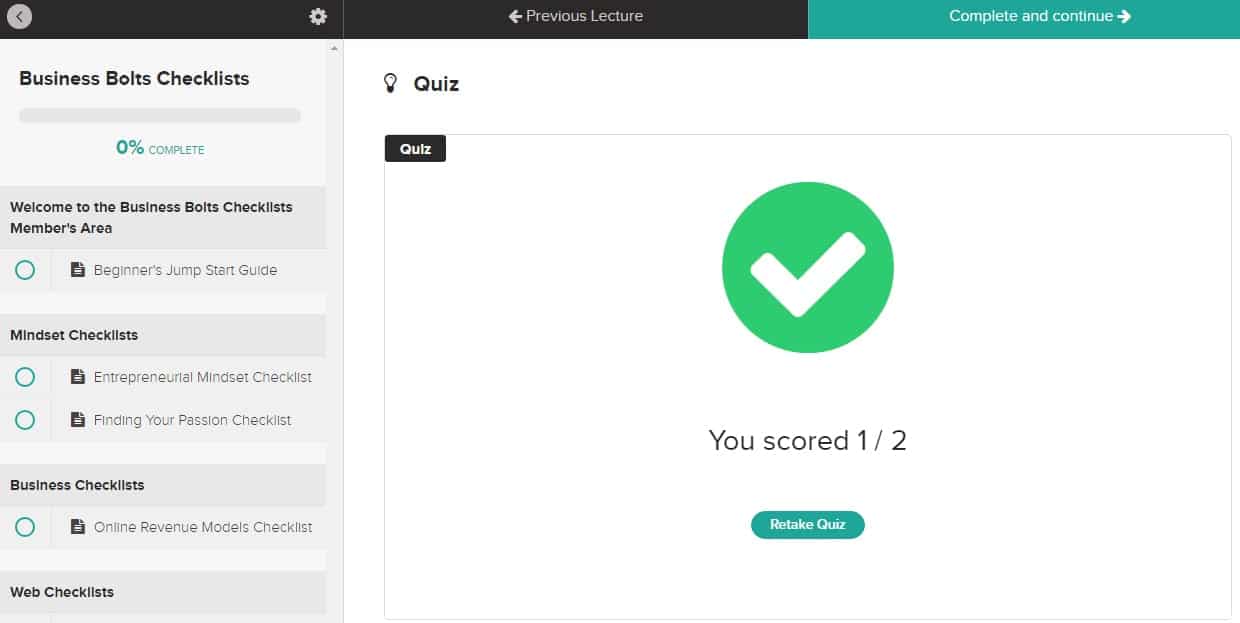
It creates pretty basic, but working quizzes with a score at the end:
One thing I didn’t like was that the main page of my course has a link with the text ‘Class Curriculum’. It’s also at the top of that main page.
That just doesn’t make sense for what I’m doing which is creating a member’s area with checklists. It’s not really a curriculum or a class.
So I figured out how to change that.
It’s under Site and then Custom Text. There are actually two different menus in this screenshot. There’s one on the left that’s just icons. The first icon is the Dashboard page, the second is for Users, the third is for Site. Once you hover over that, you’ll see the second menu show up. That one has Custom Text down a bit and that’s what you want to click on.
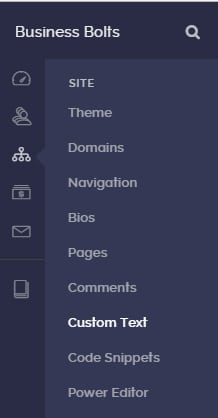
Once you click on that Custom Text link, you’ll see a lot of options. There’s a lot of text you can change on this page. The text I needed to change is under the Courses heading.
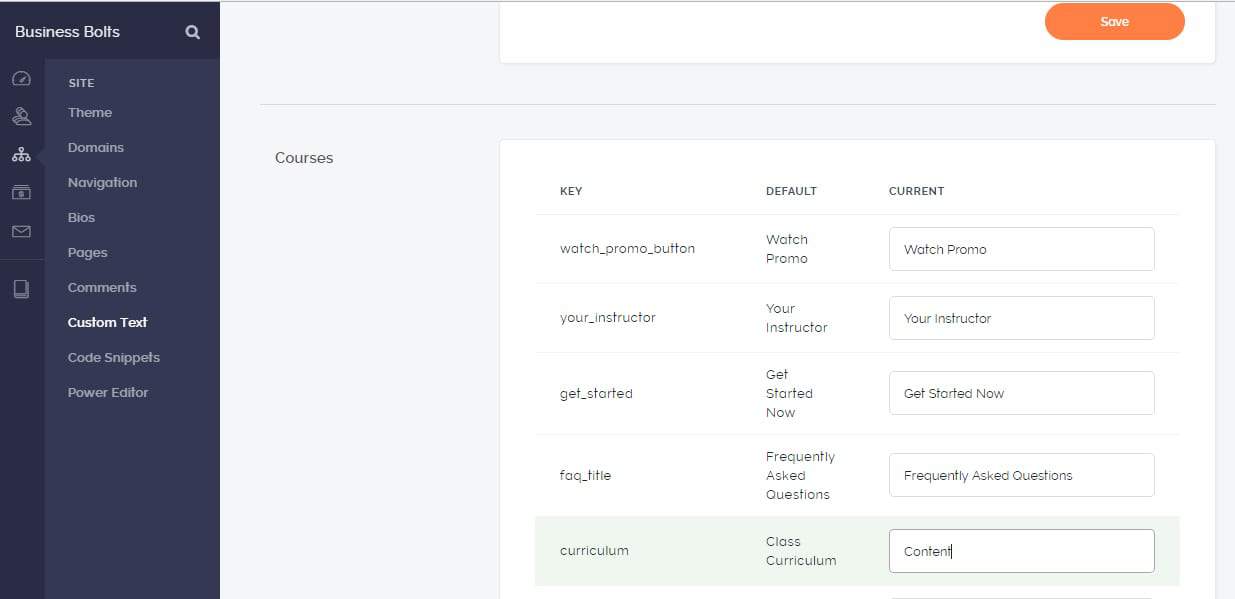
I changed it from Class Curriculum to just ‘Content’. I may decide on ‘Checklists’. You can change it to whatever makes sense to you. You can change a lot of other stuff in here as well.
Once done you’ll have to go back to your course, which you can do by going to the last icon on the left menu. It looks like a couple sheets of paper. If you hover over that, you’ll see that’s a link to all your courses:
![]()
Click on that and you’ll go back to your course. When your course curriculum is set-up the way you’d like, just go down the menu. Most of these won’t take too long to set-up.

Pricing
Here’s where you’ll pick a price option. There’s free, a subscription (which can be monthly or annual), a one-time purchase, and a payment plan.
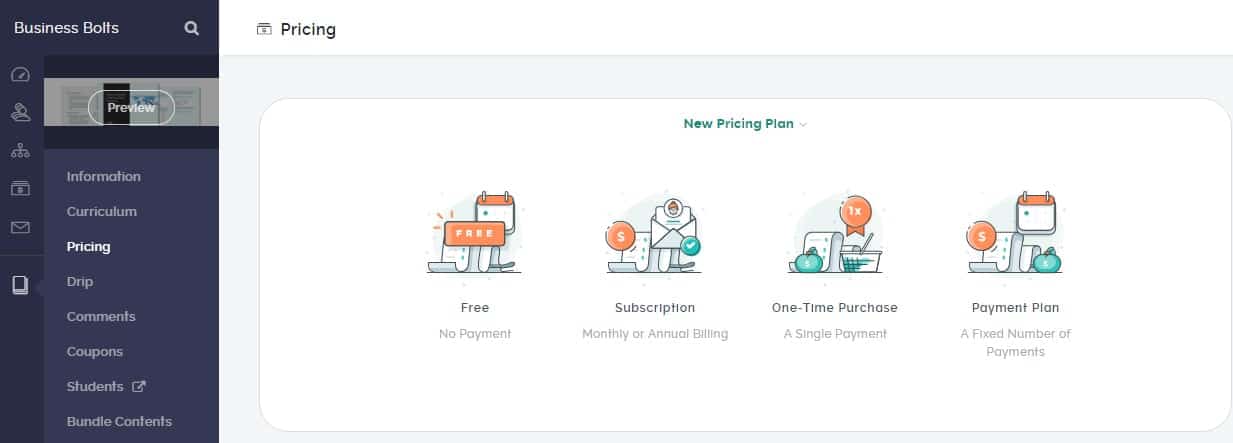
Pick whatever fits your course best and then fill out the required information.
Once you’ve done that just keep going down the list.
Drip
The next one, drip allows you to only reveal some of the content at first and then reveal more later. For instance, if you have a course with 4 modules, you can choose to release one a week. You have to upgrade to a paid plan to get this feature.
Comments
The comments link takes you to a page where you can see and manage all the comments your students sent in your courses. There’s not much to do here until you get some comments.
Coupons
This one requires an upgrade, but essentially, if you’re offering a paid course, you can enter in your coupons here. People can get a code, type it into checkout, and get a discount on your course.
Students
The students link takes you over to the Users page and just lists all your students. There’s nothing to do here, but it’s good to know where they’re listed.
We’re moving down the list quickly here to the next link which is bundle contents.
Bundle Contents
Bundling allows you to take multiple courses and offer them together for one price. It’s a discount or a way for people to get more than one course when it makes sense for them to go together. It can also be used for a bonus that goes along with your course. Organizing your bonus within its own course will make it look far more valuable.
Reports
You’ll need to upgrade to get these reports. The reports show you how your students are doing. Like what scores are they getting on your quizzes? Who’s watching your videos and for how long? Reports allow you to see those and other interesting tidbits so you can improve your course.
Certificates
Finally, we’re at the last one on the list, the certificates. You’ll need to upgrade to get this feature. It allows students who complete your course to get a certificate. Some of your students will really appreciate having an official document saying they passed or finished a course.
Next Up … Your Pages
We breezed through all the above spending the most time on the Curriculum link and now comes the pages.
You can expect to spend some time creating these pages along with the copy that’s going on them. Luckily, as you can see, there aren’t too many plus it’s pretty easy to use their layout builder.
Your Sales Page
The first page you can customize is the Sales Page. This is where your students will enroll in your course. You always want to ‘sell’ your course even if it’s free so you need a Sales Page even if you’re not charging. It’s the page where you tell people a little about what they’re going to get by enrolling in your course and allow them to enroll.
This first area you’ll see after you click on the Sales Page link allows you to select a background image or upload your own image along with your headline. Here’s a quick idea of what you can do:

There’s a lot more if you scroll down this page.
You can add in a course description, a little about you, FAQs, and any other type of sales content you’d like.
Here’s what a course description box looks like:
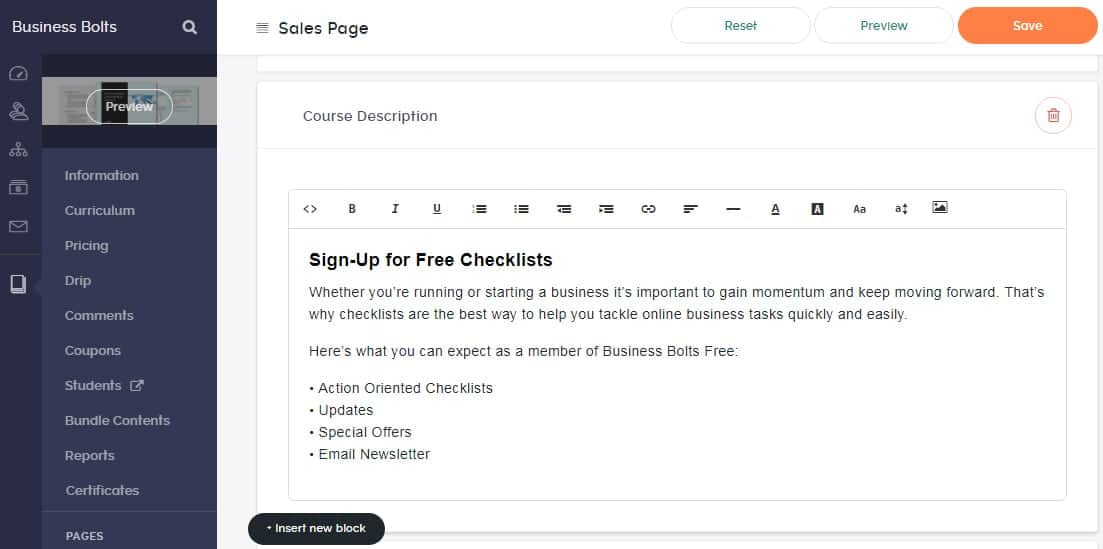
You can add in as many blocks like this as you want and organize them however you’d like. Simply click on the ‘Insert new block’ button that will show up if you hover to the bottom of the block.
These blocks allow you to add in images, text, and virtually anything else.
One of the best features of the Teachable Sales Page builder is that you can also show your course curriculum right on your sales page.
You can do this by adding a course curriculum block like this one. All you do is insert a new block and select ‘Course Curriculum’.
This block will pull your curriculum and place it on your sales page.
If you have anything marked as a preview, your page visitors will be able to click on that and see it right. I can mark the Entrepreneurial Mindset Checklist as a preview item in the admin area by clicking on the ‘make free preview’ icon:

Once it’s been marked, I can see that the Preview button has been enabled when I go back to my Sales Page.

If I click on that ‘Preview’ button then I’m taken to my course where I can see that checklist.
The curriculum embed with previews is a really nice feature to have for your Sales Pages.
I played around with the Sales Page builder for a while until I was OK with the look (what you see here was not the final draft).
When you’re done, you can move onto the next page which is the Checkout Page.
Your Checkout Page
I didn’t need a checkout page for my free course. It’s a page you can easily customize if you do need it.
So that you could see it, I added in a fake price for my course and took a few screenshots of what the check-out page admin area looks like.
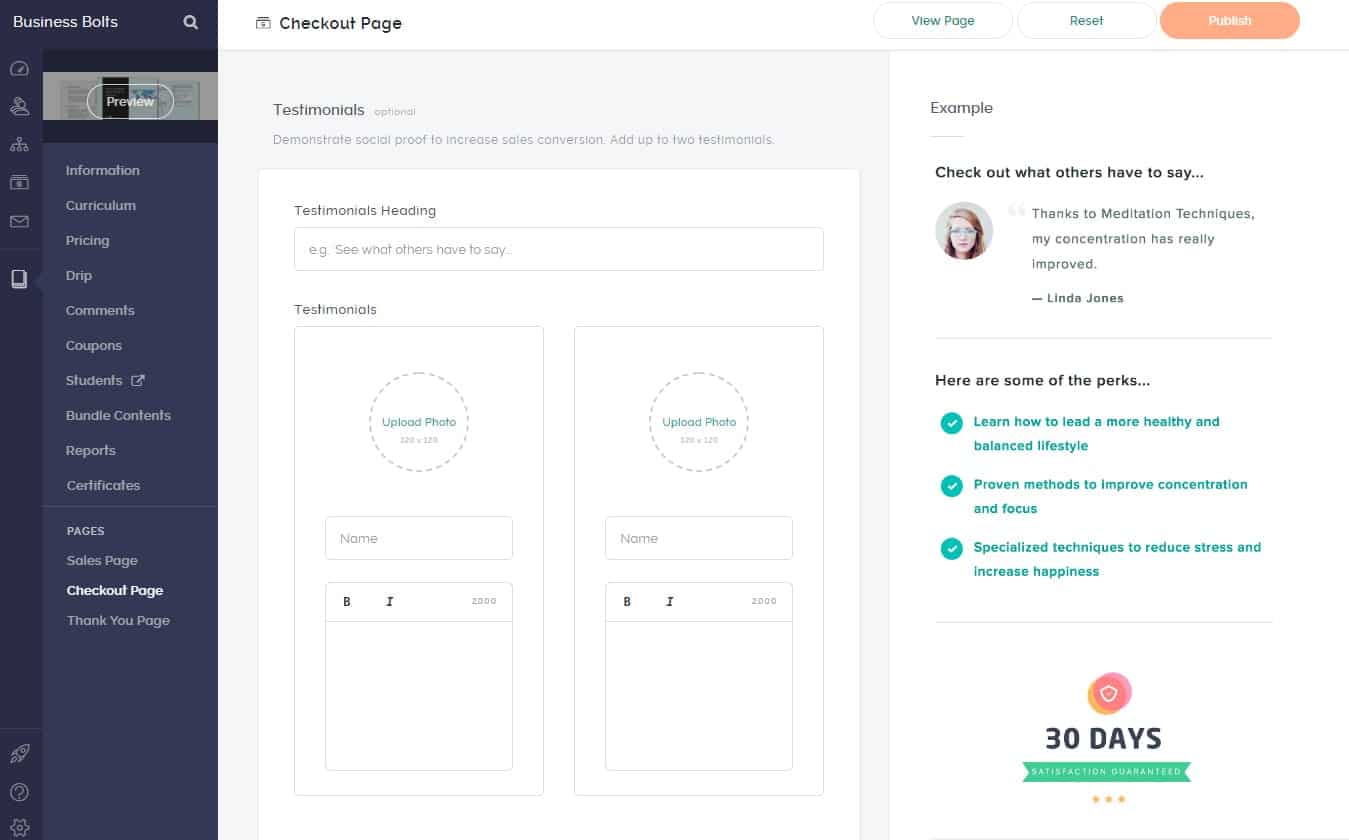
You can add in testimonials including a testimonials heading, photos, names, and the comments your success stories left.
If you scroll down this page, you will see space for bullet points and a guarantee.
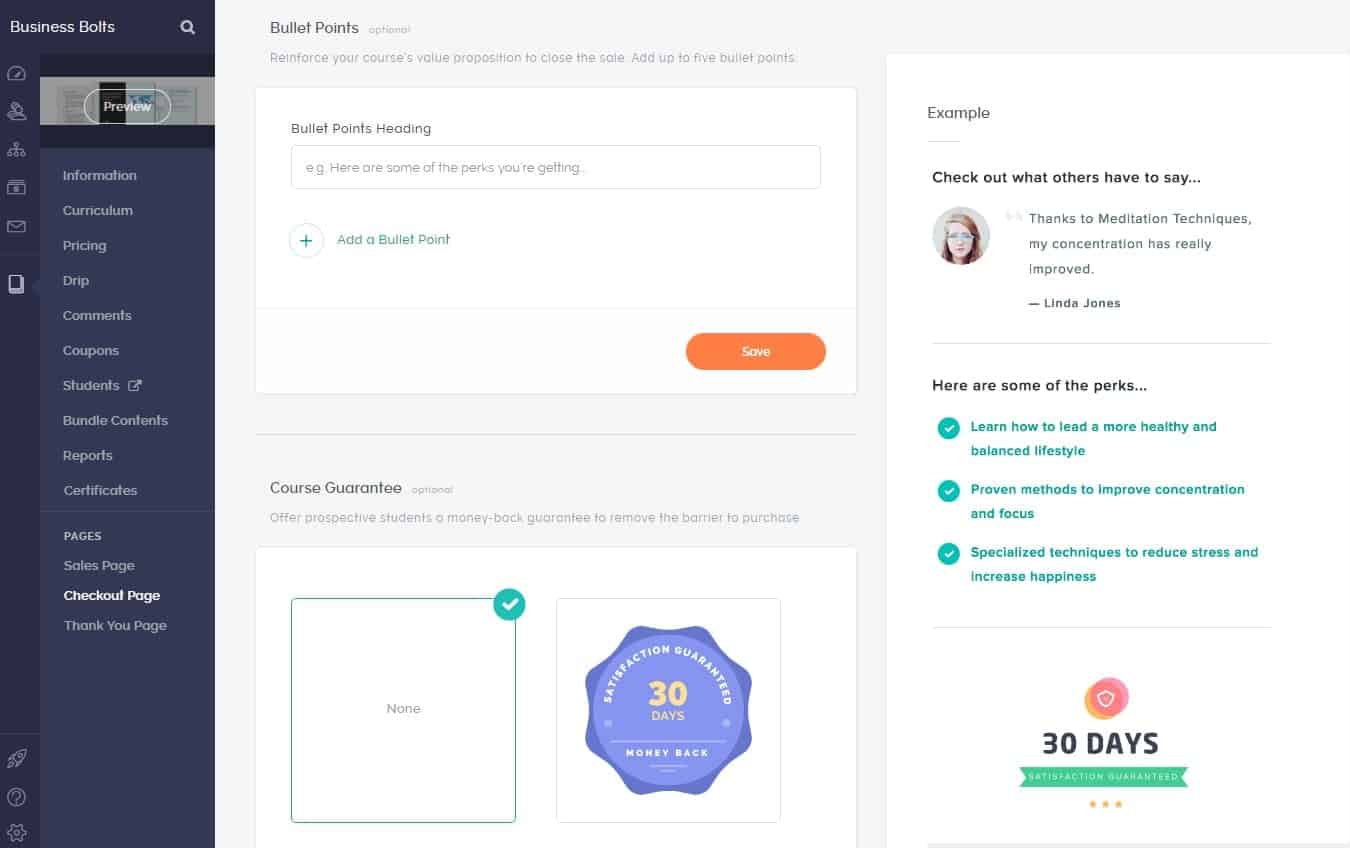
All this will really help make your Sales Page convert more visitors to your site into students who enroll in your course. There are a number of guarantee icons you can choose from or you can upload your own.
Finally, once that’s customized, you’ll want to move onto your Thank You Page.
Thank You Page
The thank-you page is also easy to customize or you can leave it alone and use the default.
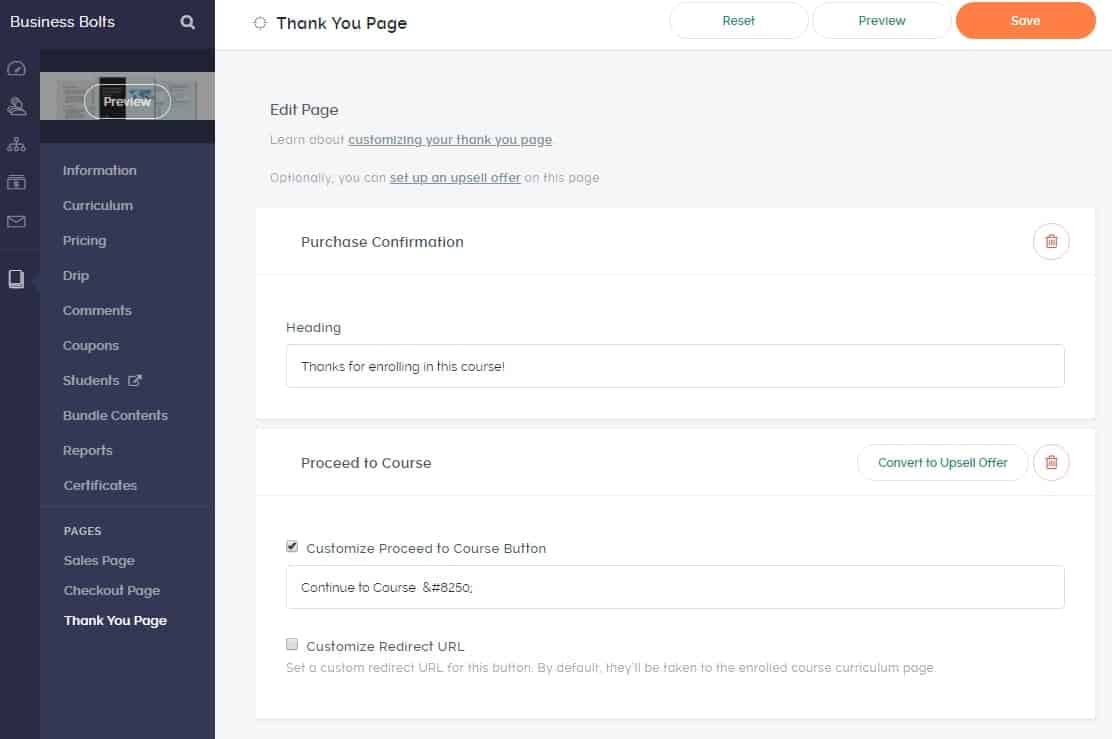
You can change the headline of the thank-you page and customize the “Proceed to Course” button or set a custom redirect URL which is a page you’d rather have them see before they go to your course. You can also handle upsells here if you have any.
That part of the Teachable tutorial covered how to build your course and the pages needed to get people to enroll. That’s the most important part of putting together your online course!
The Rest of the Menu
But there’s more in the Teachable menu. Here let’s take a look:
We already discussed the Dashboard. It’s really just a welcome screen with a few links to help you get going.
The next icon down is the Users icon.
Users Icon
There’s not much for you to do with the Users link, especially when your putting your course together.
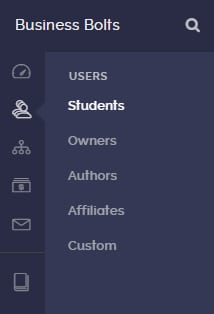
If you click on ‘Students’, then you’ll see a list of your students. You don’t really need to look here until you launch your course (because right now you won’t have any students).
There’s also a link to ‘Owners’. You’ll likely be the only one listed here.
Authors are people who can create a course in your school and earn a share of the sales for the course they help create. You don’t need to do anything there at this time unless you’re having someone else create your first course with you.
Affiliates are people who want to help you promote your course for a share of the earnings. You won’t need to do anything with that page at this point.
Custom allows you to create custom roles for people associated with your course and your school.
You can take a look at all these links under users, but there’s not much for you to do here when you’re first creating your course. You’ll want to start looking at all this once you start getting sign-ups.
[elementor-template id=”22359″]
Site Settings Icon
The third icon down is for building your site. This is where you can customize the look of your site. Here’s the menu and the main page that shows up under Site.
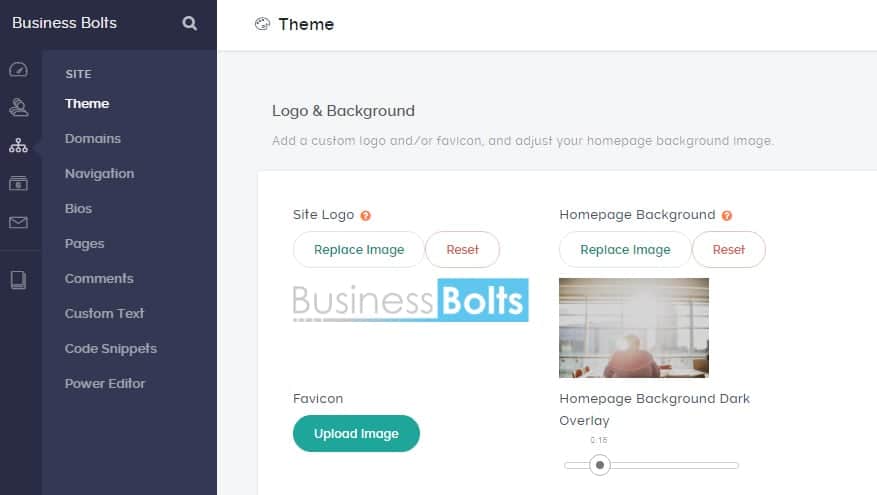
The theme page allows you to add in your logo along with an image for your homepage. A helpful tip is that what Teachable calls your homepage is your school’s main page.
This page lists all the courses in your ‘school’. If you only have one course, I don’t think you need to use this page. I’d suggest linking straight to your sales page if you already use a website builder and are planning to link to your Teachable course.
If you don’t already have a website built up and you’re planning to use Teachable to build your entire site, then you will need to customize this page. Like the sales page, you’re going to have to play around with to make it look the way you want.
If you scroll down the Theme page, you’ll see you can also choose the font to use across your school:
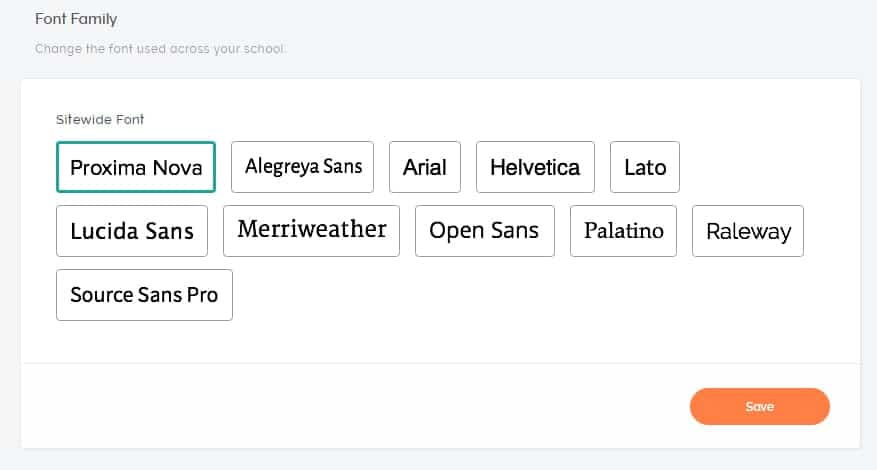
This will be the font used on every page of your school. If you already have a website then you might want to use the same font you use on your regular site. If not, then pick a font you like. All these fonts are very readable and great for the web.
Scrolling down a little more, you’ll see an area for your site colors. This too is for the colors across your school.
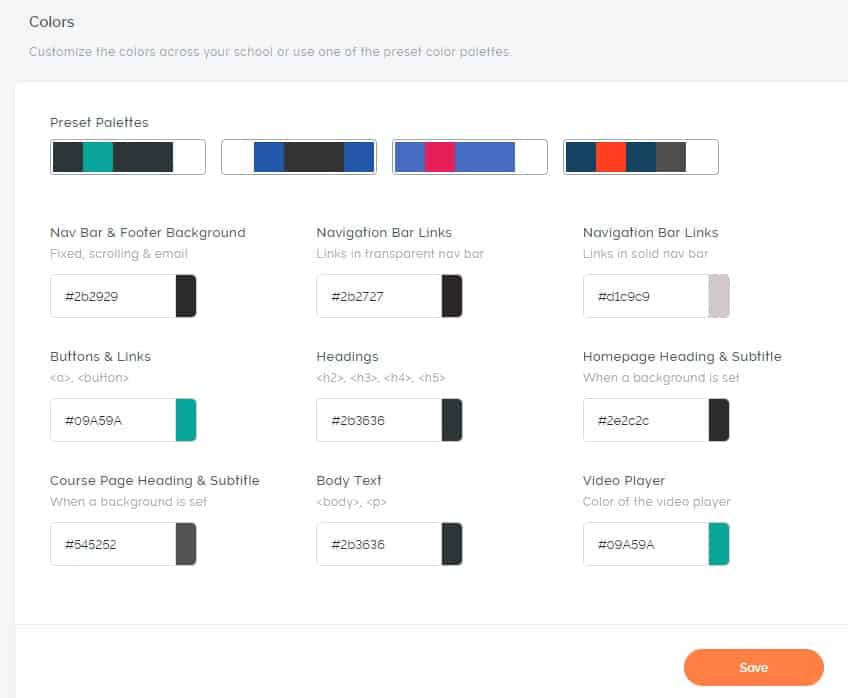
Since these colors are the same across your school, that means it controls your course pages as well as your sales page and homepage. So you have to double check that the changes you make work well across all those pages. I changed things and accidentally ended up with a white header in my course with white navigation links which doesn’t work at all. So be careful here that all your font is showing up correctly.
This page is one you’ll need to spend some time on.
Domains
The next link leads to the domain page.
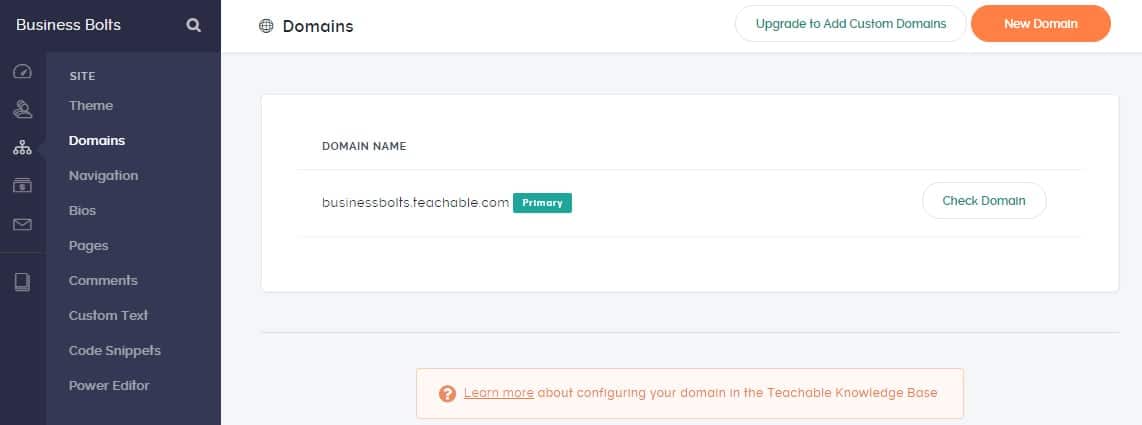
As you can see my domain on Teachable is businessbolts.teachable.com. So I have a subdomain on the teachable.com website. You can check the domain here and also upgrade to add a custom domain.
If you want your course pages, the sales page, and the additional pages on a custom domain then you have to upgrade to a paid plan.
For instance, since my site is businessbolts.com, I could change my teachable course to run on courses.businessbolts.com.
Navigation
The navigation link takes you to a page where you can change which page acts as your Teachable homepage. So if you only have one course, you can use that sales page as the homepage (which is probably a good idea).
You can even specify the homepage for logged in and logged out users.

If you scroll down, there’s also a section where you can update your navigation bar.
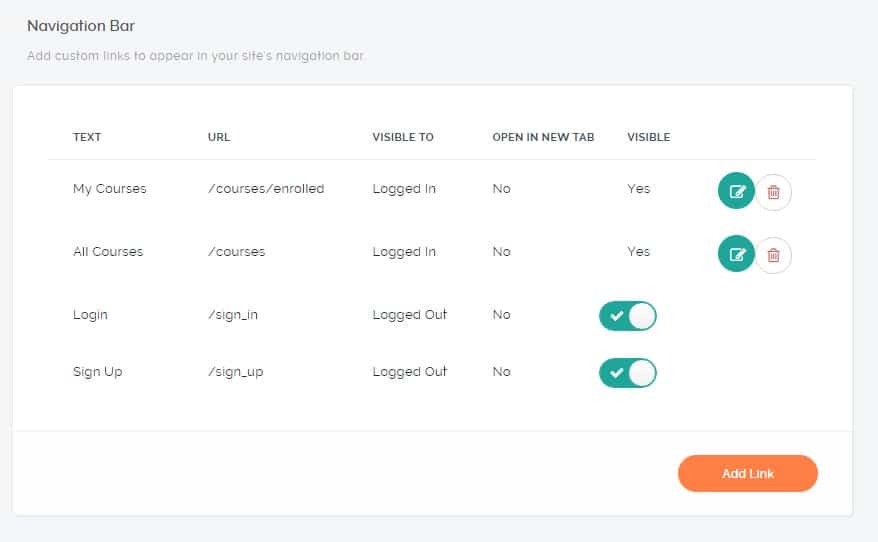
You’ll have to take a look at this and see what works best for your set-up. The default may make the most sense.
At the bottom of this page, there’s also a block for your footer. You can add in footer links there if you need to.
Bios
Moving down is the Bios link. This area just allows you to add in your name and a little about yourself or whoever created the course.
Your bio will show up within your course or within your sales page if you select it there.
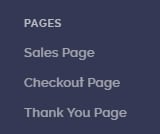
Pages
The Pages link takes you to a listing of all your pages. You can preview them all from here and add new pages if you need to.
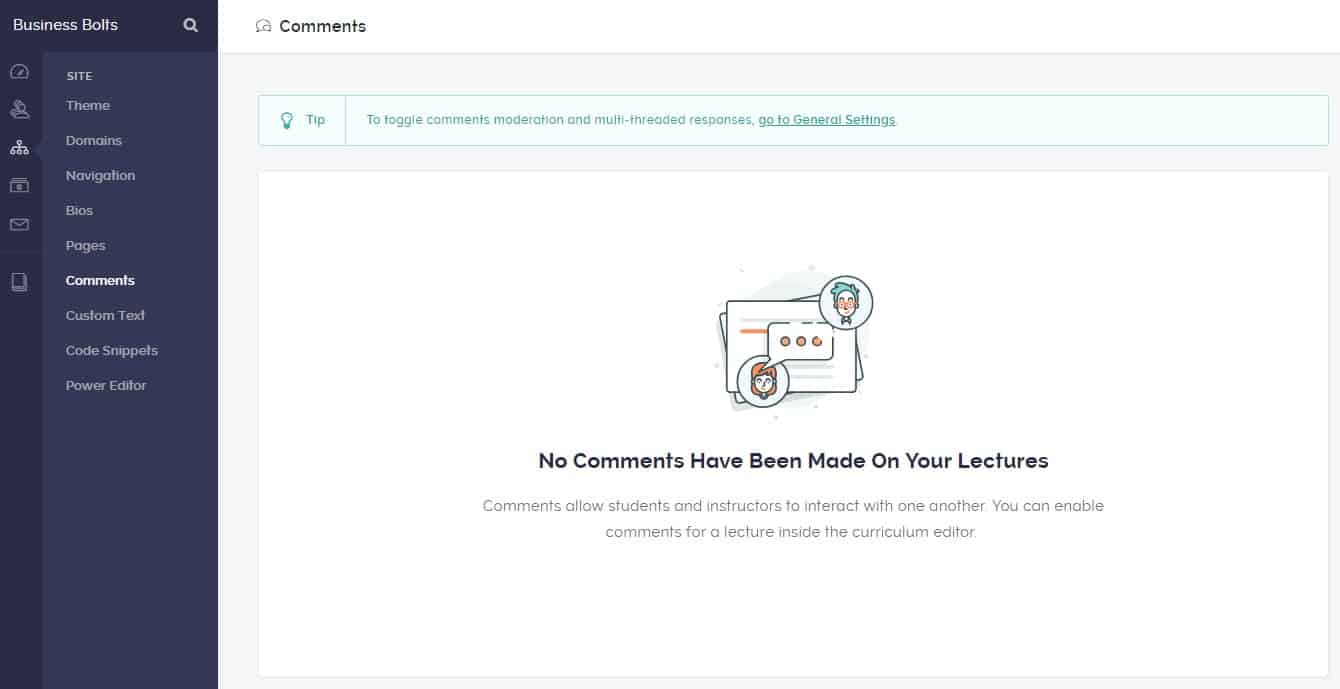
Comments
This just is another place where you can view your comments and moderate them.
Custom Text
We covered this page earlier. You can change some of the default text phrases throughout your Teachable course and the checkout process, etc … from here.
Code Snippets
This link allows you to add code snippets where you can include CSS across your pages. Don’t mess with that unless you know what you’re doing! It’s only available on the paid plans.
Power Editor
This link takes you to the Power Editor which allows you to add in more custom HTML and CSS. It’s only available on some of the paid plans. With that, we’ve wrapped up the Site Settings and will move back to the column of icons.
Sales Icon
Next up is the Sales icon. Clicking on it will take you to your transactions. As you can see, I don’t have any. Bummer. But my course is free so there wouldn’t be any reason for me to click on this.
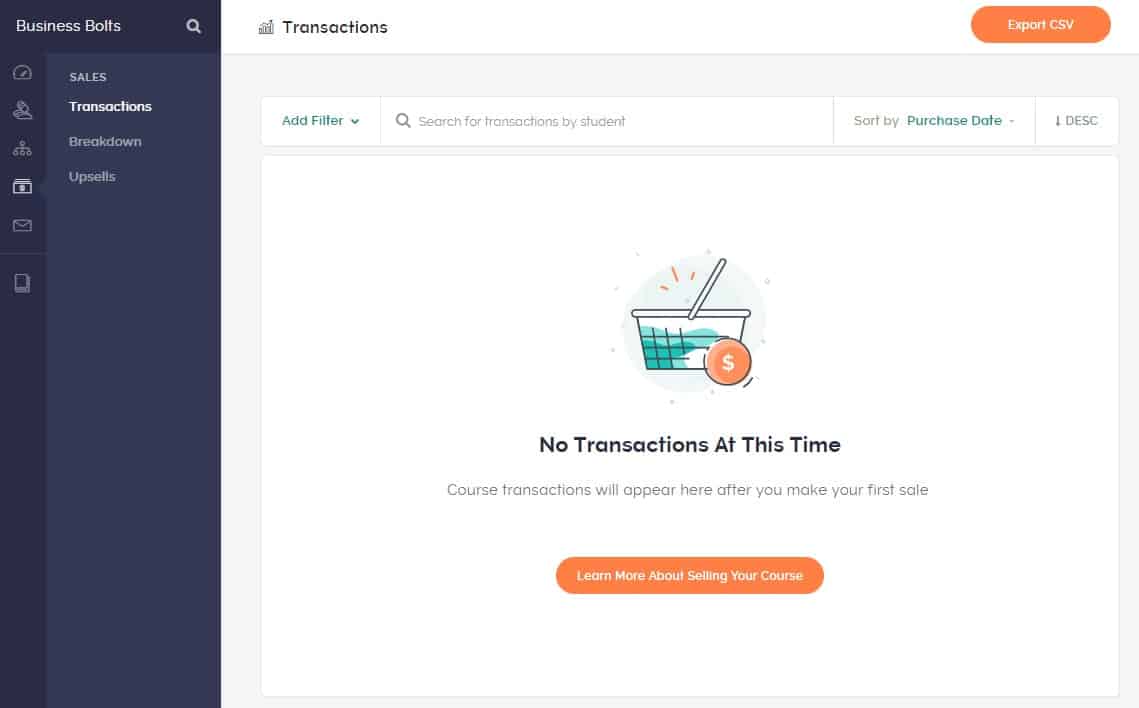
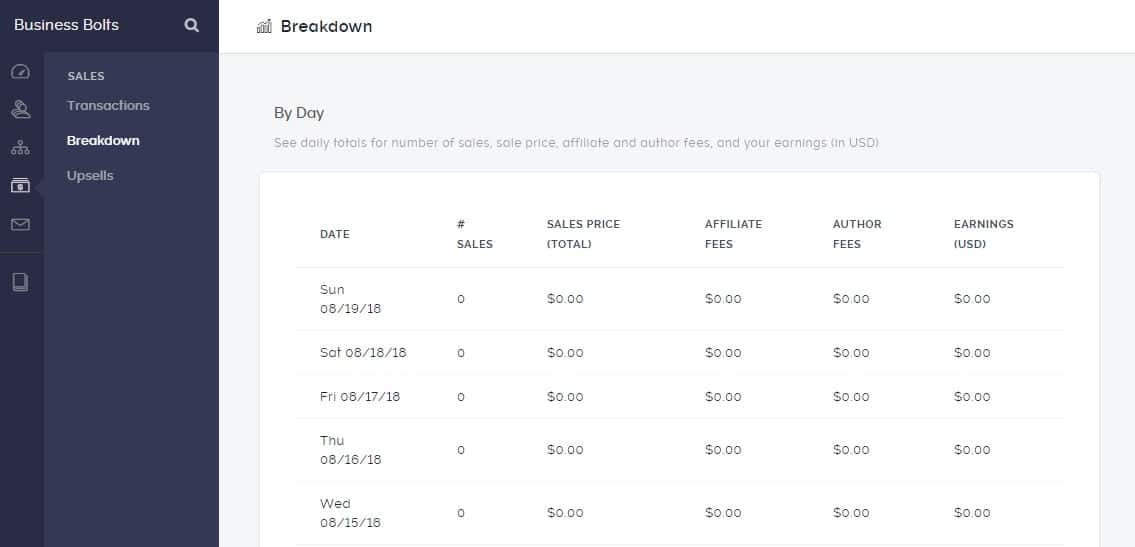
You can click on Breakdown and it’ll show you the transactions by day. Which again, I won’t have any, but it’s a nice layout of your earnings day-by-day.
The Upsells link takes you to data on your upsells. This is available only in a higher priced upgrade.
Email Icon
Clicking on the last icon takes me to the Email Page where I’m shown that I need to upgrade to use page.

None of the email features work on the free plan. If you enable this, you’ll be able to email your students. If you have access to an autoresponder or email marketing tool like convertkit, aweber, or any other tool then you will want to segment your students out of your regular subscriber list and email them separately.
I can see how some people might want to use this feature in Teachable, but even then, you should still have a separate email marketing tool. Email marketing is one of the most powerful tools we have to market an online business, so you want to take full advantage of it.
Course Icon
Following the Email icon is the Course icon.
![]()
That’s how you can get to a page that shows all your courses and edit them.
After the Courses icon, there’s some space and then 3 more icons. I’ll go through these quickly.
Plan Icon
The first one is the Plan icon.
This page shows you the plan options. There are three plus the free plan.
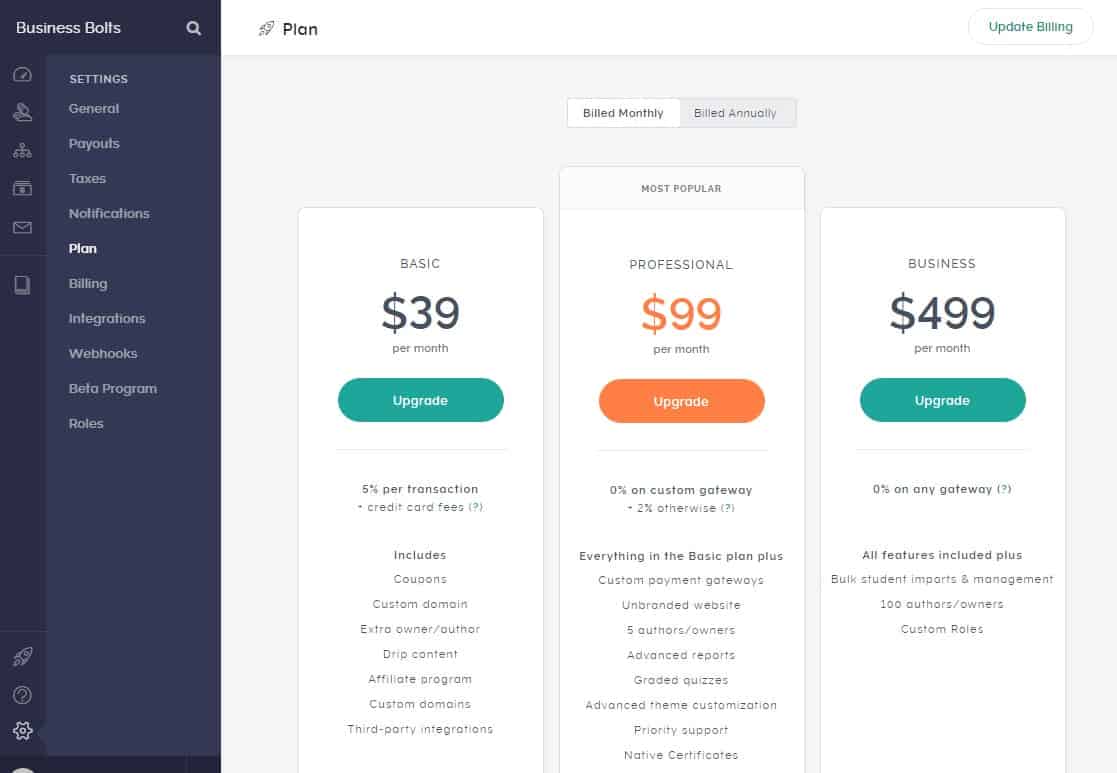
Basic Plan
As you can see, the next plan up from free is the Basic plan at $39 a month when billed monthly. There are a lot of features in this plan, but you will still be billed 5% per transaction + whatever your credit card fees are. So if you’re selling a lot of your courses that will add up.
You’ll also gain access to coupons, using a custom domain, and the ability to add an extra author in case you want to partner up with someone. You’ll also be able to drip content, add an affiliate program, and add in third-party integrations.
Professional Plan
The Professional plan at $99 a month includes a few more features and 0% per transaction if you hook your sales up to Stripe or Paypal. If not, then Teachable charges 2%. However, they will only pay you monthly so that’s a downside.
This is the best plan if you’re making at least a few thousand dollars a month in course sales. I had to get out a calculator for this, so hopefully I did it right, but if you sell $3,000 a month of your course and Teachable charges you 5%, then you’d pay $150 that month in Teachable fees. If you’re on the $99 a month Teachable plan then at the most you’d be charged 2% in Teachable fees which is only $60 in fees.
The difference is $90 less a month.
When your course sales are about $3,000 a month, it’s going to make sense just based on the sales fees alone that you consider going from Basic to Professional.
And that’s if you go with the Teachable gateway. If you want to use Stripe or Paypal and get paid instantly (they do have their own fees), then you will have 0% Teachable fee with the Professional plan vs a 5% Teachable fee with the Basic plan.
So it’s something to look at once you start making a decent volume of sales.
You’ll also get access to a few additional features like additional authors, advanced reports, graded quizzes, advanced theme customization and more. For the most part, all their features are available to you on the Professional plan.
Business Plan
Finally, there’s a Business plan. This plan offers 0% Teachable fees whether you use Stripe, Paypal, or the Teachable gateway. They’ll still only pay you monthly if you use their gateway though.
This is for a big school where you may need to import and manage students through a bulk feature. You can also have 100 authors and custom roles. So unless you are doing a very large volume of sales or you have a ton of authors you probably don’t need this plan.
Help Icon
Next up is the Help icon. This one offers you a screen with links to their knowledge base or for creating a support ticket.
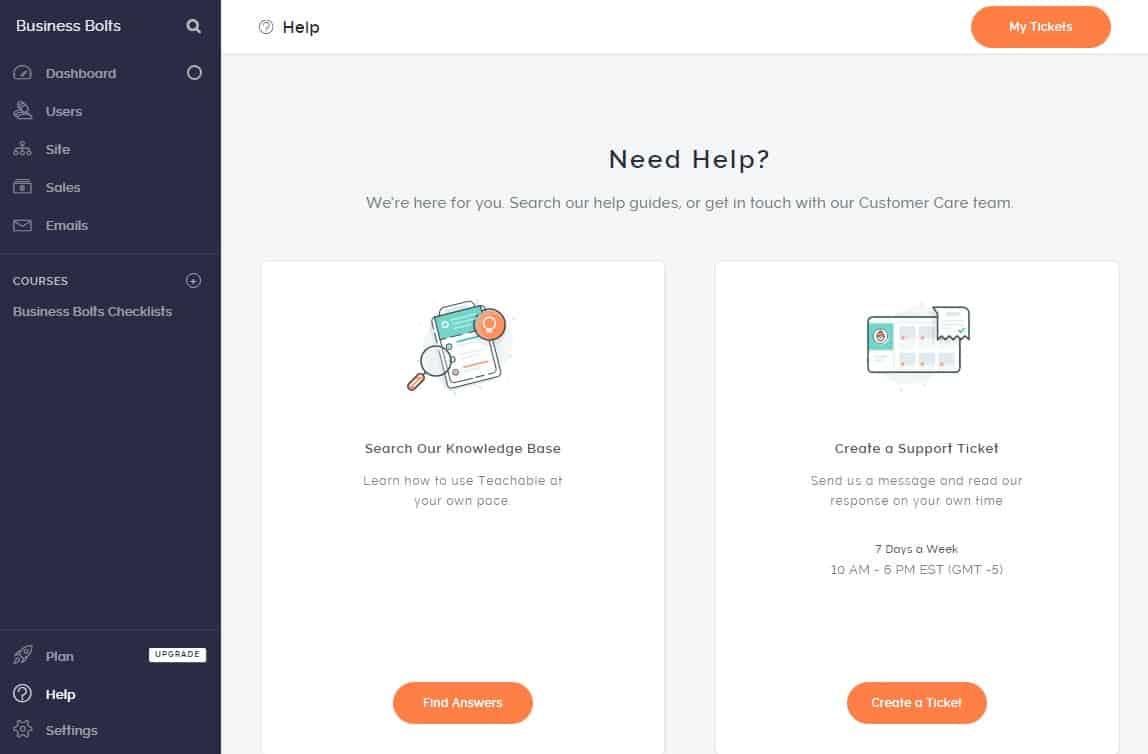
I found everything I needed in their knowledge base. It includes very in-depth articles which is nice.
Settings Icon
Lastly is the Settings icon. I’m not sure why it’s way at the bottom since you can overlook it and there’s important stuff here.

General Settings
Under the general link, you’ll see where you can enter your School Name, a heading for your homepage (which again is the main school page). Then you can also enter in a description for the school page. This description actually looks more like a subheading that shows up under your headline.
After that you’ve got some basic information you can add in like your email address and name. There’s also place for selecting reCAPTCHA if you want to help cut down on the number of spam enrollments. You can also disable students from opting out of their payment plan (that sounds good). Then in the next block, you can enter your address and other contact information for tax reporting purposes.
Next is a block with lecture settings followed by one for comment settings.
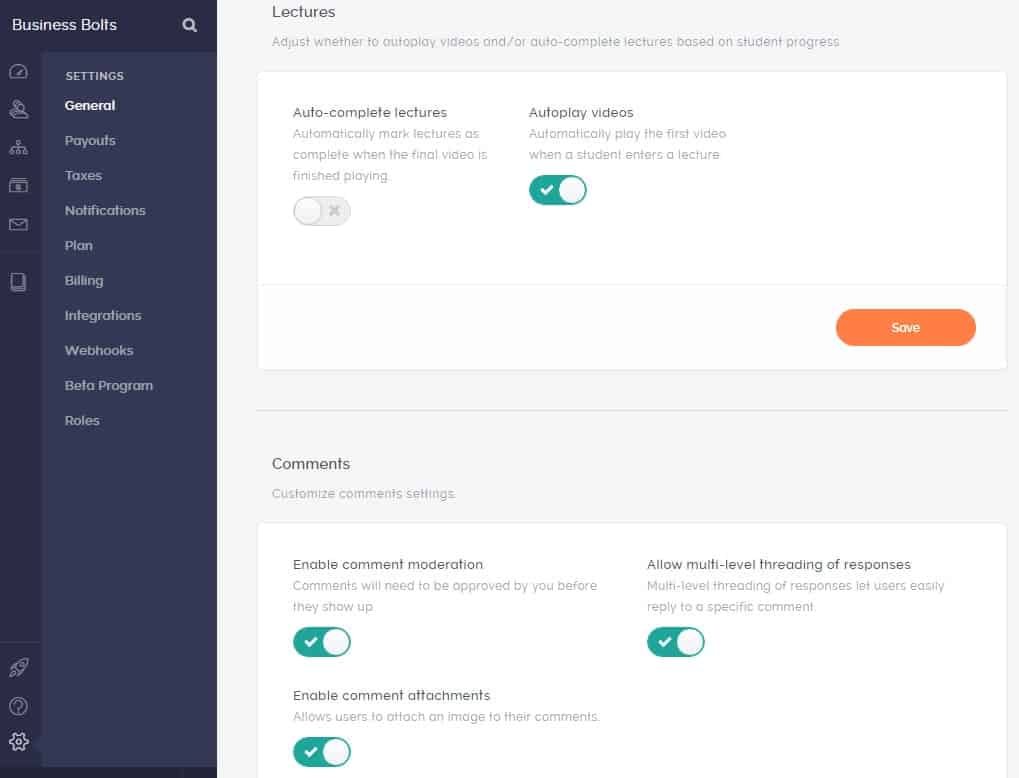
Under the lecture settings you can choose to auto-complete lectures which means when the final video is finished playing, the system can mark the lecture as complete. Or you can leave it off and your students will have to mark their own lectures as complete.
You can also select to autoplay videos or leave that off.
Next, you can customize a few comment settings. You can enable comment moderation which means you have to approve the comments before they show up. You also have the ability to allow or disallow comment attachments and to allow or not allow multi-level threading of the responses.
Next up comes the feature for adding a blog to your school.
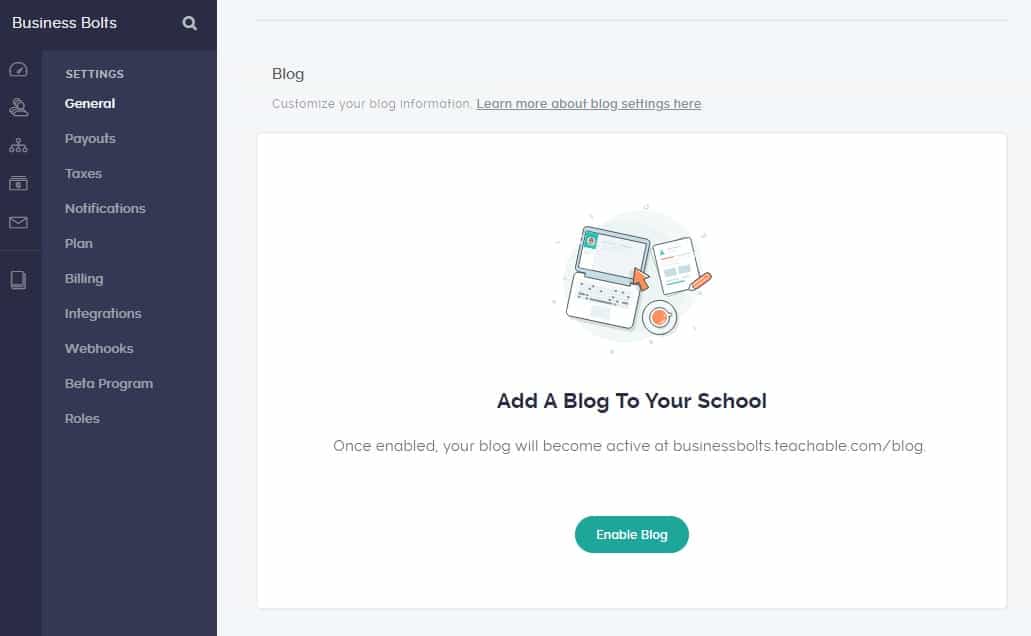
If you’d like to use the Teachable blog you can enable your blog and follow the prompts there. Alternately, you can set-up your own blog and link to and from your Teachable pages from your blog.
The last two blocks under the General settings include your course status and enabling myTeachable accounts.
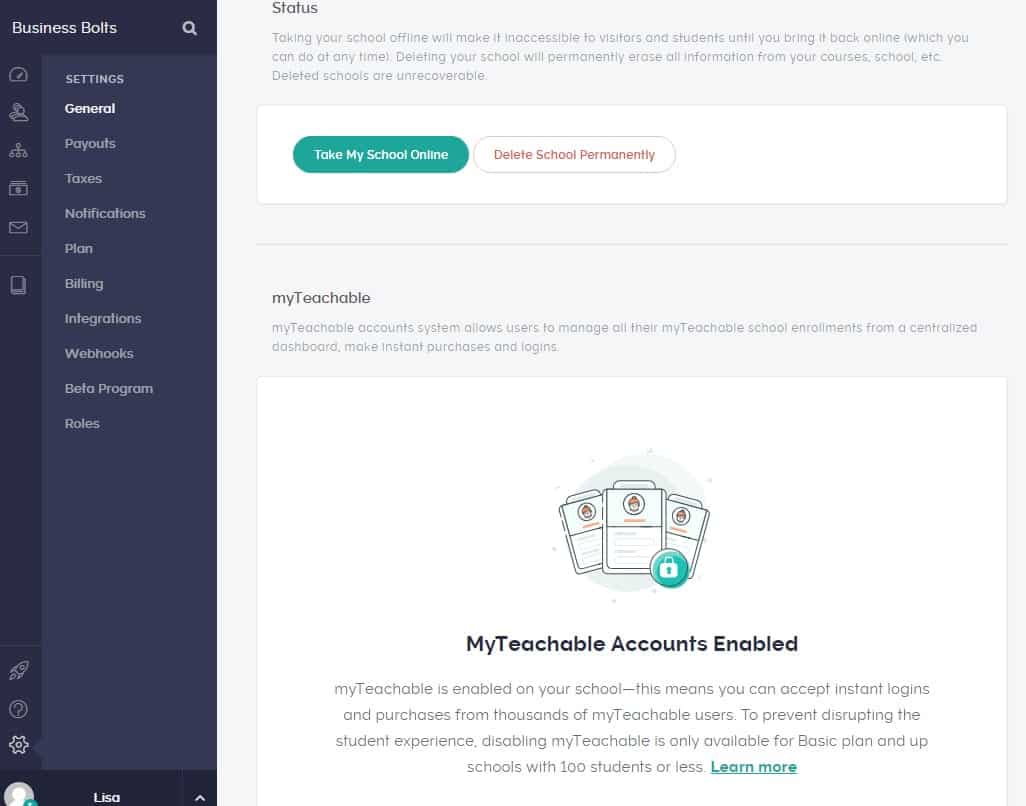
The Status block allows you to take your school online or to delete your school. Deleting is permanent so make sure you really want it deleted before you press that button!
Enabling myTeachable allows myTeachable users to sign up and enroll in your courses quickly and easily. This block is just a notice as all schools default to having this enabled. You have to meet certain criteria to get it disabled.
Payouts Settings
The payouts link takes you to a screen where you can choose how to set up your payouts.
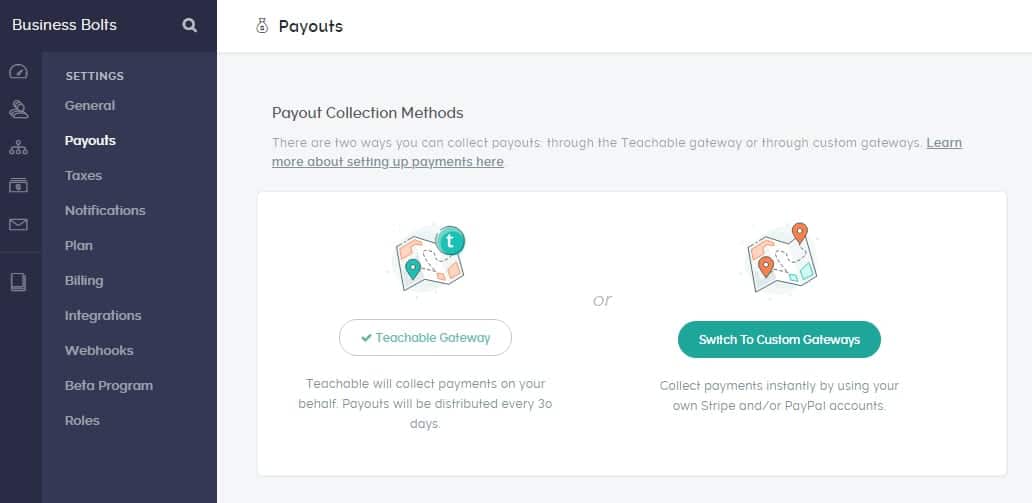
You can select from the Teachable Gateway where Teachable handles your payments and pays you every 30 days. Alternately you can switch to a custom gateway which includes Stripe or Paypal. You can also enter your Paypal address on this page. That’s how Teachable will pay you if you choose to let them run the transactions.
Taxes Settings
The taxes link let’s you show VAT inclusive prices when customer are in countries that charge a VAT. You can choose to toggle this on or off.
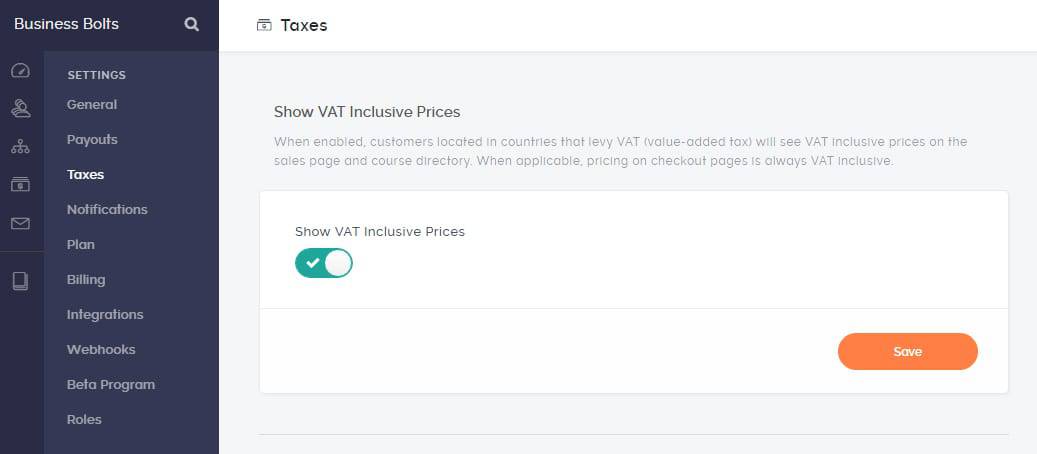
There’s also a block on how if you upgrade you can upgrade your plan to adjust tax settings.
Notifications Settings
The Notifications link just let’s you toggle on or off when you’d like to be notified by Teachable for certain actions. The first block allows you to control your enrollment notifications. You can get notified when a new student joins the school and/or when a student enrolls in a paid course and a free course.
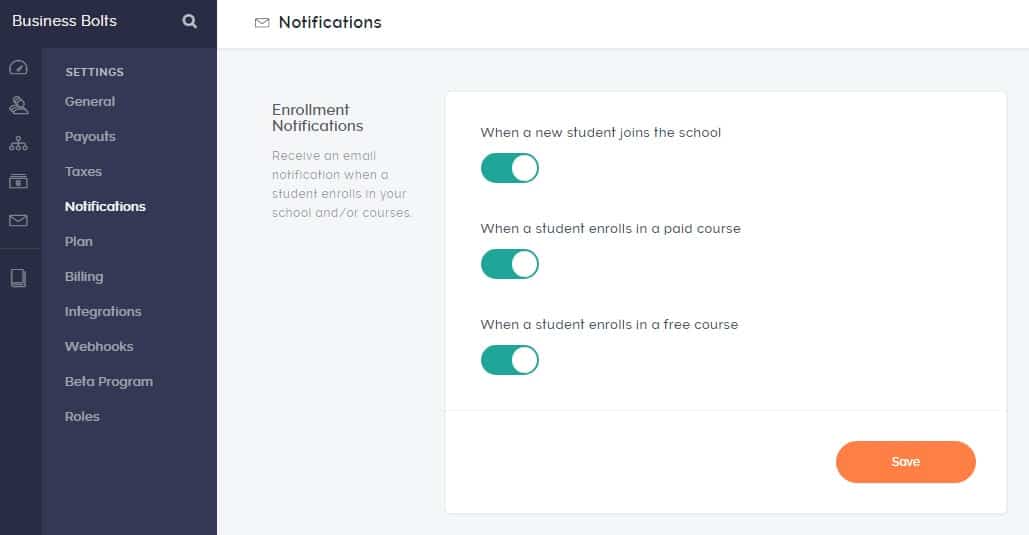
There are also controls for subscription notifications like when a subscriber cancels their plan or when a subscription payment fails. You’ll want to know about things like this if you’re running a paid course since you’ll want to get paid!
Lastly, you can control comment notifications. You can choose to get a notification for every comment or just some.
Plan Settings
The Plan link takes you to the same page displaying the Teachable plans that I showed you earlier. You can choose any one of the paid plans at any time.
Billing Settings
The billing link takes you to a page where you can enter your credit card number to pay for a paid Teachable plan. They want to get paid too!
Integrations Settings
The integrations link allows you to integrate the Teachable platform with another by simple ticking off a checkbox and entering a pass code.
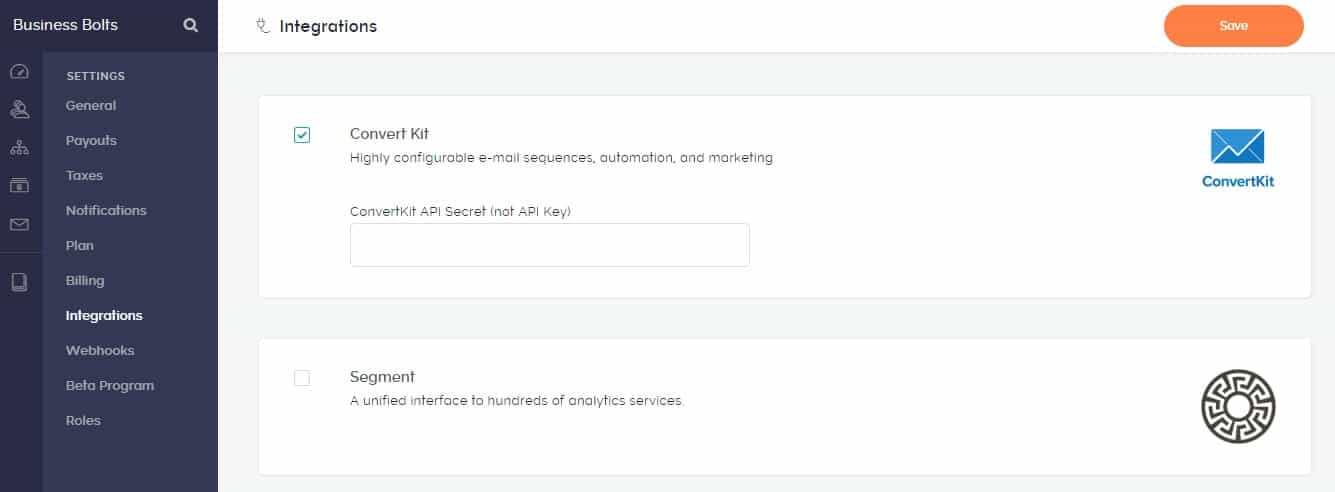
I’m on the free plan and they show Convertkit, Segment, Google Analytics, Sumo, MailChimp, and Zapier. However, the free plan will only support Google Analytics and Sumo. For all the others, you will need to be on the Basic paid plan or up for them to work.
This means that for my use of Teachable, I will need to be on a paid plan. I will want to integrate my course with an email marketing tool so there’s no choice but to pay for a plan. But it’s nice that they do let you try all this out and even get started on the free plan.
Since you can integrate Teachable with Zapier, you can integrate with many other tools. The Zapier integration alone claims it can help you connect to 100+ tools.
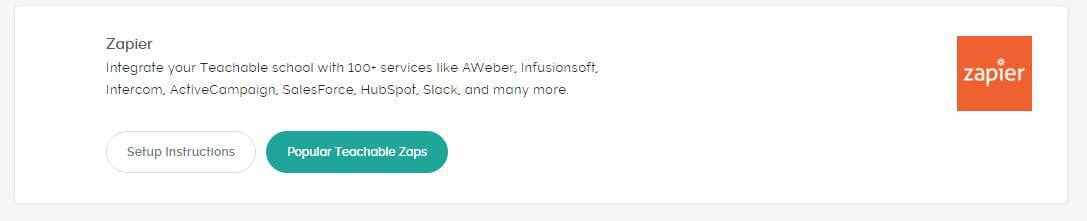
Just so you’re aware, Zapier has a free plan along with paid plans so you’ll have to check into the costs associated with connecting up the tools you need with Teachable. You may have to pay a monthly fee for that as well if you’re planning on getting advanced with your integrations.
Webhooks Settings
If you’re on the free plan, the Webhooks link takes you to a page where you’ll be asked to upgrade to a paid plan if you want to use this feature.

Webhooks offer another method for hooking Teachable up to other tools. You can use Zapier for this as well or you can add in code to help with these integrations. Obviously this is only going to work out if you’re a developer or have access to one. For the rest of us, we’ll have to use Zapier.
Beta Program Settings
This link takes you to details on the Teachable beta program.
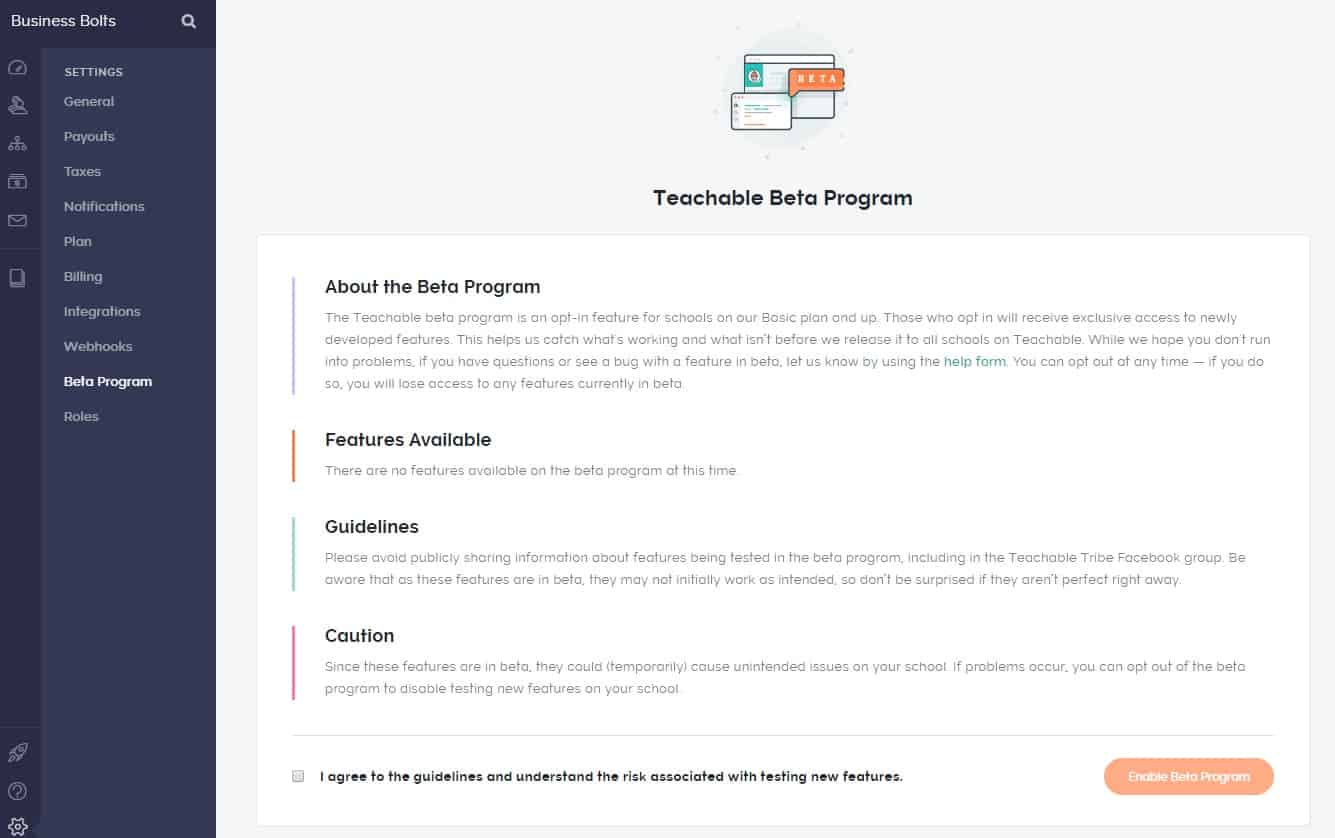
If you opt into the beta program (which requires that you’re on the Basic paid plan or up) you can get access to beta features. The downside is that the beta features could cause issues on your school. You’ll want to think carefully before ticking off that checkbox.
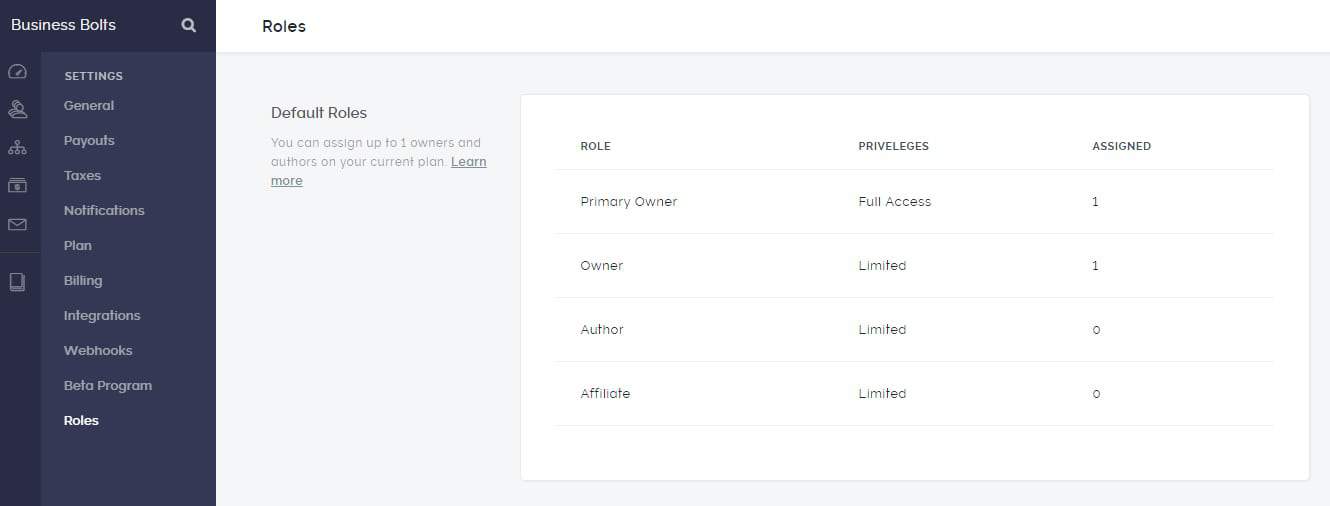
Roles Settings
The Roles link takes you to a page where you can assign user roles (depending on the plan you’re on).
Whew, we’ve finally gotten through this Teachable tutorial! Thanks for sticking with me through the end.
If you were wondering what all the Teachable platform has to offer, you should be full of information on what it can do as we’ve gone through the entire admin! If you need more information, check-out the Teachable review. There’s also a Teachable vs Thinkific comparison to help you see the differences between these two platforms.
If you’re thinking about creating an online course or switching to the Teachable LMS platform, I highly recommend signing up for a free plan right now. It’s easy to use and you can actually do a lot with their free plan. Depending on how many features you need, you can get your course completely set-up and even start getting sign-ups with your free plan.
