Our content is reader supported, which means when you buy from links you click on, we may earn a commission.
How to Add Audio to Google Slides in 5 Easy Steps
You could have a solid business proposal or extremely valuable information compiled into the most beautiful Google Slides presentation possible. Yet, you might fail to impress the viewers or those you are presenting to because all they can do is forward through the presentation. They can’t hear your voice. You aren’t there to walk them through it.
But did you know it is possible to add audio to Google Slides?
You can include a voice-over to your Google slides to complete the presentation. It also creates an excellent impression on the viewers by letting them know you are up to date with the latest trends and know how to use technology.
Here, we bring you a step-by-step guide on how to add audio to Google Slides to help you create lessons and presentations that will leave the best impression.
Why Use Google Slides?
Google Slides are highly functional and easy to use. You can use Google Slides on your phone or desktop if you have an internet connection. This application also allows multiple people to work on one presentation simultaneously.
You don’t have to worry about saving your work; everything on Google Slides is saved automatically. Every change you or your co-worker makes is updated and saved automatically, ensuring you never lose important data.
Using the step-by-step guide here, you can effortlessly create interactive and impressive lectures for your clients. Not only are Google Slides easy to use, but they also help make you look like a true industry professional.
5 Steps to Adding Voice-Over to Google Slides
Google doesn’t have a built-in audio recording feature, but it allows you to add voice-over narrations, music, and other sound effects to your slides once the presentation is ready. Here we list five simple steps to add voice-over to your presentation.
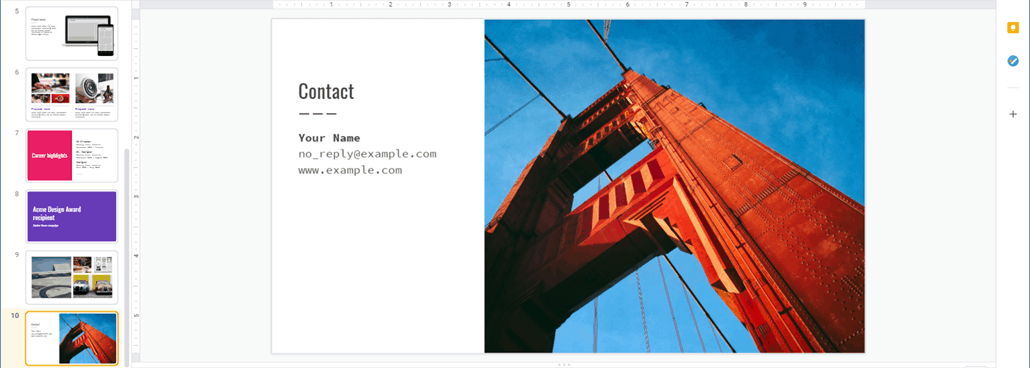
Step 1: Create Your Presentation on Google Slides
For many years, PowerPoint has been the go-to for everyone wanting to create a professional presentation. Recently, however, there have been other software and tools that are offering comparable features to PowerPoint, including Google Slides.
The main benefit of using Google Slides is that it allows the creator to create and edit the presentation online, which can mean on your phone or desktop. You can also use Google Slides offline, making them accessible and easy for all users.
Another significant benefit is that Google Slides is free software. You only really need an email account to access it. If you are using a Gmail account, you don’t need to create an additional account; you can access Google Slides through Google Tools via your Gmail Account.
If you don’t have a Gmail account, you can visit Google.com, and click on ‘Sign In’.
Add your email account details and create a Google account with it. Once you have a Google account, you are free to use Google Slides when you need it.
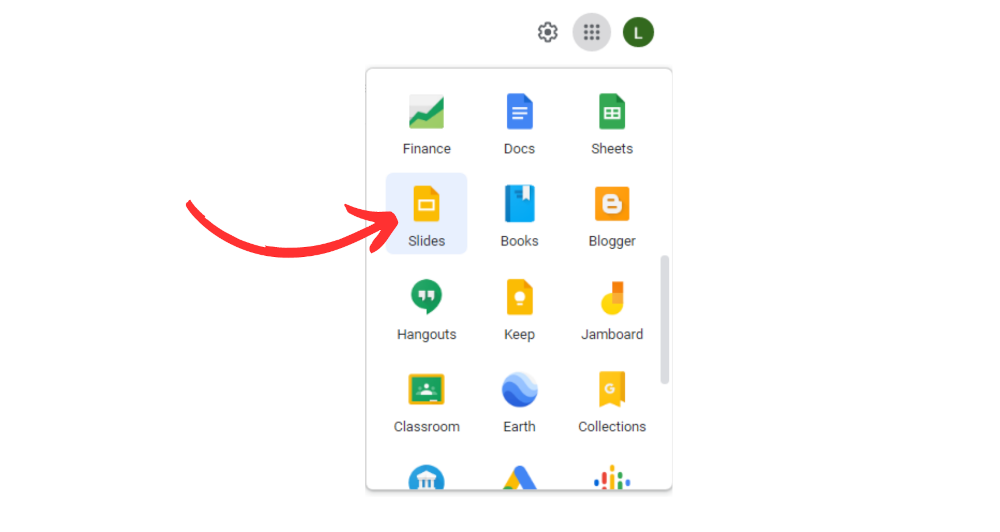
Once your account is set up and logged in, you can access Google Slides by clicking on the grid pattern drop-down menu at the top right corner. You can then click on the Google Slides icon and create the slides.
Get as creative as you want; remember to keep your slides simple and easy to understand for everyone. Try to make them as aesthetically appealing as possible to help increase viewer retention.
Step 2: Write Down the Audio Narration
You can create the audio script first and then create your presentation if you find that a more viable option. However, we suggest you create the presentation first so that you know precisely what your viewers will be visually exposed to.
Suppose you write the audio narration first and create the presentation second. In that case, you may discover you lack visual material to impart the knowledge you want as efficiently as possible. Here, you may need to go back to the audio and edit it again to suit the visuals, which is more time-consuming.
You can’t go wrong at this point. Be sure you aren’t spending any more time than you need to. As an online course creator, you will be creating a lot of presentations and a lot of videos. Your goal should be to create an efficient system that helps you unleash your true potential.
Step 3: Record the Audio Narration
As mentioned, Google Slides has no built-in microphone, so you must record the audio file separately. You will need to have a couple of tools on hand for that. Make sure you have a good-quality voiceover microphone.
In addition, you must ensure you can record in a quiet place.
If you can, soundproof one room in your house to create a good-quality voice-over. If that sounds impossible, find a secluded corner in the house where you can close the door and avoid all distractions to block out extra noise.
Test your recordings in multiple locations to find one that suits your requirements best. Listen to every recording to ensure there is no playback, extra echoing, or background noise you may need to edit out. These little details help ensure that your end product is professional and high-quality, adding to your overall product value.
Options for Recording
You can use one of the many available free audio recording software online. Two options to mention are Audacity and Camtasia.
You can also use Movavi or the voice recording app on your smartphone. You can plug your microphone into your phone and record good-quality audio for voice-over narration.
Be sure to speak slowly and clearly. Try not to breathe too much into the mic, as that creates a very uncomfortable experience for the listener. You must also ensure that your voice or narration isn’t completely flat, as that can get pretty boring. Take care to include intonations by speaking in a good flow and interactive manner.
Lastly, ensure that your Google Slides’ playback speed matches your narration speed for the audio recording section. You don’t want to discuss the previous slide still while the viewers have moved on to the next. Make sure you keep track of the playback for each slide and adjust it according to the speed of your narration to sync perfectly.
You will have to take care of this while recording your audio, as it also helps ensure you don’t speak too long on one slide. By monitoring the time you take on each slide and taking notes on where you need to adjust the playback speed, you also give yourself the time to edit your script and shorten it if necessary.
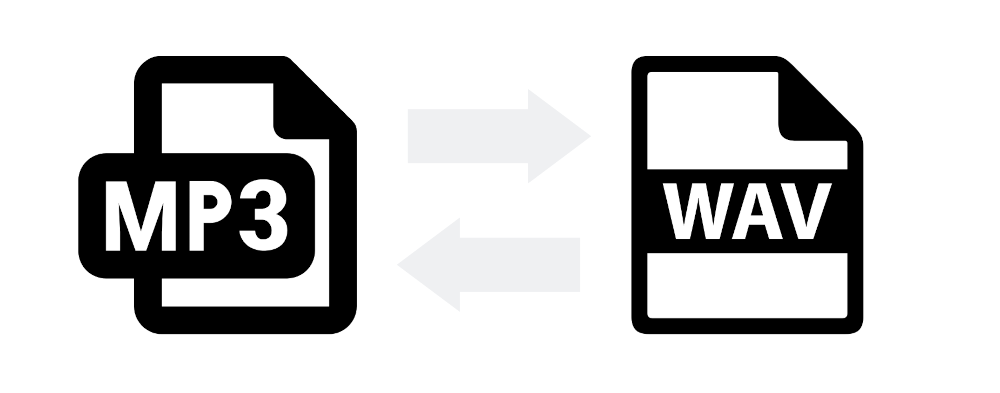
Make sure your audio file is in an acceptable format. You can only upload audio files in a .mp3 or .wav format, as these are the only two accepted by Google Slides.
Step 4: Add Audio to Google Slides
In this step, you’ll add the audio to Google Slides. To upload an audio file to Google Slides, you’ll have to store it on the cloud, and for that, you will have to upload it on Google Drive. So go ahead and upload your final audio File to Google Drive.
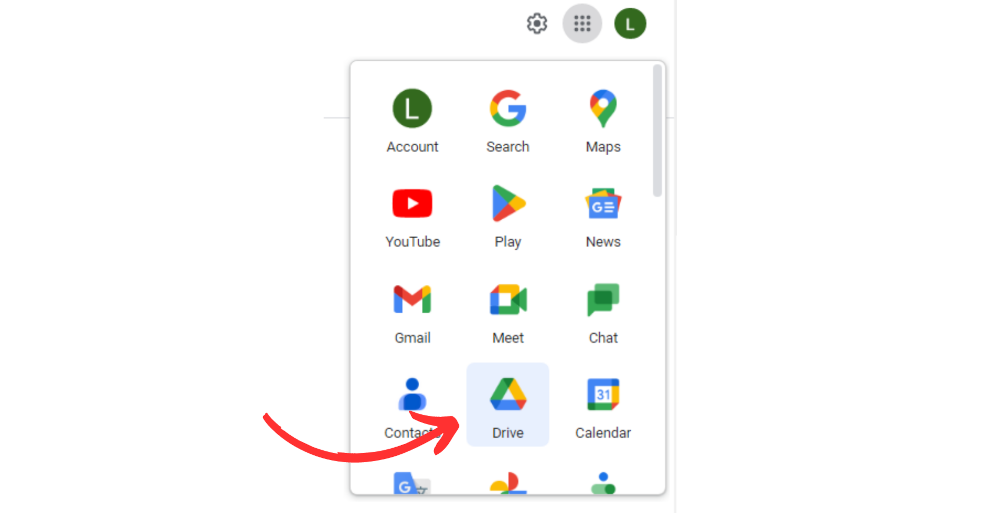
You must go to your Google account to upload the File on Google Drive. From there, place the cursor on the grid-patterned icon on the top right of the screen to view the drop-down menu containing the complete set of Google Tools. Select Google Drive from the list of tools. Google Drive features a triangular icon.
Once in Google Drive, click on My Drive. 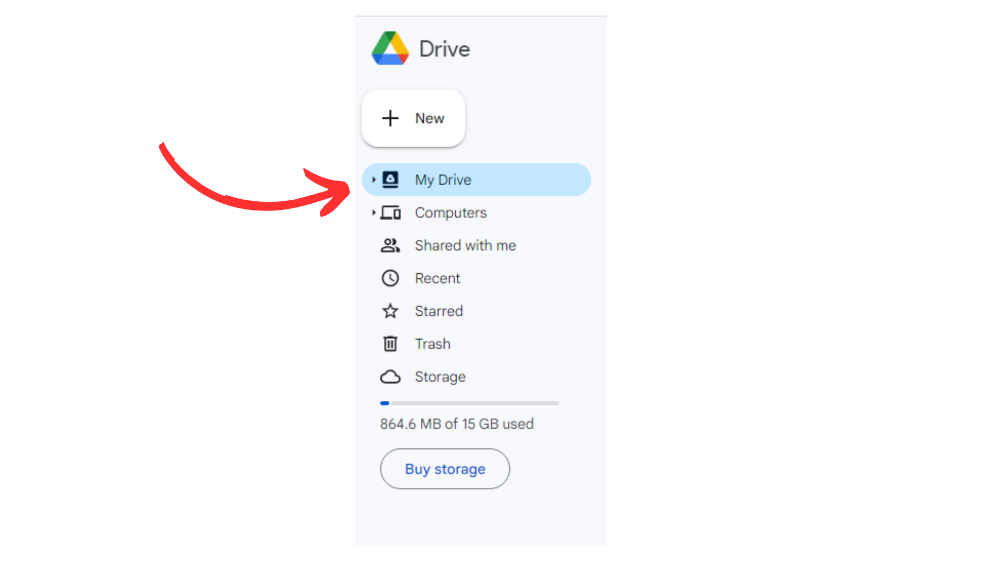
This will open a new drop-down menu from which you will select File Upload.
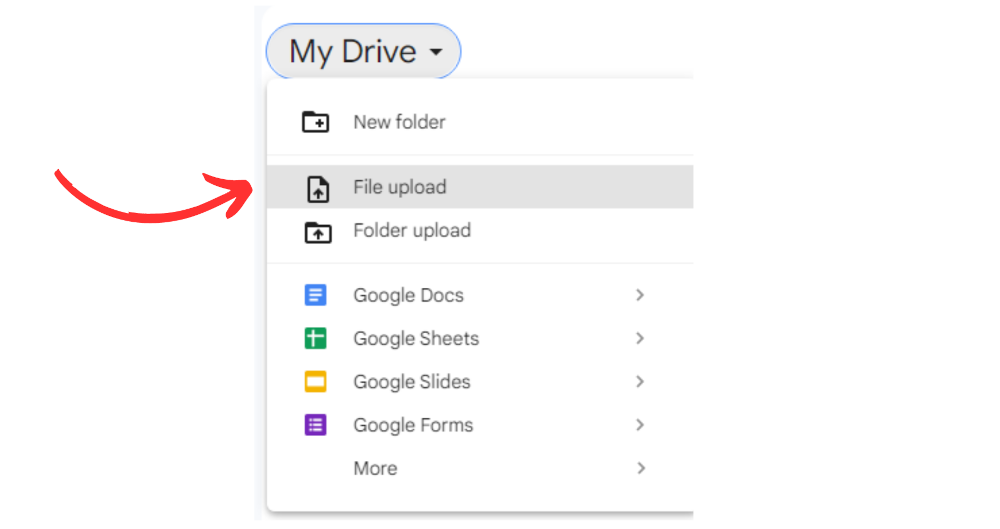
Once you click on “File Upload,” you will be redirected to a new window. This is where you can manually browse and upload the audio file or drag and drop it on the screen, which will automatically upload.
Change Sharing Settings
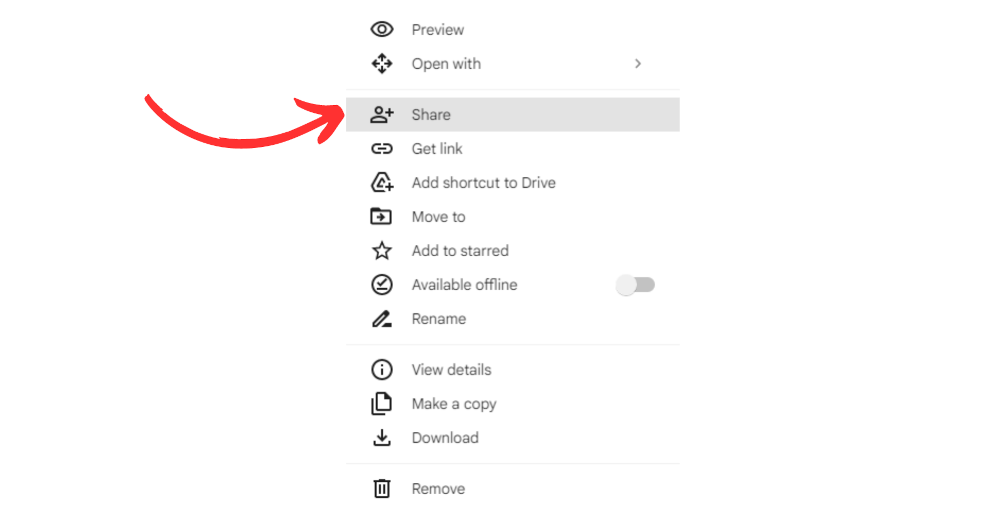
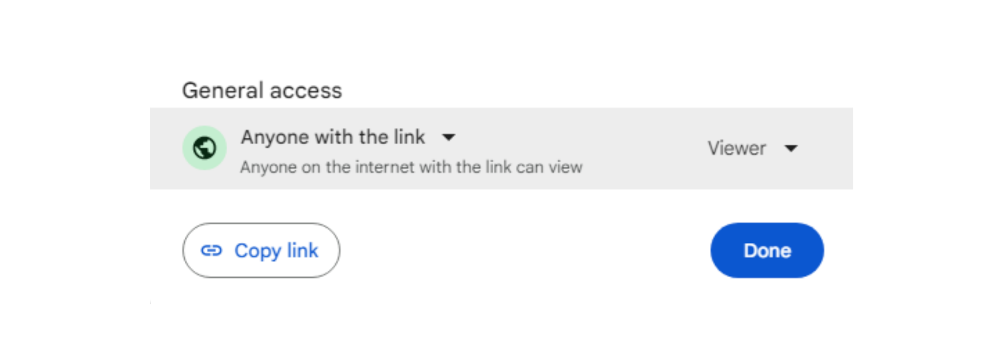
Once you upload the file, you must change its sharing settings. Right-click on the uploaded audio file, and select ‘Share’ from the pop-up menu.
Change the sharing settings to ‘Anyone with this link on the Internet can share or view.’
Then you go to Google Slides and click on the slide you want to insert the audio file. From the toolbar at the top, click on ‘Insert.’ Doing so will open a drop-down menu from which you will select ‘audio.’
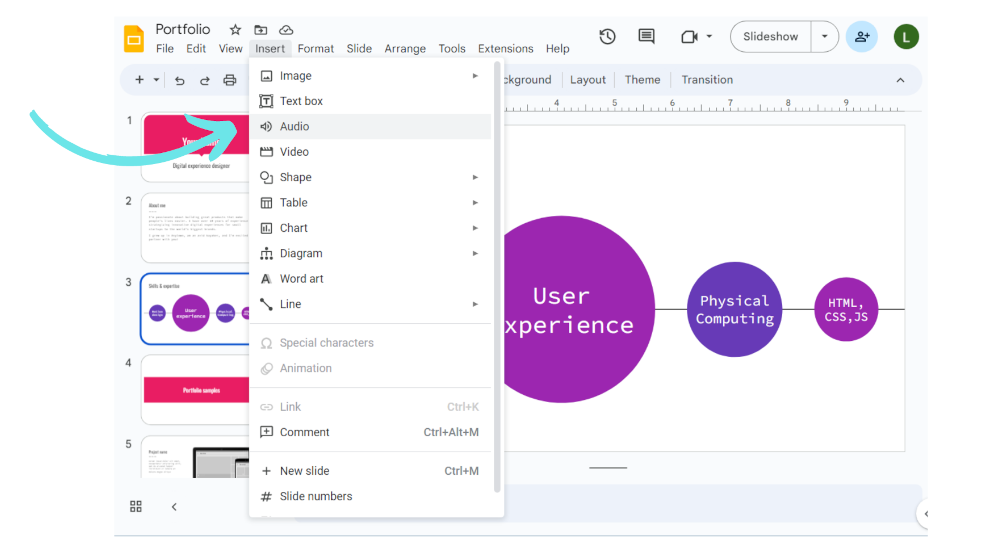
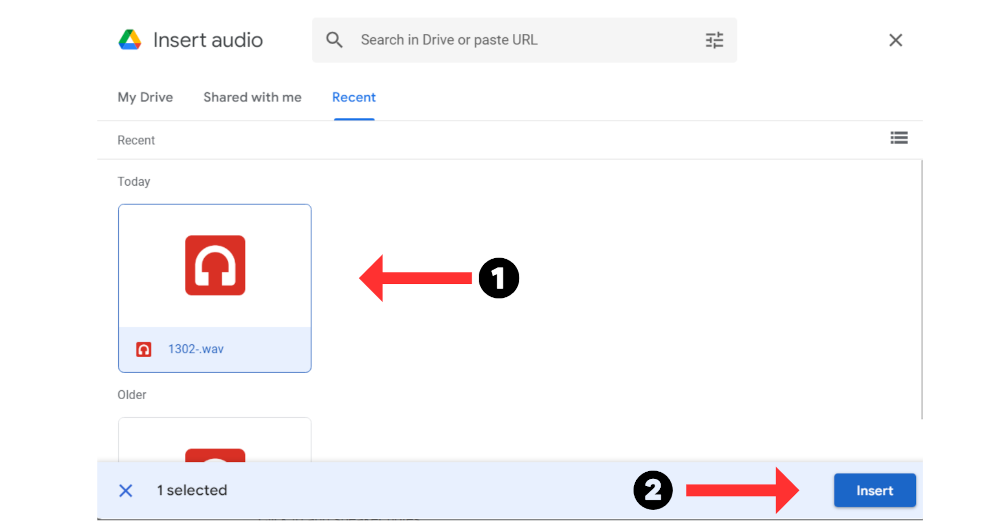
You will be redirected to Google Drive, from where you can choose the audio you want to place on the selected slide.
It is important to note that you will place the audio for each slide separately, so you must record the audio separately and label them accordingly.
Label them correctly so you don’t upload the wrong file over the wrong slide.
You can also preview the audio by clicking on the speaker button at the top right corner of the slide.
You can also adjust the audio for the slide using the speaker button and lower it or increase it as needed. Just make sure the audio is uniform throughout the presentation so your viewers don’t have to adjust it at their end and can concentrate on the lesson.
Step 5: Make Adjustments Where Needed
In the final step, you can adjust the audio playback and make other necessary changes. For example, you can set whether you want the audio to play automatically when the viewer opens the presentation video or whether you want to give them the option to open the audio themselves. Doing so is extremely simple.
Select the slide with the audio object, and you will notice an audio toolbar. Click on the audio playback button, and you will have access to a link titled, ‘Format options.’
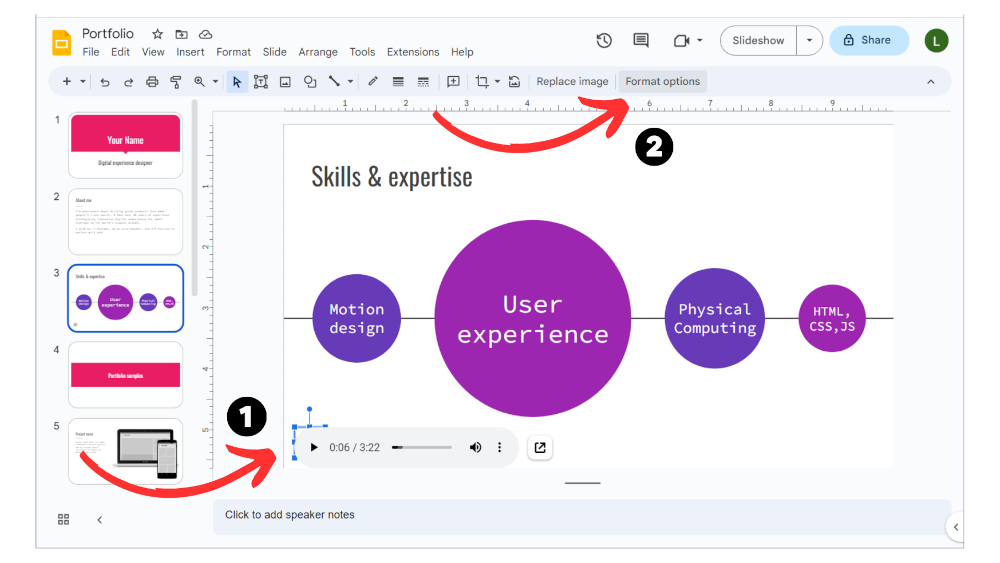 Click on ‘Format Options’ from the new menu, and a new screen section will appear with options. Audio playback is the option that allows you to adjust the audio for that slide.
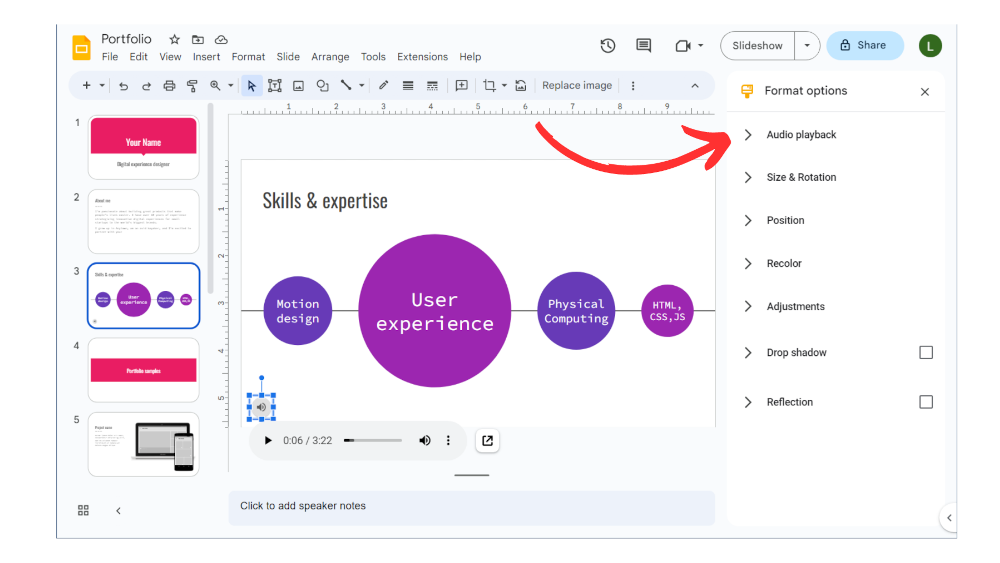
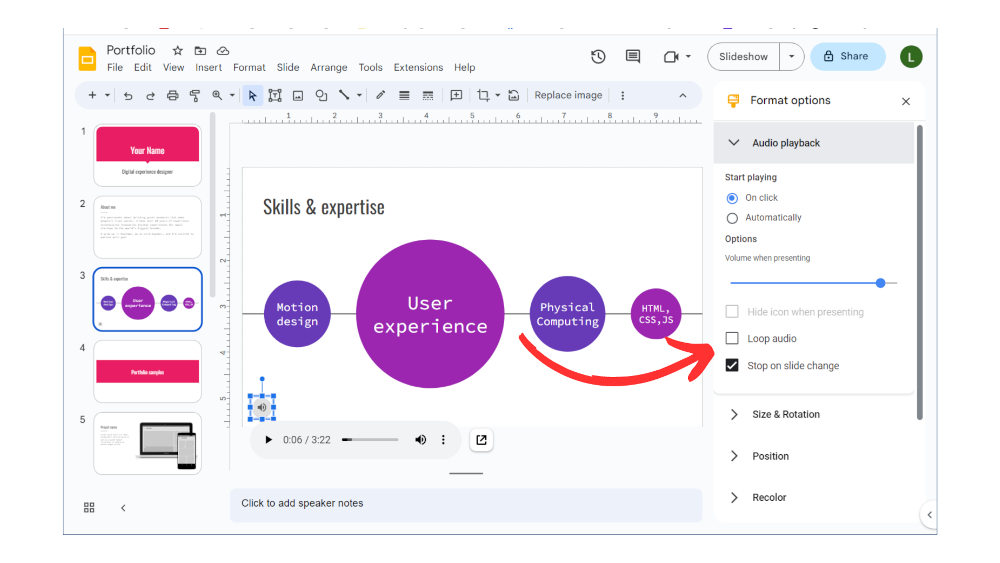
The screenshot below shows the options in the Audio playback section. You can decide if you want the audio to play automatically or if you want it only to play when the viewer clicks on the ‘play’ icon on the slide. You can also use the slider to increase or decrease the volume.
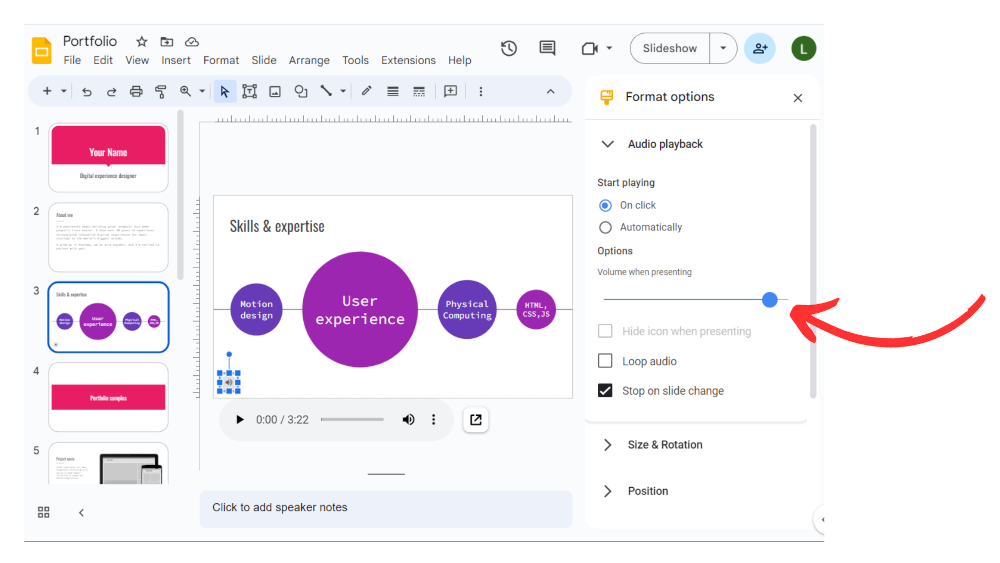
Looping & Repeating
You can also set whether the audio needs to play in a loop throughout the video or how many times you want to repeat the audio and after how long.
This is more of a finishing touches step. You may not need to make adjustments to the presentation or to the audio, but it is always a good idea to go over your settings one more time and tweak them a little to ensure everything is as it is.
Adjust the audio, add a few personal touches, and preview the audio to ensure everything is in order before you finally upload your presentation for your viewers.
Additional Tips on Adding Audio to Google Slides
Review these tips before recording your audio so that you don’t end up making mistakes you can avoid.

1. Start by creating your presentation first.
Your presentation should be short, sweet, and simple, and your slides should not have a lot of text. You will compensate for the lack of text with your audio recording. Your visuals will only act as complementary material to what you will tell your viewers through your audio recording.
2. Keep the slide open in front of you as you record your audio.
That way, you know what your viewers can see and what you should discuss. It helps ensure that you know how long the audio for each slide is and will help you adjust the playback for the slides efficiently.
3. Record in a quiet and secluded room.
The audio quality is just as important as the quality of the content you put out. Ensure the audio is clear and free of external noises and distractions.
If your voice bounces off the walls of the room you are recording, this will be a big problem as you will have to edit the audio extensively to make it audible for the viewers. If you don’t edit the echo from the audio file, your viewers will have difficulty deciphering what you are saying.
4. Speak clearly and concisely.
You should have a pre-written script and also keep the slides open in front of you as you record. Doing so will help you deliver the lecture a lot more efficiently. It will help ensure that you aren’t speaking too fast or too slow and speaking naturally like you are giving a lecture.
5. Try to keep your voice as interactive as possible but don’t get too animated.
You want to keep the viewers engaged, so avoid recording lengthy audio in a monotonous voice. Break down the audio into bits and supplement the breaks with images or videos to keep it interactive. You should also ensure your voice is lively because if you sound about to fall asleep, your viewers won’t stay attentive for long.
6. Lastly, but most importantly, review your audio and make changes where necessary.
If you feel like your script needs to be changed or need to record the audio again to ensure it is better quality, do it.
Make sure you prioritize quality above all else, even if it means double the work. Your viewers want quality and professionalism, or they’ll be sure to go elsewhere.
Frequently Asked Questions on Adding Audio to Google Slides
Can you do voice overs on Google Slides?
You can add voiceovers to your Google Slides presentation by recording and inserting them separately. After recording your voiceover, click to insert the output file, and you will magically have a presentation.
Can you use Google Slides to record audio?
Unfortunately, there isn’t a built-in audio recording feature for Google Slides. However, you can still include audio in your presentation. Just record the audio separately and then insert it into your slide.
Why won’t my audio upload to Google Slides?
If you’re having trouble adding audio to your presentation on Google Slides, it could be because you’re using an unsupported file type or lack permission to add audio and make edits. The best thing to do in that situation is to ensure that you have the right permissions and are using a compatible file type before reattempting.
What type of audio files can be uploaded to Google Slides?
Google Slides allows you to add audio files with .mp3 or .wav file types. Anything else besides those two file types may cause an error.
