Our content is reader supported, which means when you buy from links you click on, we may earn a commission.
How to Wrap Text in PowerPoint

Do you have an image on your PowerPoint slide that you’d like to surround with text?
If so, you need to learn how to wrap text in PowerPoint.
You’ll learn several different methods for wrapping text in this tutorial. So let’s get started …
What is Text Wrapping in PowerPoint?
It’s called text wrapping because you’re literally wrapping text around other elements in PowerPoint.
These other elements can include images, tables, diagrams, charts, and other shapes. You’re not just limited to wrapping text around images only.
While you can wrap text around anything, the consensus is it’s not a great look in PowerPoint presentations.
Why Wrap Text in PowerPoint?
You may be considering learning how to wrap text in PowerPoint because you have both an image and plenty of text.
You may be thinking it’d be great to have all that in one slide.
While the end result is often cluttered, you can definitely try it.
Wrapping text around an image or any other element can definitely aid readability when you have a lot of text.
Alternately, you may have a small amount of text, but want to add unique visual interest to a slide. Text wrapping can accomplish that.
Another potential option is that you may be using PowerPoint for something other than creating a presentation, like creating a poster or other graphic where the effect will look cool.
Different Options for Wrapping Text in PowerPoint
Text wrapping is not directly supported in PowerPoint, but you can accomplish it with these techniques. Each is only a workaround solution, you may need to experiment to get just the right look.
Option 1: Insert Spaces Around Object Manually
This method will work in every version of PowerPoint.
With this technique you’ll need to insert the image and then insert a text box over the image. From there, you’ll have to use the space or tab bar to manually create the breaks around your image.
Here’s a step-by-step breakdown of this option …
First, insert your image (you can either copy and paste it or go to the Insert tab, then click on Pictures and navigate to it on your computer):

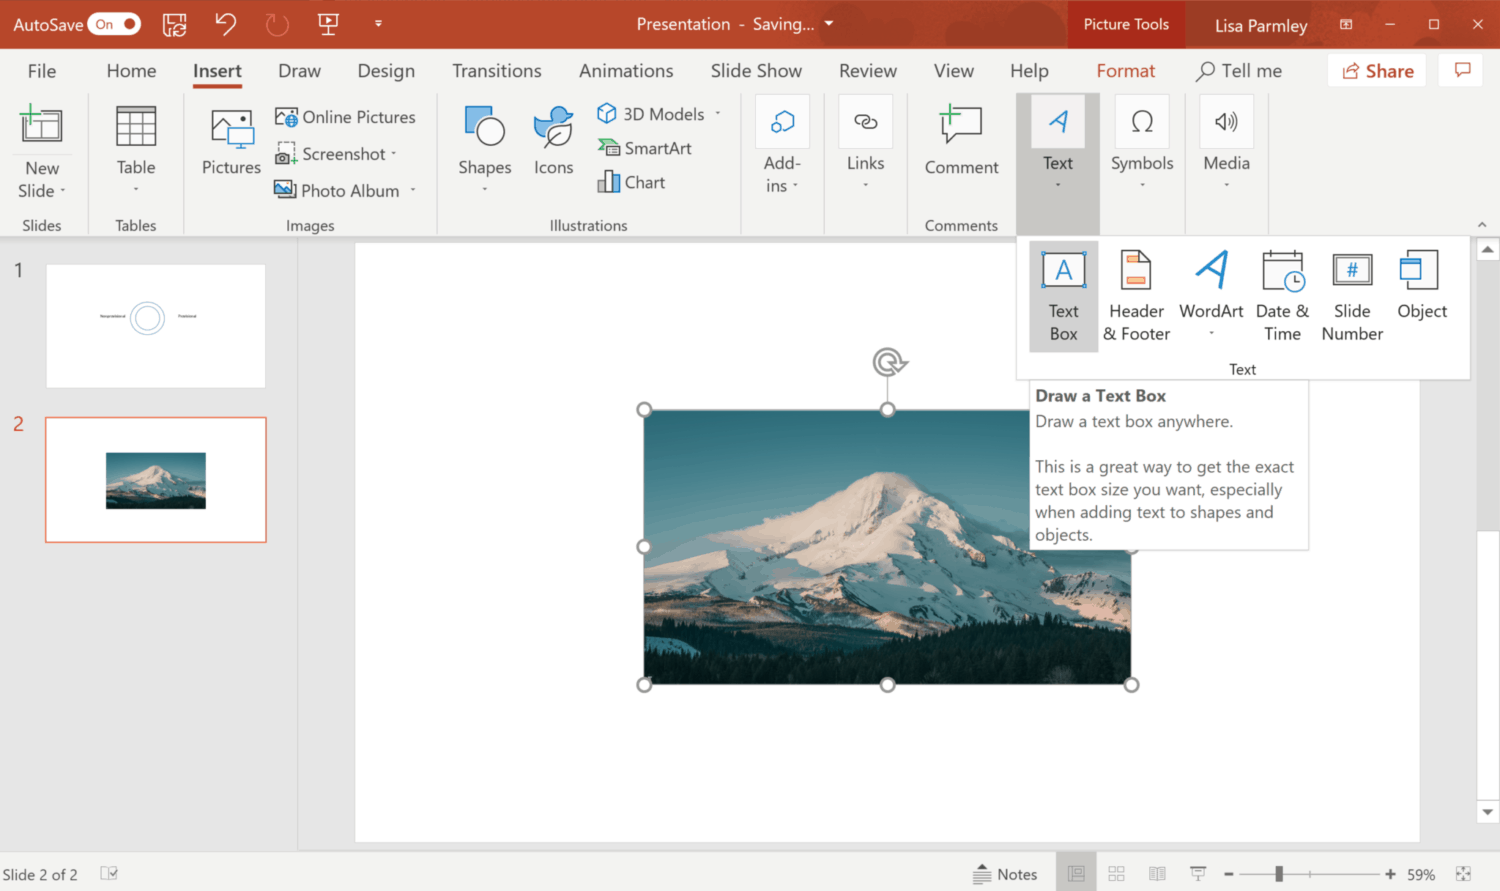
Insert a Text Box. You can accomplish this by going to the Insert tab, then click on Text, then click on Text Box as shown below:
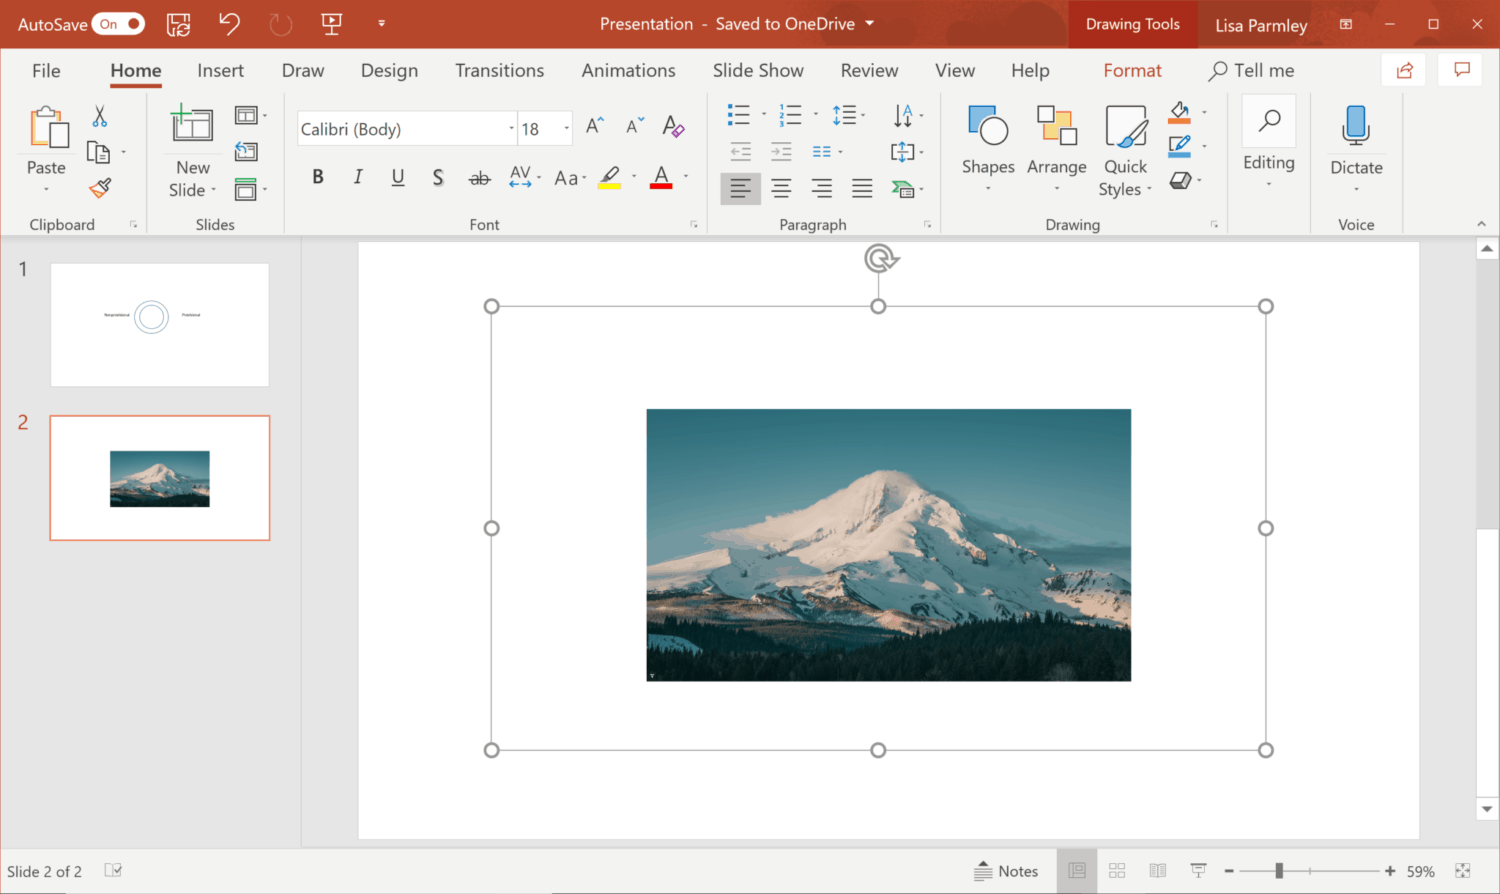
Position your Text Box around your image with a square or rectangle as shown here:
Then type or paste the text into your Text Box:

Make sure to bring the text to the front so you can see the text over the image. You can accomplish this by sending the image to the back. Simply select the image, right click on it, then navigate to Send to Back.
Start using the space bar to make breaks around the image.
The image below shows a terrible example of text wrapping in PowerPoint:

As you can see, I’ve wrapped the text around this image. It looks terrible and demonstrates what not to do in your presentation.
Sure I could have taken a little more time and made it look a little better, but the end result will still look pretty bad.
Con: It’s tedious and may not look that great.
Option 2: Use Text Boxes Around Image
This method will work in every version of PowerPoint.
If you have a rectangular image then you can insert text boxes all around the image to give the impression of text wrapping.
Here’s a step-by-step plan for this technique …
First, insert your image:
Next, place a Text Box on each side and at the top and bottom to give the effect that the text wraps around the image. You can do that by going to the Insert tab and then click Text, then click on Text Box. Copy and paste your text into the text boxes and drag them around on the slide where you want them to be.
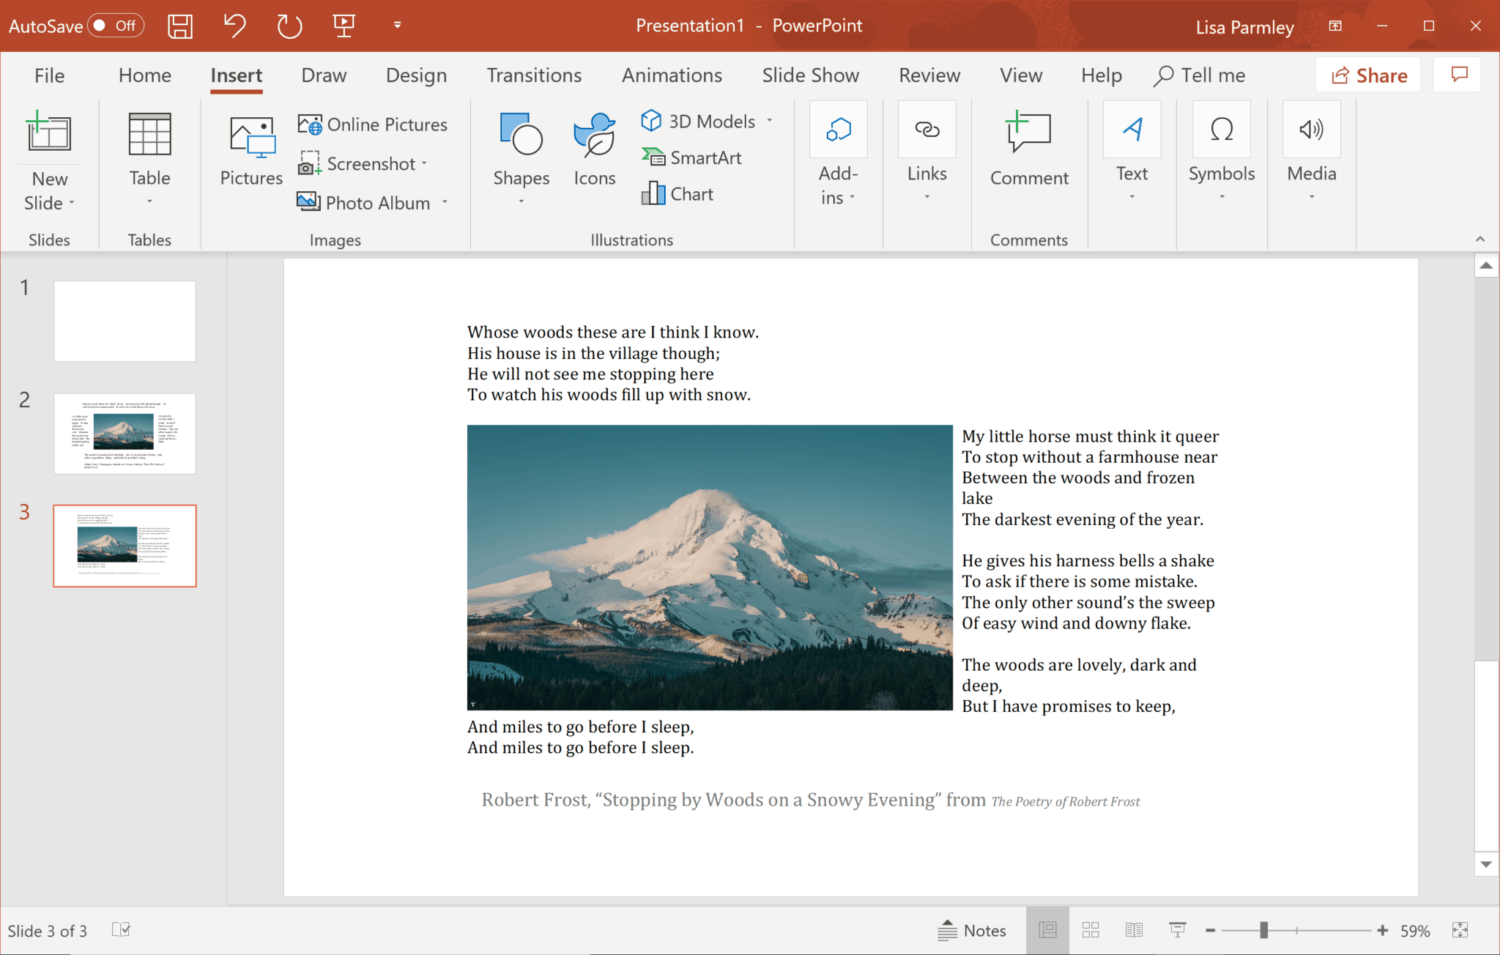
So here I’ve actually done it for you:
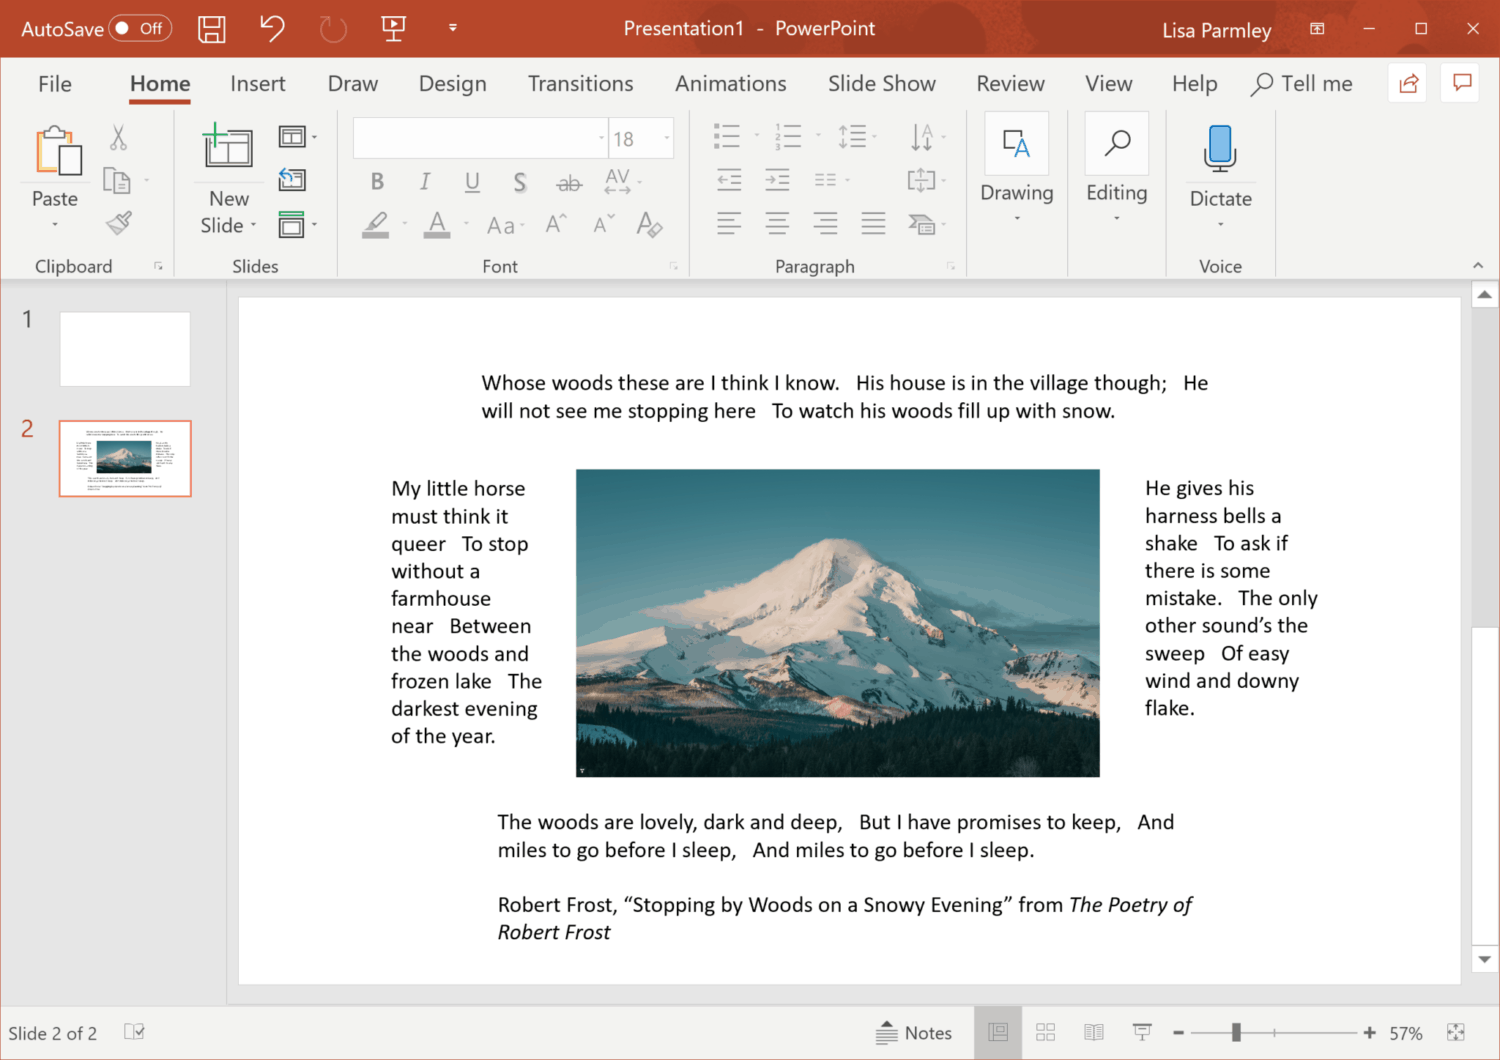
This one looks a lot better than the previous example, but this still doesn’t make for a great PowerPoint slide.
There’s just too much text on the slide.
This method does create a better end result though because you have more control over the spacing around the image.
Con: Can be uneven. My example above turned out OK since I’m using a poem with 4 equal sized stanzas (a stanza is like a paragraph or section within a poem). There are 4 sides to my image. So I was able to take one stanza for each side and it looks even. I wouldn’t have been able to break it up this nicely if there were a different number of sections.
Option 3: Import Already Wrapped Text From Word
This method will work in every version of PowerPoint.
Here’s a step-by-step walk through of how to accomplish this …
If you’re working in an older version of PowerPoint then start here …
You will first need to create your image with the text wrapped around it in Word.
Here I am in Word. I’ve copied and pasted the poem into Word:
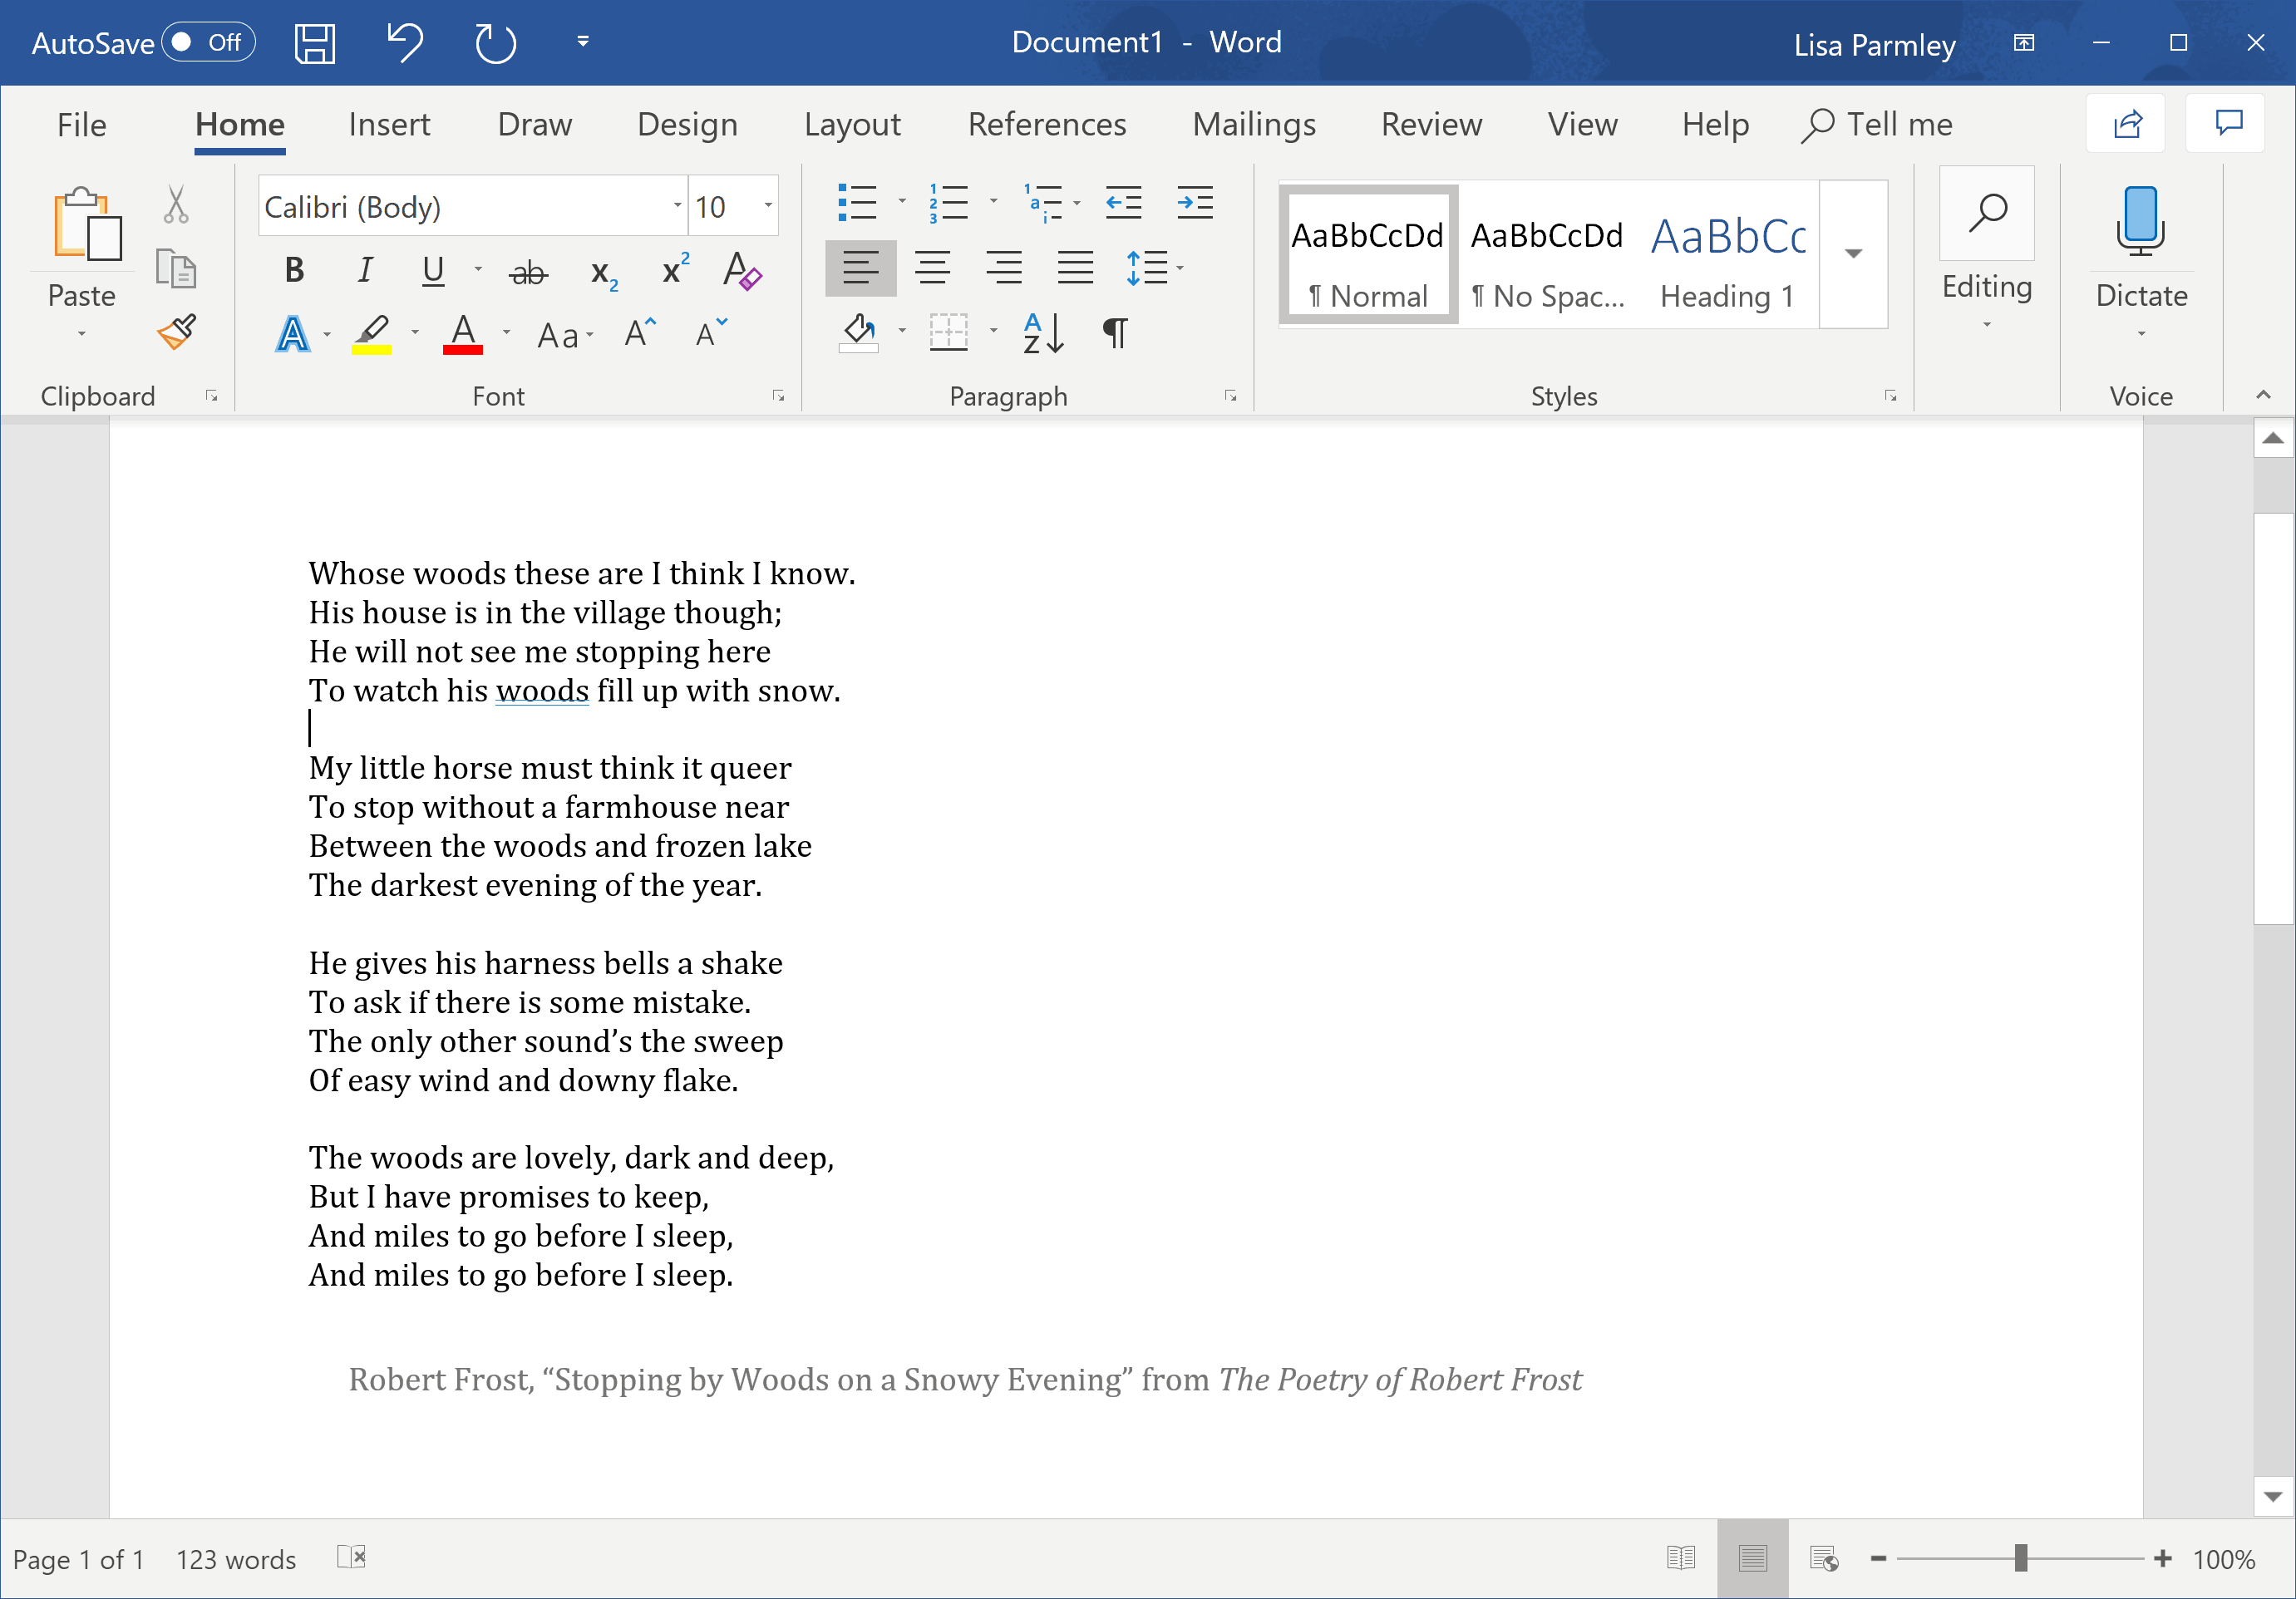
Now I’m going to paste in my image after the first stanza.
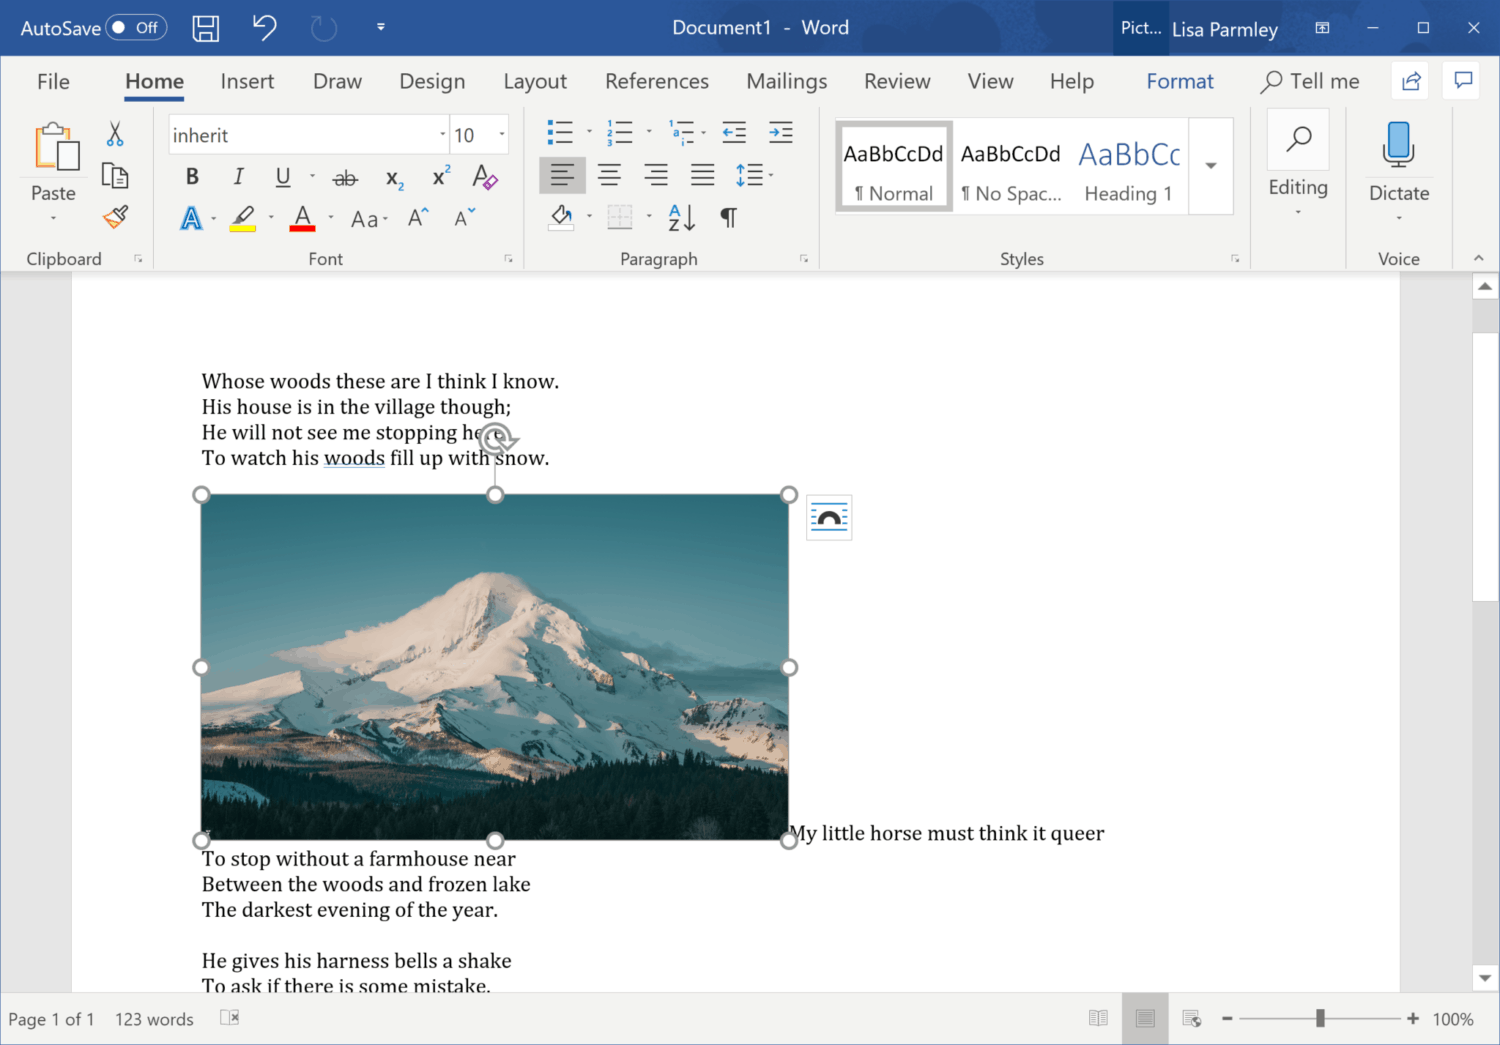
Word has a built in text wrapping feature and to get to that I right-clicked on the image:
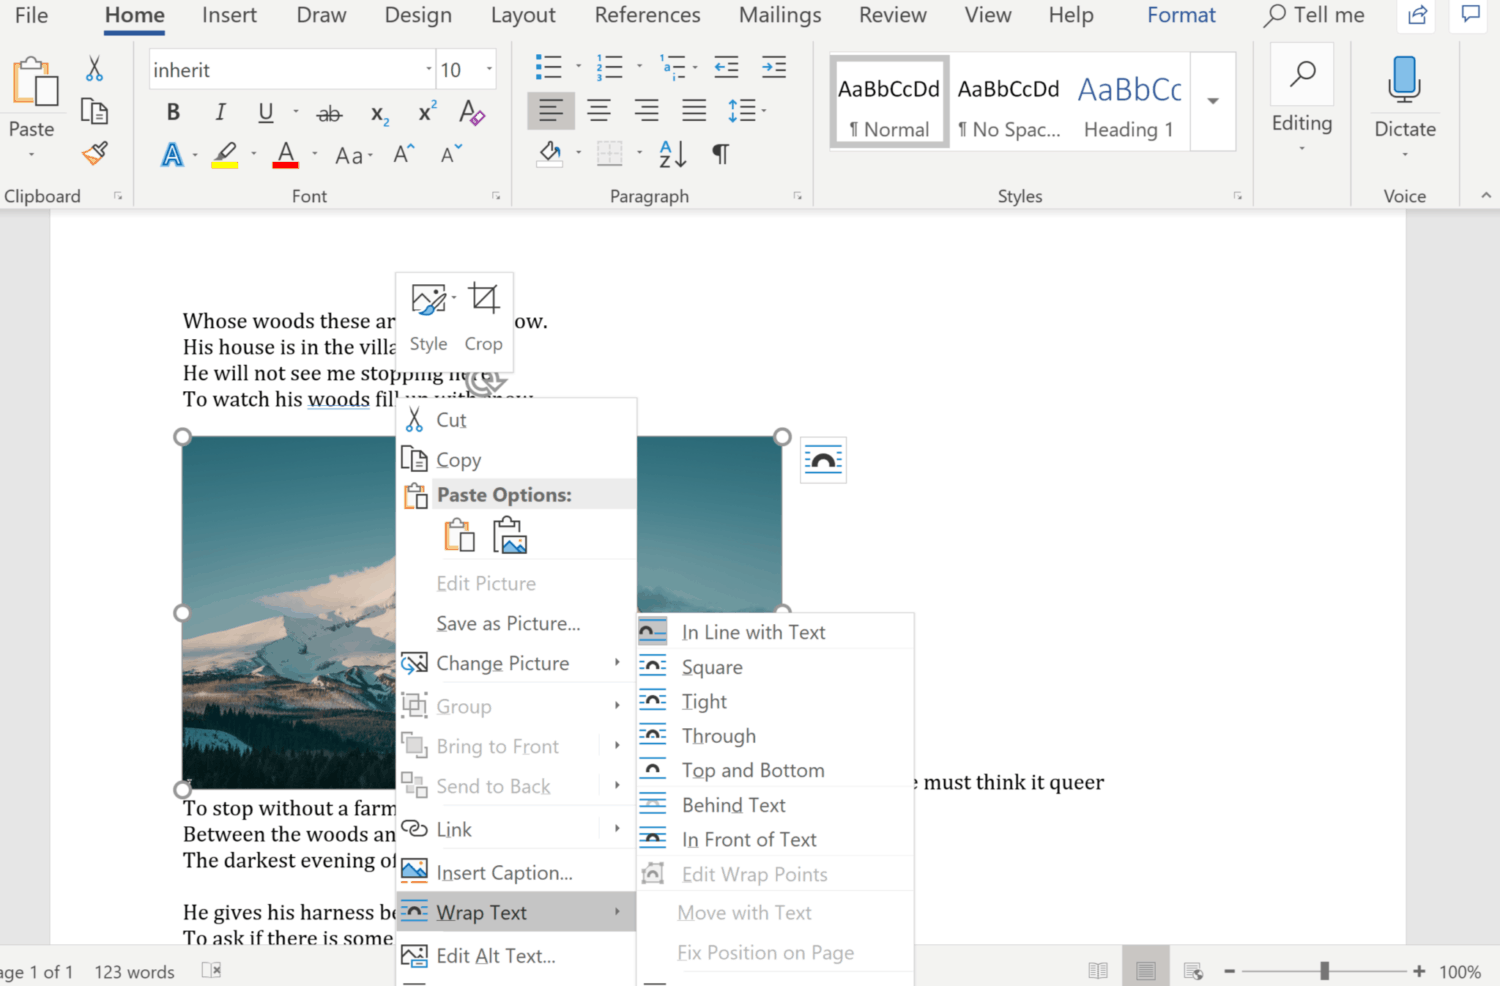
When you right-click on the image, a display box will show up with Wrap Text (as shown in the image above). If you hover over that then another box appears and you can choose from the method for wrapping text.
I chose Square and ended up with this:
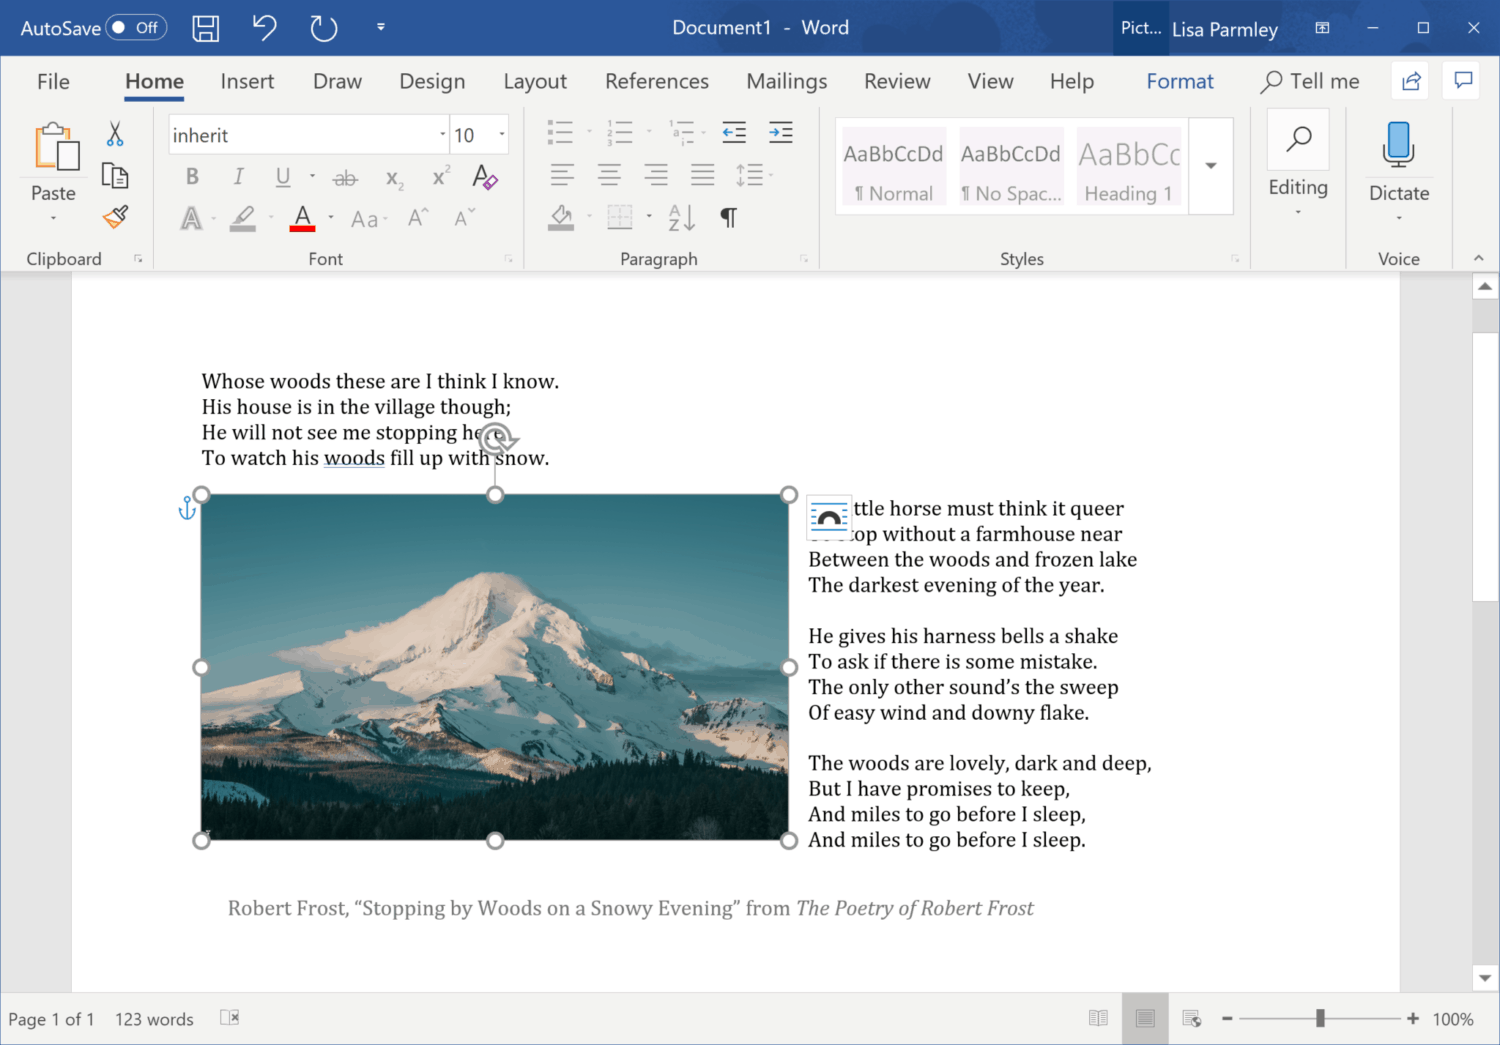
You can play around with the text wrapping feature in Word and when you have it just right, save your file.
Then you’ll need to go back to PowerPoint.
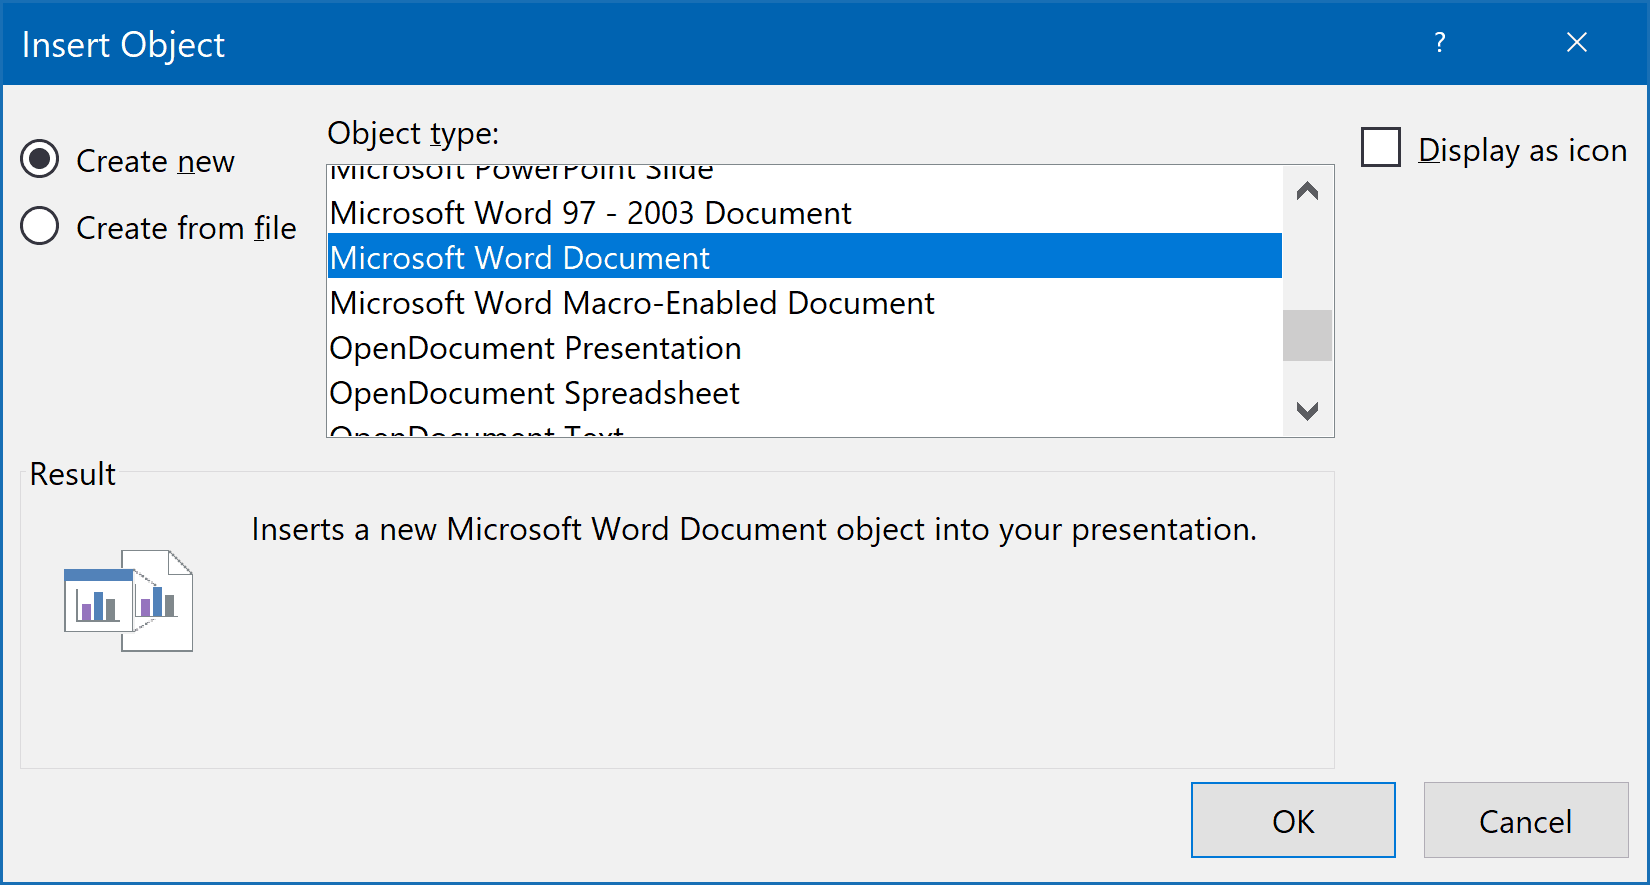
From within PowerPoint, go to the Insert tab and then find Text. From there, you’ll see an option to select Object. We want to insert an object so select that.
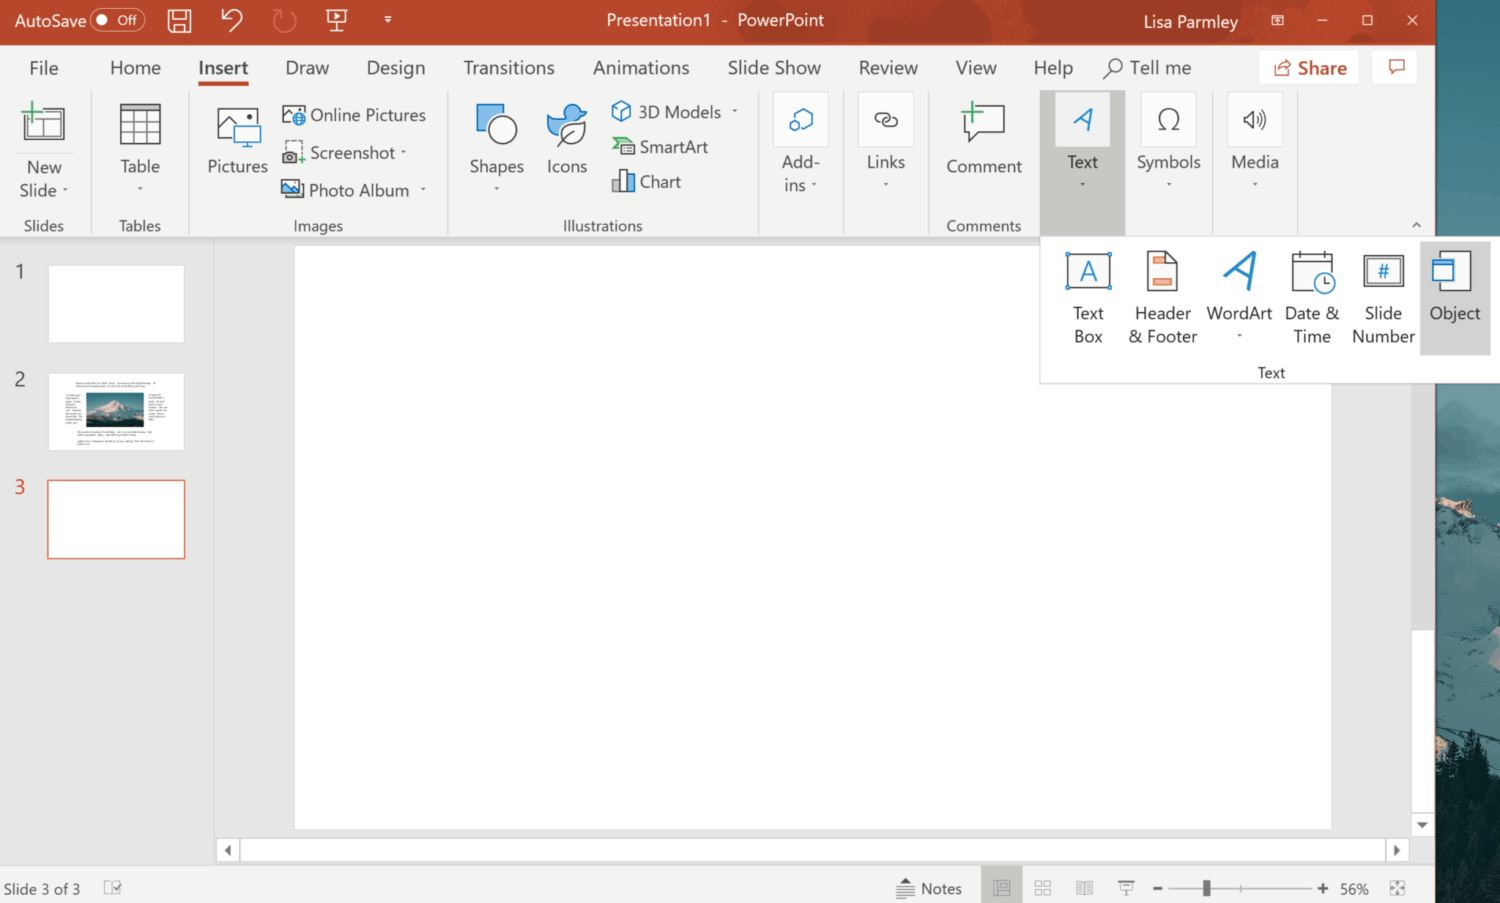
Select Microsoft Word from the drop-down list
Insert the image and your text:
Now if you need to change your image or the text, you will have to open Word and make your changes there.
If you’re using the Office 365 version of PowerPoint then you can start here …
From within PowerPoint, go to the Insert tab and then find Text. From there, you’ll see an option to select Object. We want to insert an object so select that:
Select Microsoft Word from the drop-down list
In this newer version, PowerPoint essentially embeds a working version of Word right into your slide.
You’ll have to insert your image there as well as paste in your text.
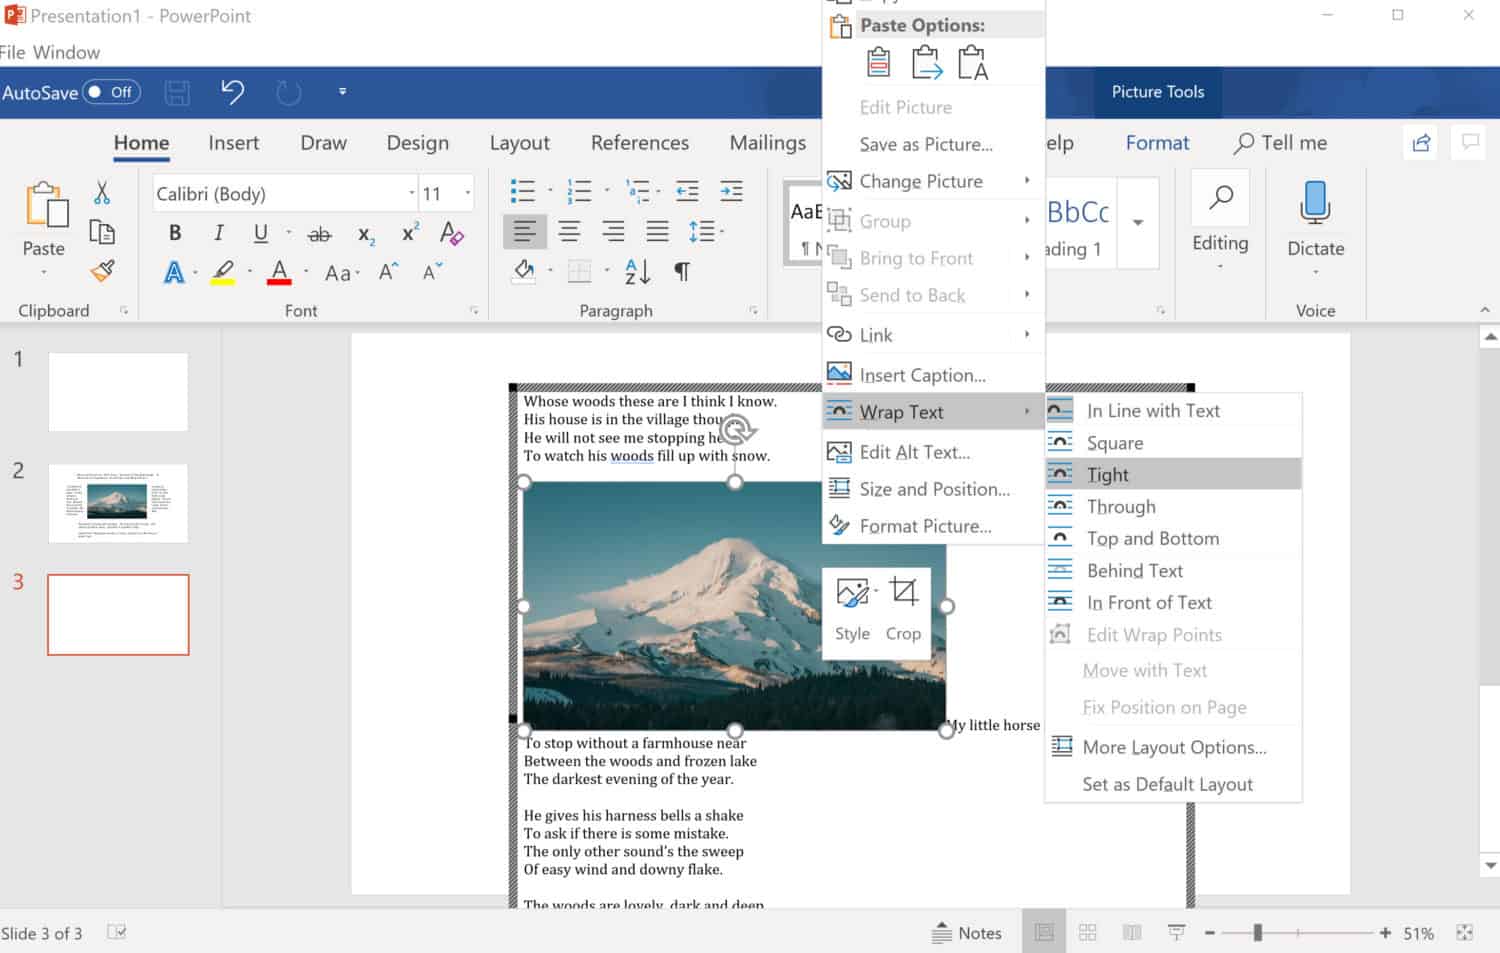
Once you have that in the Word embed, right click on the image, select Wrap Text, and choose Tight:
This will wrap the text around the image like shown below:
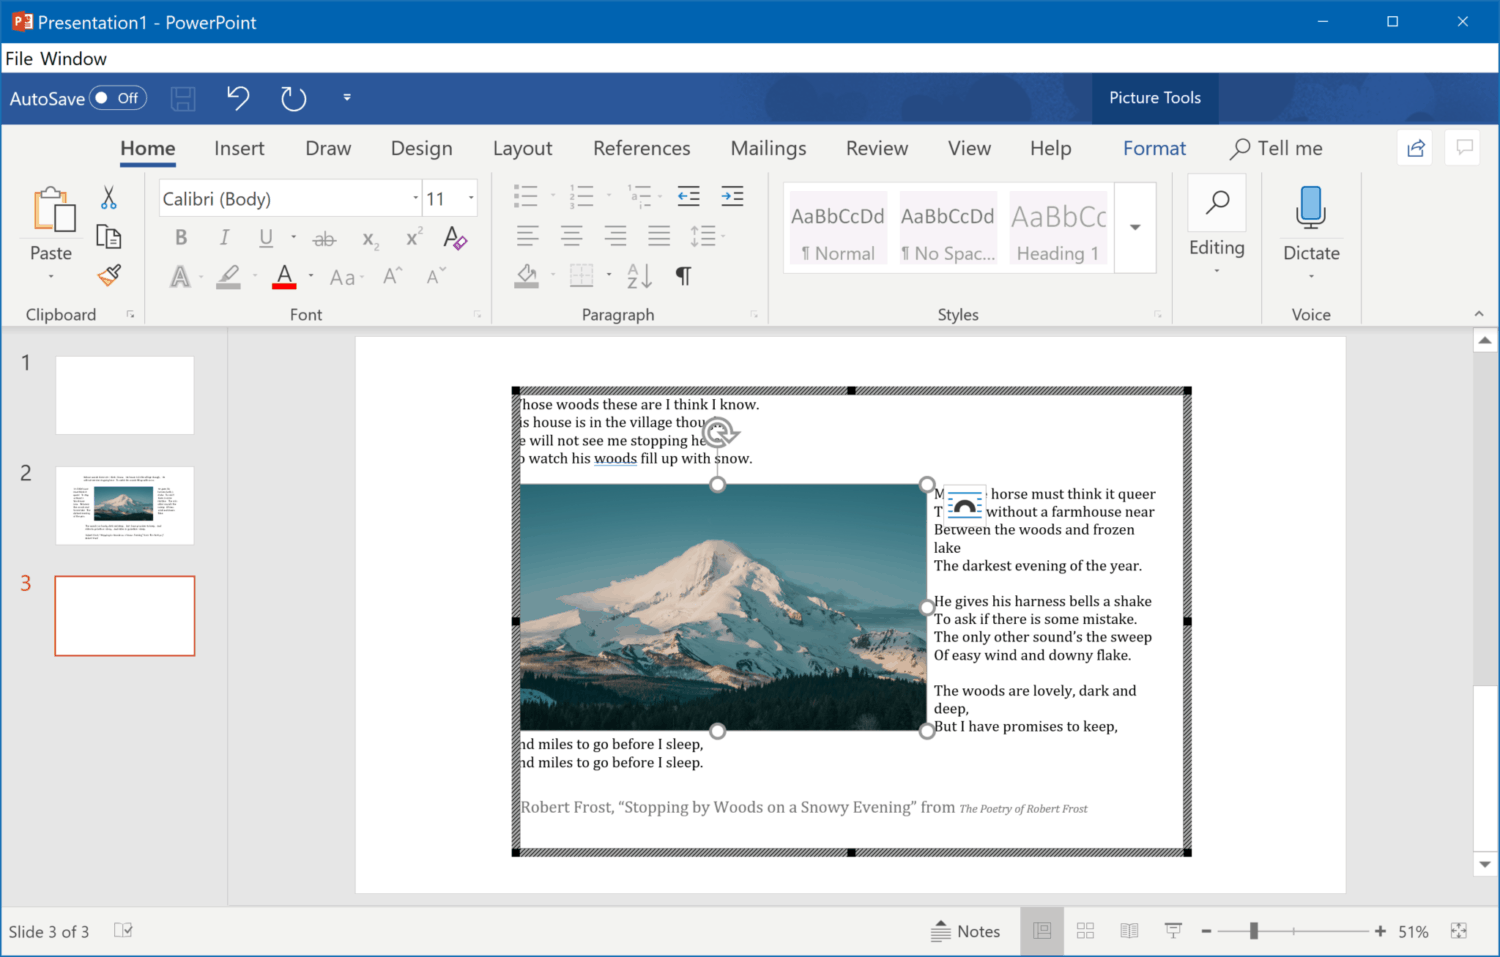
Click on the PowerPoint slide to get rid of the Word embed lines and you’ll see your completed slide like shown below:
Again, this was using PowerPoint Office 365. In Office 365 you have Word embedded right into your slide.
Just a note, doing this hung up my brand new laptop so this fancy object embed in Office 365 just about crashed my computer.
And really, the end result just doesn’t look all that great so I don’t plan to ever do that again!
As you can see, there are 3 different options for how to wrap text, but I think you’re better off not wrapping text.
What could you do instead?
Even Cooler, More Creative Ideas
As mentioned earlier, with the poem I’m using as example text, “Stopping by Woods on a Snowy Evening”, by Robert Frost, there are 4 stanzas.
What if instead of trying to fit all 4 on a slide, you broke each one up into a different slide with an image?
You could create a much less cluttered slide such as the example below:
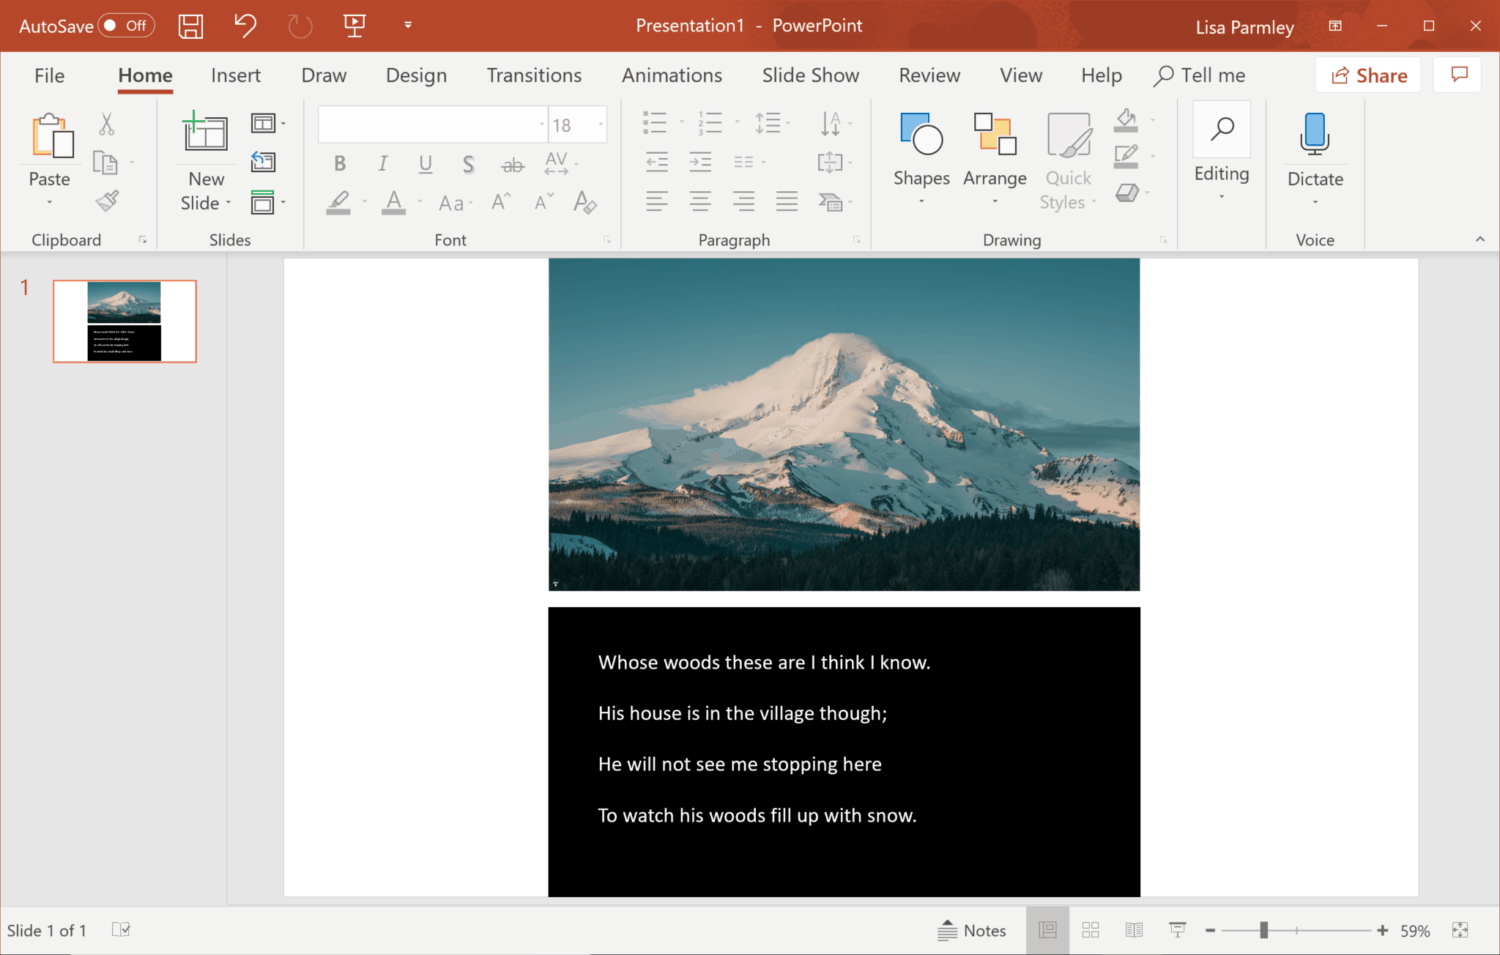
In this example, the text isn’t wrapped at all. In addition, the amount of text on the slide is more manageable.
I whipped this up in about 2 minutes by inserting the image and then inserting a rectangular shape with a text box over the shape.
I’m not saying this looks great, I think it could use more design work like with a background, but I’m just showing you options other than text wrapping.
If you found a vertical image then you could make this look better very quickly.
Here I cheated and turned the image into a vertical layout to show you how much better this looks:
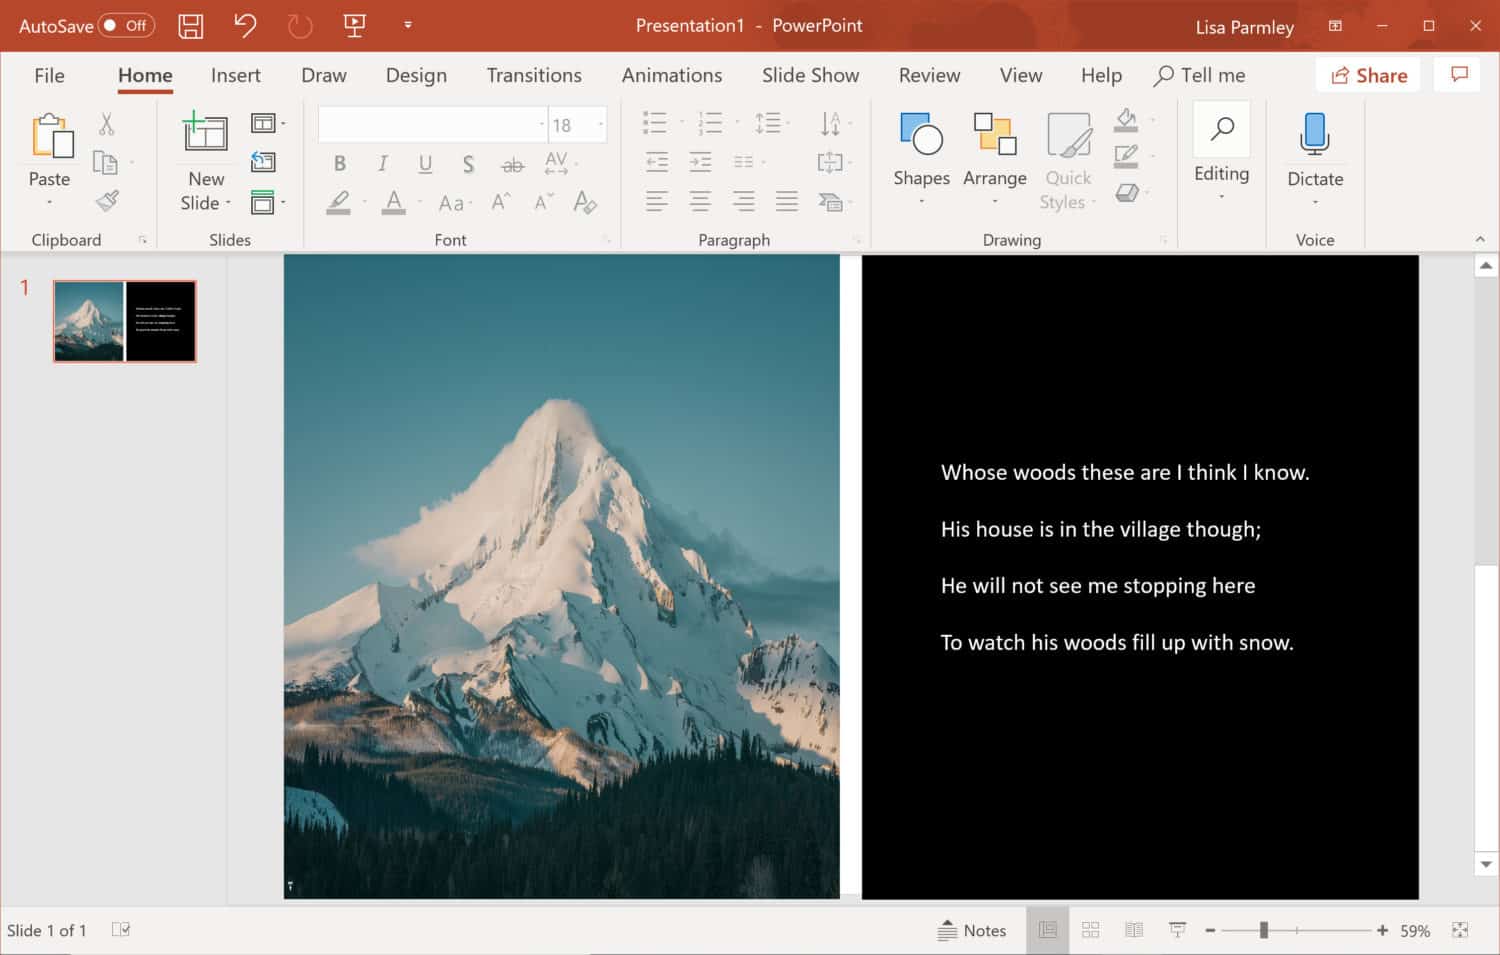
I use designs like this one all the time in my presentations and think they’re pretty effective. Often, I’ll have even less text than in the example above.
That’s just one idea you can use.
Ultimately, instead of using text wrapping, you need to break up your content into a number of slides and make sure each slide has a manageable amount of text on it.
Break your content up and if you have to use it all, use text wrapping sparingly.
Best Uses
Ruler and Grid-Lines
If you’ve just got to use text wrapping (or even if you’re just trying to line elements up) then use the ruler and grid-lines. This will help you line everything up correctly.
In addition you can snap objects to the grid. Here I’ve enabled both the ruler and grid-lines:
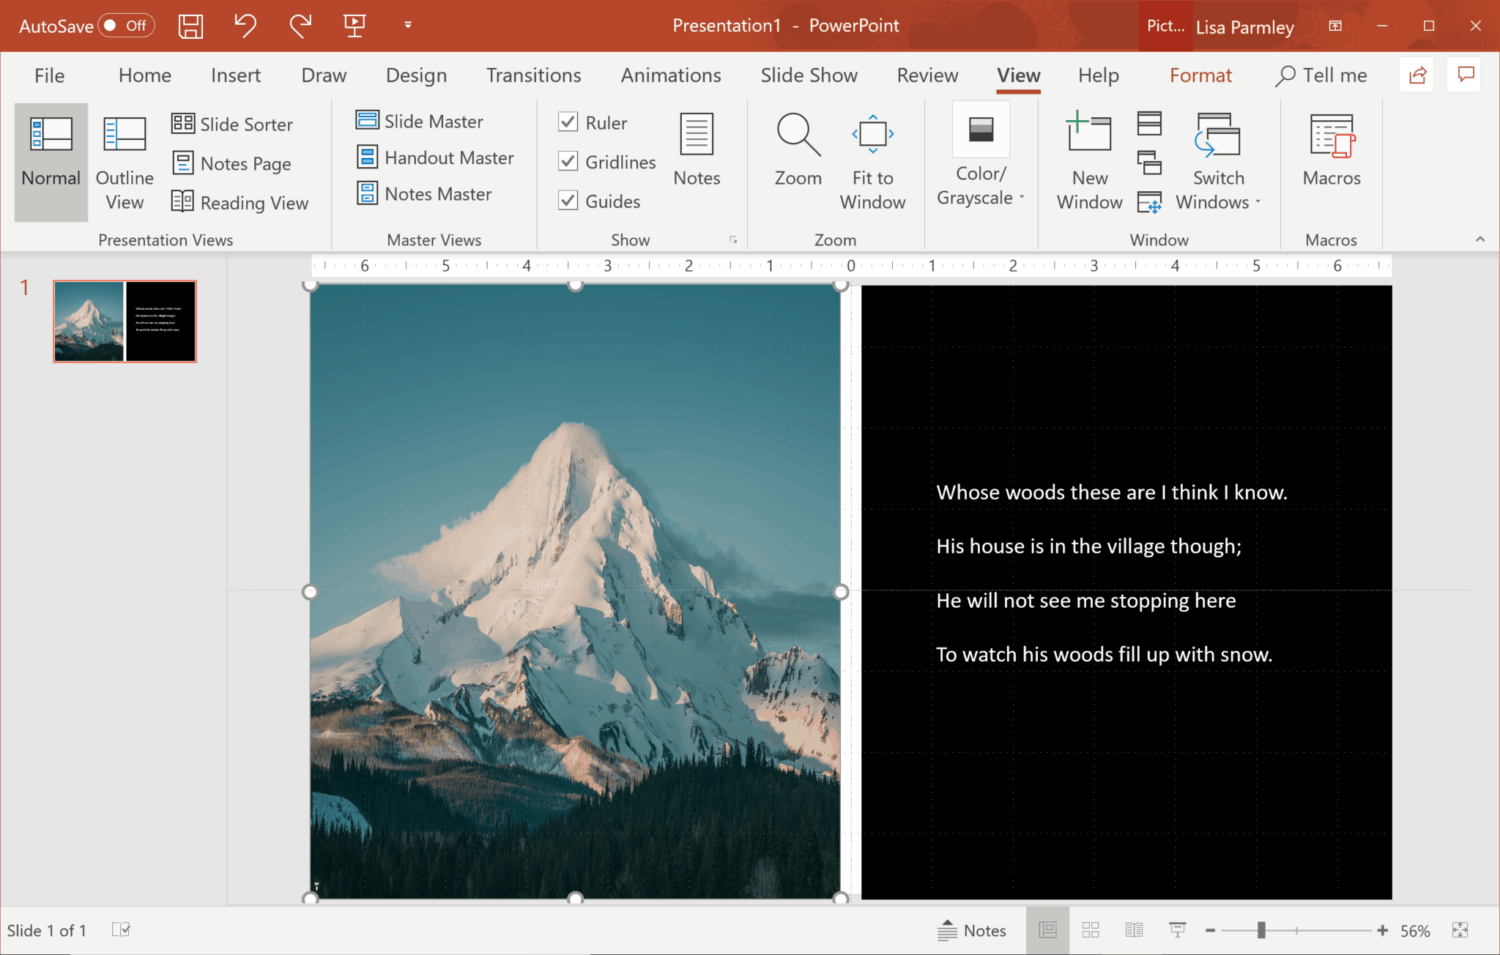
The grid-lines are hard to see, but they are there.
To enable these, go to the View tab. Then mark off the tick boxes for Ruler and Grid-lines.
White Space
Make sure to have enough white space around the image or diagram or it’ll look even more cluttered. Like this one. It looks terrible:
It’s got a jarring design. You don’t want a jarring design.
This one below is still weird, but getting better:
The white space and the structure really make a difference. Again, the one above is still not even a marginal PowerPoint slide.
As you can see, centered images with a lot of text can often create an odd effect that’s difficult to read.
Word Hyphenation
Watch for thin columns of text. You don’t want every word hyphenated if it won’t fit into the space you have. Don’t try to squeeze the text right next to an image.
Consider Alternatives to Text Wrapping
As you’ve seen, successful text wrapping is tricky.
It’s difficult and awkward to do even using the ruler and grid lines.
So you may want to consider not using text wrapping at all. Placing a lot of text on your slide will always make it look busy and make it more difficult for the learner to process.
Text wrapping can be great for blogs where the image is often placed on one side and the text wraps around it. But blogs are a different medium than PowerPoint slides.
Make sure the text is really easier to read, otherwise, it’s best not to use it.
Conclusion
You’ve seen several ways to wrap text in PowerPoint as well as an alternative strategy which involves creating several different slides to break the text up.
There are several other strategies you can use on text in PowerPoint. For instance, you can highlight text in PowerPoint and use subscripts in PowerPoint (as well as superscripts).
If you found this short PowerPoint tutorial helpful, please share it.
We hope that through these tutorials, you’re able to start creating your next PowerPoint presentation quickly and easily!
