Our content is reader supported, which means when you buy from links you click on, we may earn a commission.
How To Video Record Yourself Presenting A PowerPoint (with 4 Pro Tips)
An estimated 35 million PowerPoint presentations are given every single day. From corporate boardrooms to high school classrooms, a PowerPoint presentation is among the most popular mediums for sharing content that can engage your viewers and help them get a better understanding of various concepts.
Due to convenience, more and more people now prefer online courses over the traditional, offline mode of learning. Online course providers might need to stream or record their lectures into videos so that their students can watch them on their own time. In the absence of a blackboard, an online PowerPoint presentation is a much better alternative for creating online courses and lessons.
Why Should Course Creators Video Record Themselves When Presenting a Slide Show?
In many cases, a screen recording showing PowerPoint slides on their own just doesn’t do enough to convey the information well. Hence, many course creators have tried the following:
- Recorded narration over the PowerPoint slides.
- Used a screen recorder to capture slides and voice-over.
- Use an online chat tool to record the slides as they are being presented.
Although these methods are a step above the plain and regular PowerPoint presentation, they are not able to engage viewers as completely as a course creator presenting in front of them would. The most effective type of PowerPoint presentation is one where the learners are shown both the slide show as well as the presenter.
Because of the face-to-face contact and body language, learners feel more like they are in an actual classroom. This will help them remain focused on the topic, improve comprehension, and make them retain the subject matter for a longer period.
Hence, when it comes to class lectures, online skill-sharing, and organizational training, using PowerPoint presentations in conjunction with video is the best way to share information.
Here are some reasons course creators prefer a PowerPoint presentation where you record yourself presenting the slide show rather than lifeless slides:
Greater Power of Persuasions:
Video presentations have higher persuasion ability through video-audio communication and involve the sight, sounds, and emotions that trigger engagement.
Better Retention:
According to statistics, viewers retain approximately 95% of the message when watching a video recording as compared to just 10% when viewing only text.
Available at Your Fingertips:
About 75% of all audio and video are played on smartphones, tablets, and other mobile devices. This means accessing and viewing videos are now easier than ever. This provides course creators a big opportunity to ensure more and more people watch their content.
Time-Saving:
Video presentations allow course creators to break big blocks of information into bite-sized pieces. This makes it easier for the learners to process the information.
Overview: Steps to Create Video PowerPoint Presentations
Almost everyone who has ever used a computer has a basic idea of how a PowerPoint presentation works. Initially, the slide show was created for overhead projector transparencies, which was the most favored medium for many instructors before video projectors.
However, thanks to advancements in digital technology, creators can now enjoy various interactive elements like animated transitions in between slides and audio and video embeds in their presentation to make it more engrossing.
Creating PowerPoint Slides
Every PowerPoint presentation starts with the same basic template. Your slides can be fully customizable or you can choose from pre-made templates to expedite the design process of the slides.
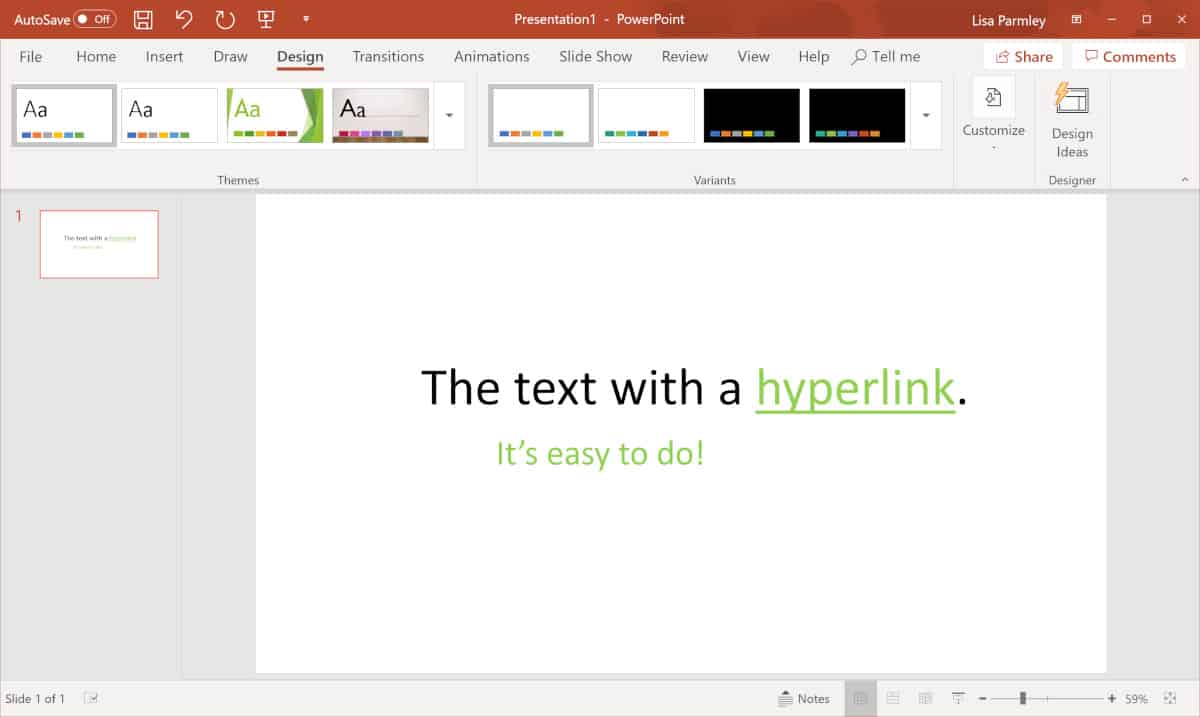
To make a simple PowerPoint presentation, you need to add text, bullet points, and images. You can use the standard layout or select the content themes from the top ribbon.
PowerPoint now also comes with a gallery of stock images. In addition, the application also recommends design ideas based on your layout so that your slide looks more professional. This is a useful feature if you do not have a lot of time customizing the slide design.
Once you are satisfied with the general look of your slides, you will need to add the audio and video content to the presentation. You can then export the entire presentation and share it with your learners.
Recording Audio on PowerPoint
Do you know that PowerPoint software itself allows you to record your audio onto the presentation? This summary you a quick run-down of how to use this feature.
Before you start the audio recording, it is a good idea to use the “Rehearse Timings” option to see how your script fits your slides. This will open up a test screen, which will show how long you played the slide show and how much time you took on a single slide.
You can use the “Pause” and “Reset” buttons to make changes and use the “Notes” section to document the changes you made to your script.
To add your voice recording, go to the “Slide Show” tab on the top ribbon. Go to the “Record Slide Show” option and start recording the audio. You can also use the audio on and off toggle video options at the top of the record screen to record only the audio.
Although you can record your audio through the built-in microphone on your laptop or phone, it is a good idea to invest in a good-quality mic for better quality audio.
PowerPoint allows you to record the full slide show in a single take. You can also click through the slides to trigger the added animations or to make progress through the presentation.
Once you are done, you should review the recording, which will be saved on a slide-by-slide basis, so you do not need to record the presentation again to fix any errors.
Pro Tip:
PowerPoint audio is not recorded during slide transition, so make sure you finish speaking before you skip to the next slide to avoid cutting off your conversation.
Creating a Video of Yourself
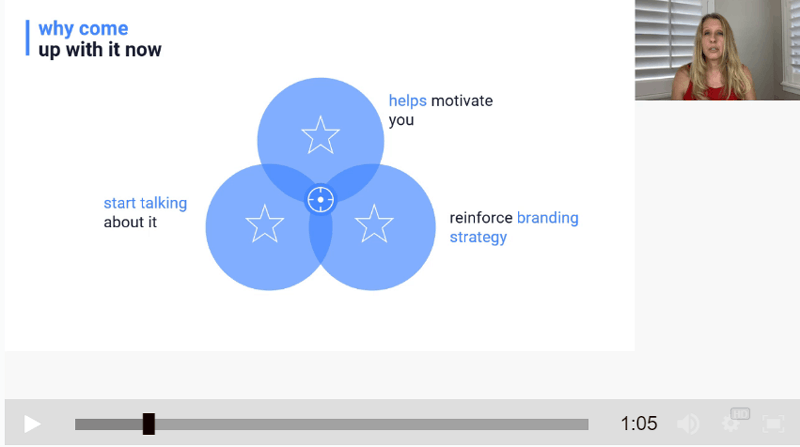
To add yourself to the PowerPoint presentation, switch on the video option located on the Record Slide Show screen. By default, PowerPoint will show the video picked by your camera at the bottom right of the presentation during the recording.
Once your video has been recorded, you should return to the editing screen. You will find your video recording shown at the bottom right of the slide.
Resizing and Repositioning the Clip:
You can drag your recording from the default place to anywhere on the slide. You can also blow it up to fit the slide frame or remove the recording by selecting it and pressing the delete option.
Making Video Presentations with a Screen Recorder
Although PowerPoint presentations allow you to make a perfectly good screen recording, you can also find a lot of powerful and robust third-party tools that can take your video presentation to the next level. Making your video presentation appear more professional and sleek will help you stand out from the crowd and will help you establish trust and authority with your learners.
Screen recorders or screencasting software offers a more comprehensive range of editing and post-production options, including closed captioning, professional transitions, and the ability to add interactive elements. They also come with an added bonus of directly sharing your online lesson to video-sharing sites like YouTube and Vimeo and allow you to save your presentation in alternative formats, including .mpeg2, .avi, and .mov.
Let’s take a look at how you can video record a PowerPoint presentation with Camtasia.
Using Camtasia to Record PowerPoint Presentations
Camtasia is an industry leader in video editing and screen recording. The software allows you to capture videos via your webcam, add sound effects from the royalty-free music library, record sections from your screen, capture content from iPhone, integrate animations, set up customized video themes, add device themes, and allow course creators to benefit from a whole lot of other features.
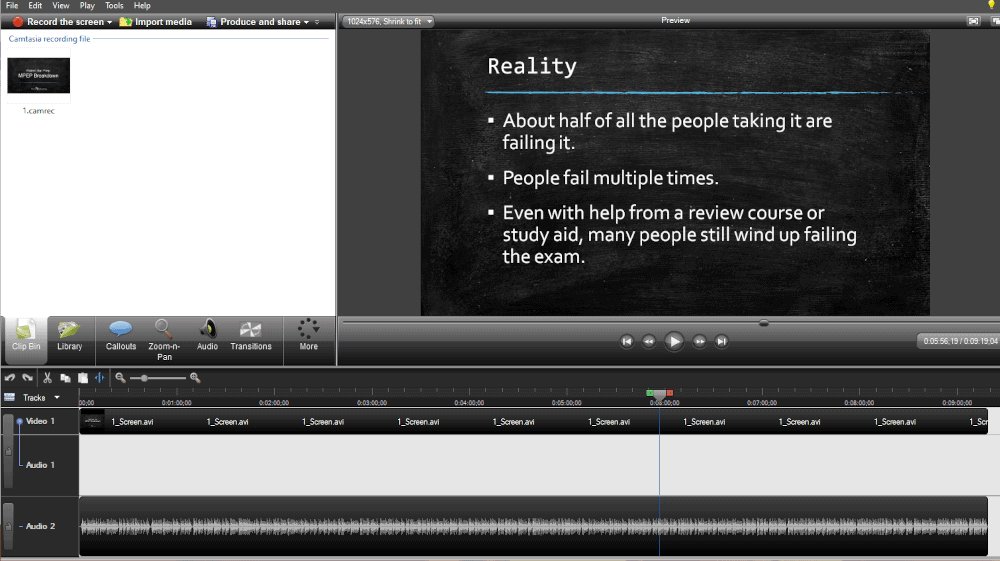
If you have Camtasia on your computer, you can import your PowerPoint slides into the software and edit them through Camtasia. Just click on the “Import Media” option and select your PowerPoint file. This will turn your slides into PNG format. PNG files are not editable so you will not be able to change the content in your slide, it will give you better control over the presentation design and style since you will be able to adjust your slides to fit in with your video and audio overlay easily.
Pro-Tip:
For online course creators, Camtasia offers real benefits since it allows you to export your finished file as a SCORM package. This means it can be downloaded to any SCORM-compliant LMS and will enable the LMS to track learning activities, like quiz performances and time spent on a course.
This is not possible if you are making your presentation using only PowerPoint software.
Recording the Screen
To start the screen recording, you need to click the “Record” button at the top of the toolbar. This will open up the Camtasia recorder which is default set to capture everything that is happening on your screen.
Customize Recording
You can either choose to record the full screen or click on the arrow to “select area to record.” You can also choose to record other elements on the screen, including the webcam, mic audio, and system audio. Click on the down arrow button or the double arrows next to the options to choose a specific webcam (if you have one) or mic. This way you can record yourself presenting a PowerPoint. Click on the “Start Recording” button to begin.
Record Yourself Presenting the PowerPoint Presentation
As mentioned, you can use the tools within Camtasia to record your screen which consists of your PowerPoint slides. Then you can use the recorder to choose a specific webcam. However, you can also use a different device to record yourself presenting a PowerPoint.
For instance, if you have a video camera or a Smartphone, you can set that up to record yourself as you go through the presentation. Then you can import that video file into Camtasia later on.
Finish Recording
Depending on whether you are using Windows or Mac computers, you will need to follow slightly different to finish recording on Camtasia. If you use Windows, click the Camtasia recorder icon located on the taskbar and press the “Stop” button. To re-record, delete the recording and then start over. Alternatively, you can also press “F9” to pause and resume the recording and “F10” to stop the recording.
If you use a Mac, click the Camtasia icon on the Apple menu bar and press the “Stop Recording” button. To re-record, click on the “Start Over” button. Alternatively, you can also press “CMD+SHIFT+2” to pause or resume a recording, and “CMD+OPTION+2” to stop a recording.
Import the Audio and Video into Your Camtasia Project
Camtasia works with projects. Once you’re done with your presentation recording and you end the recording, a new project should open. You’ll want to import any additional audio and video into that project.
That means if you recorded yourself separately on your Smartphone, you’ll need to upload that to the project. Then you can organize both your Camtasia recording and the video of you presenting a PowerPoint on the timeline.
Trimming the Video
To remove the extra content that is often found at the start of a video, drag the end of the clip “in” on the timeline. If you remove too much material from the recording, drag it back out to restore the video. A great thing about this is that any edits you make on the timeline will not change the original recording saved in the media bin.
Cutting Out the Video
To cut out a certain section on the video, drag the red or green handle on the video playhead to select a specific area on the timeline. Then, click on the “Cut” button to remove that section. The program will add a stitched line on the timeline to show where the cut was made. In addition, if you want to bring the playhead together, double-click on the playhead.
Adding Titles and Annotations
Make your video more professional by adding titles, annotations, and effects to the content. You can easily add an annotation by clicking and dragging the relevant option from the tool panels to your video timeline or the canvas.
Double click the annotation to change the test. You can change the background color, font, and other elements in the properties panel. To change the position, rotation, and size of the annotation, click and drag the handles.
Adding Effects
Camtasia also offers you “Shapes” and “Blur” options as effects you can add to your Powerpoint presentation. You can add a shape by clicking and dragging one from the tool panel to the timeline or the canvas. If you want to hide sensitive or copyright information, use the “Blur” option. In addition, you can also adjust the size, position, and intensity of the blur in the properties panel.
Exporting the Video:
Click on the “Export” button to see all the export options that Camtasia provides. The first option downloads the video file on the computer. Other options allow you to upload your file to web services. This requires you to sign in to an account. You can then invite your learners to review the video presentation.
Using a Zipped Project
You should export your file in zip format. This way, all the original media used in the video presentation will be placed in one file. This allows you convenient access to all files in the project. To zip your files, go to “File” and select “Import Zipped Project.” This will import the zipped files into a new project.
Pro Tips for Making Better Video PowerPoint Presentations
To make your PowerPoint videos even better, you should consider the following tips:
1. Make it Short, Sweet, and Simple:
Your video clips should just be long enough to captivate your audience, not bore them to tears. Depending on what course you are offering, the length of your video will vary. However, make sure you do some research to find out how long is too long for your students.
2. Focus on the Point:
Before starting on the core subject, make sure you inform your learners about the goals and objectives of the course. Once you start the presentation, do not deviate from the core message. Your text, audio, and graphics should all be relevant to the subject matter. They should not detract your learners from your main lesson.
3. Know Your Audience:
The tone of your PowerPoint video presentation should match the content of your course. For example, if you are offering a makeup tutorial, your words should be simple. If, however, you are teaching an advanced course on physics or engineering, your language will be technical since your course covers a technical topic.
4. Adding Engagement:
You can turn up the engagement of your videos by adding more interesting elements to the content. For example, you can add YouTube videos, music, and interactive quizzes to ensure your course has the learner’s full attention.
A Meaningful Ending:
When ending your presentation, make sure you leave your learners with a resource that they can take away from the lesson. It could be a simple link to your website, a short ebook as a freebie, or just a few links. This provides a lot of value and creates a lasting impression on your customers.
Frequently Asked Questions on Recording Video
How can I record video online?
There are a few different ways to record videos online. One option is to use a screen-recording program like Camtasia or Snagit. These programs allow you to record your screen and create professional-looking videos.
Another option is to use a webcam to record yourself. This is a good option if you want to record a tutorial or how-to video.
Finally, you can use your smartphone. This is a good option if you’re recording something impromptu or if you want to record video in a format that’s easy to share online.
How can I record video for free?
One free option for recording video is to use a smartphone or tablet. Most devices come with a built-in camera, and there are also many apps available that can be used for recording video. If you already have a smartphone, then you may not need anything else to start recording for free.
How can I record audio and video online?
There are a few different ways you can record audio and video online. One option is to use a screen recording program like Screencast-O-Matic, Camtasia, or Snagit. These programs allow you to record your screen, along with any audio coming in through a microphone. You can then save the recording as a video file and share it online.
Another option is to use a webcam. Most computers come with a built-in webcam, or you can purchase an external webcam that plugs into your computer’s USB port.
Once you have a webcam set up, you can use it to record video by using a program like Skype or Zoom. You can set a webcam up to record audio through a microphone (if you want higher quality audio).
You can record audio separately (or with your video) by using a program like Audacity, Camtasia, or GarageBand. Once you’ve recorded your audio or video, you can save it as a .MPG file and share it online.
What is the best free online video recorder?
There are a number of free online video recorders available. These mostly cater to people using webcams and include Movavi’s Webcam Recorder, Webcamera.io, and Screen Capture.
While you’re looking for the best free online video recorder, consider the following factors:
- Ease of use: Look for a recorder with a user-friendly interface that won’t take hours to learn.
- Quality: The video recorder should produce high-quality recordings. Look for a recorder that offers various quality settings so you can adjust them according to your needs.
- File format: Look for a recorder that can export to different file formats so you can view your recordings on any device.
- Storage: Look for a recorder that offers cloud storage or that can save recordings directly to your hard drive.
How can I record my screen with audio online?
The first thing you’ll need to do is choose a screen recorder or screencast software. There are many options available, but some of the most popular include Screencast-O-Matic, Snagit, and Camtasia.
Nearly all screen recorders will connect up to an external microphone (if you have one) which will make the voice-over higher quality than using the built-in mic on your device.
Once you’ve selected a screen recorder, simply follow the instructions to record your screen. Often, it’s as simple as pressing a ‘record’ button!
Typically, you can record both your screen and your voice-over at the same time. When you’re finished, save your recording and share it online.
Final Words
PowerPoint presentations have come a long way from simple bullet points and stock images. Now, you can benefit from a plethora of impressive designing and editing options that allow you to create even more engaging and informative content for your online courses, tutorials, or webinars. In addition, there are plenty of tools available that allow you to record these presentations so that they are accessed and viewed anywhere, at any time.
Making excellent video PowerPoint presentations is now more important than ever. There is an increasing number of reasons to believe that more and more courses, classes, conferences, and events will be hosted through virtual content in the future.
As video presentations grow in popularity, learners will demand a higher quality of content. Hence, it is now more important than ever to produce sleek, professional quality, captivating PowerPoint presentations to establish yourself as an industry leader in the world of online courses.
