Our content is reader supported, which means when you buy from links you click on, we may earn a commission.
Learn How to Use LifterLMS from the Ultimate LifterLMS Tutorial
Please note: I’m part of the LifterLMS Affiliate Program which means I’ll receive a commission if you end up buying LifterLMS through one of my links. There’s no cost to you. I only review products I’ve used and believe could be useful to my readers.
A Little About This LifterLMS Tutorial
LifterLMS is a WordPress LMS plugin. In case you’re not sure what an LMS is, it stands for learning management system and allows you to deploy an online course on your website. An LMS will help you set-up the content, manage users, and track their results.
I used the 30-day demo for this LifterLMS review. LifterLMS installed the plugin on a subdomain on their servers for this demo. In full disclosure, I have not run an online course business with LifterLMS. I have however tried it out because I considered using this plugin for one of my courses.
You can get a 30-day demo for $1. This demo does not provide you with access to the plugin to install on your own site. It’s access to a demo area that’s all set-up for you (this actually makes trying it out a lot easier).
This LifterLMS tutorial and the LifterLMS review are both based on my experience using their 30-day demo. I do think this tutorial will help you figure out if LifterLMS is right for you and if you do decide to buy it, you’ll be able to get your online course up and running much quicker after reviewing this.
The LifterLMS demo is a WordPress install. But it’s not just the LifterLMS plugin that’s installed, it’s a dummy site that already has courses pre-programmed into it. That way you can see exactly how this LMS plugin works.
So it’s actually a great demo. Otherwise, you would have to add all this in yourself to be able to see what it looks like.
Table of Contents
Tour of What the LifterLMS Plugin Can Create
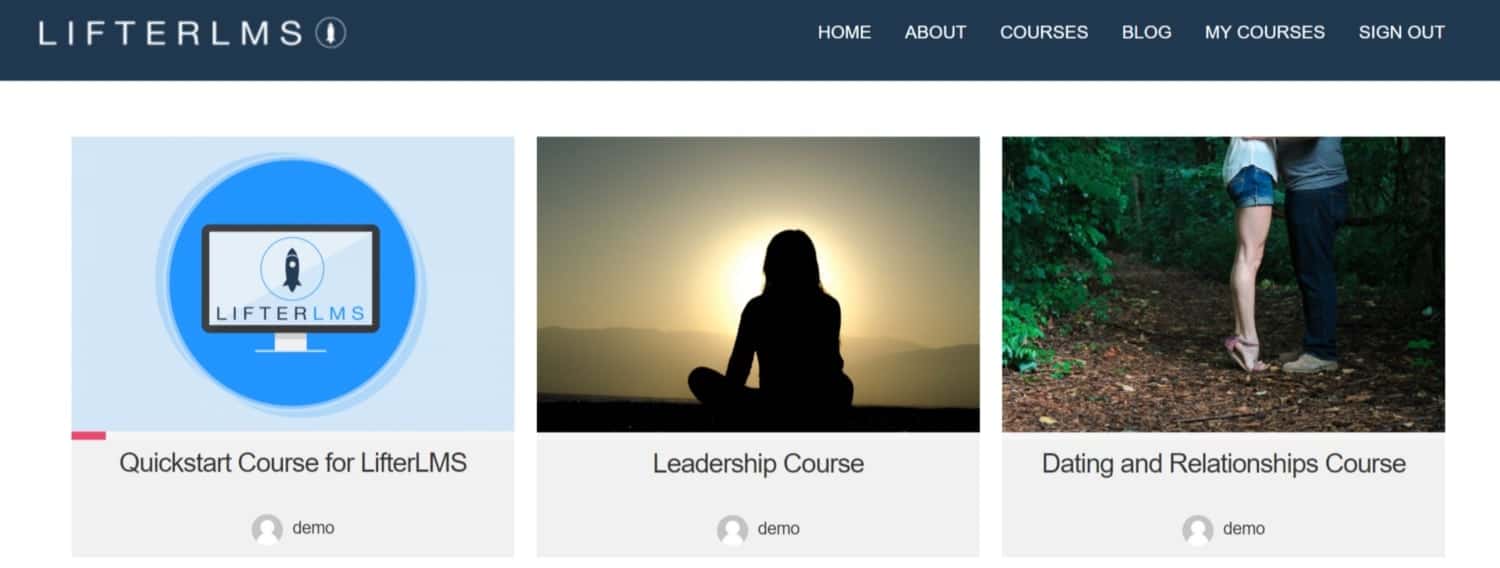
Here’s an example of what your LifterLMS course page will look like:

This is like a catalog of your courses.
When you click on an example course, as the first course in the screenshot above, you’ll be taken to the sales page for that specific course:
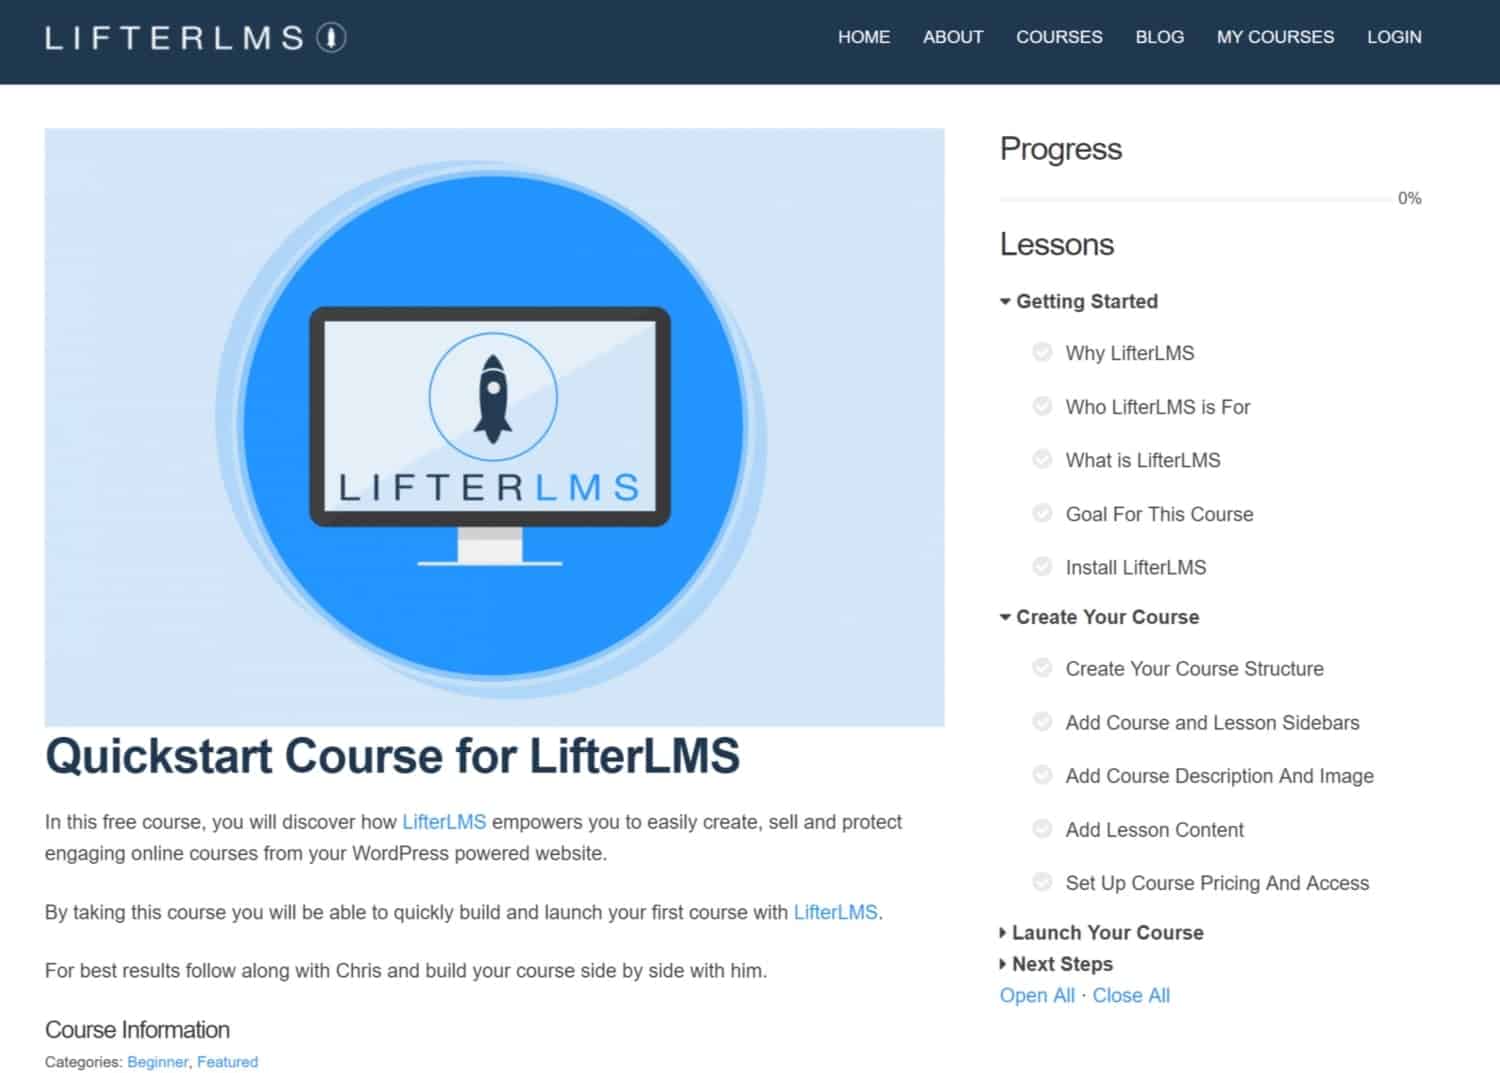
This page looks ultra-professional. I like the layout with the image and then over to the right is the breakdown of the course lessons. You can click to open and close the specific lessons within each model. Then under the image, you can add in your course description.
Underneath that is the area where you can talk about the course instructor.
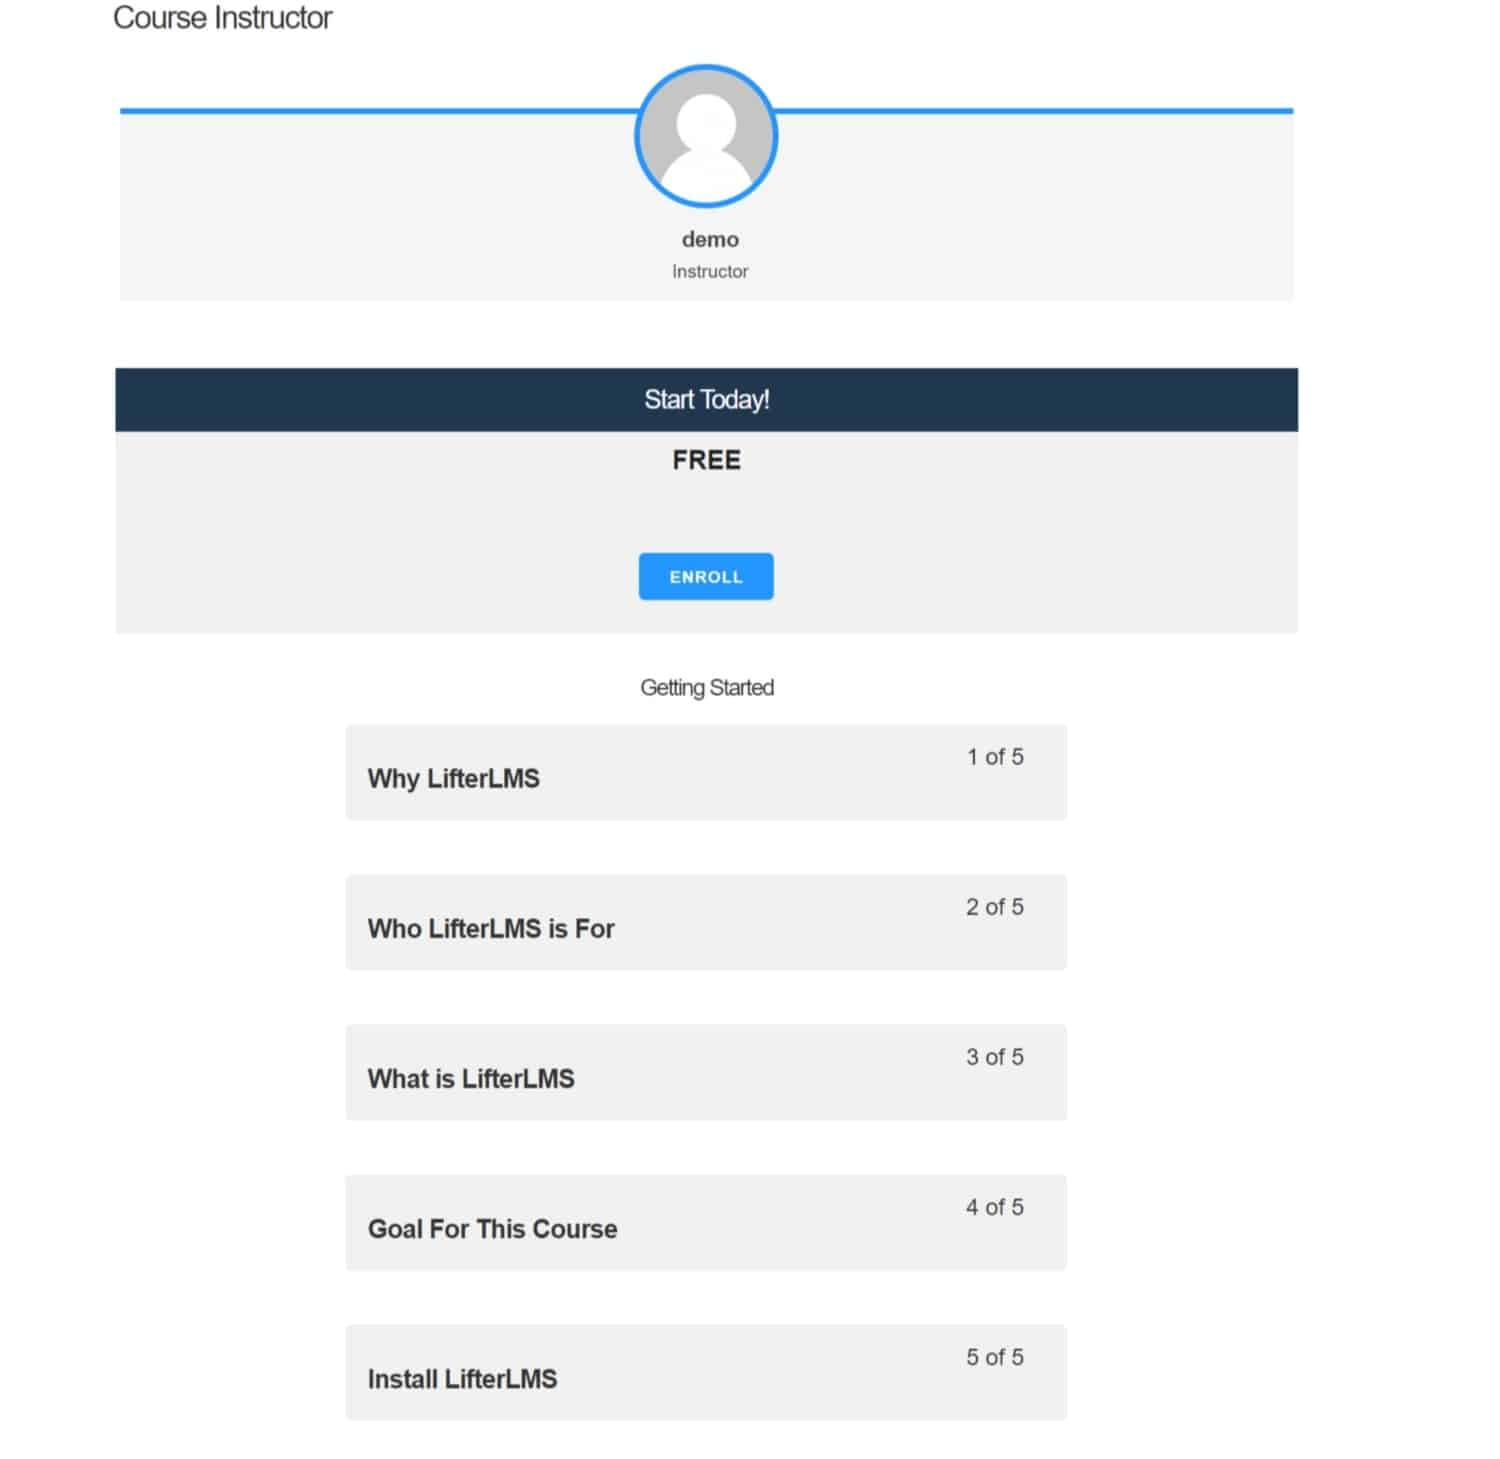
You can add in an image there for the instructor.
Then there’s also a box with the price and an enroll button.
After clicking on enroll, you’ll be taken to a sign-up page on your site that looks like this:
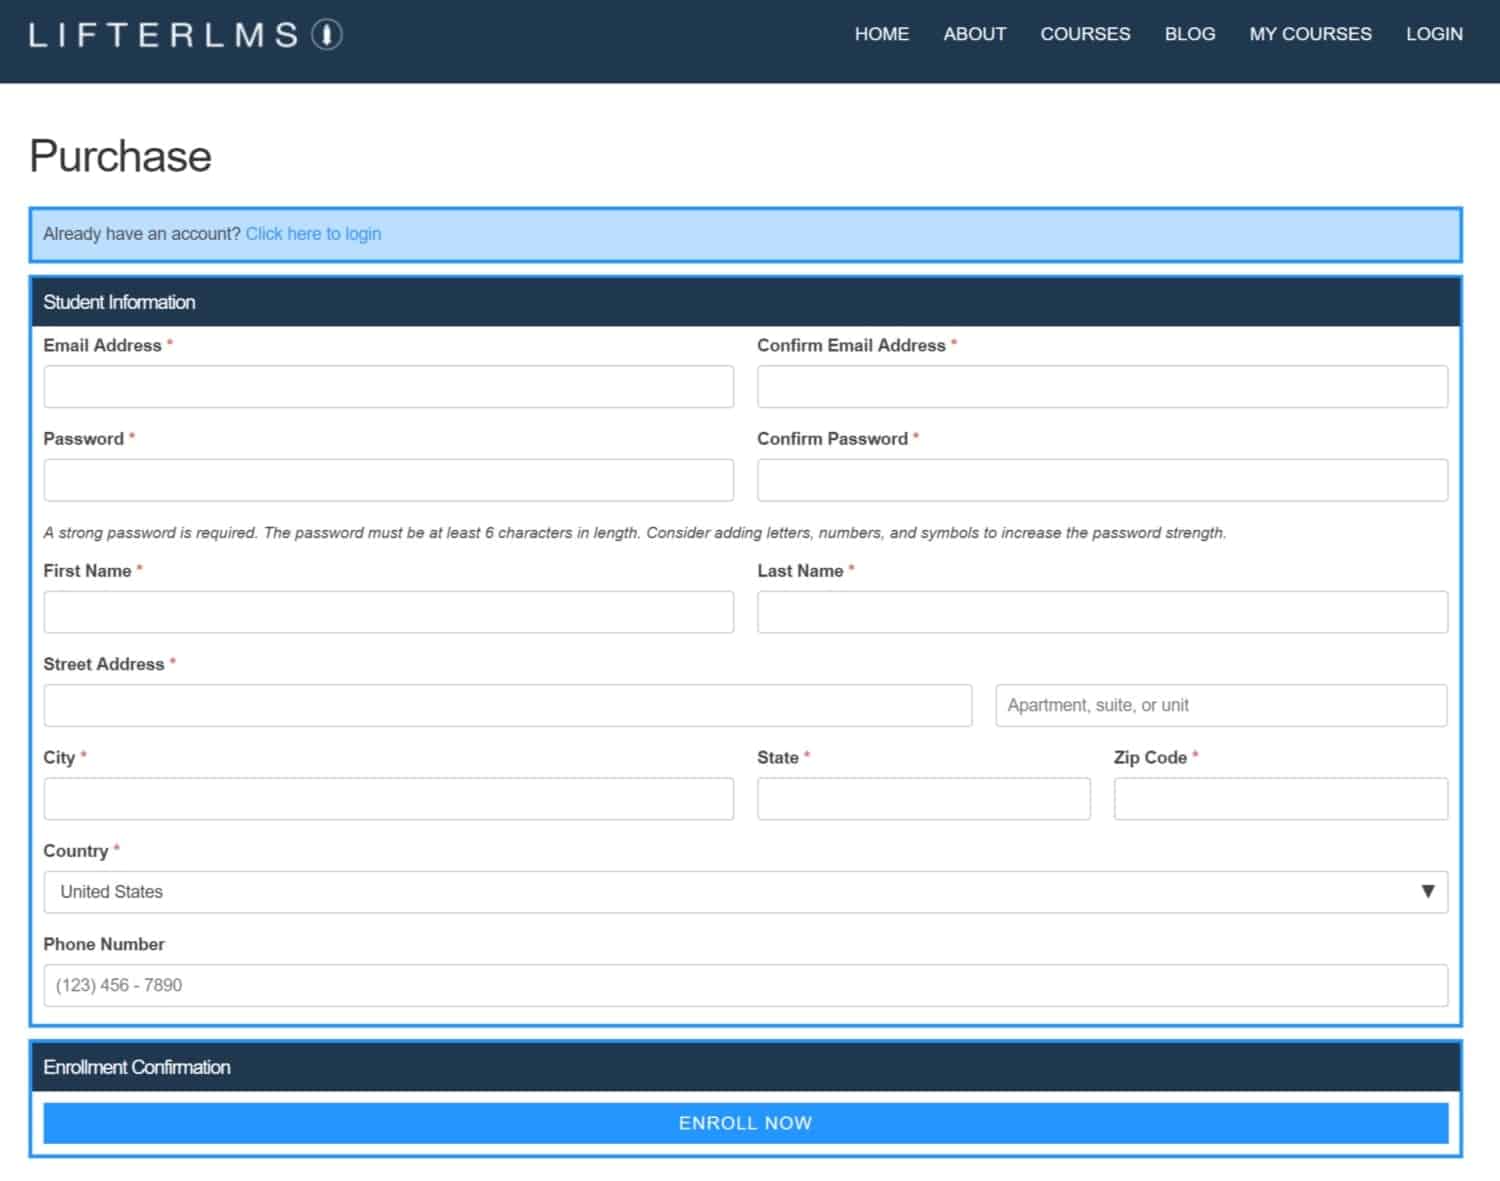
It’s a little wide but looks pretty good otherwise. Everything is all on one page. With this one there’s no credit card information needed since it’s a free course.
In addition, you can actually dial back the information you ask for with a free sign-up. You may just want your learner’s name and email address and there’s a way to do this (you’ll see as we keep going).
Inside a LifterLMS Course
I was taken right to the course page once I entered in my sign-up information, which was nice. There were no further hoops to jump through. It logged me in automatically and even showed me a little success box (it disappeared before I could grab it in the screenshot).
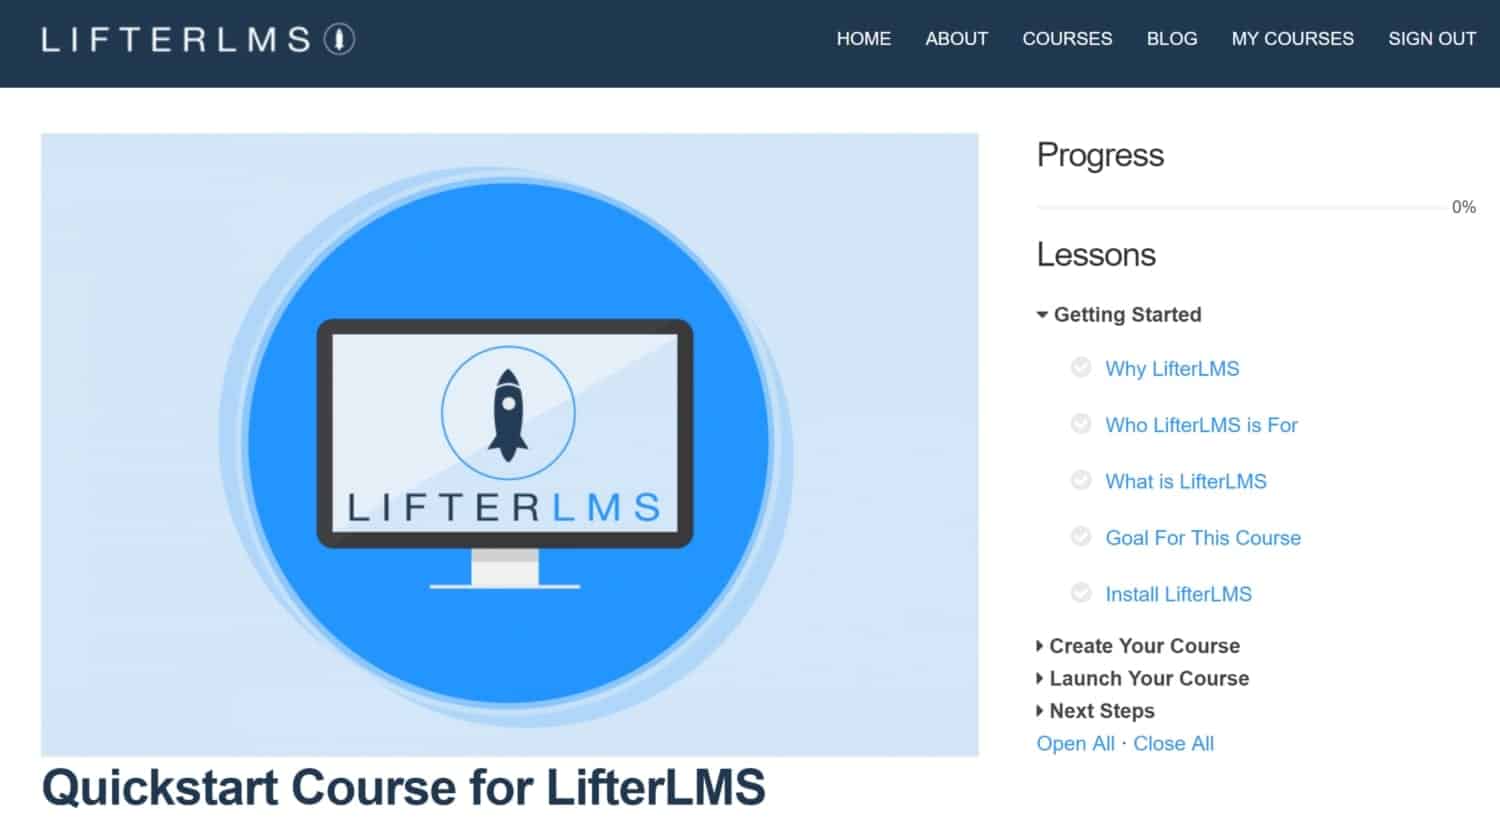
Since I was logged in immediately, I was able to click on the menu on the right and start with the first lesson, ‘Why LifterLMS?’. When I clicked on that lesson, I was taken here where I could watch the video and start learning.

That page looks great. It’s got the video embedded in it as well as the same menu so you don’t get lost. Then there are also Lesson Resources. There’s also a button to mark the lesson as complete.
When I mark it off, it crosses out the ‘Why LifterLMS?’ text in the menu as shown:
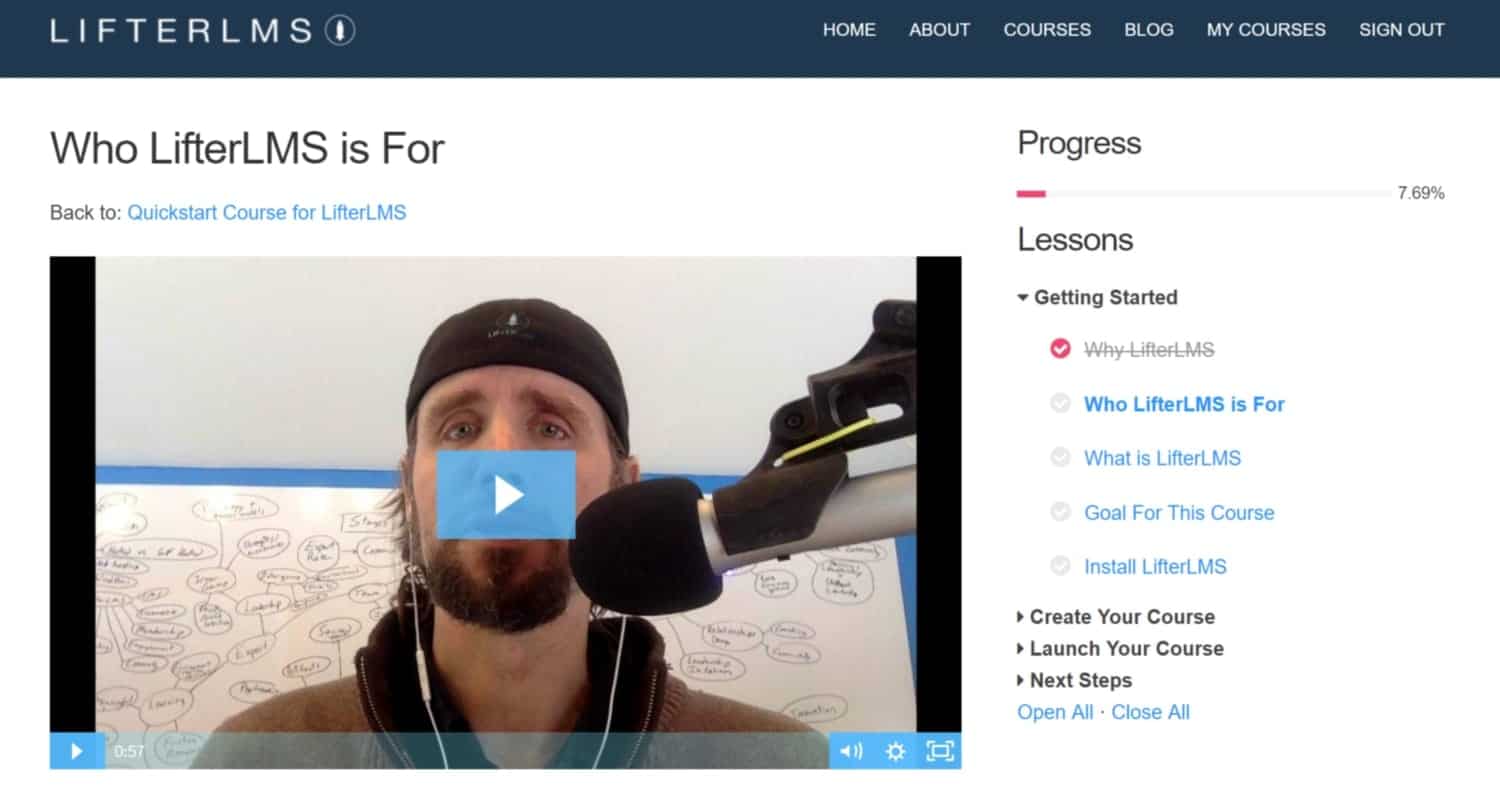
The progress bar also moves forward a little which is a great feature.
Under the ‘Mark Complete’ button there’s also a section where you can see the previous lesson and the next lesson:
This is also a nice touch. Everything really looks great.
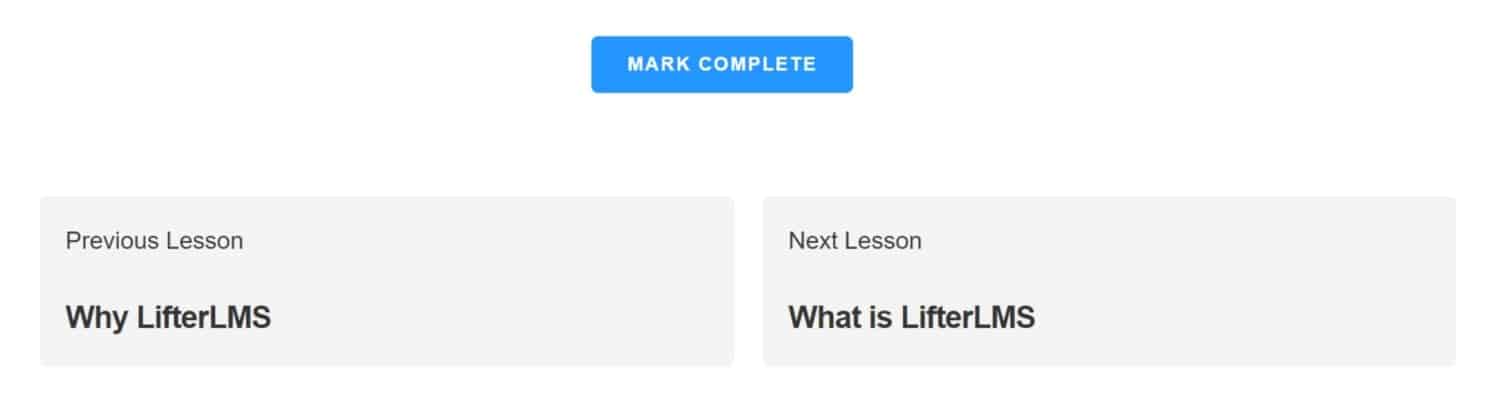
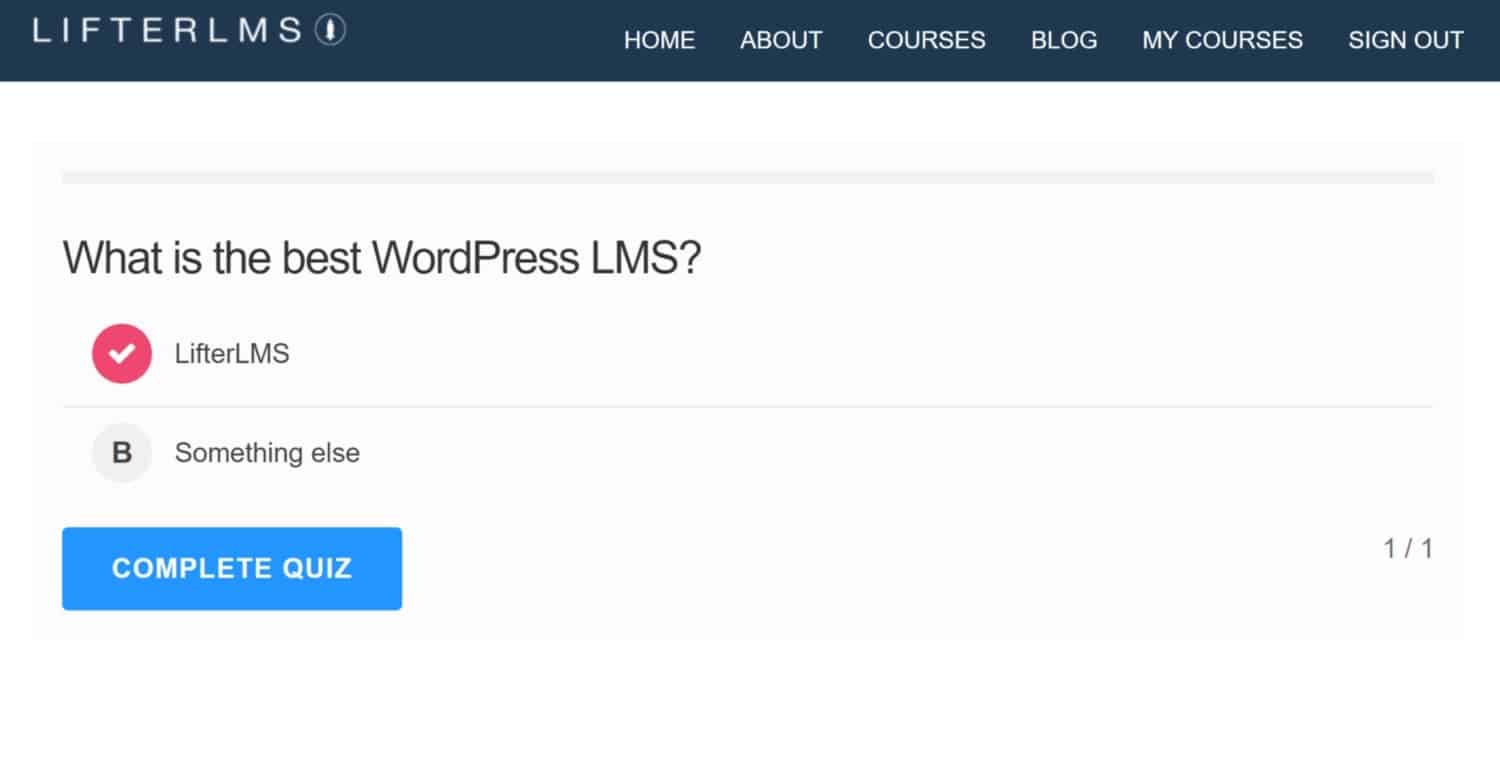
Quizzing Your Students With LifterLMS
You can also quiz your students. Within this course, LifterLMS offers a short quiz so you can see what a quiz looks like. Here’s a screenshot of the quiz:
When the quiz is complete, you’re taken to a page with your score:
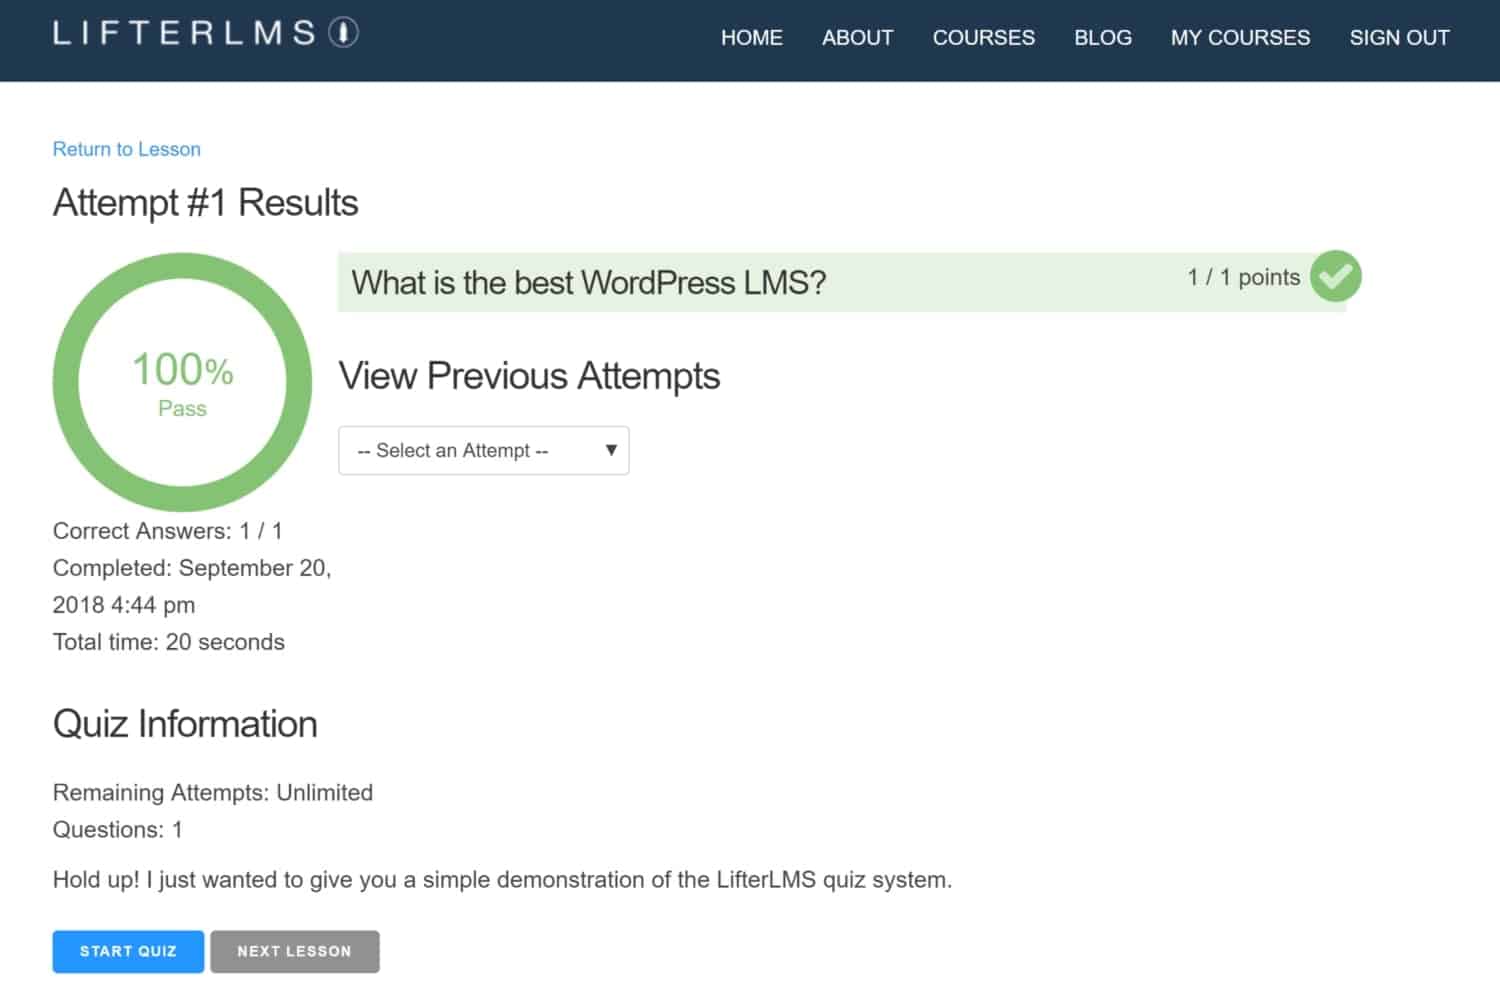
There’s a nice graphic on this page as well as some quiz information. I think it really looks great!
LifterLMS Engagements
In addition to quizzes, you can also set-up achievements and certificates for your learners. In this screenshot I’m logged in as a learner who has visited the certificates page:
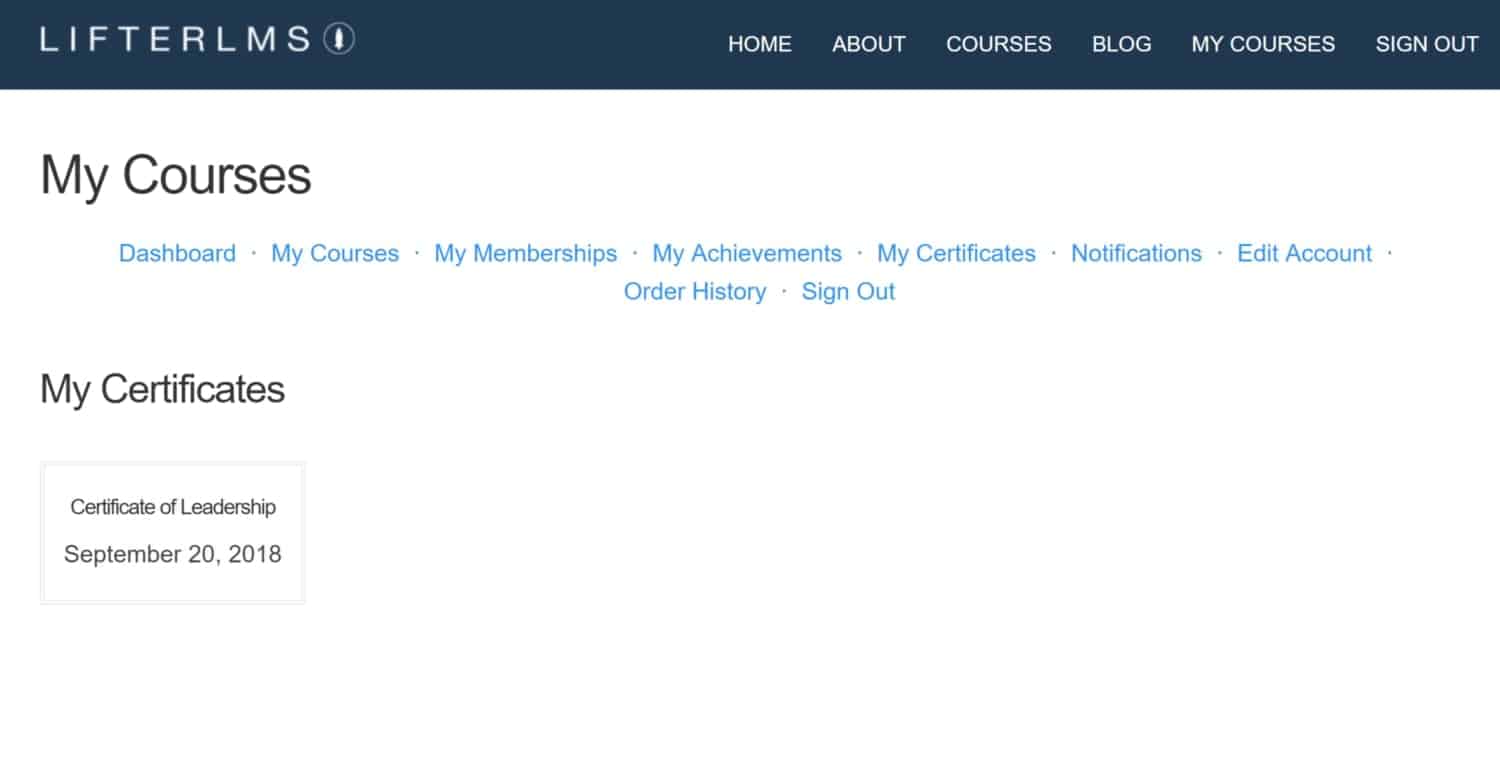
As you can see, there’s a certificate in there.
LifterLMS will also display messages as you’re working through a course. It’s a nice way to get some engagement with your learners even when you’re not actually online with them. Otherwise, if there’s no acknowledgment of completion, scoring well on a quiz or test or finishing a course can seem underwhelming.
You can also set up achievements for your learners as well. This might be when they pass a quiz while a certificate could be for completing a course.
LifterLMS Student Dashboard
You can go to the ‘My Courses’ link on the site and check-out all your courses.
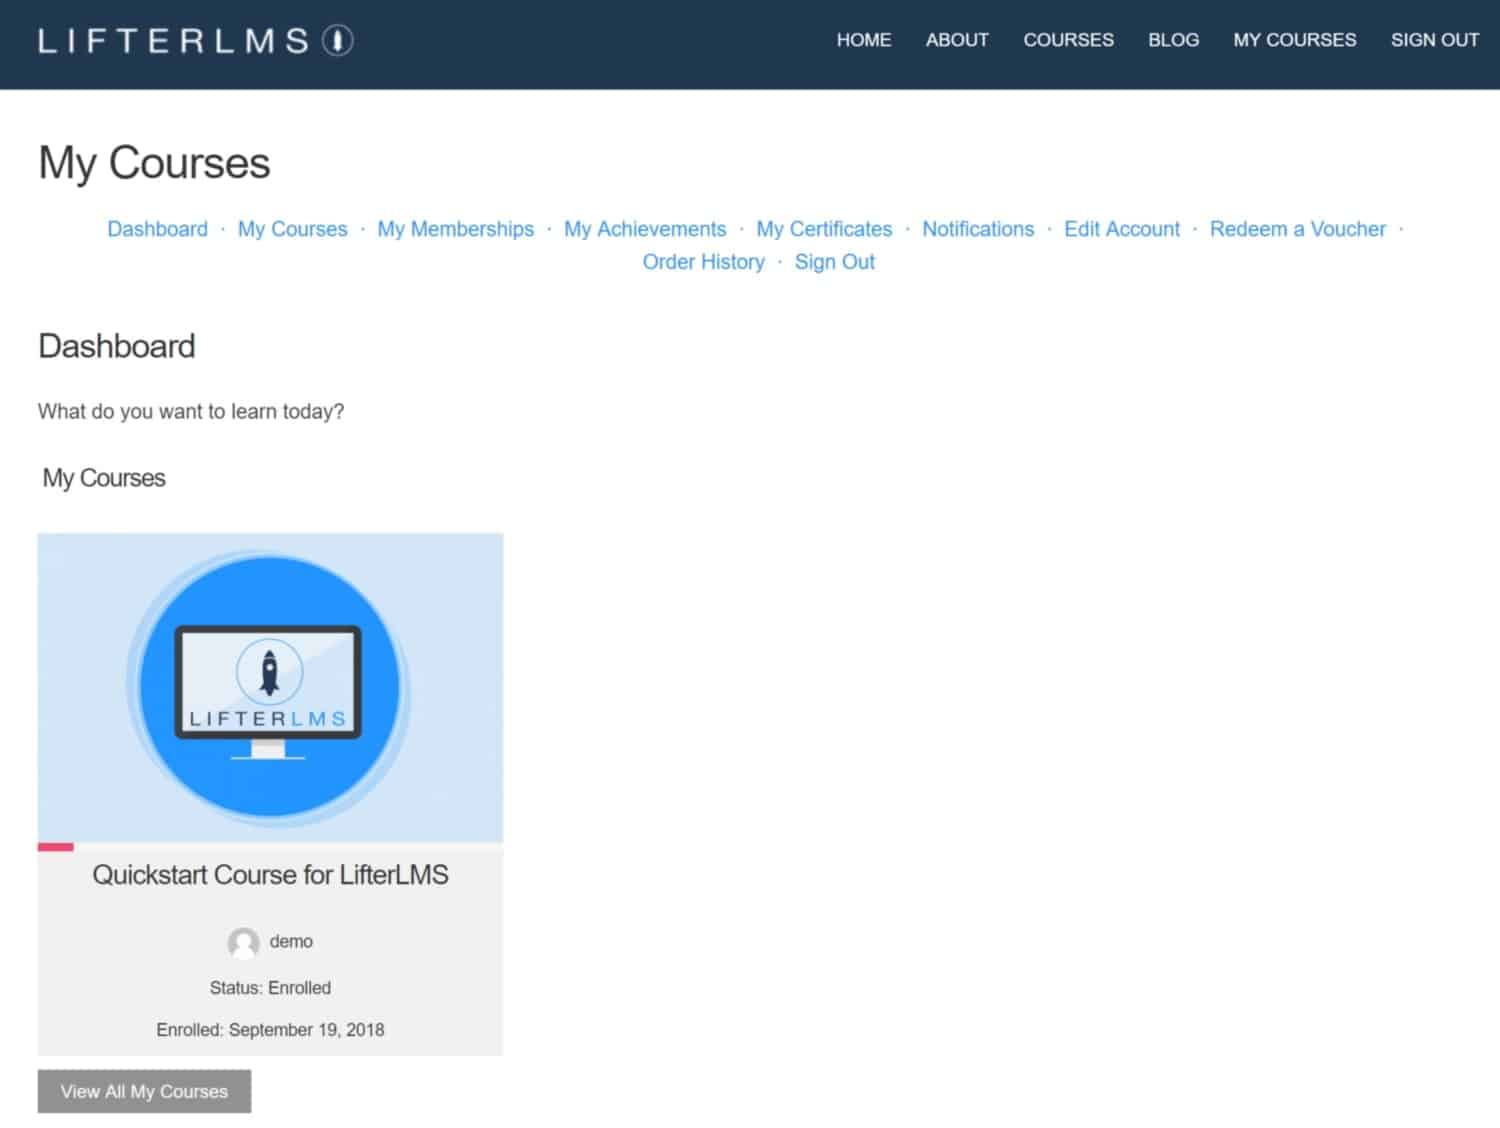
This shows you all the courses you’re enrolled in.
I really liked the red progress bar there that shows how far you’ve made it through that particular course. So the plugin is keeping track of your progress and displaying it to you in several places in the course.
If you’re a logged-in student and you go up to Courses, you’ll see the course page again. This time any course you’re enrolled in will show you the progress you’ve made through that particular course:
See the little red progress bar by the Quickstart Course for LifterLMS? It’s a nice feature!
Social Learning is Possible
You can also set-up social learning (this is an add-on with a premium price) so that your users will each have a social page and can connect with each other within your course and on social sites like Facebook. Here’s what a social profile page looks like:
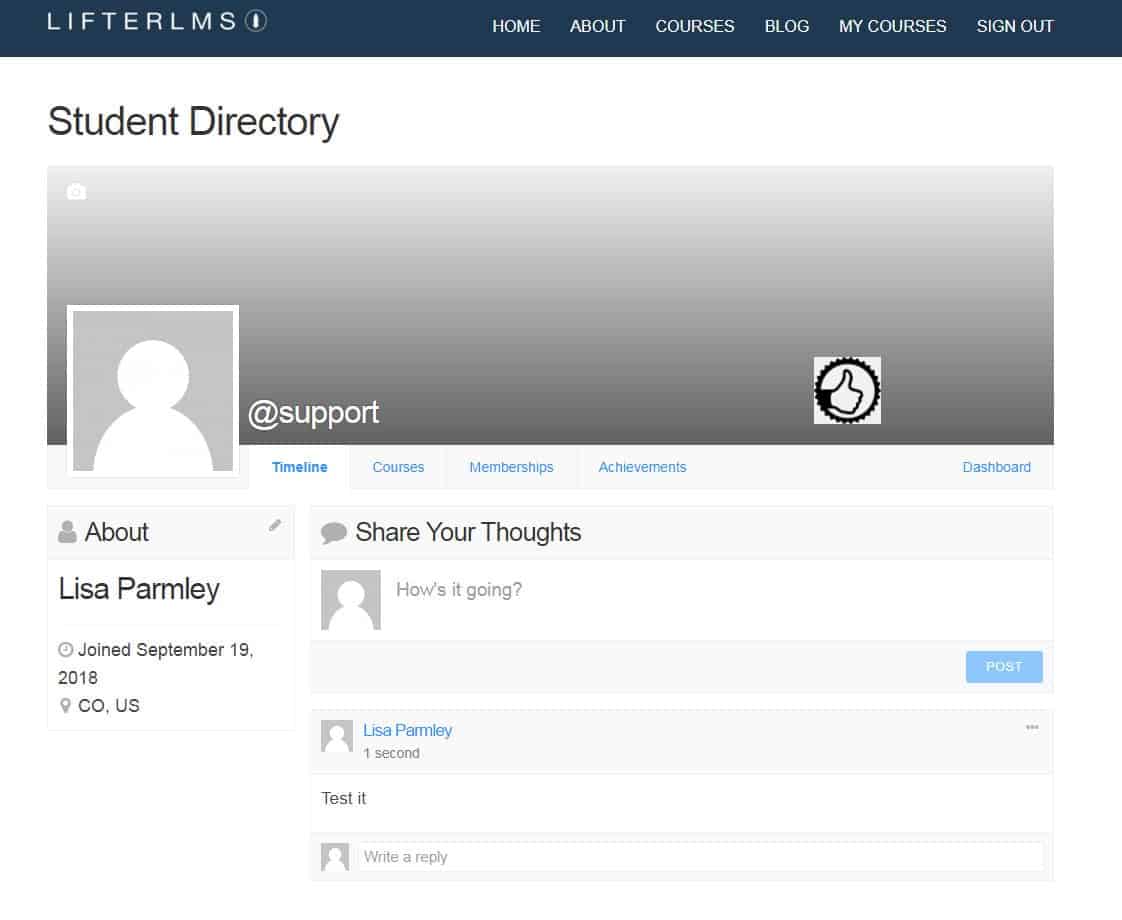
If you enable this add-on then users can customize their profile and background images. They’ll also be able to show off their achievements here (you can see I’ve got an achievement, which is indicated by the thumb’s up on my banner). Your learners will be able to share their thoughts and review their courses, memberships, and achievements. It’s a nice feature!
From the standpoint of a user, LifterLMS is very nice. Everything is organized well and it’s got a lot of features learners will appreciate.
Paid Course Example
Now if you’ve got a paid course, you can see how that looks by trying out the Leadership course (it was the second one on the courses page). The Leadership course has a sales page with all the same information as on the free course; a place for an image, description, course instructor bio, and then there’s a paid box that looks like this:
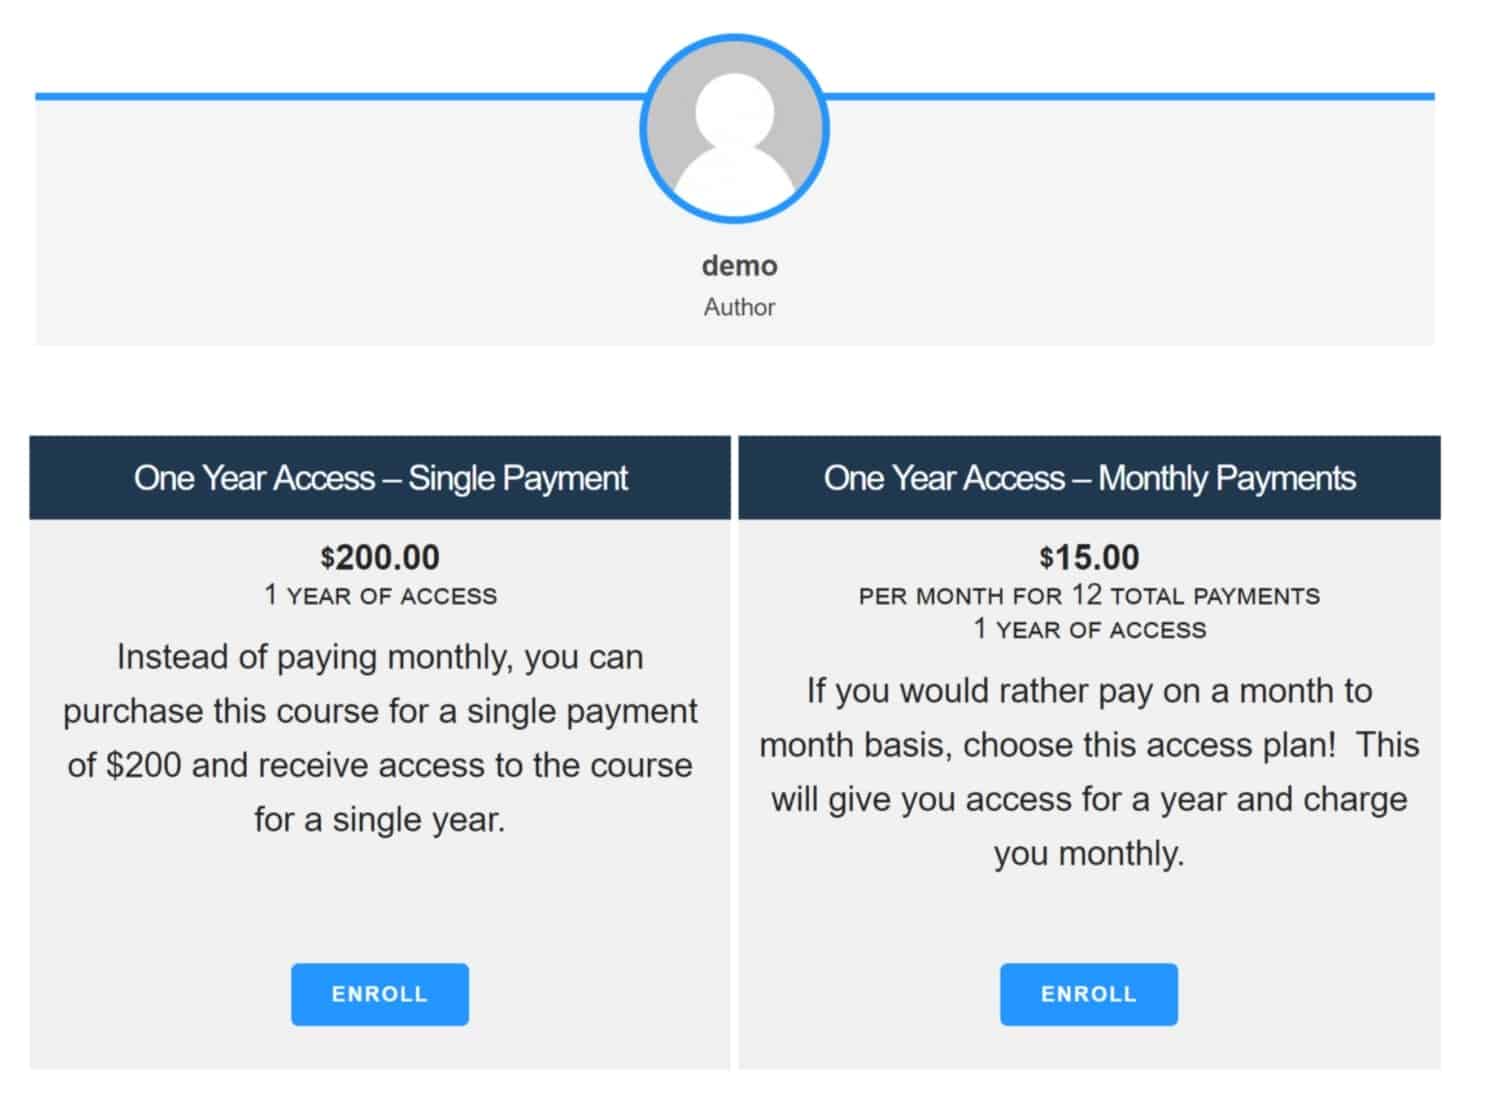
It looks great. I like how you can offer the course with different payment plans like making a one-time payment or making monthly payments.
Login Page
If someone has already signed up for a course and wants to log in, they’ll be taken to this page here:
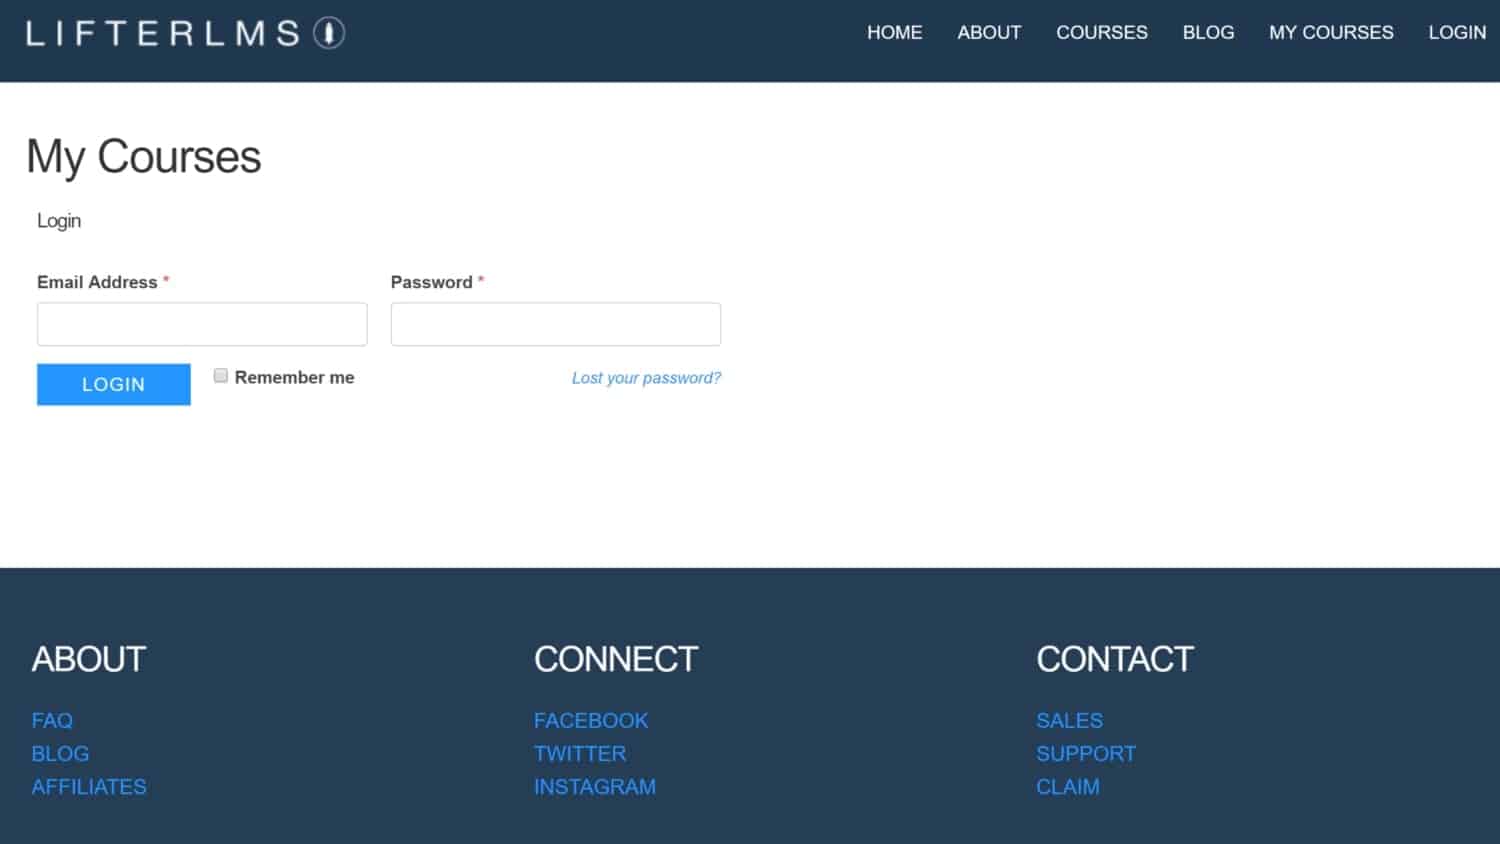
It looks professional and simple. It also has a ‘Lost your password’ link where a student can retrieve their password. In addition, there’s a ‘Remember me’ checkbox so students don’t have to continually enter their login information.
Each page I’ve shown you have the same header and footer which is a nice feature. This is something that isn’t always possible with a cloud LMS. It’s definitely a benefit of hosting your own LMS.
LifterLMS Admin
Since LifterLMS is a WordPress plugin you’ll navigate a typical WordPress site in the admin.
Once you log in, you’ll see all the standard WordPress links like your Dashboard, Posts, Media, and Pages. You can add and edit posts and pages right from the admin just like you would normally do.
In fact, if you install LifterLMS to a preexisting WordPress site, then nothing will change to your visitors. All the changes will be within your WordPress admin until you start creating course sales pages.
The LifterLMS link is after the Comments link. That area of the WordPress admin will be new as well as the Courses, Memberships, the Engagements link, Orders, and Private Posts links. This section that you’ll be most interested in:
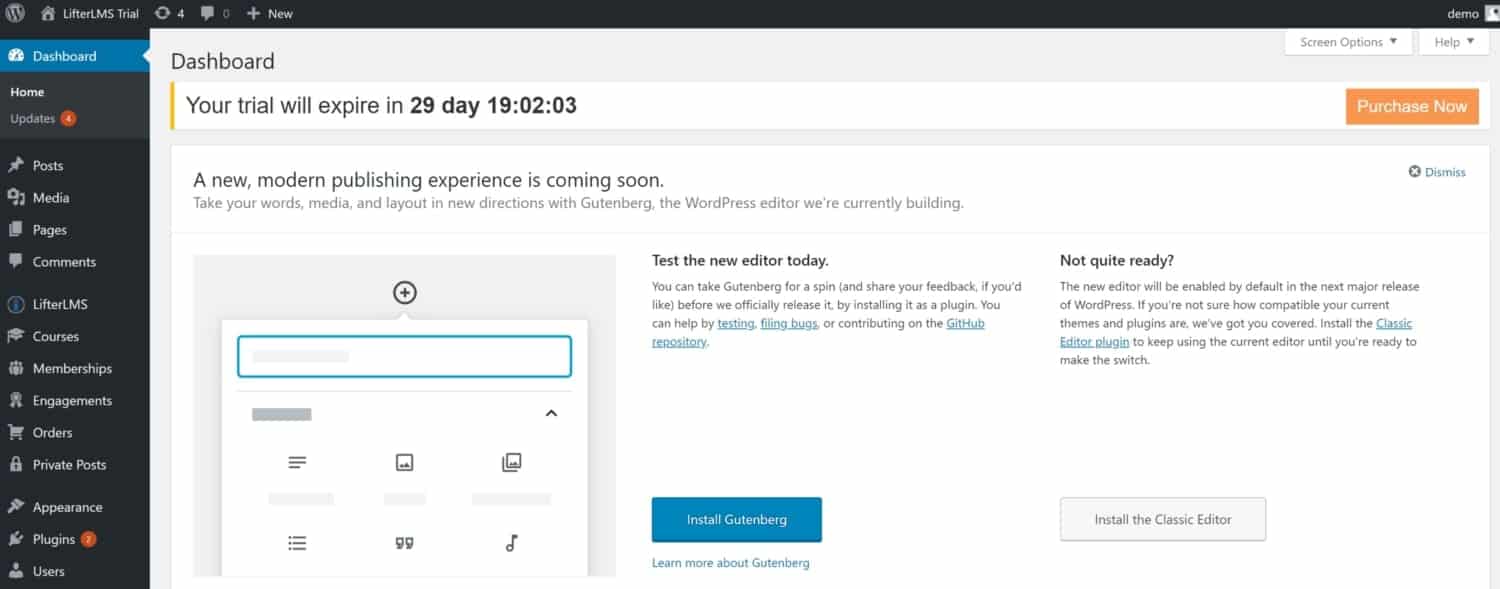
Since I’m using the trial for this LifterLMS tutorial, the ‘Your trial will expire in … days’ banner will be in almost every screenshot. It displays how long you have left along with a Purchase button. Even though that’s a little annoying, I like the $1 trial. I didn’t have to install the plugin myself and instead just got everything set-up.
This $ trial is actually really handy if you have a WordPress site already running with visitors coming to it. You may not want to install a robust plugin like this on a live site until you know for sure you’re going to use it.
I would highly suggest putting your site in a ‘sandbox area’ (one where it’s not live) when you do get around to installing LifterLMS. My host, Kinsta offers this. Within the Kinsta control panel, I can set up a staging environment (or the sandbox), where it’s not live. I can configure it exactly the way I want it, then push it to live when I’m sure it’s all ready for the world to see.
LifterLMS
Clicking on the LifterLMS link in your menu takes you to the settings page first.
Settings
The settings page is the default page when you click on LifterLMS. There are several tabs on this page that we’ll go through next.
General
Clicking on the Settings tab takes you to the General settings page right away. This page shows you the number of enrollments and registrations you’ve had this week, the sales, and the number of lessons your learners have completed.
LifterLMS also shows you the most popular add-ons, courses, and resources their company offers here as well.

Courses
Settings is a big section. You’ll be presented with 8 tabs running across the top of the settings pages. Courses are the second tab.
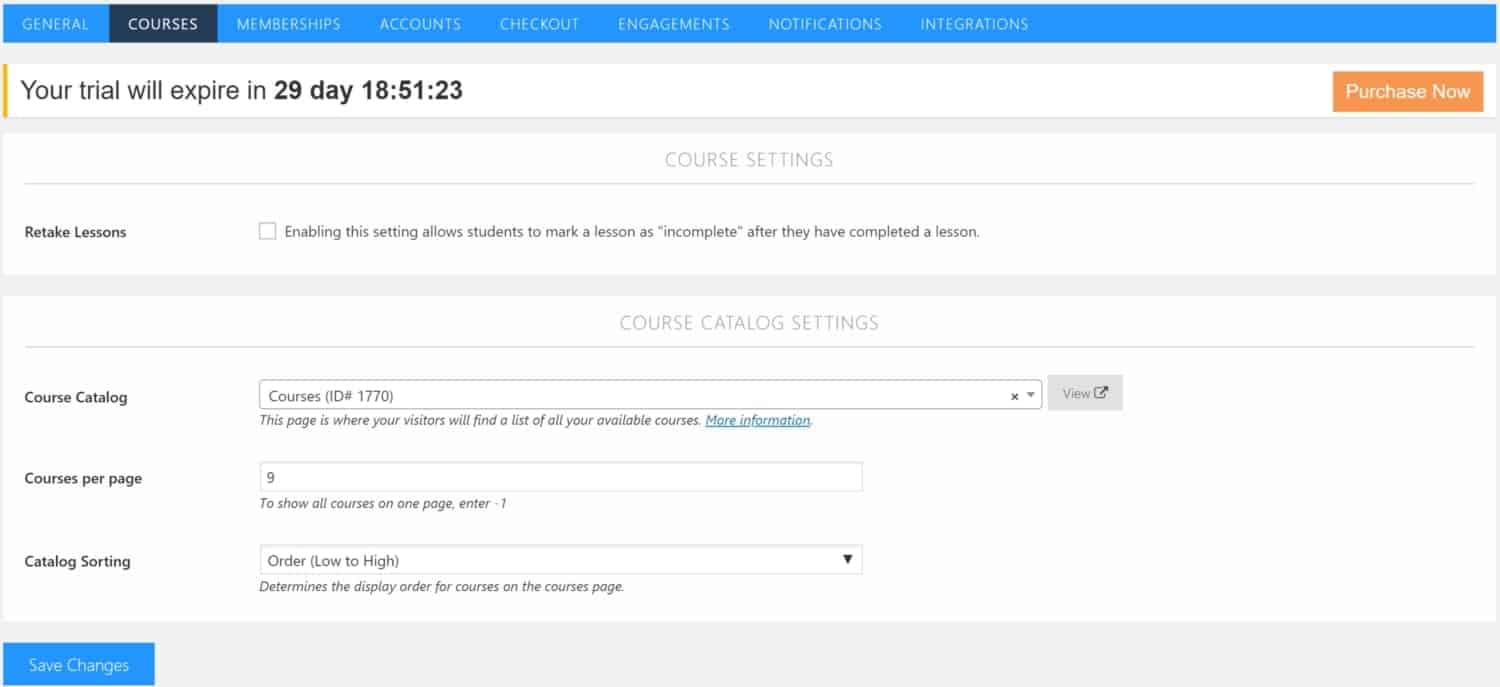
The Courses page allows you to configure some global settings like allowing students to mark a lesson as ‘incomplete’ after they have completed a lesson. That way they can retake lessons.
You can also set the course catalog page. This is the page where your students will end up when they click on the Courses link in your main menu.
In addition, you can also set how many courses you’d like to display per page and you can re-organize the courses. You can choose from alphabetically or most recently uploaded courses to name a few.
Memberships
The memberships tab allows you to restrict your site by membership level. This means you can allow access to the site only to users who have a specific membership level. They’ll be able to view and purchase a membership level right from your site. If you have a collection of courses and would like your learners to gain access to all (or a portion) of them depending on their membership level, you can do that from this screen.
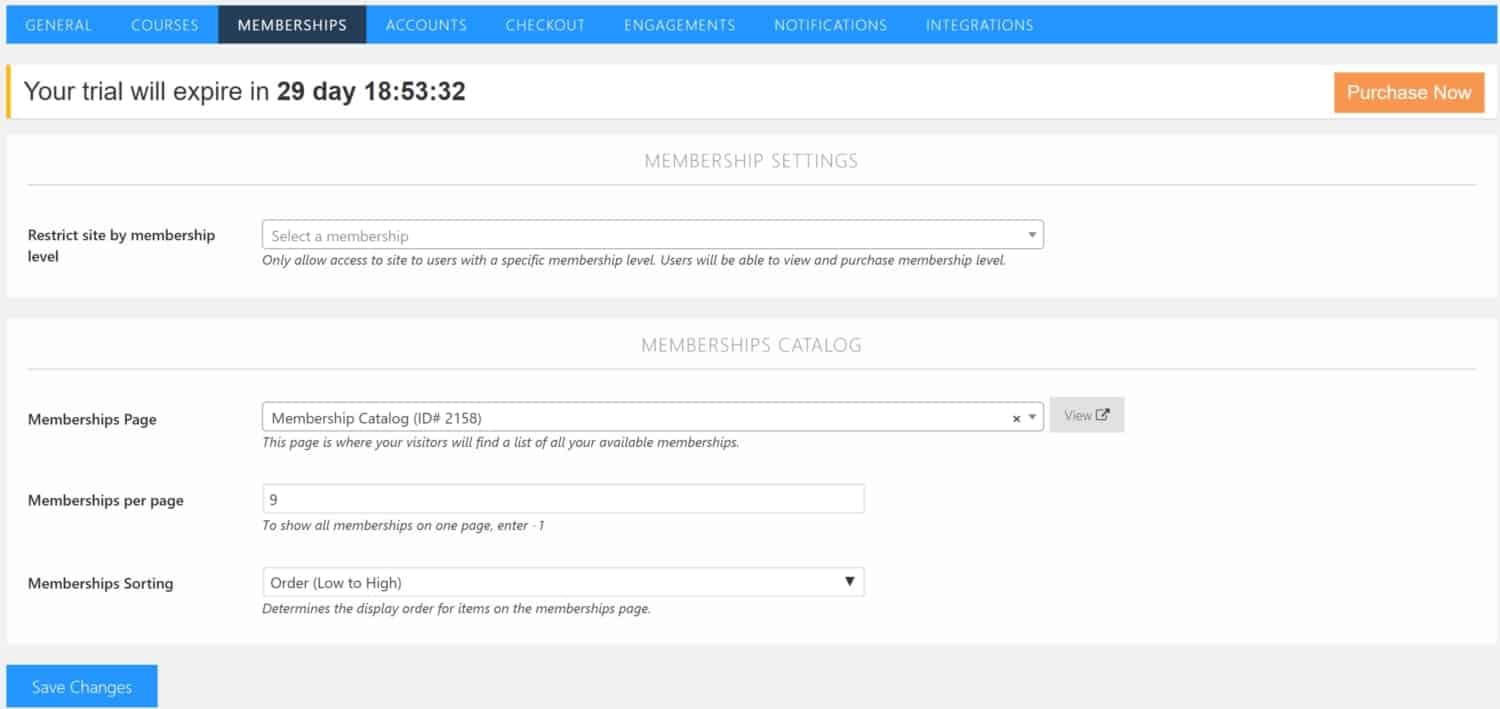
Just like with courses, you can select which page will serve as your membership catalog page as well as how many memberships to show per page and how you want them sorted.
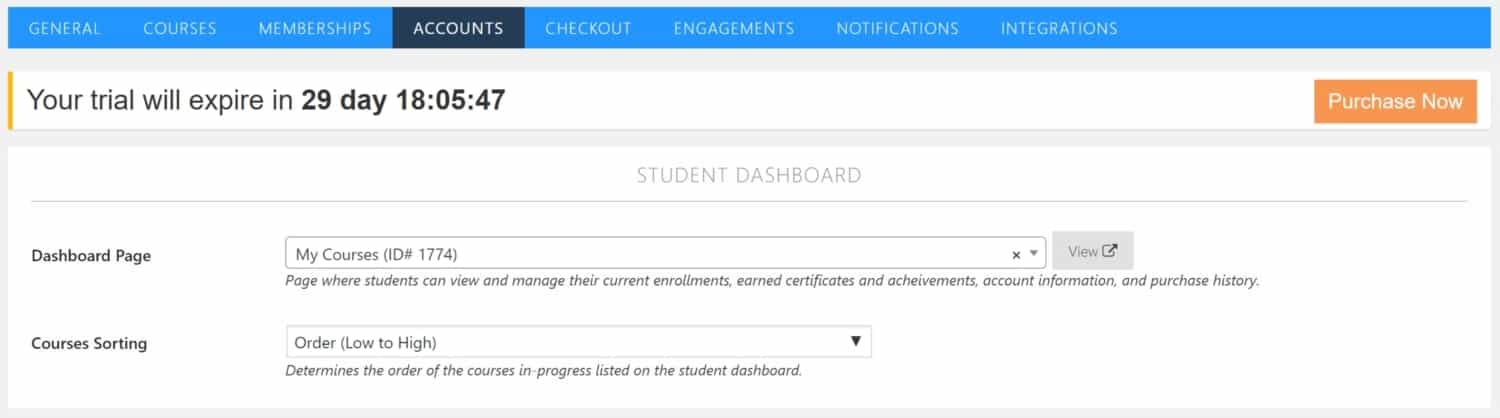
Accounts
The accounts tab has quite a bit to it. The dashboard page will be shown to logged-in users. You can customize it here and select how you’ll order your courses.
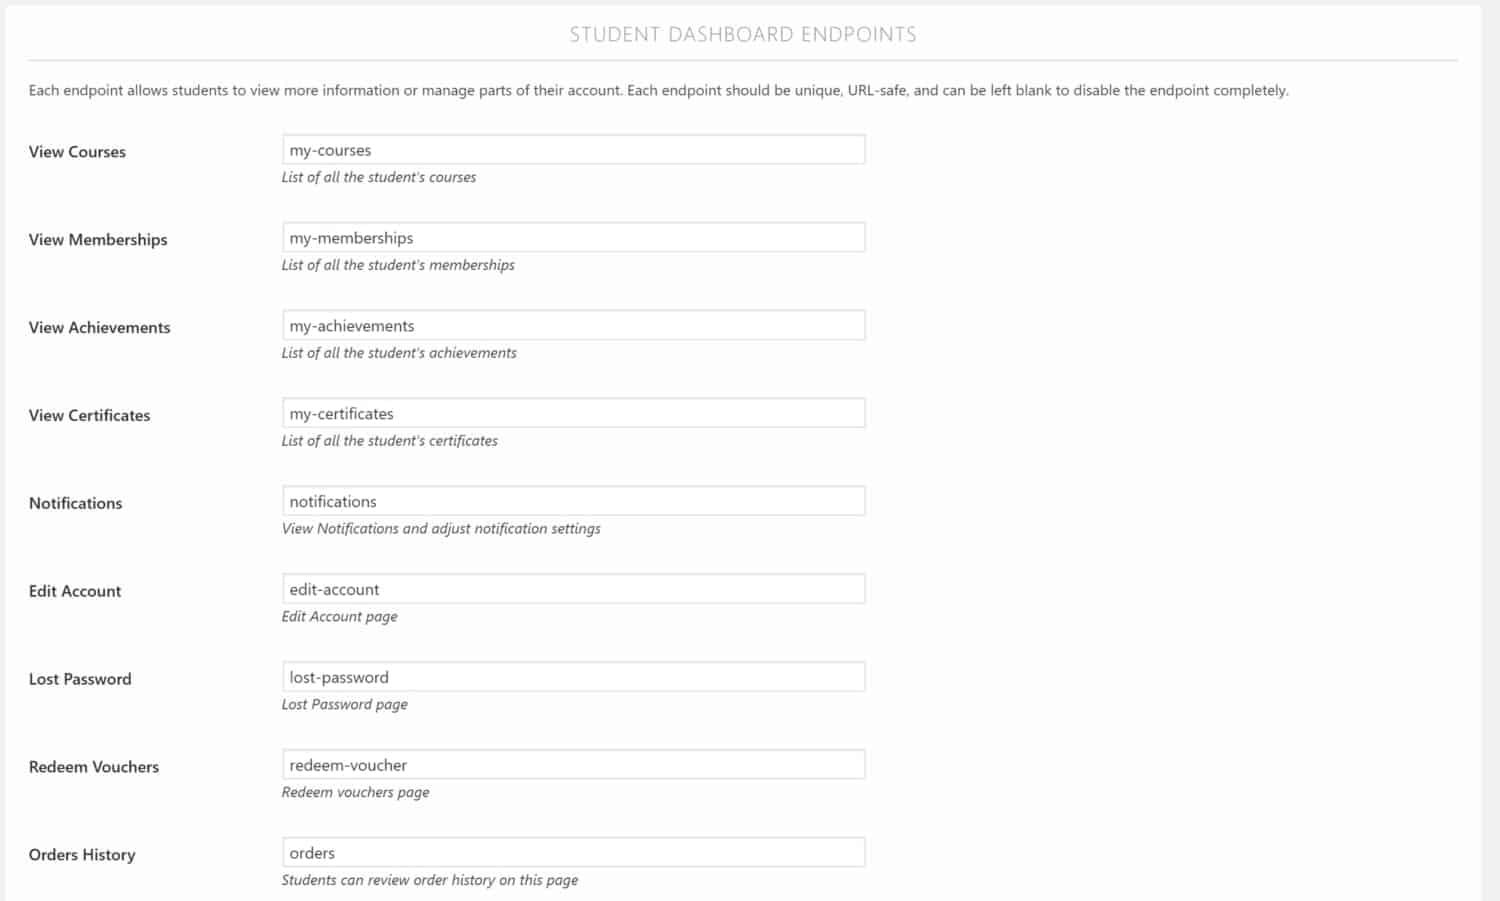
Student Dashboard Endpoints
Then you can select Student Dashboard Endpoints. These endpoints are what shows up on their Dashboard. You can allow them to view the courses, memberships, achievements, certificates, notifications, edit their account, retrieve their password, redeem vouchers, or view their order history.
I deleted some of the text in these; like the lost password and redeem vouchers, and those menu items were no longer on my Dashboard page. So you can decide how many of these endpoints you want to allow to your students.
User information options
There’s a lot of settings you can adjust here to make your course exactly the way you want it. I’ll just go through some of the most relevant options (the stuff I was most interested in).
You can disable usernames and the system will stop allowing your users to choose their own and will instead enable them to login with their email address. This is great because your learners will have less to remember. You can make things as easy on them as possible (which I think is a good idea).
Next, you can set the password strength. I actually signed up for the free course while this was enabled and it sucked! I would have given up if I were a real student. So I suggest not marking this checkbox or at the very least leave it marked, but lower the required password strength down to weak or medium.
Otherwise, you are asking your users to come up with very complex passwords and even worse, they have to match it. This will be difficult for most of them.
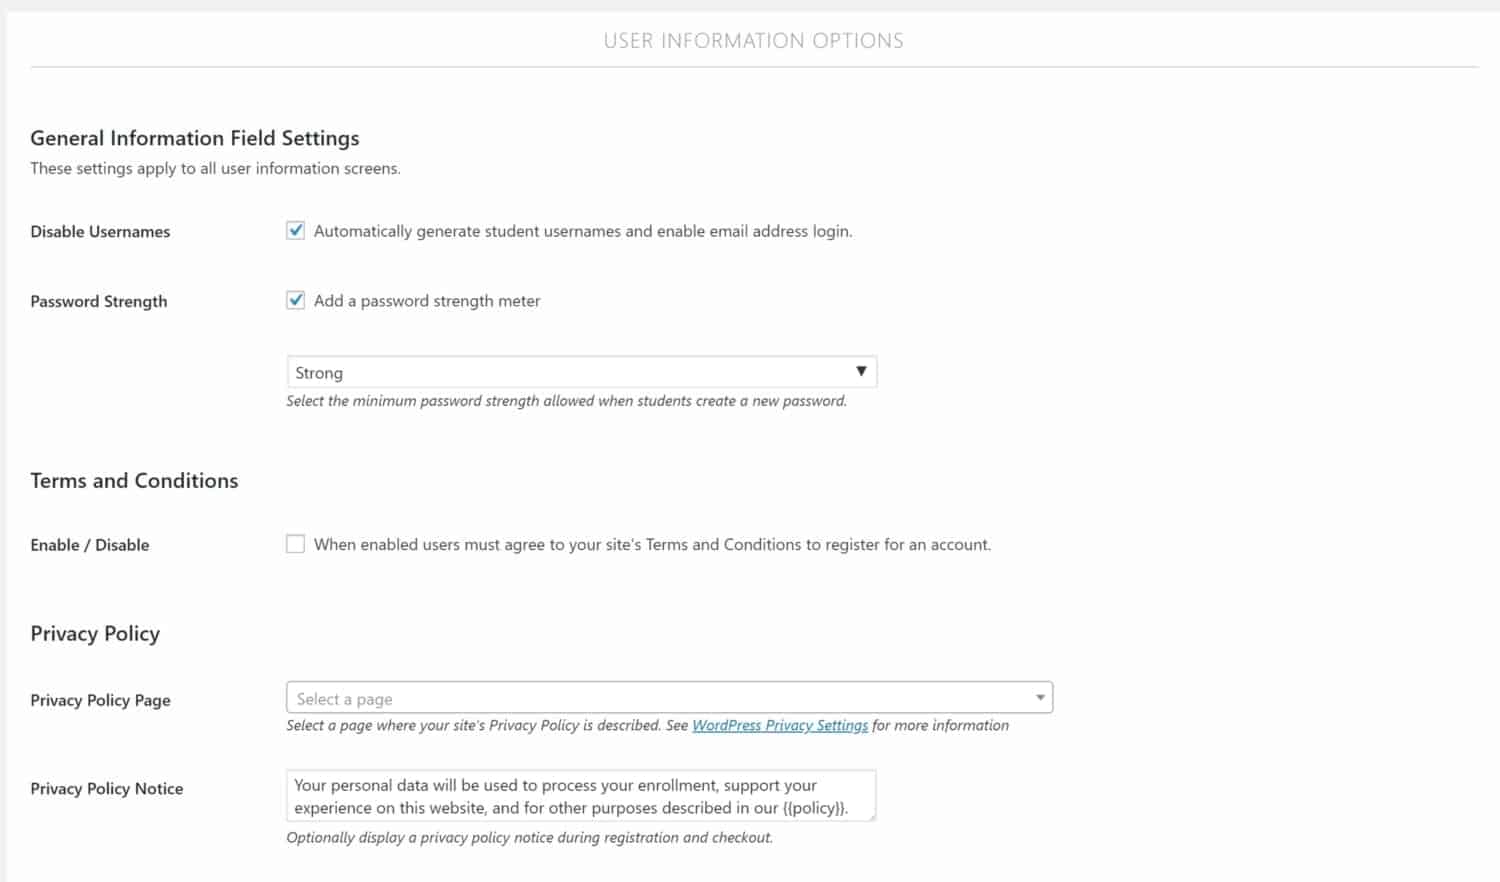
This next part deals with Terms and Conditions and your Privacy Policy. You can configure LifterLMS to only allow users who agree to accept your Terms and Conditions to enroll in your courses. If they don’t accept, they cannot enroll.
You can also select a Privacy Policy page and decide whether you want to display a Privacy Policy notice at registration and check out. It’s nice to have these as options!
Account Erasure Requests
This allows you to wipe all your user’s data.
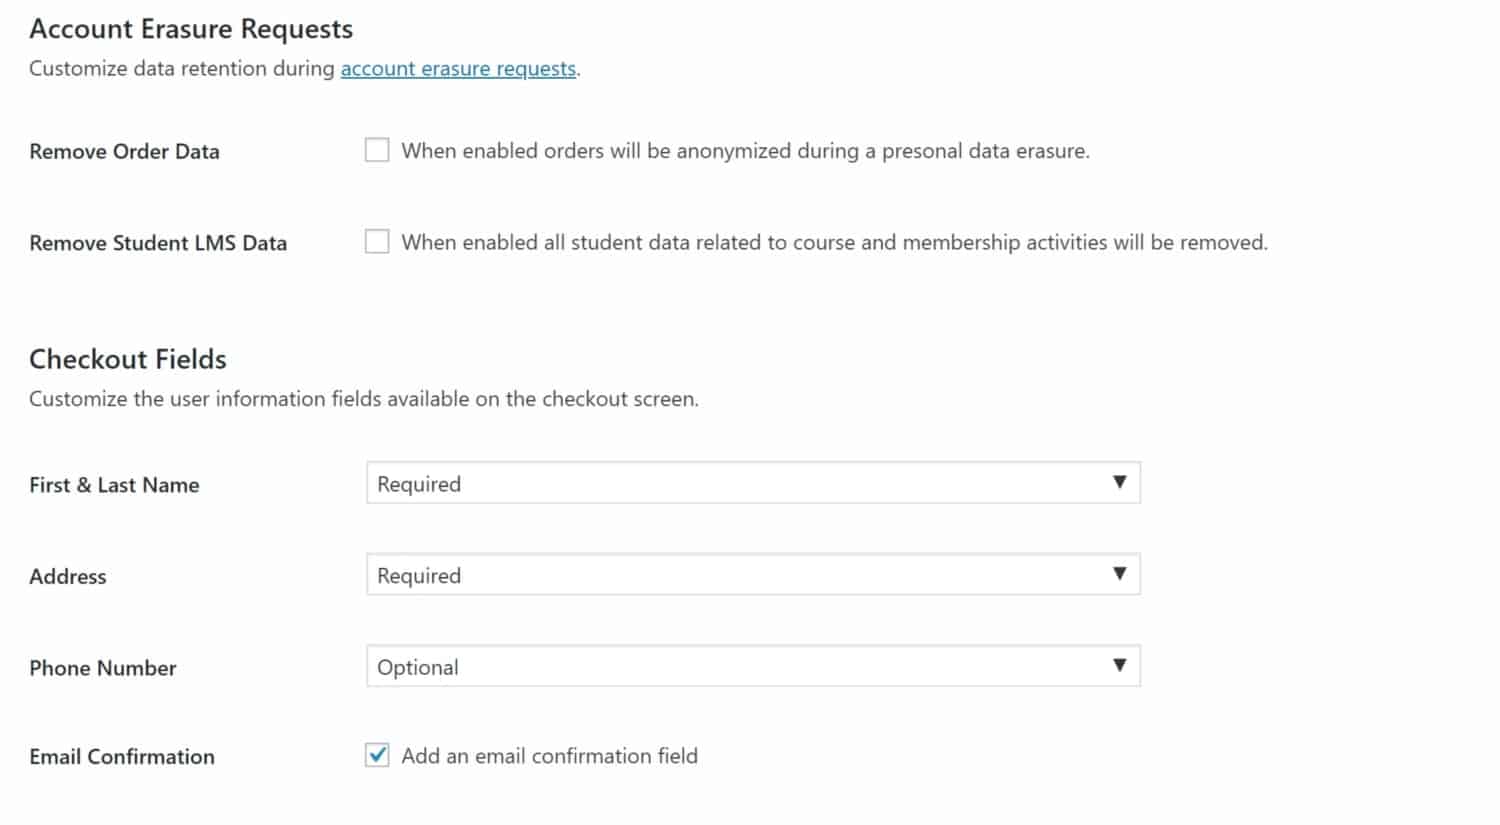
Checkout Fields
The checkout fields section is handy. You can decide exactly what information is required at checkout. You can ask for first and last name, address, phone number, and ask for an email confirmation.
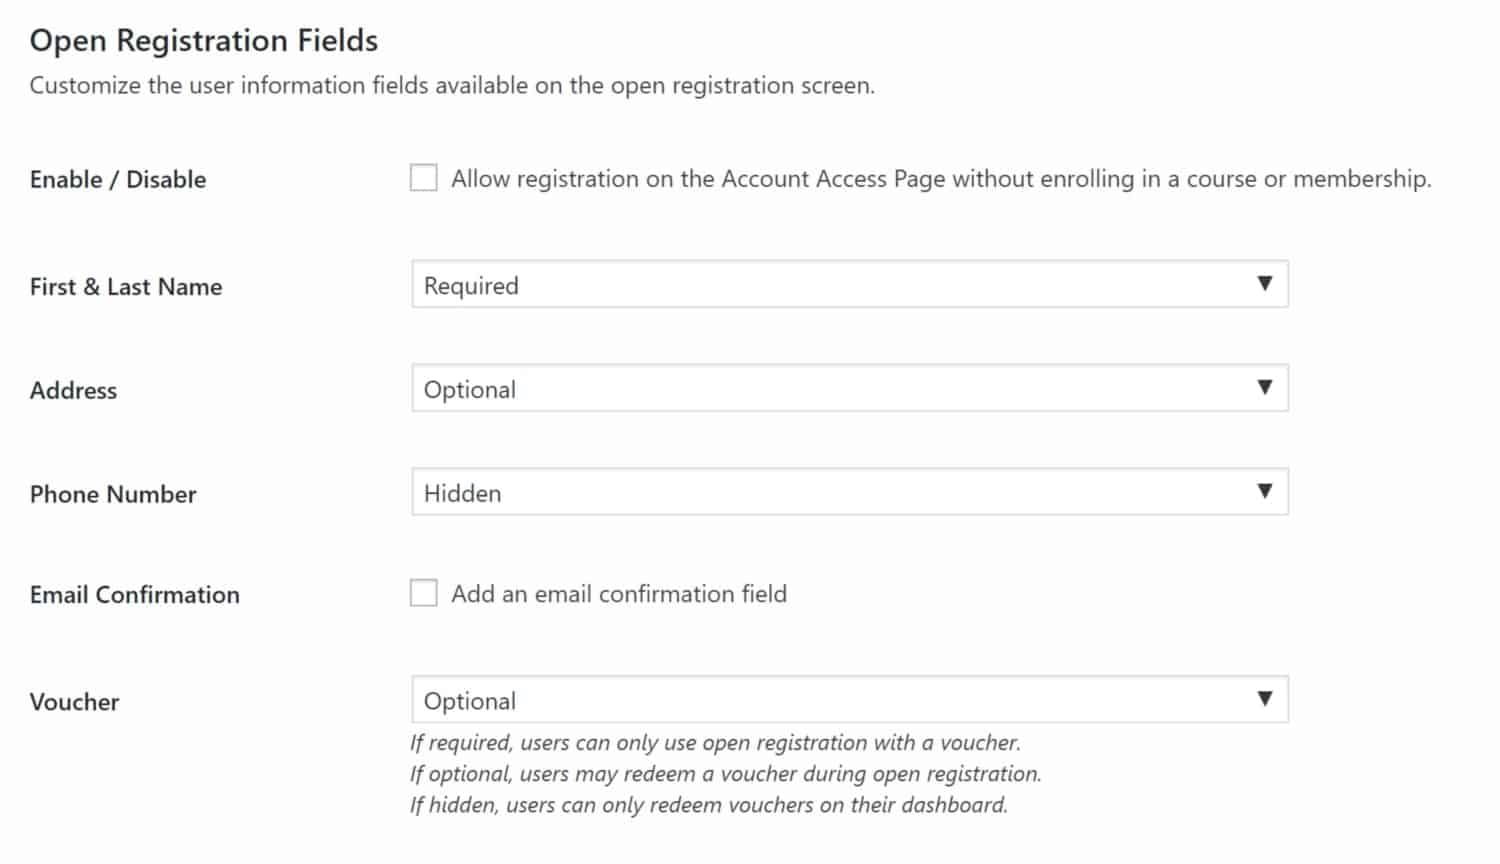
Open Registration Fields
The open registration is for signing up for a free course. You can change any of the fields below:
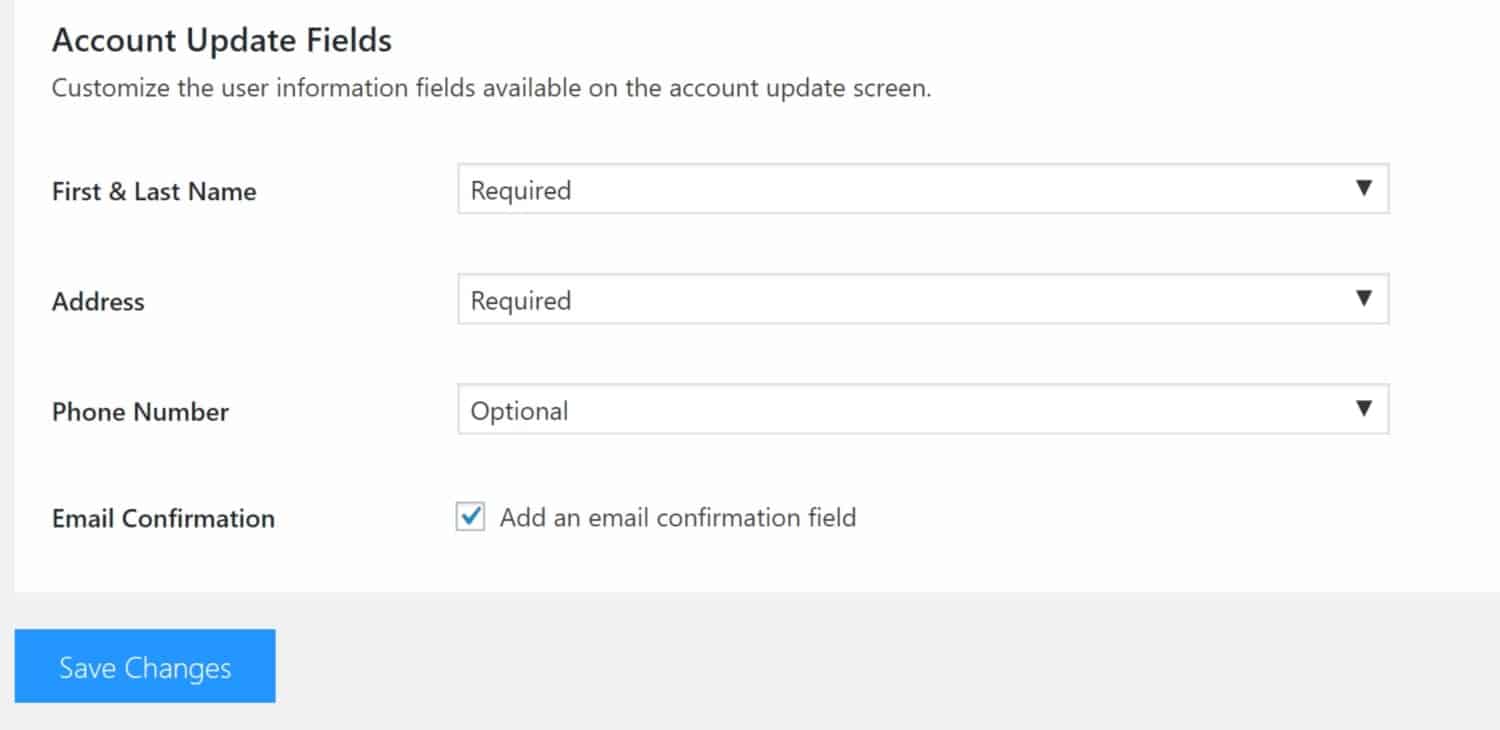
Account Update Fields
The account update fields panel allows you to customize the user information fields available to your learners on the account update screen.
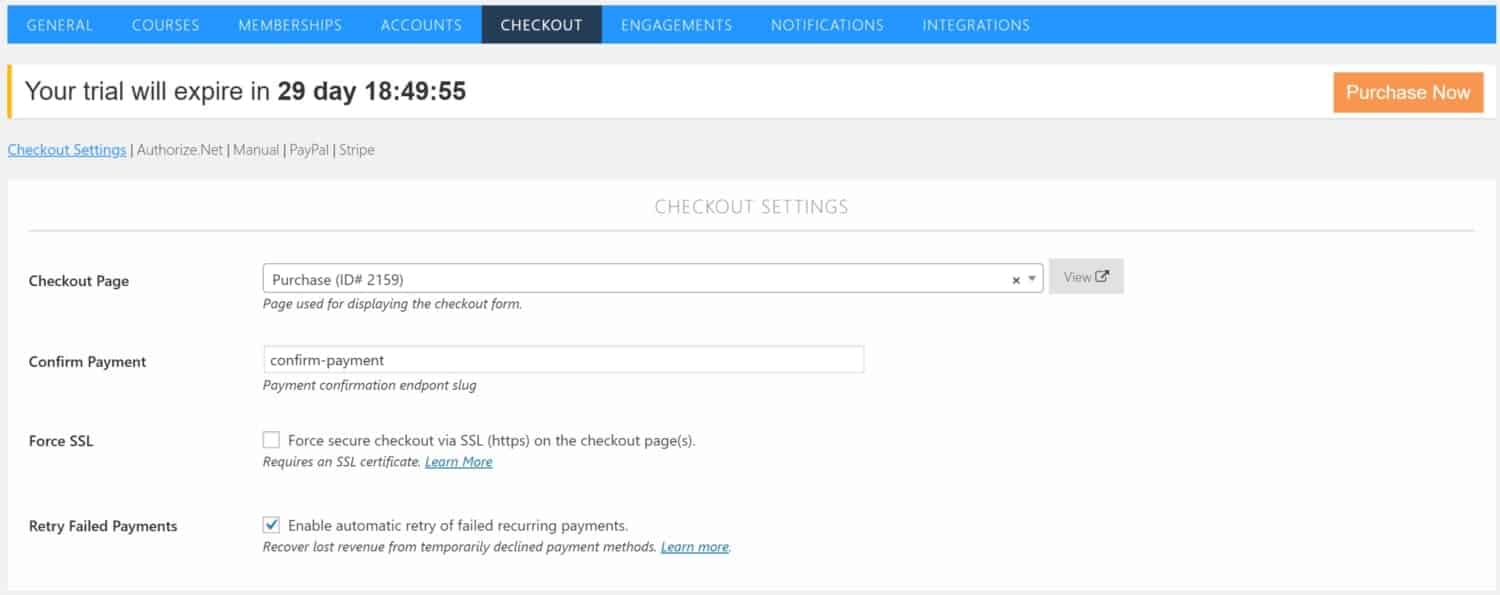
Checkout
The checkout tab allows you to customize your checkout page. You can decide which page to use as well as force that page to display on an HTTPS page. This will likely help many of your users feel more comfortable entering their credit card information. Here you can also enable automatic retry of failed payments.
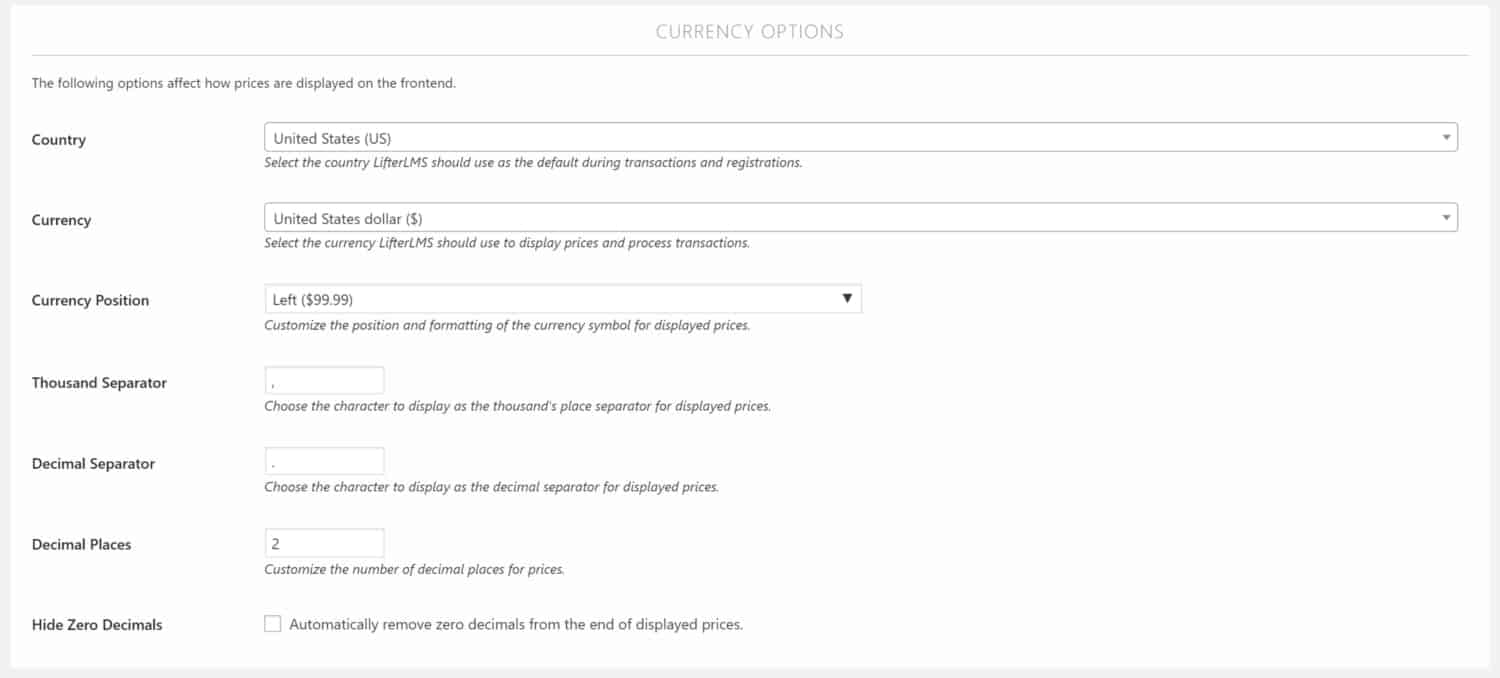
Currency Options
Currency options are next. There are quite a few options here that you might use especially if your target market is not in the U.S.
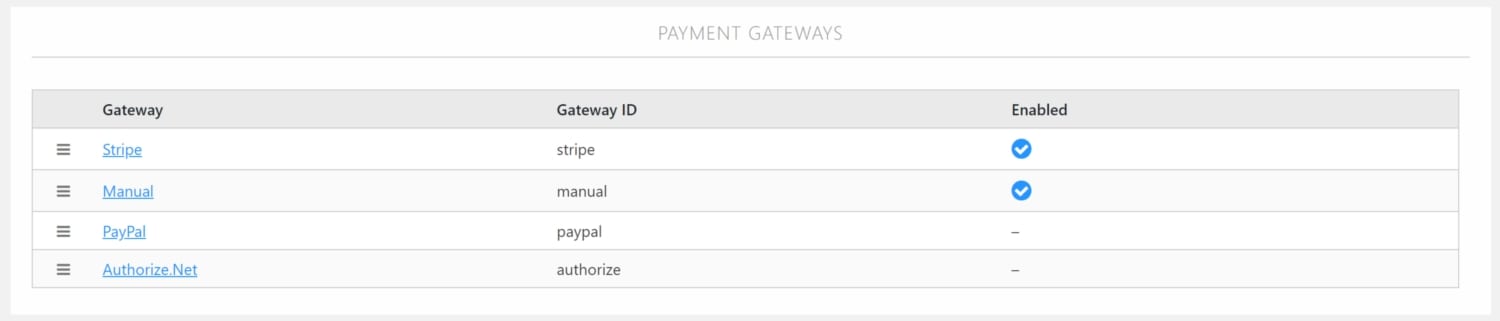
Payment Gateways
This panel will allow you to set-up and enable your payment gateways.
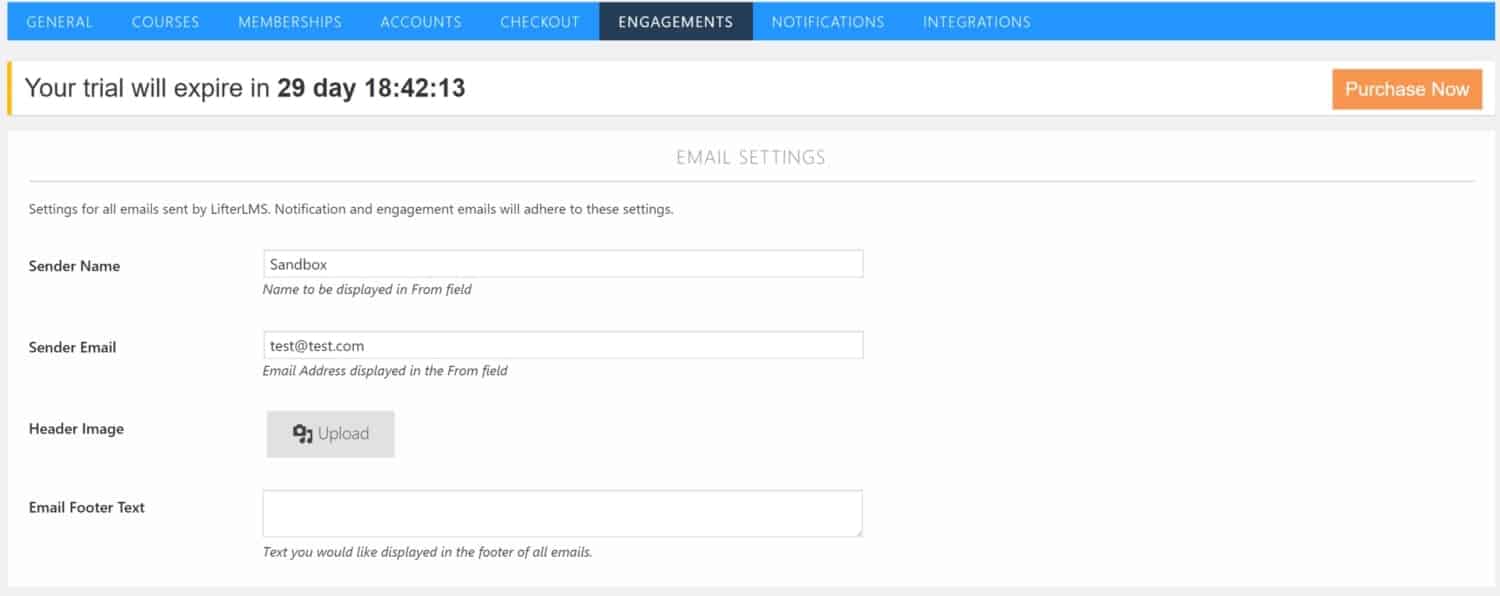
Engagements
An email can be sent out when a learner completes an engagement. You can customize the emails the LifterLMS system sends out under the Engagements tab.
You can change the sender name, which in my case would be either my name or Business Bolts (my site name), the sender email (so put your company email there), the header image (which could be your logo), and the email footer text.
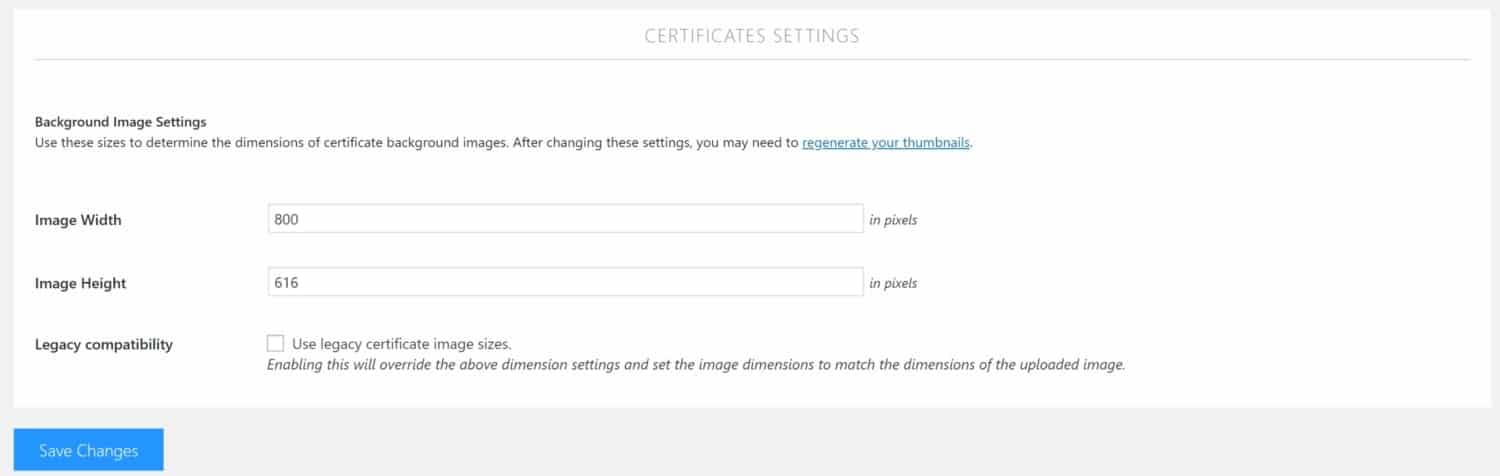
Certificates Settings
Email certificates to your learners as they complete all or part of a course. Change the image height and width or enable the certificates to be sent as legacy image sizes. You’ll have to test all this out to see how they look best.
Notifications
The notifications tab will show a display like the following:
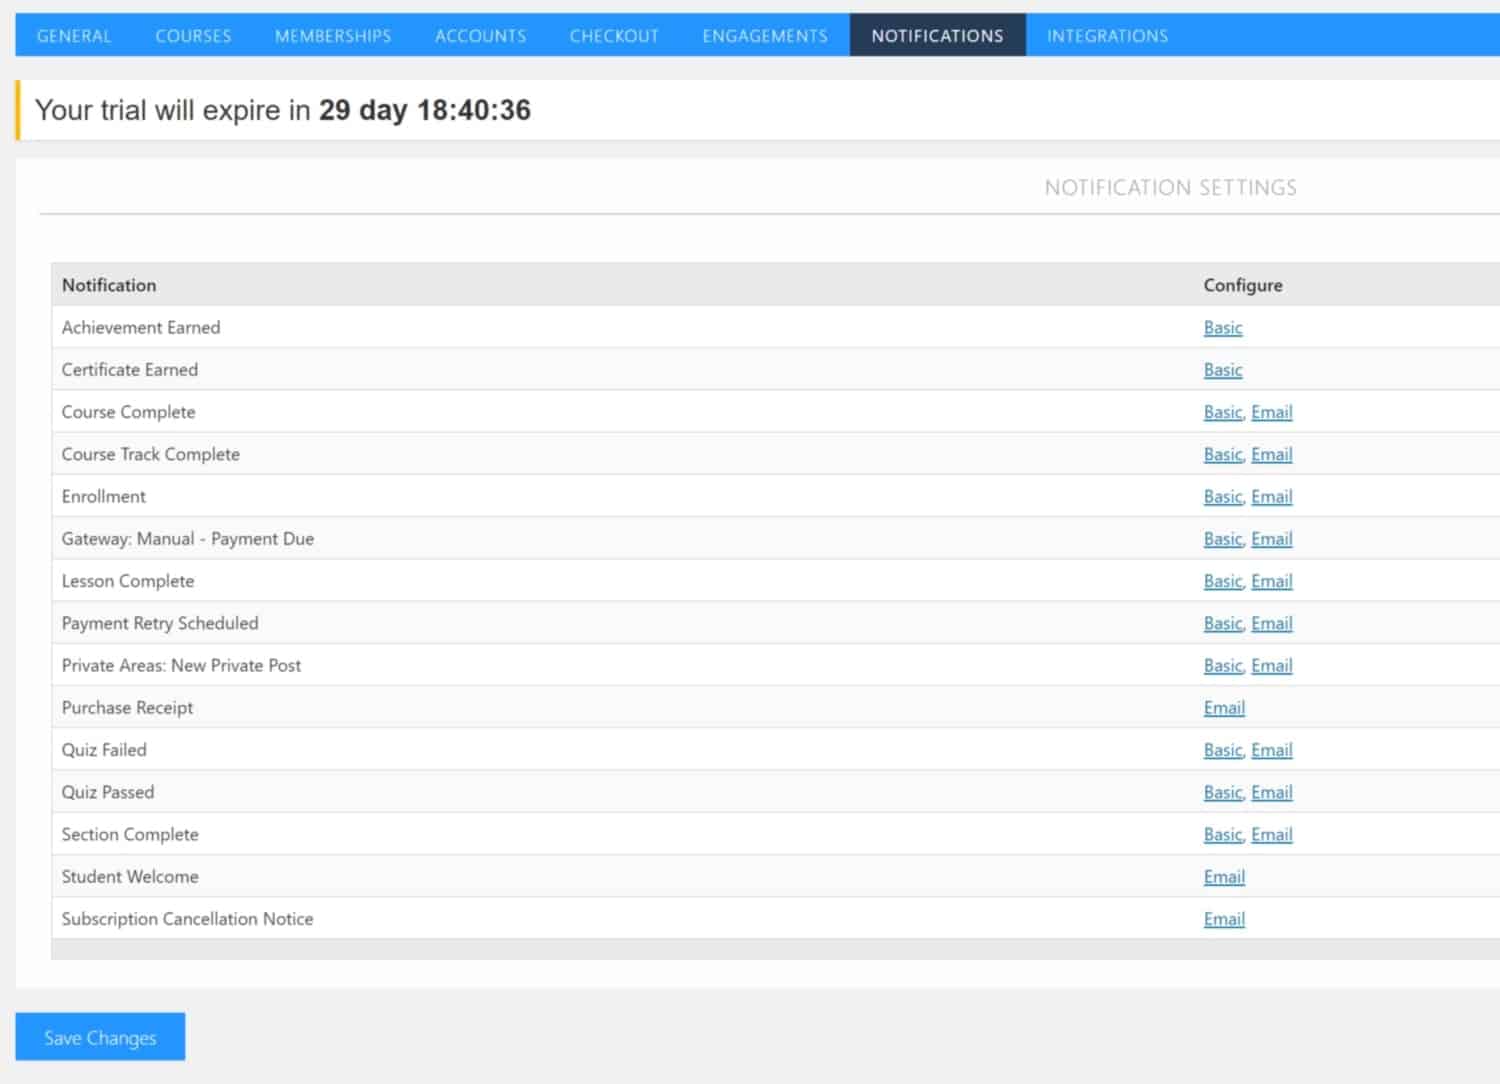
These notifications relate to certificates and achievements as well as receipts. There are many other reasons you might want to configure LifterLMS to send out notifications. You’ll see a list of the different reasons you may send out notifications and then a configure column over on the right.
If you click on that column, you can configure the notification. I clicked on the first Notification which is for an Achievement earned. It’s taken me to the following screen:
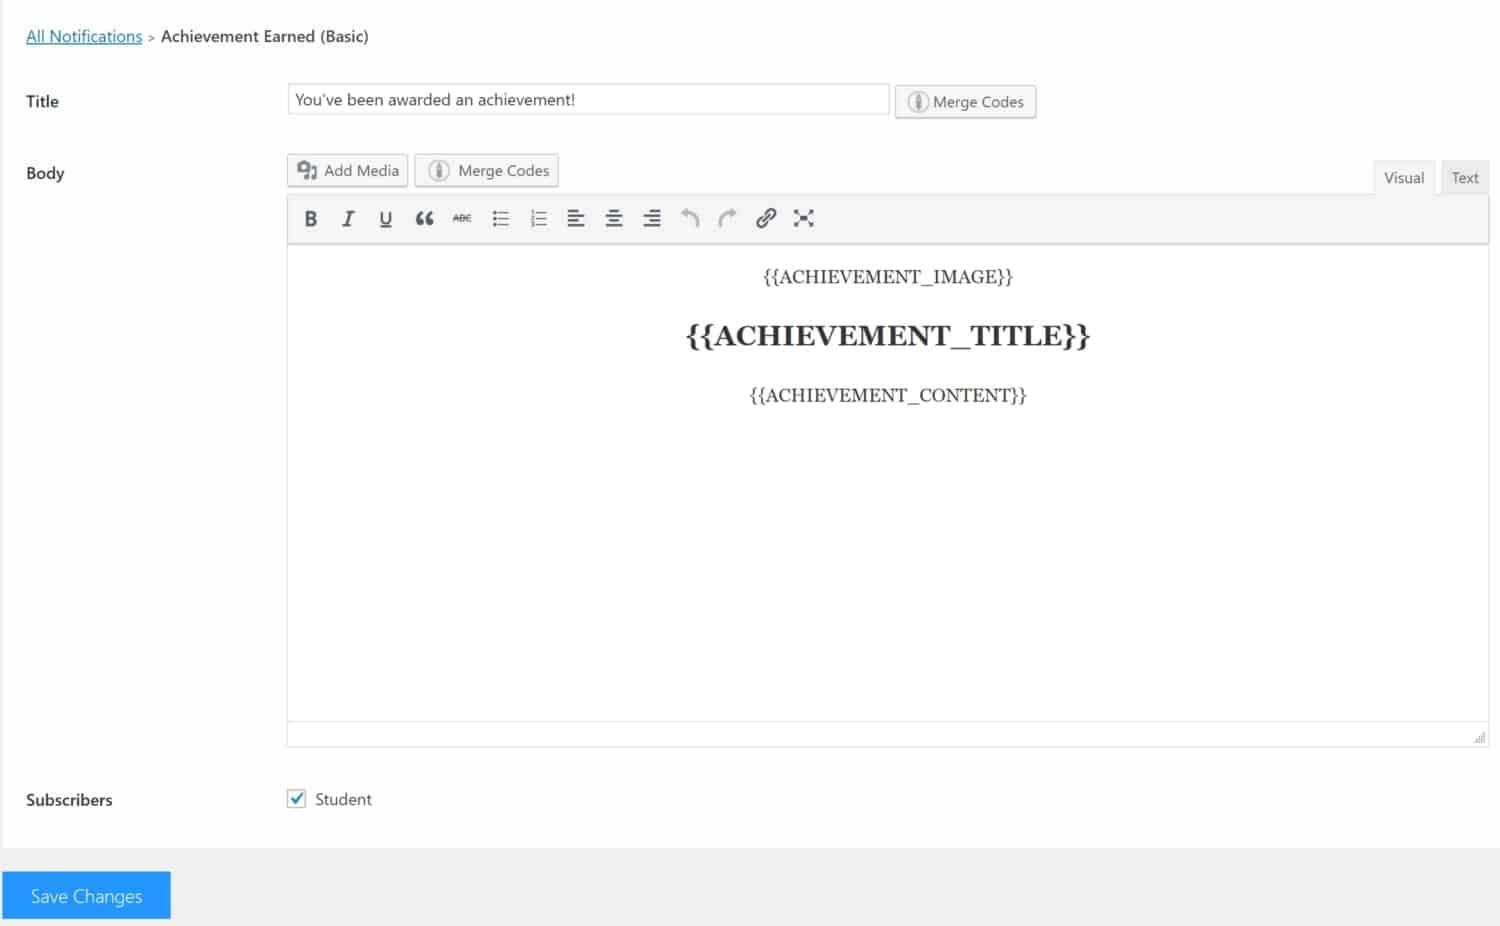
As you can see, you can customize exactly what will be displayed for an achievement.
There are also email notifications on the notifications screen. I clicked on one of those and was taken to the following screen:
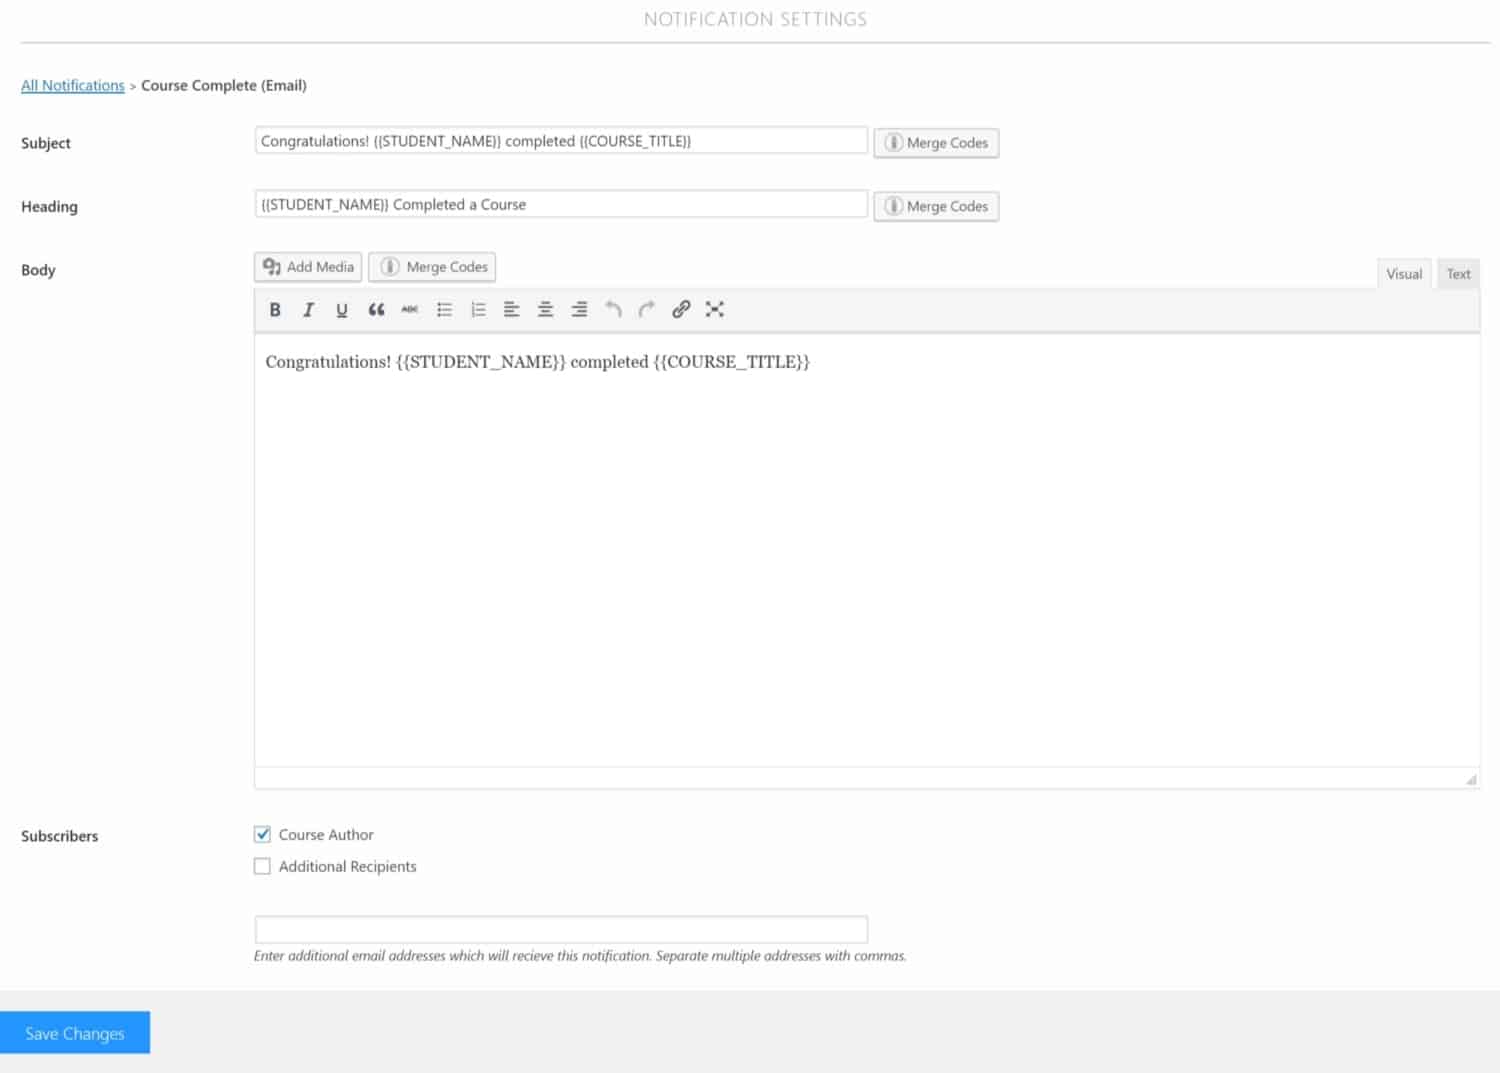
You can also customize the email notifications as well as who will get those. For instance, if the instructor should get a notification that a student completed the course you can change that here.
As you can see, LifterLMS allows for a high level of engagement.
Integrations
The integrations screen allows you to see at a glance what integrations you have enabled and installed.
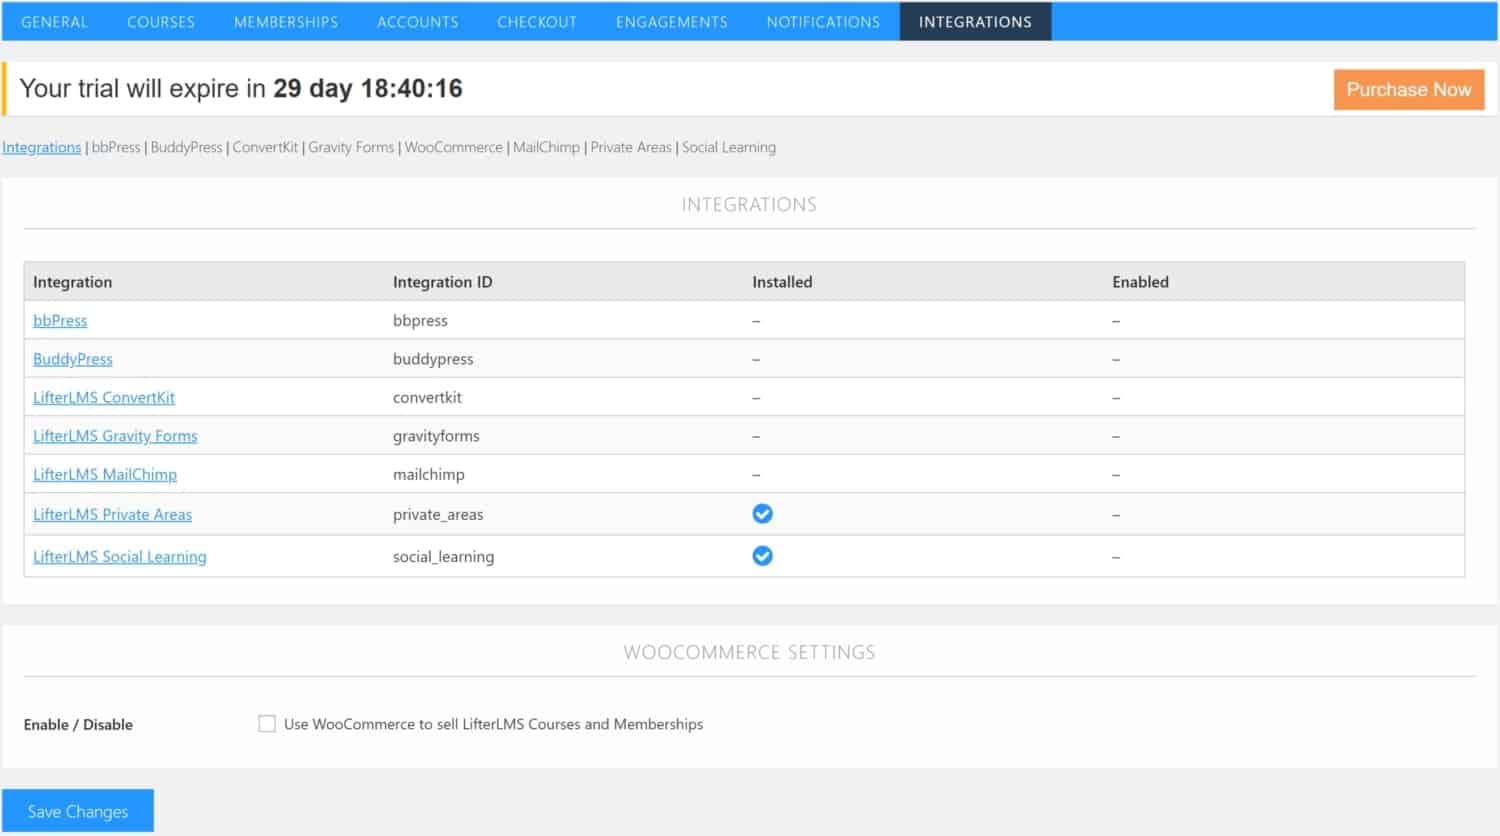
You can click on the integrations to configure them from within this screen. Here, I clicked on LifterLMS Social Learning and was taken to this screen:
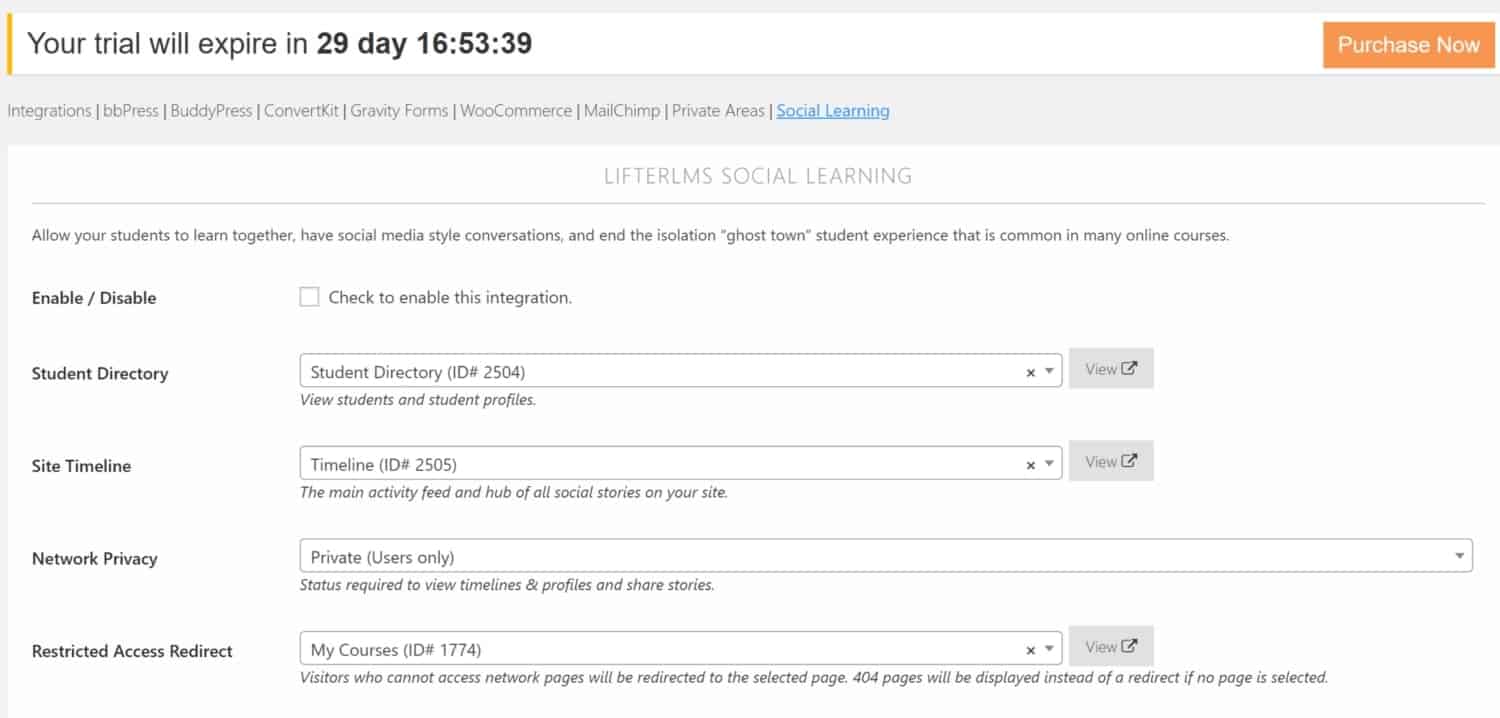
You can enable or disable this plugin here as well as select the page where the student directory, those without access, and the timeline will be shown. You can also select who will be allowed to view the social comments (for instance you can keep it to users only or enable it for the public).
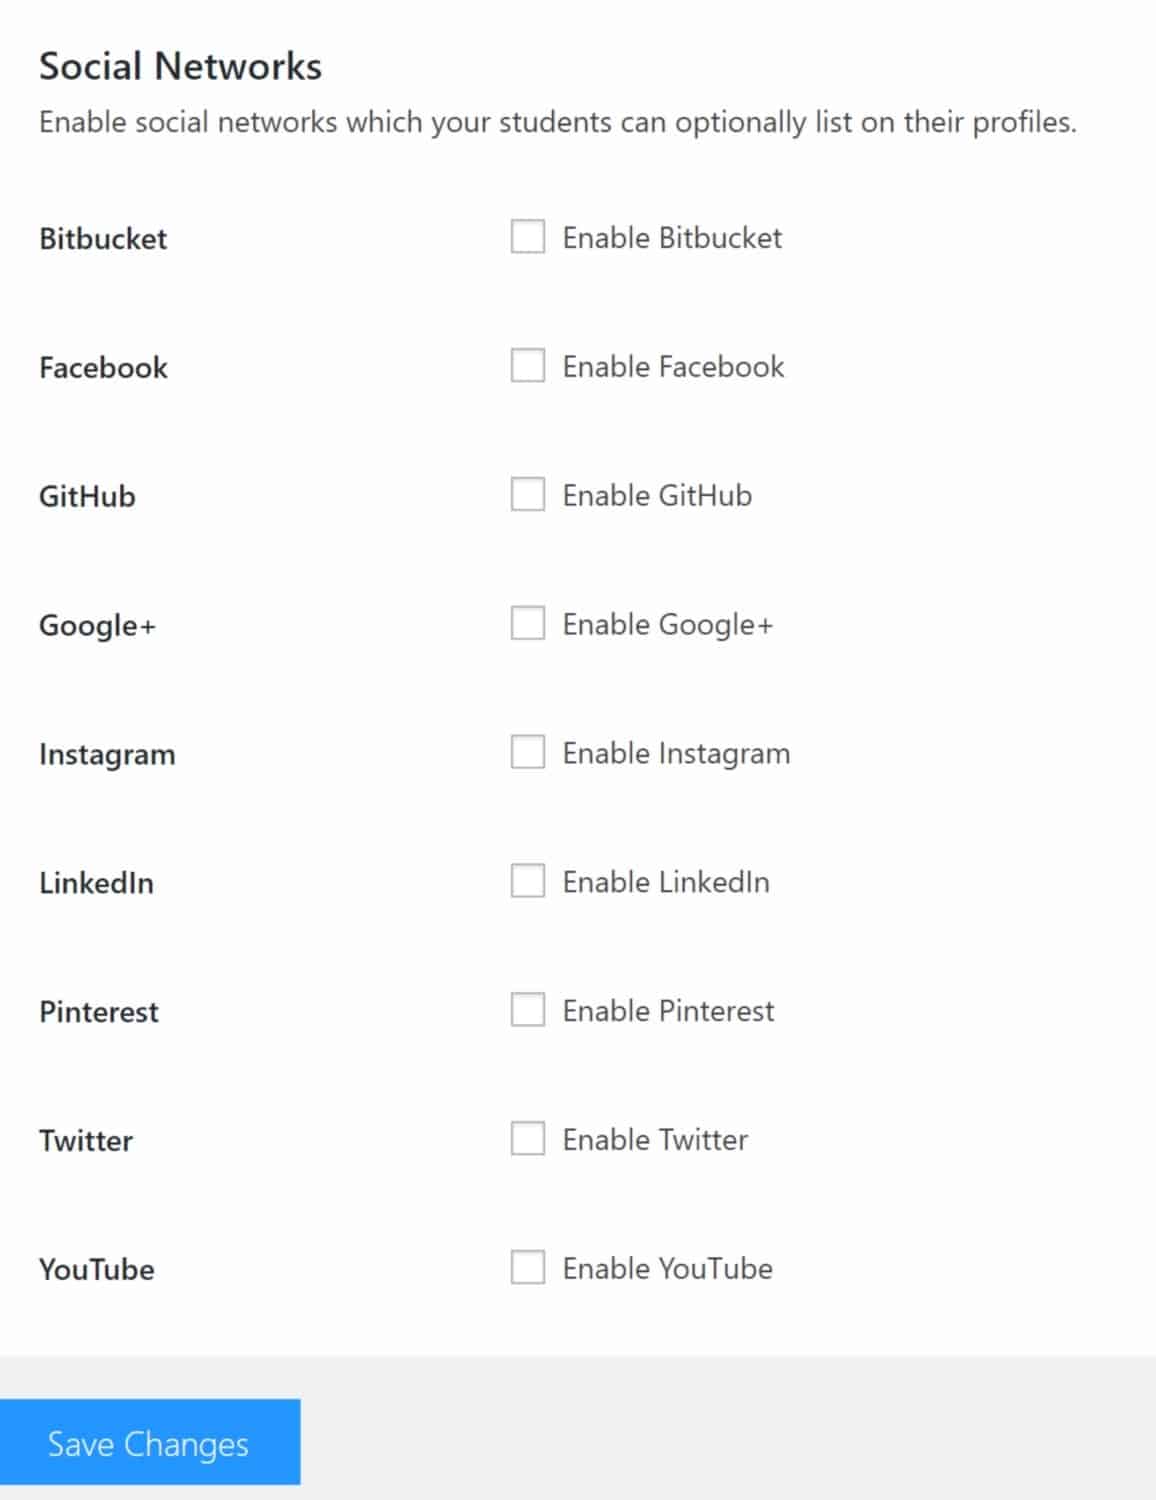
Then you can also choose which social networks you want to enable as shown in the screenshot below:
Reporting
Reporting is another big menu under LifterLMS on the main WordPress vertical navigation bar.
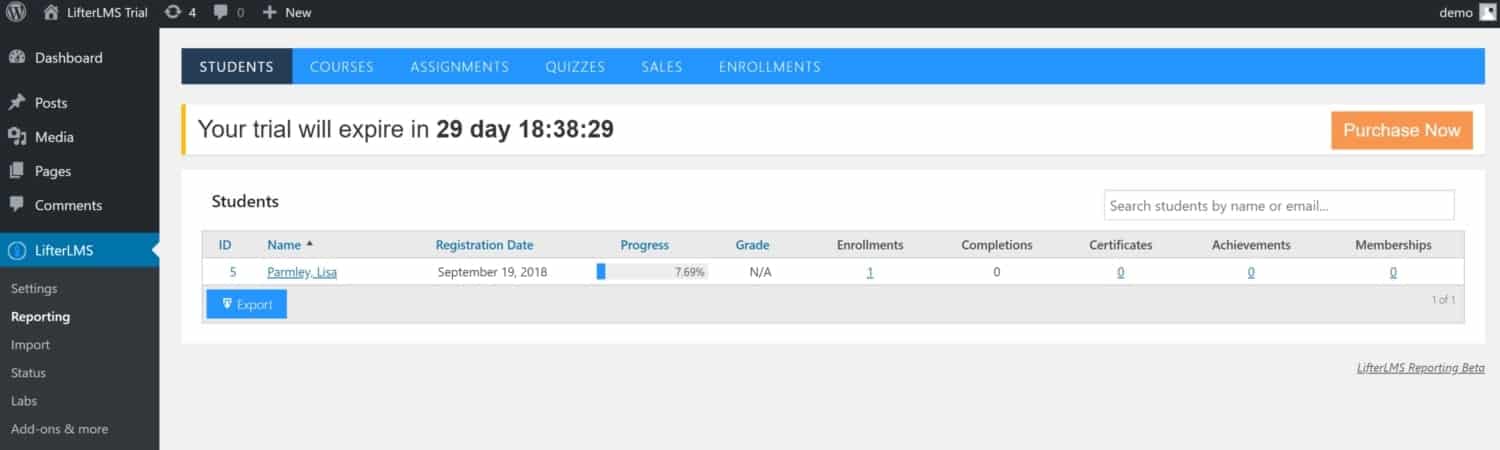
The Students screen is the first screen you’ll be taken to after clicking on the Reporting tab.
Students
The Students tab lists out all the students registered for your course. It also shows the date they registered, their progress through the course, and any engagements (like achievements or certificates) they may have gained.
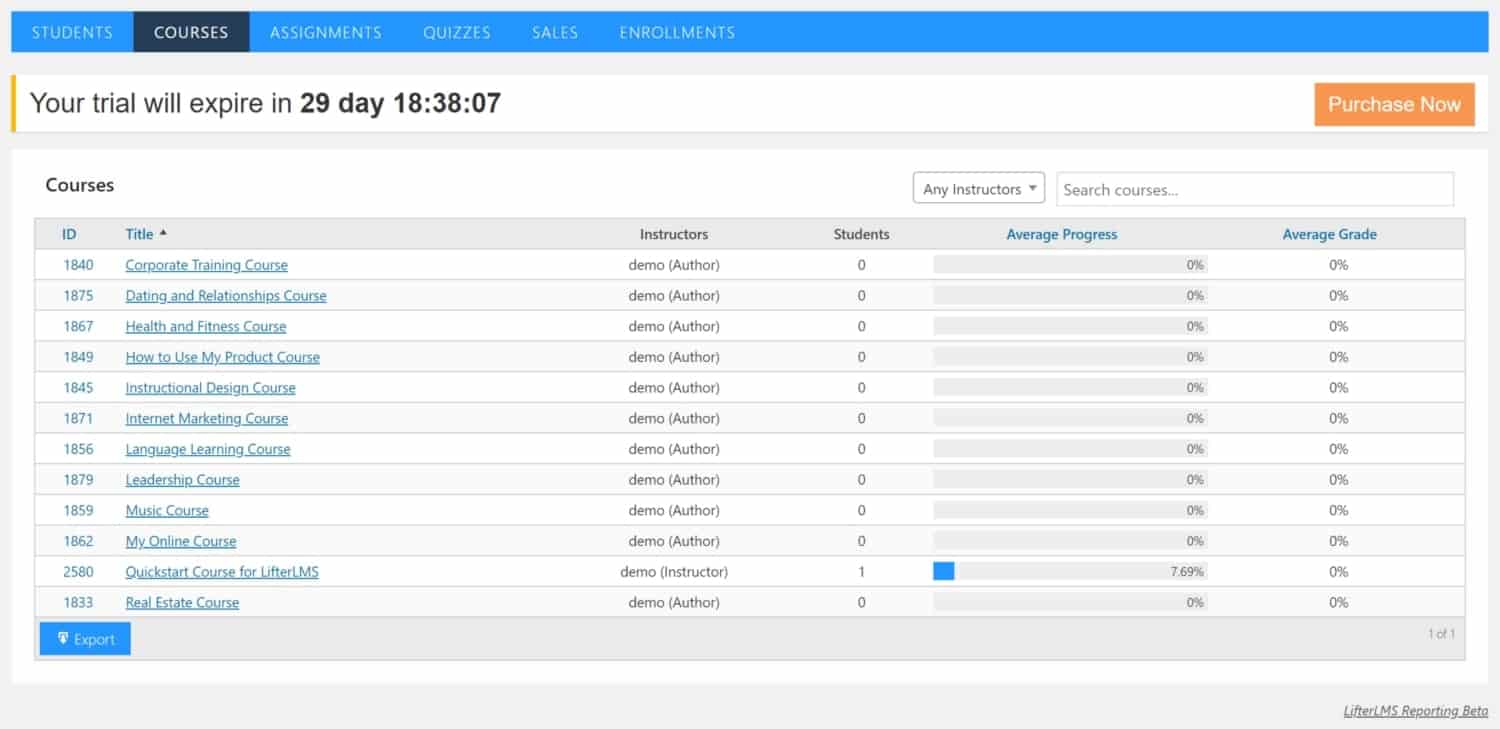
Courses
The Courses screen under the Reporting tab shows all your courses ‘at a glance’. Here you can see the name of the course, instructors, the number of students in that course, the average progress made through the course, and the average grade (if you’re assigning grades).
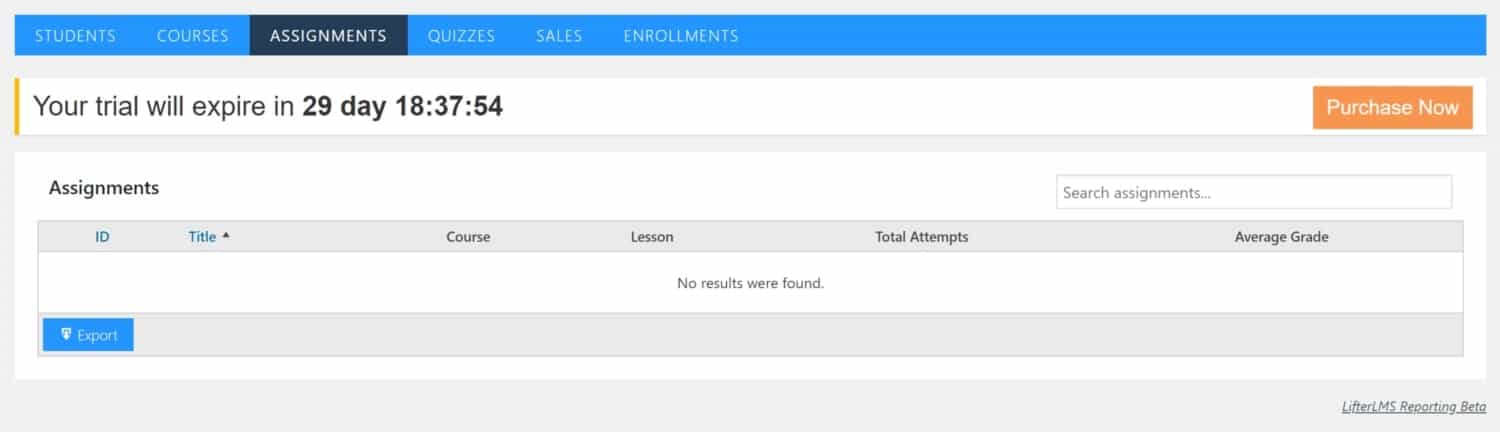
Assignments
This next screen shows the assignments given (if you’re giving assignments).
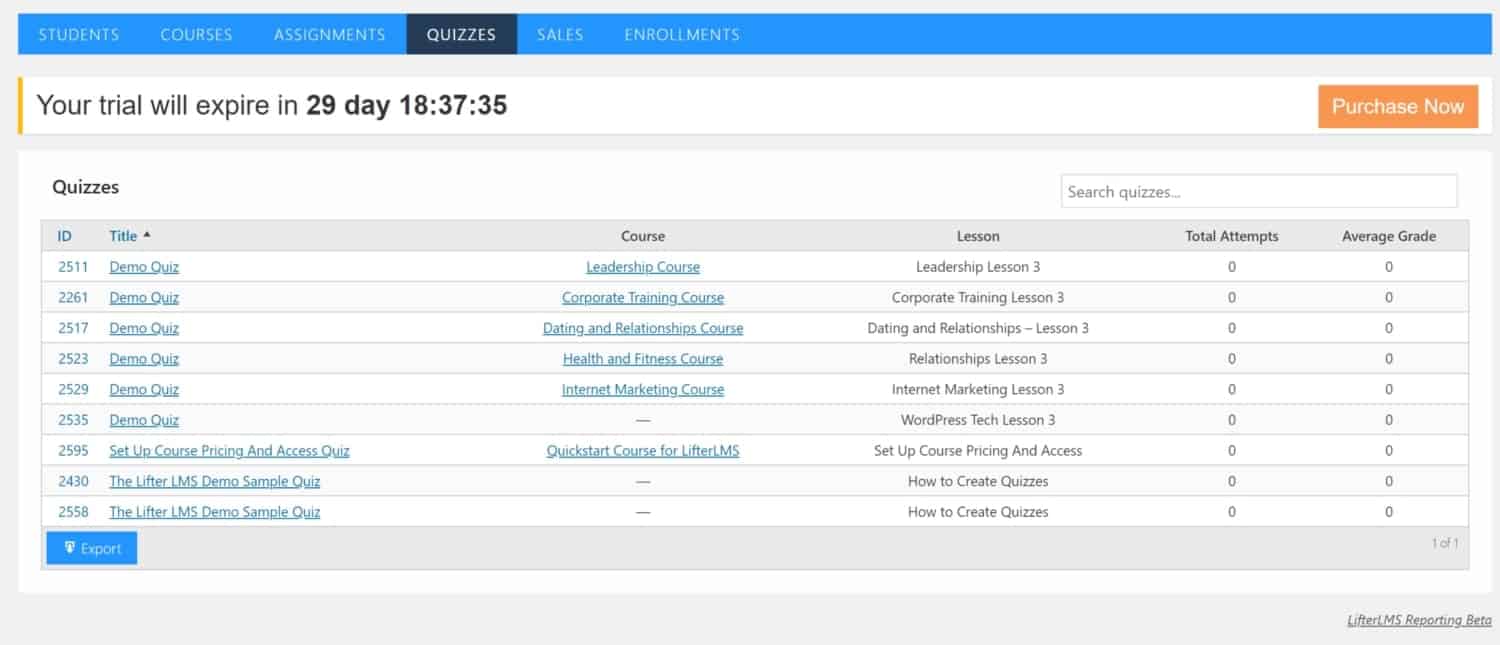
Quizzes
Next, you can see reporting for the quizzes you offer. The title of the quiz, course, and lesson it’s located in, total attempts, and average grades are all shown.
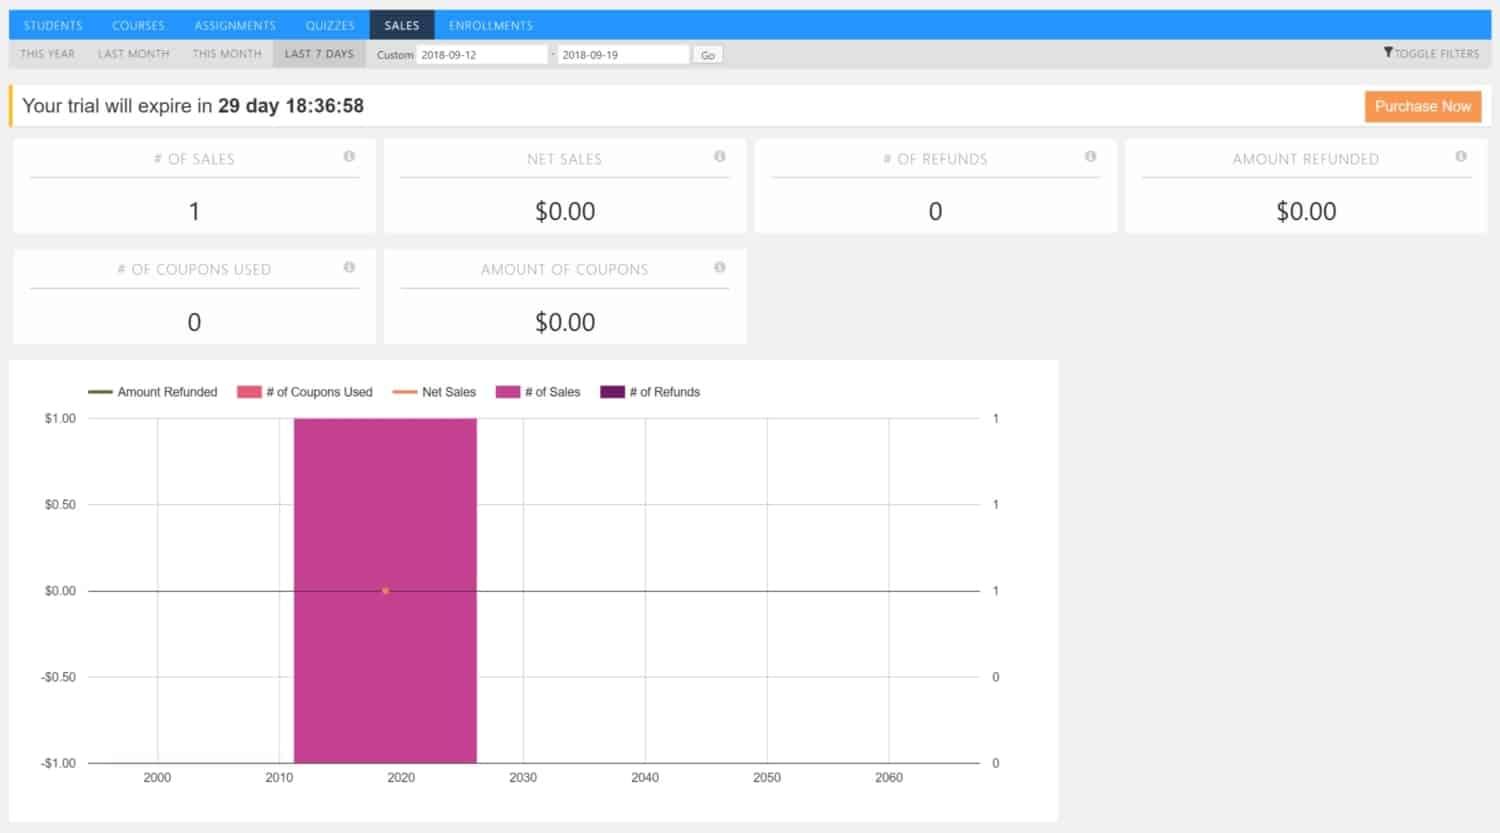
Sales
The sales screen shows the number of sales you’ve made along with the total number of refunds given, and a few more bits of information for a selected date range. A graph of the sales information is provided.
Enrollments
The final reporting screen shows information related to your enrollments. You can see the number of registrations, enrollments, courses completed, and lessons completed.
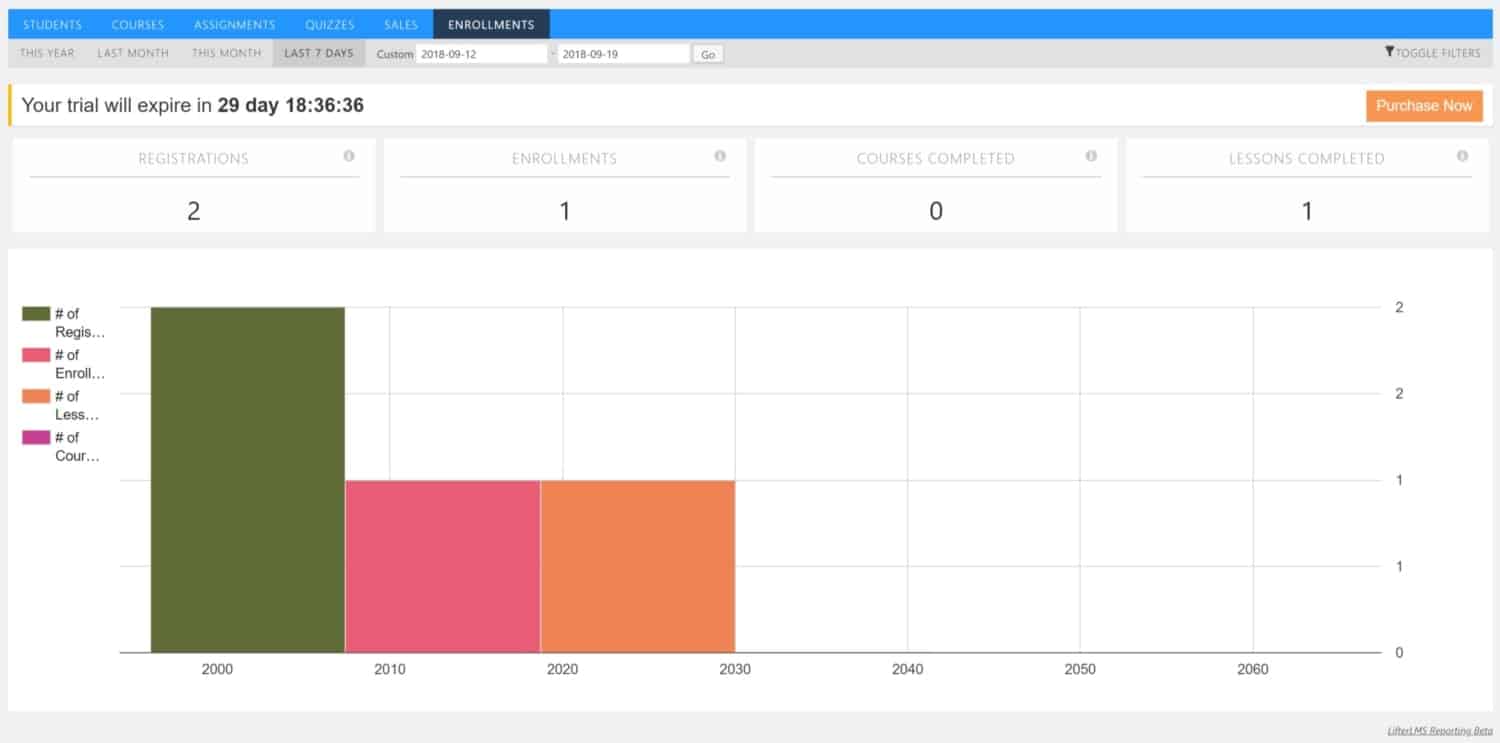
This reporting tab is very handy!!
Import
The import course feature could be useful if you’ve got another installation of LifterLMS and want to move those courses over. Importing will only work on files generated by LifterLMS.

Status
The Status tab in the main WordPress navigation menu has 4 screens within it.
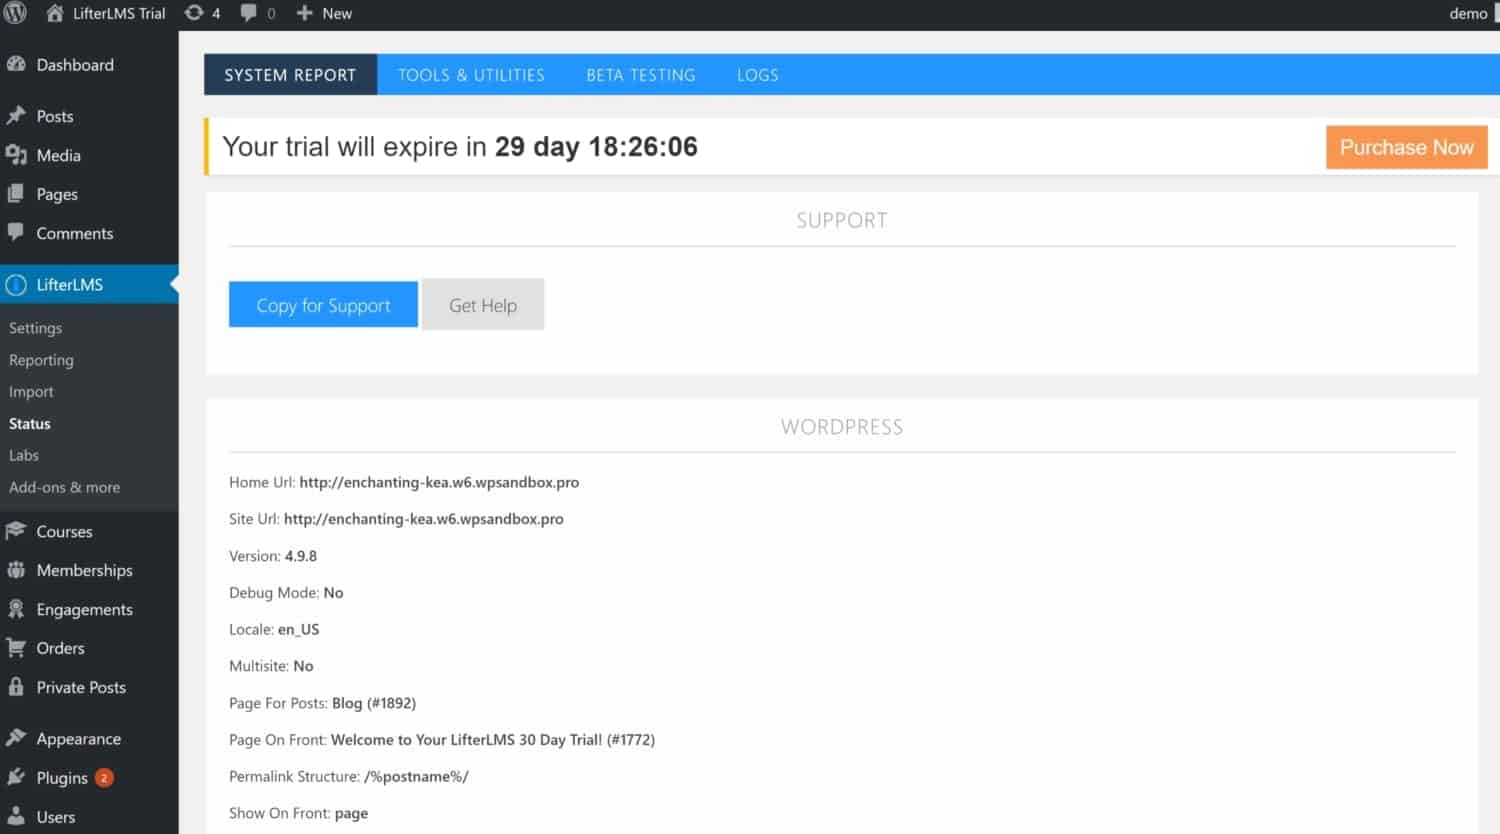
When you click on the Status tab you’ll be taken immediately to the System Report screen.
System Report
The System Report screen shows you all the reports available on your site. You may need to use this if you’re experiencing problems or you need some information about what version of any component you’re running.
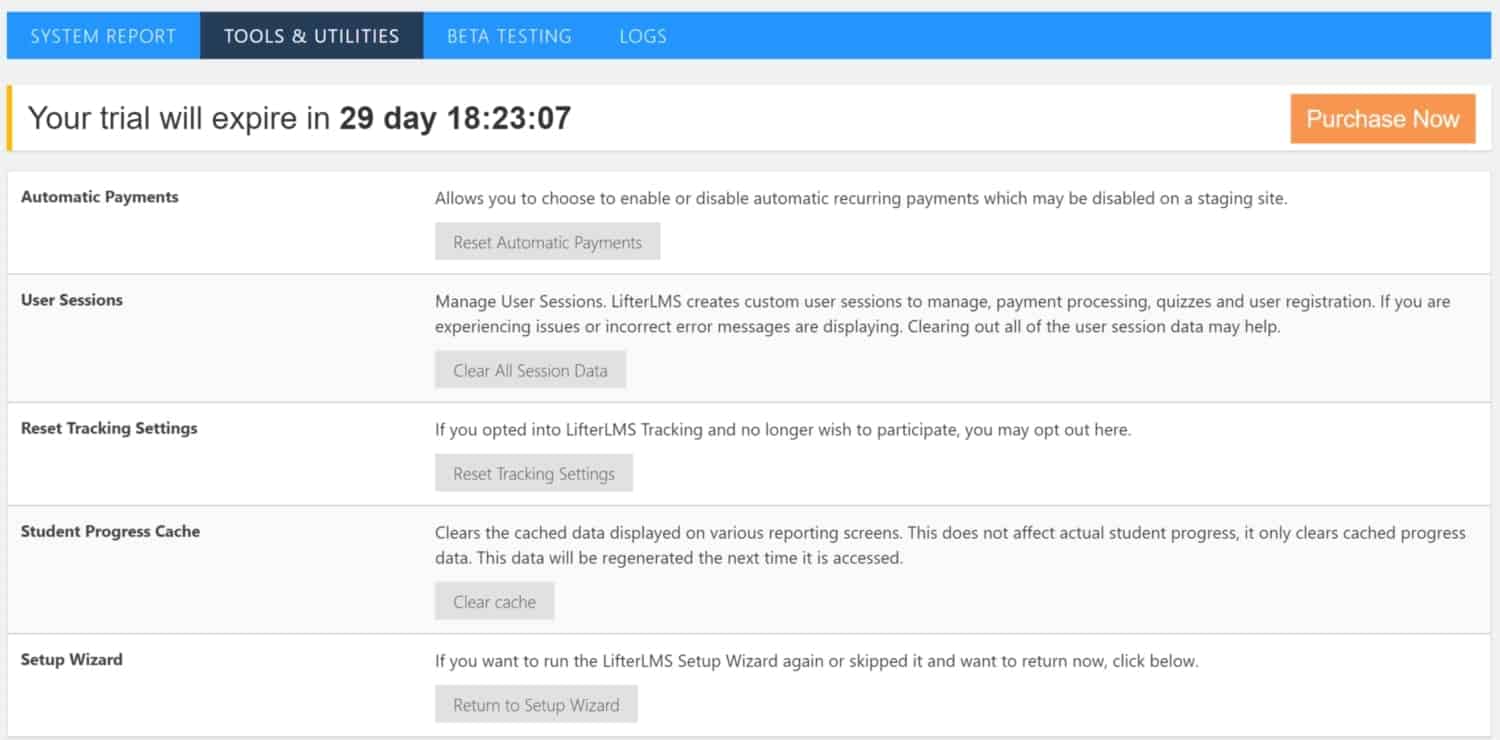
Tools & Utilities
The Tools & Utilities screen allows you to do a few tasks right from the screen. You can reset automatic payments (for instance if you were on a staging site), clear all session data, reset tracking settings, clear the cache on student progress data, and return to the LifterLMS setup wizard.
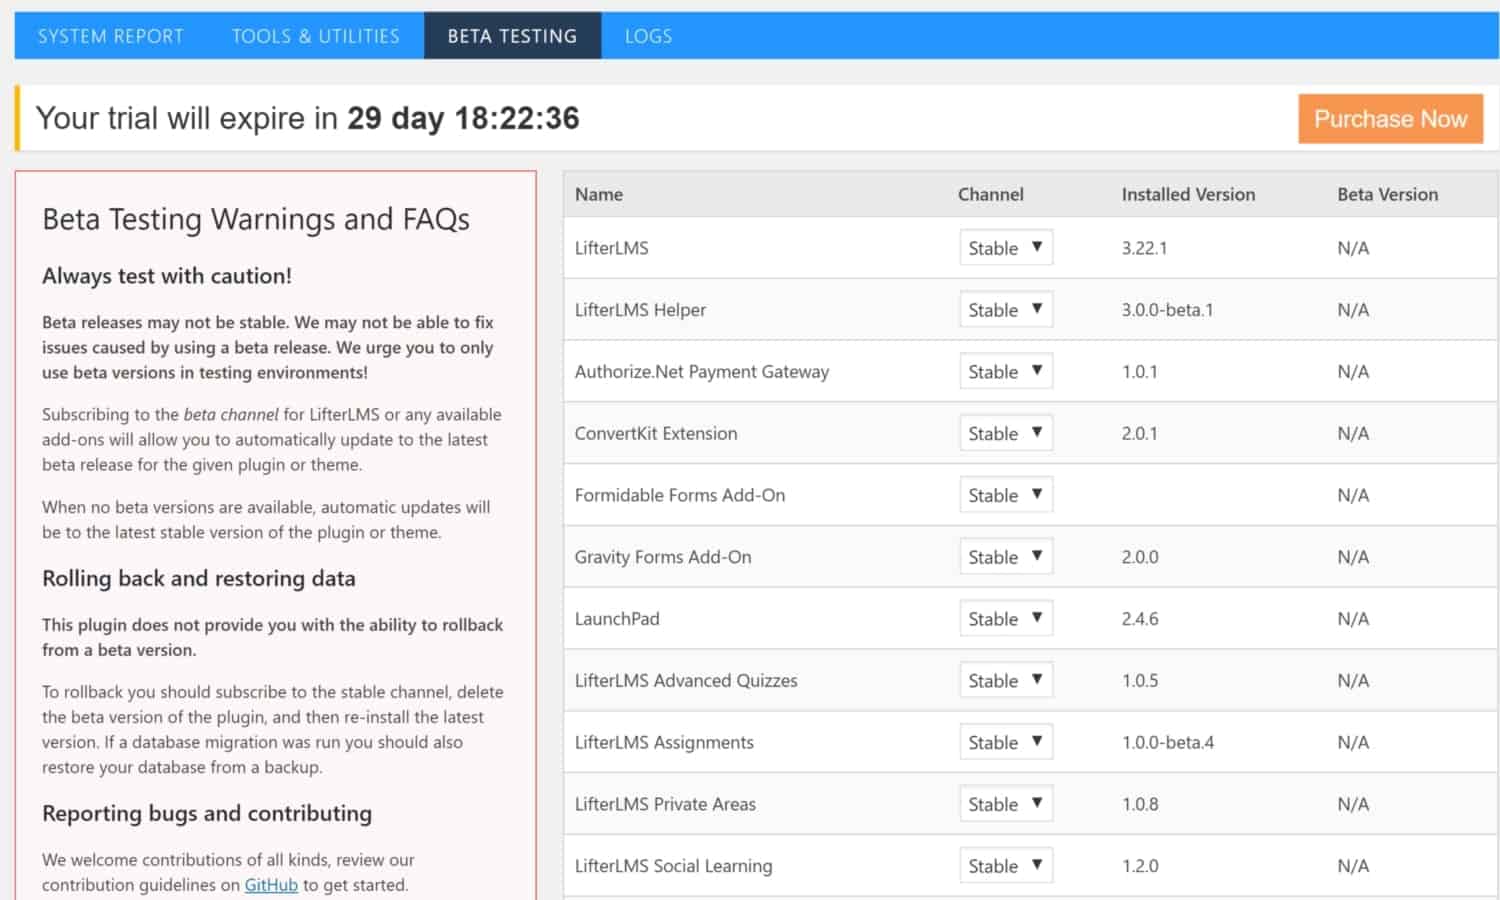
Beta Testing
This screen will allow you to review areas where you might want to beta test new features. Otherwise, you can leave everything set on Stable. If you do want to beta test features, you should try it out in a staging environment instead of a live site!
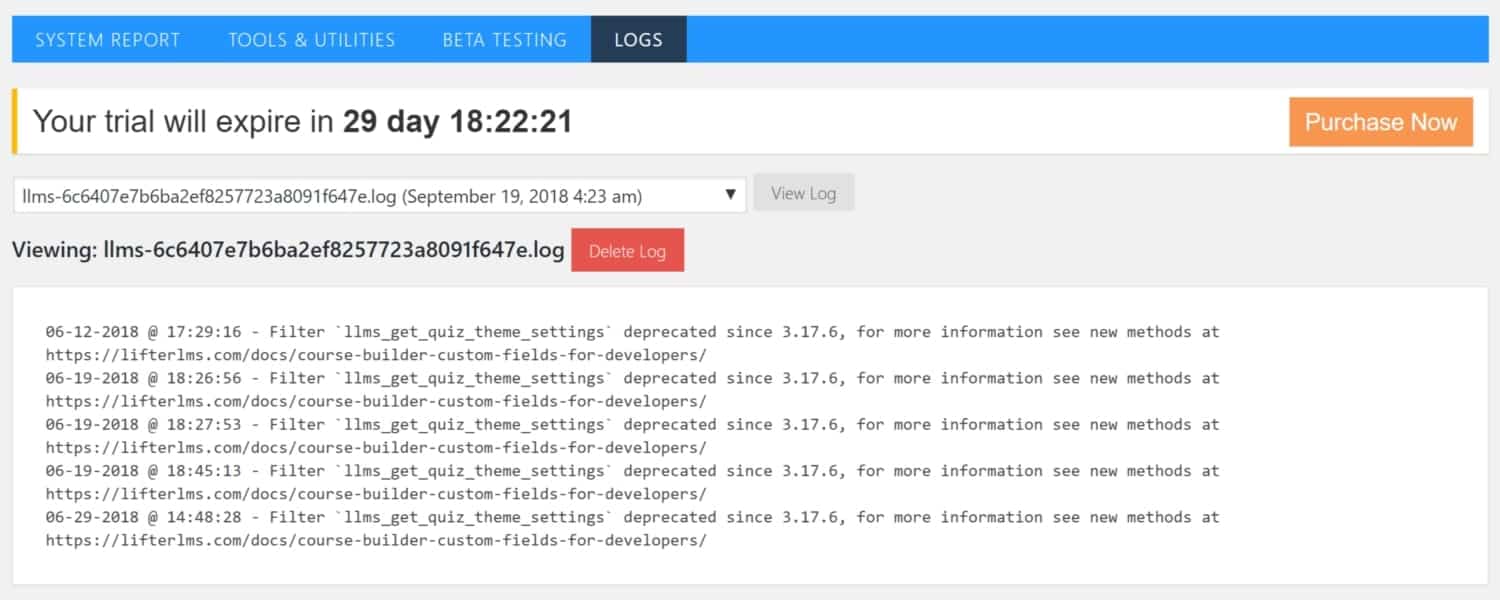
Logs
Lastly is the logs screen. This might be useful if you’re having problems and want to review the logs for errors.
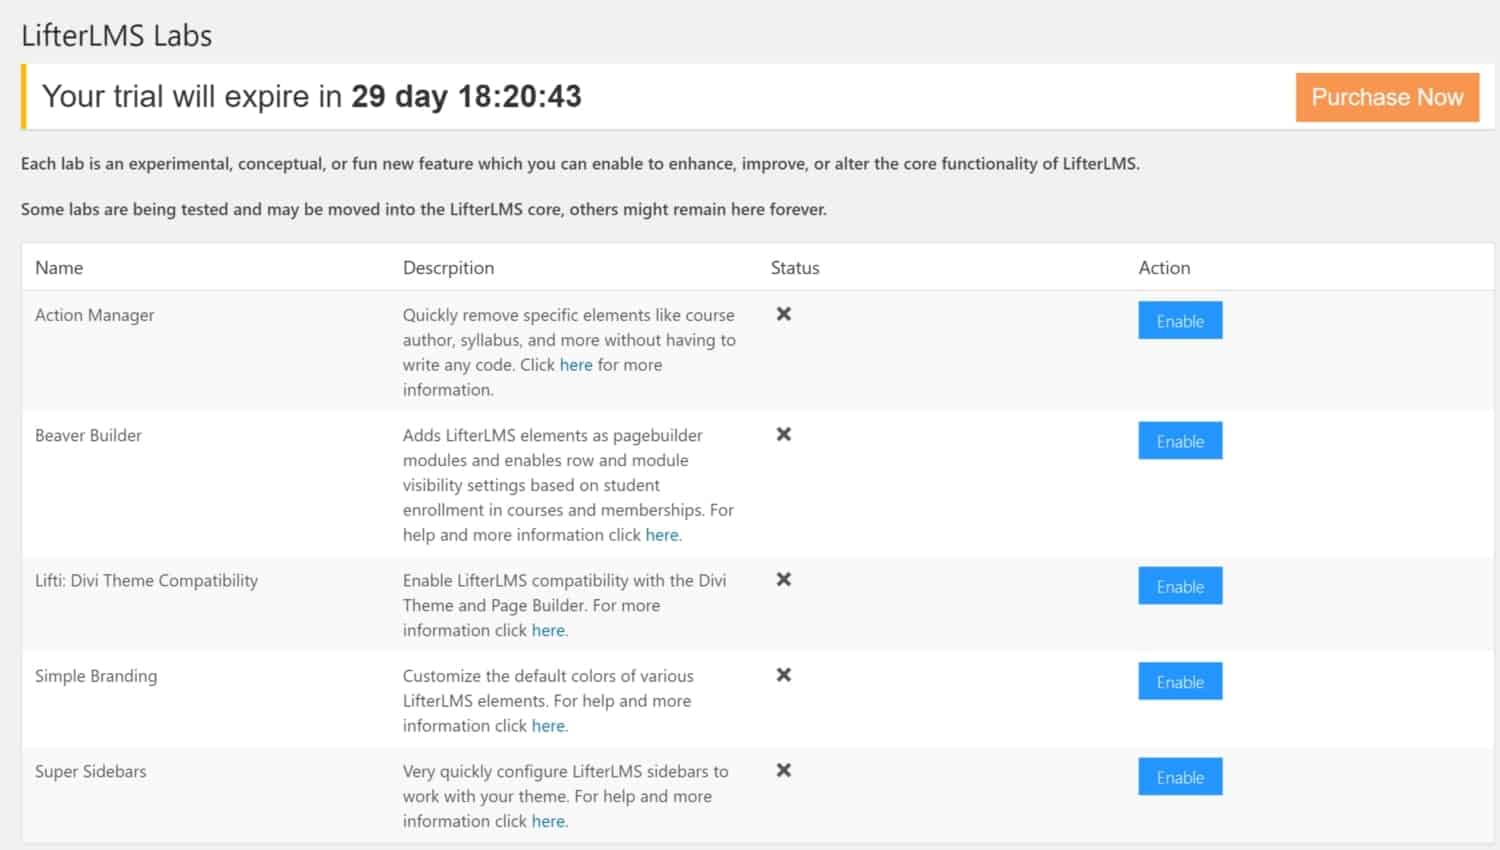
Labs
LifterLMS Labs offer fun new features you can try out on your site. You can choose to enable any of the labs that show up here. If you enable it, you can always disable later on if you decide you don’t like it.
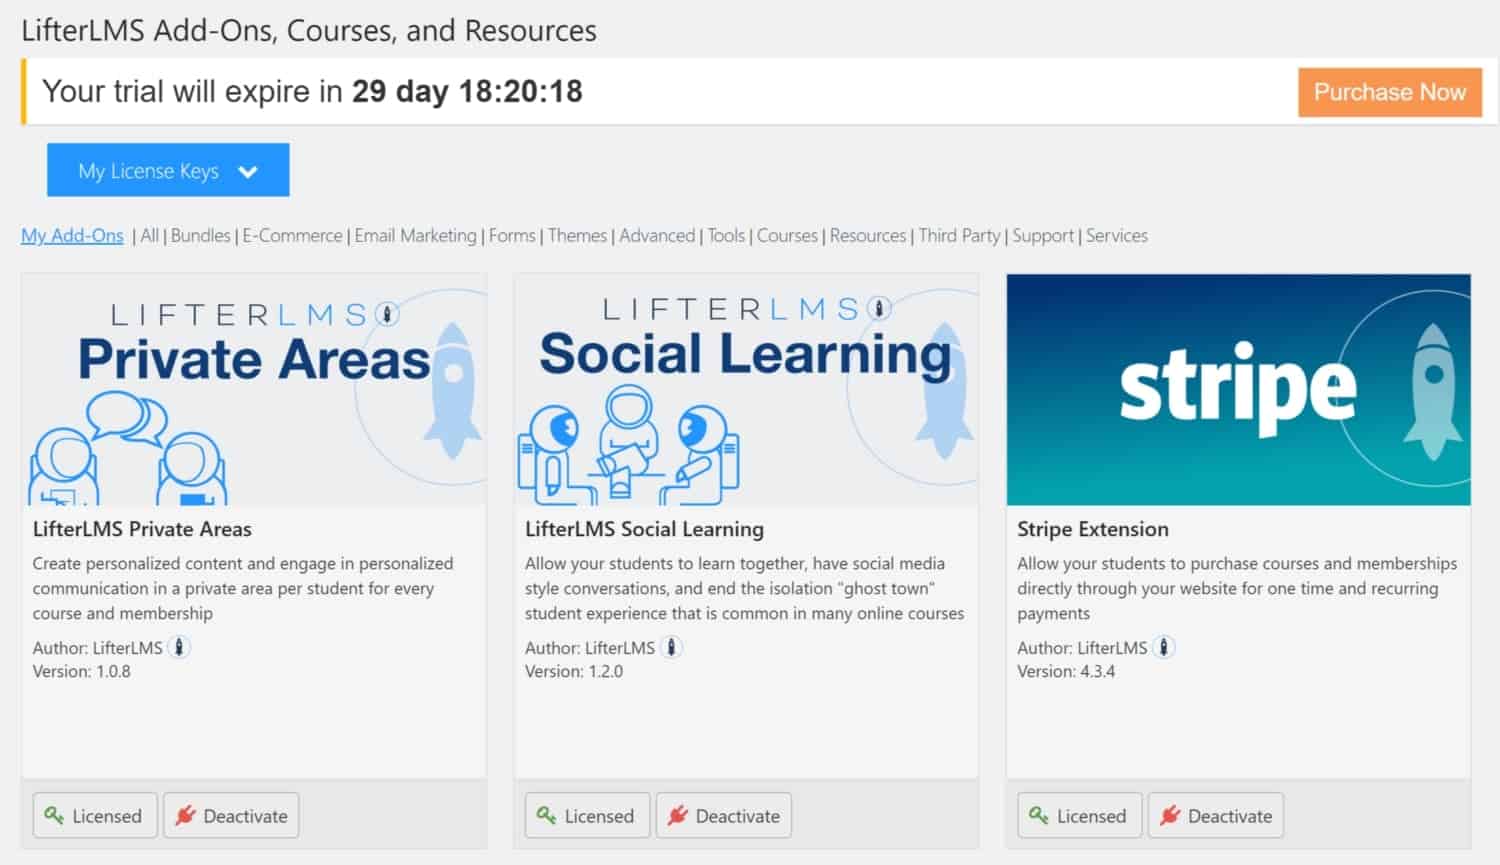
Add-ons & more
LifterLMS advertises a few of their add-ons here. You can see all your add-ons as well as what’s available to you. Some of these add-ons are incredibly powerful and will give your users a custom experience.
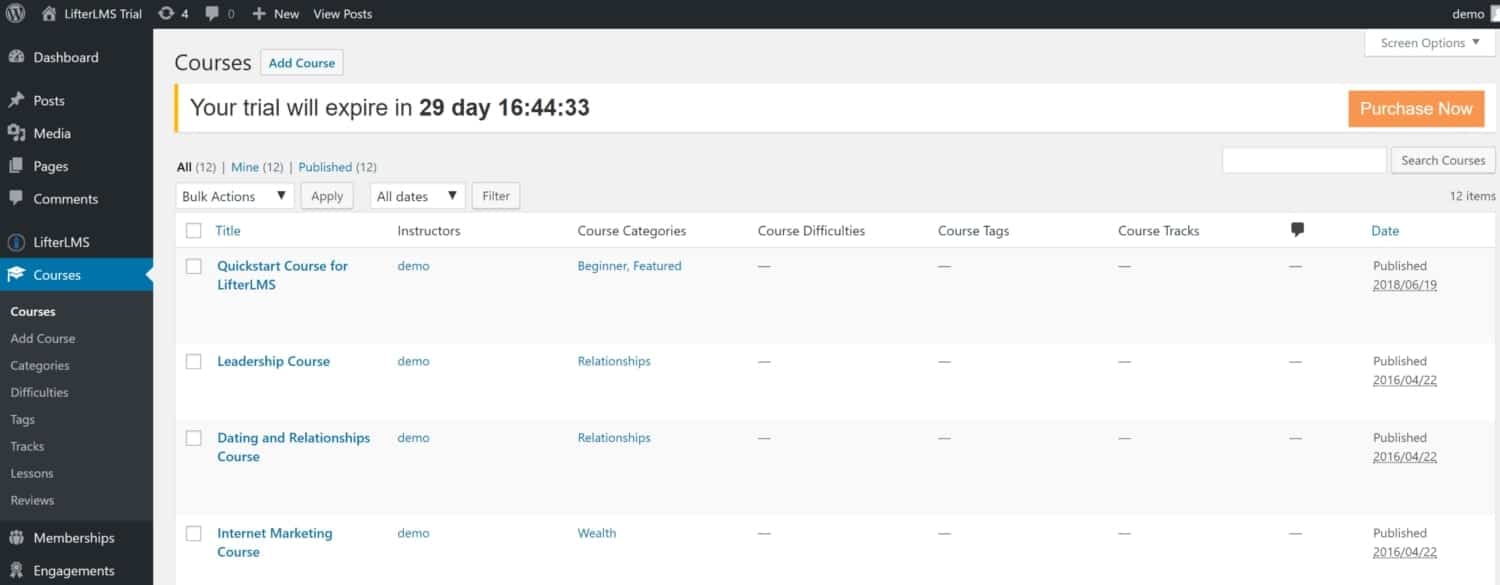
Courses
Under the LifterLMS tab comes the Courses tab. Clicking on this takes you to a page with a list of all your courses:
You can hover underneath a course title and you’ll see a bunch of options appear.

If you click on ‘Builder’ you’ll be taken to a screen where you can start building out your course. Here’s a screenshot of what the builder area looks like:
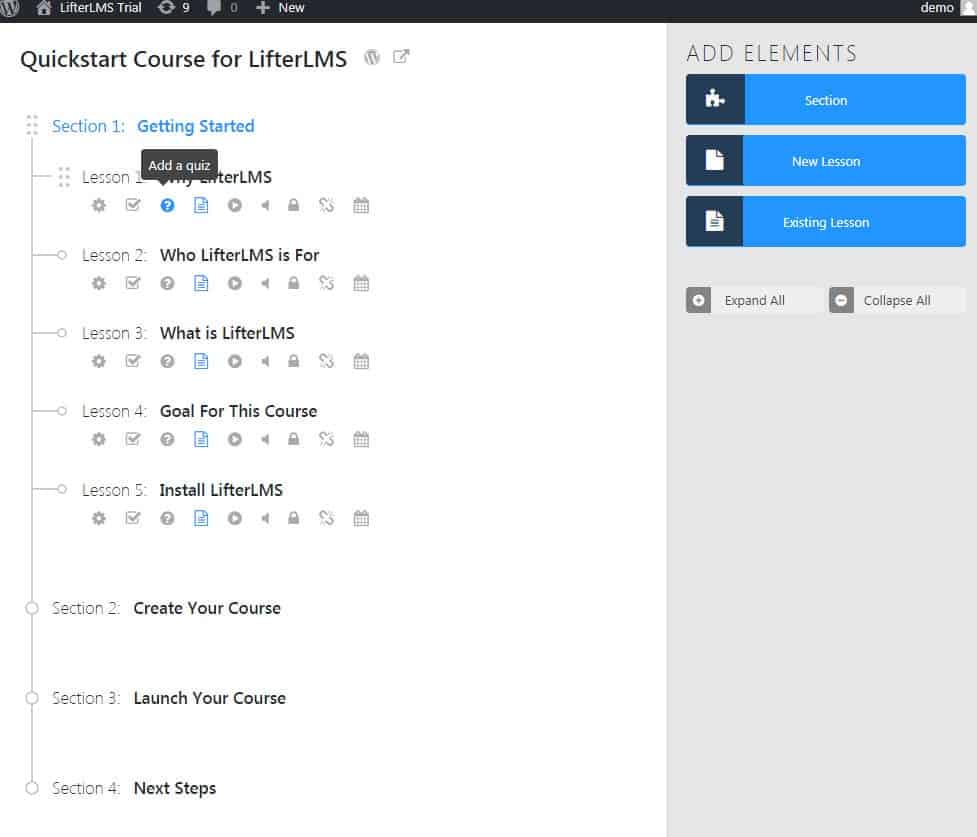
Under each lesson is a row of icons that you can hover over and a tooltip explaining what that icon does appears. Depending on which add-ons you add to the core LifterLMS plugin, you’ll have more or fewer icons than shown here.
To add a quiz, you’ll need to hover over the question mark icon and then click it. Doing so will open up this new interface where you can select to create a new quiz or edit an existing quiz:
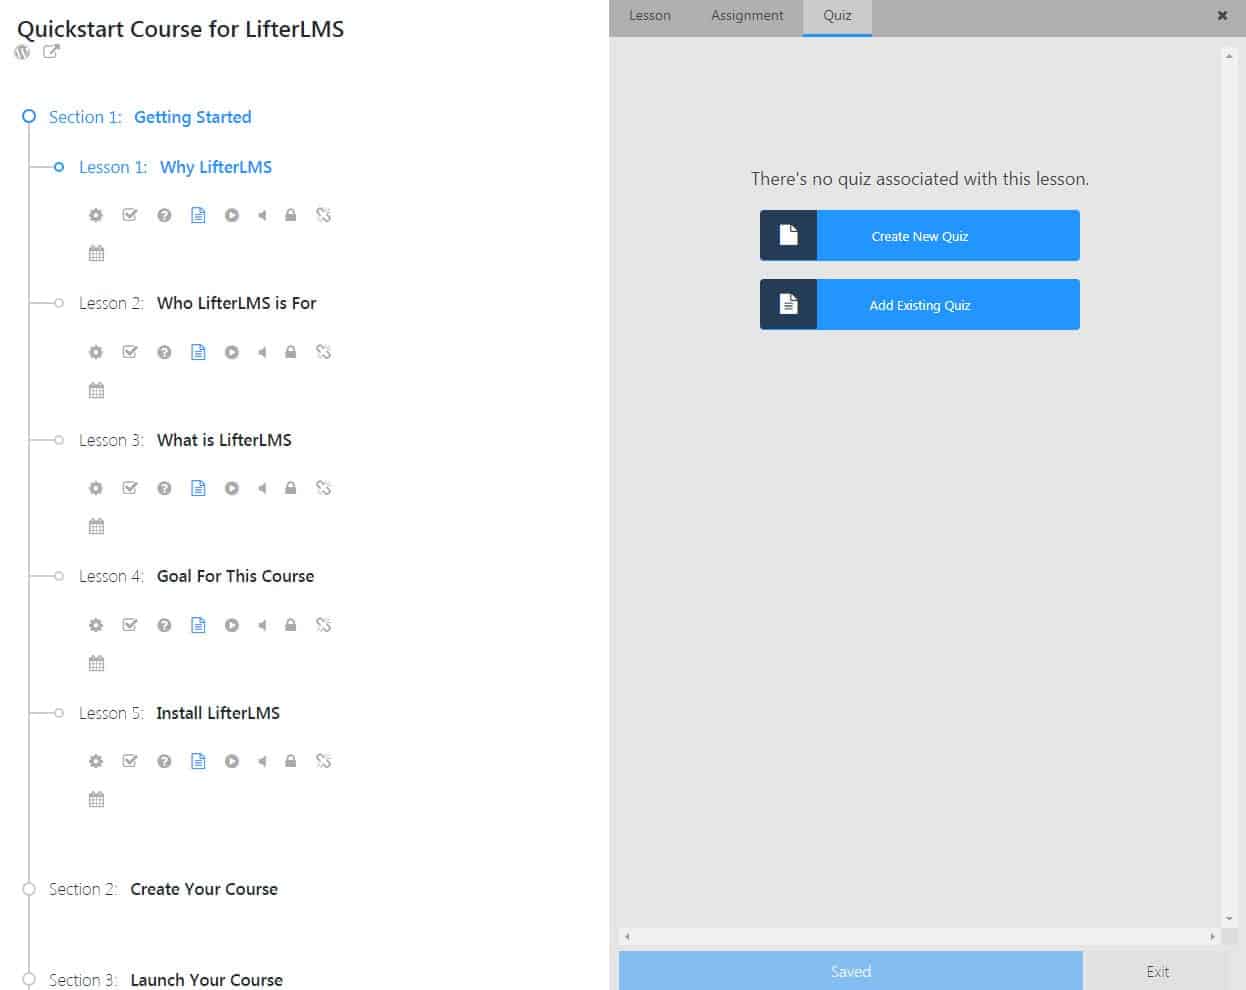
If you select ‘Create New Quiz’, then the quiz interface will open up and you’ll see this screen:
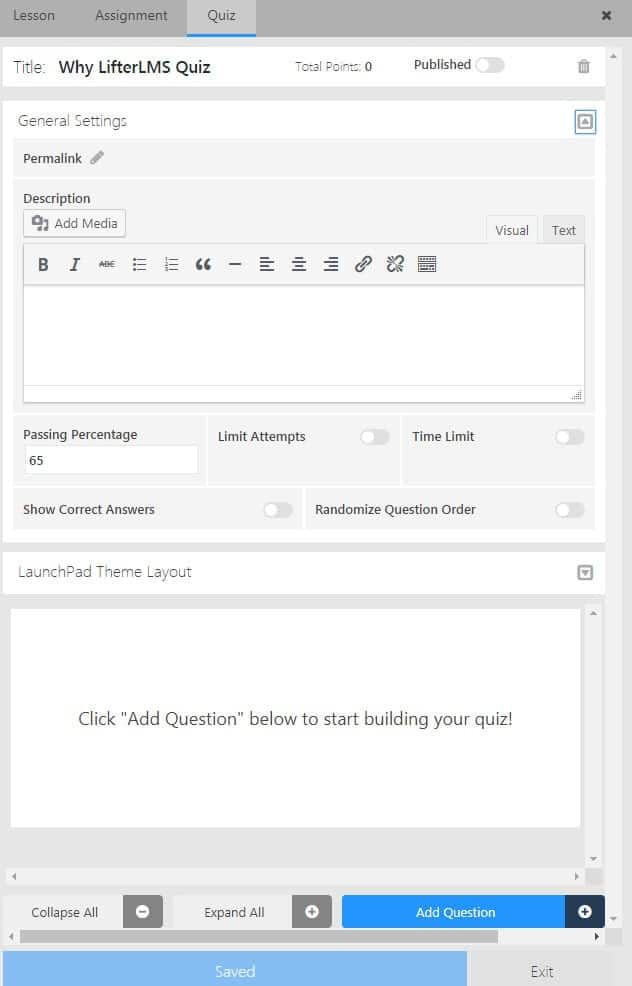
Here you can enter in some general settings like the passing percentage, come up with a description for the quiz, decide whether to limit attempts and/or set a time limit. You can also check whether to show correct answers and/or randomize the question order. It’s pretty advanced!
Under the general settings is a drop-down for the layout which looks like this:
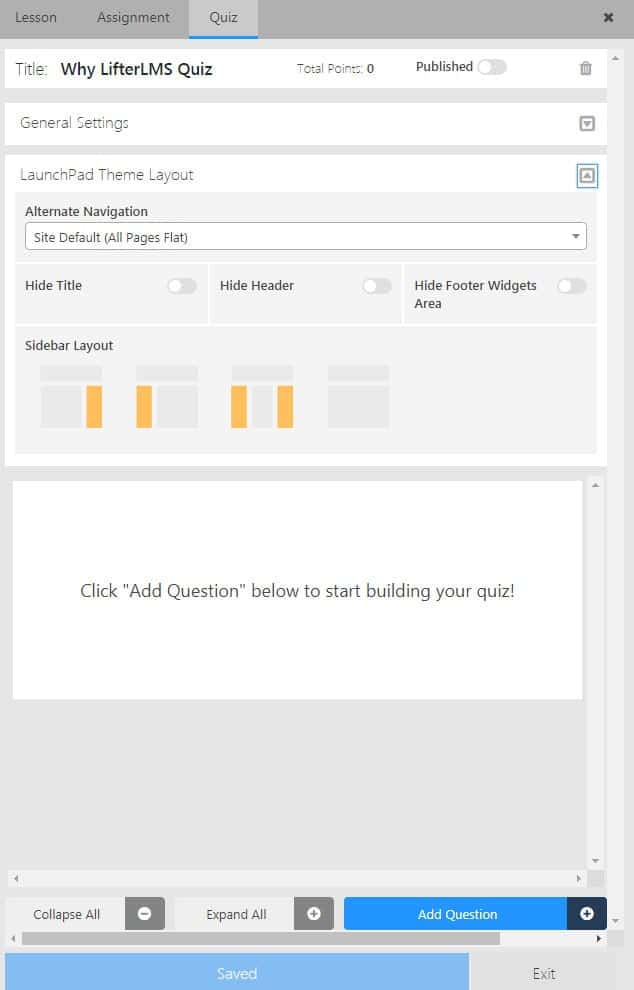
Here you can choose the layout of your quiz page. Once you’re done, you can click on ‘Add Question’ and that opens up this screen:
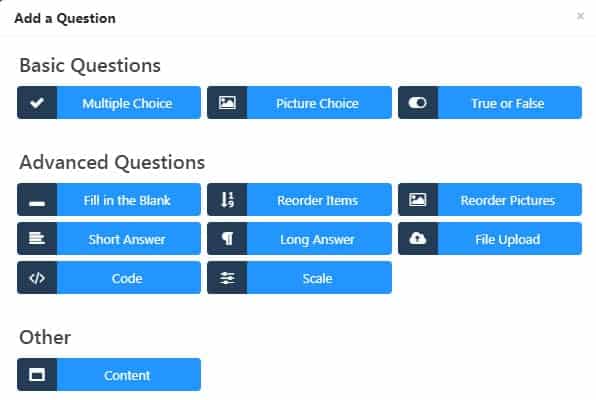
There are extra options shown here because I have the full suite of add-ons. The core LifterLMS plugin only comes with the Basic Question types. You just click on the type of questions you want in your quiz. Once done you’ll be taken to a screen that looks like this:
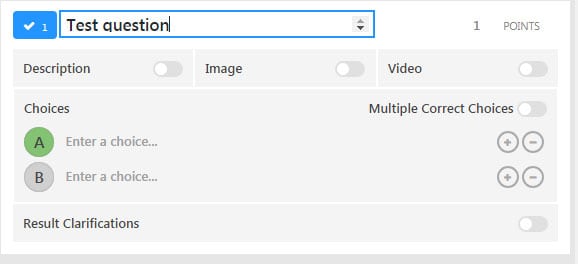
Just add your question, enter the answer choices, and select the correct answer. You can also toggle on the Result Clarifications and enter in an explanation. When you’re done, just save it, and exit out of the course builder.
If you go back to the main list of courses, you can click on a course title on this screen, and go to the edit page for that course like shown below:

Here you can make edits to an existing course.
Add Course
Under the courses tab comes the ‘Add Course’ tab. Clicking on this brings you to a screen with different options on it. The first part of this screen is where you can enter your new course title as well as some content about the course.
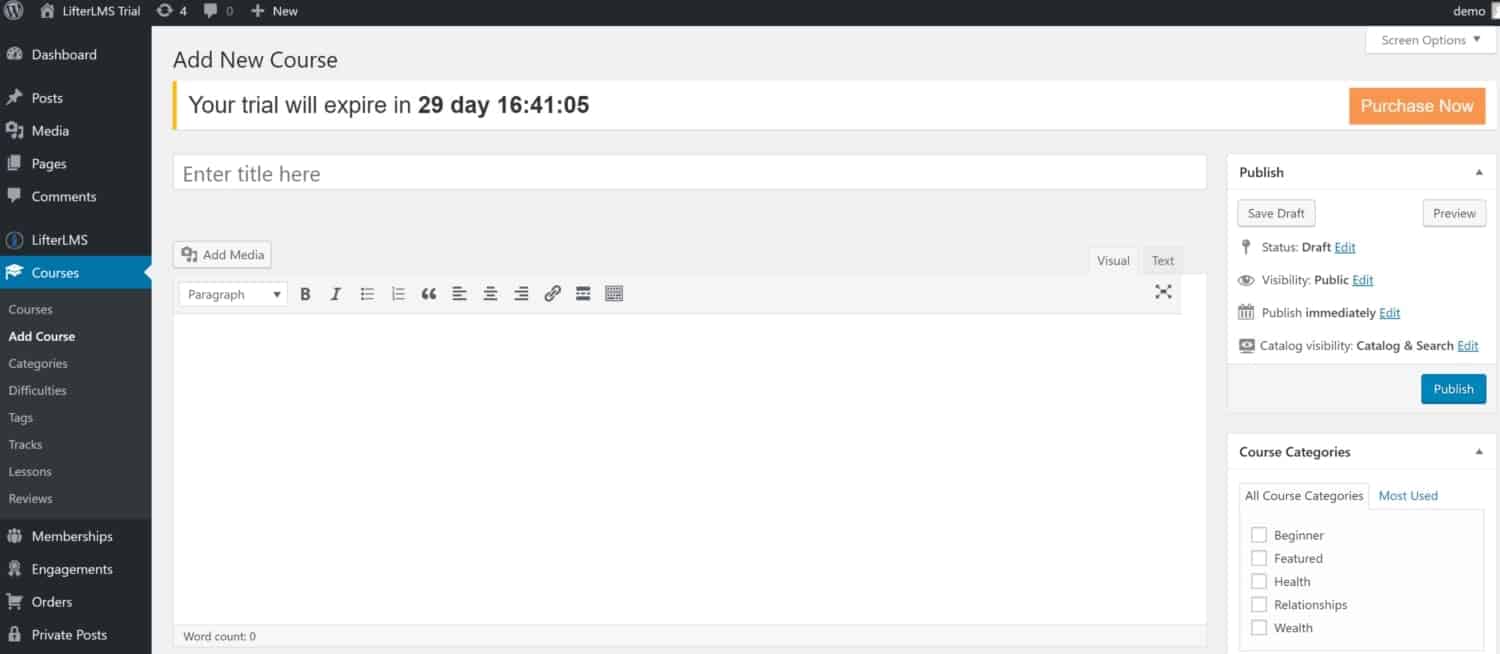
This page is set-up like a typical WordPress screen where you can decide to publish the post, keep it as a draft, or set it to publish on a schedule. You can also choose to add it to a specific course category.
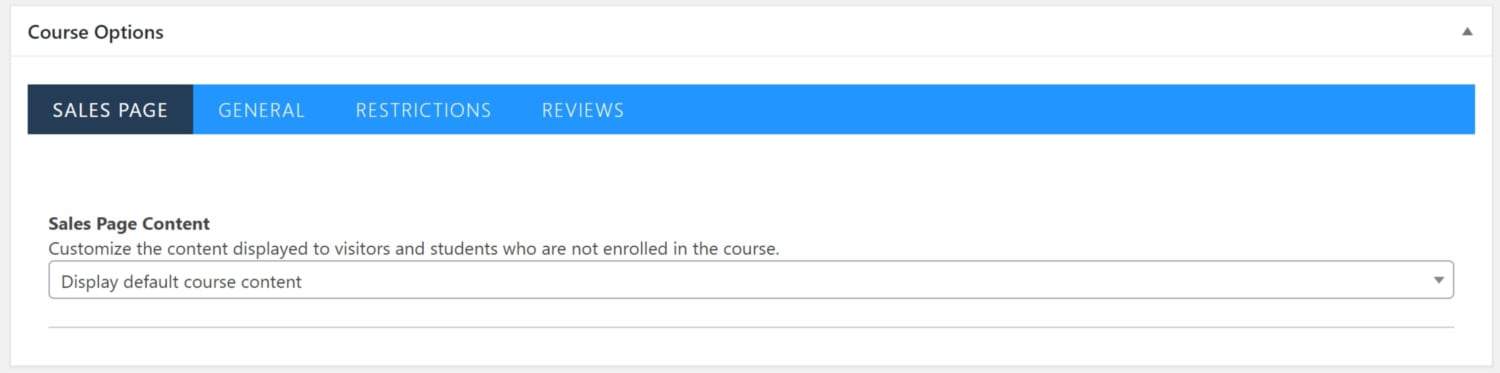
Course Options
You’ll see the Course Options box next. This box has several tabs, the first of which is the Sales Page tab. You can choose to display different content to visitors who are not yet enrolled in the course. The options are; display the default course content, show custom content, redirect to a WordPress page, or redirect to a custom URL.
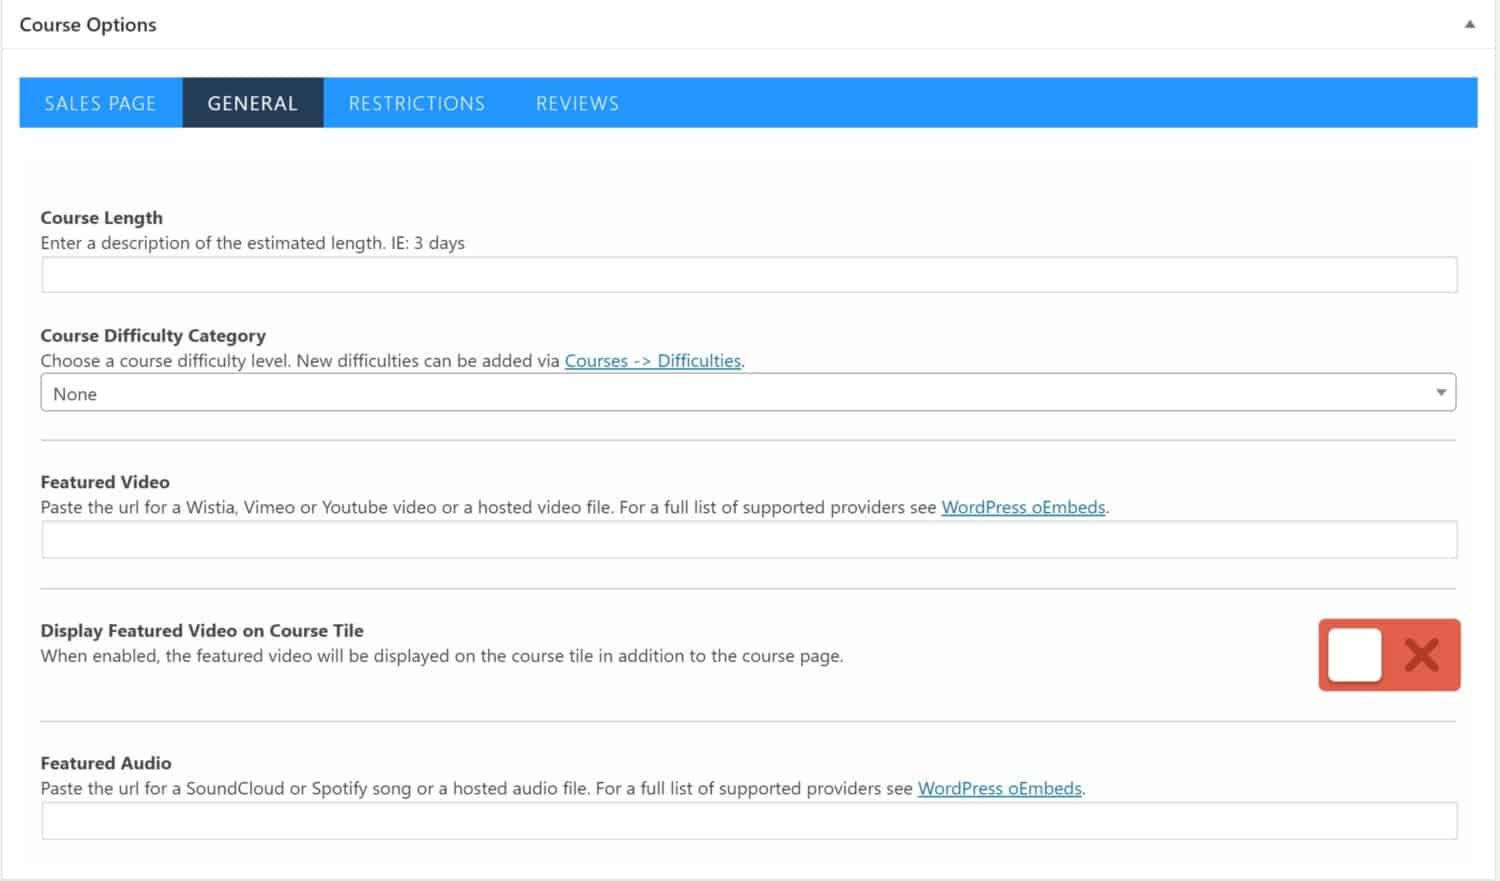
The General tab comes next. This General tab allows you to enter in an estimated length for your course, choose a difficulty category, include a featured video as well as a special display feature for it, and include featured audio. You can see a screenshot of the General tab below:
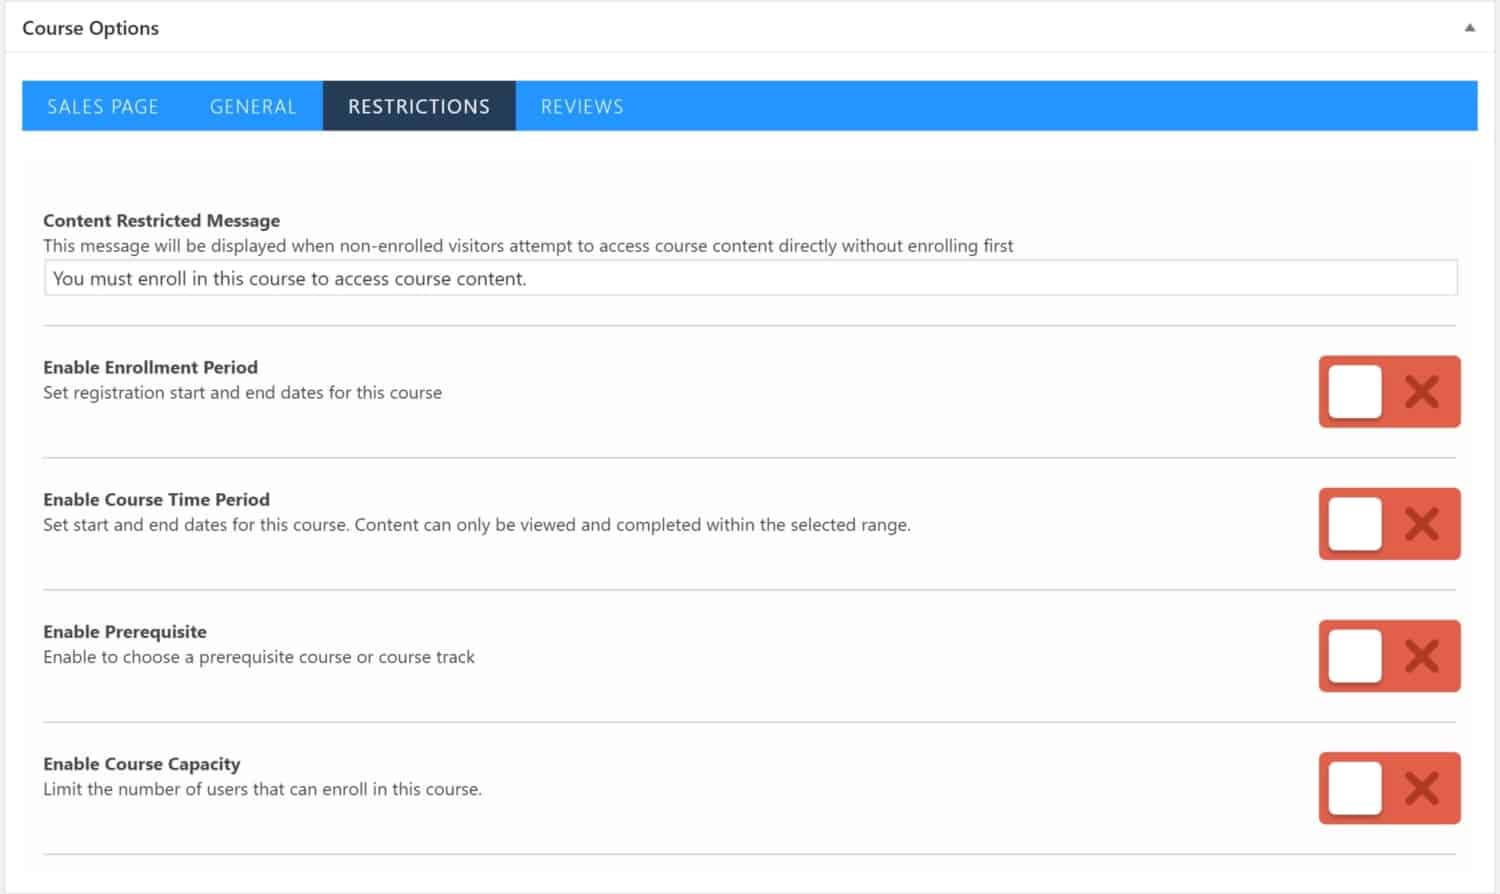
Next comes the restrictions tab. Here you can change the message that will show when a non-enrolled user tries to access your content without enrolling first. You can set registration start and end dates for the course, as well as set start and end dates for the course. Another option is to enable a prerequisite course that users must take first. Finally, you can enable a course capacity (if you need to limit your enrollments in a particular course). All this is very handy!
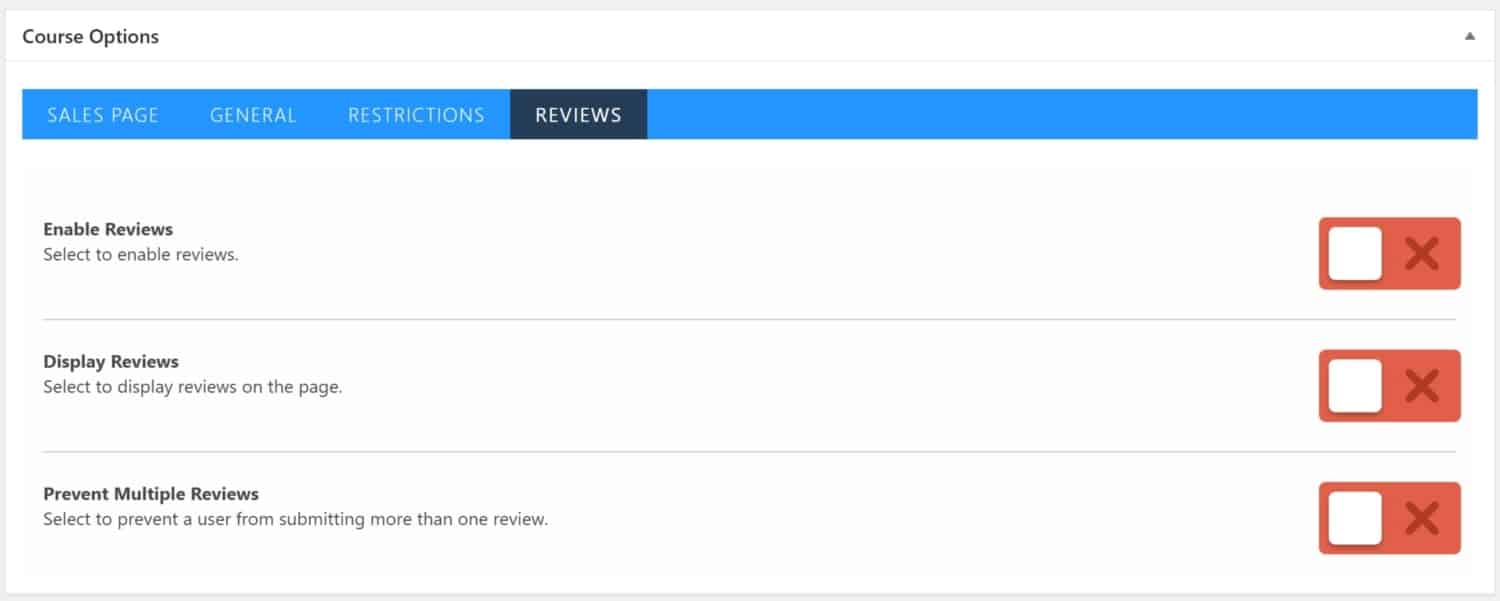
The last tab under Course options is the Reviews tab. You can choose to enable reviews, display them on the page and even prevent multiple reviews from being submitted by the same user.
Product Options
If you keep scrolling down the new course page, you’ll see the Product Options box. This is where you can add in course access plans. When you first scroll down to this box, it’ll look like this:
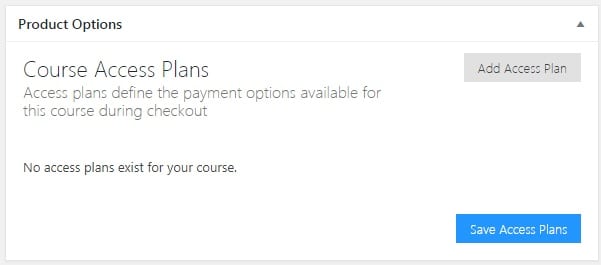
You can click on Add Access Plan and the box will open up to display the following:
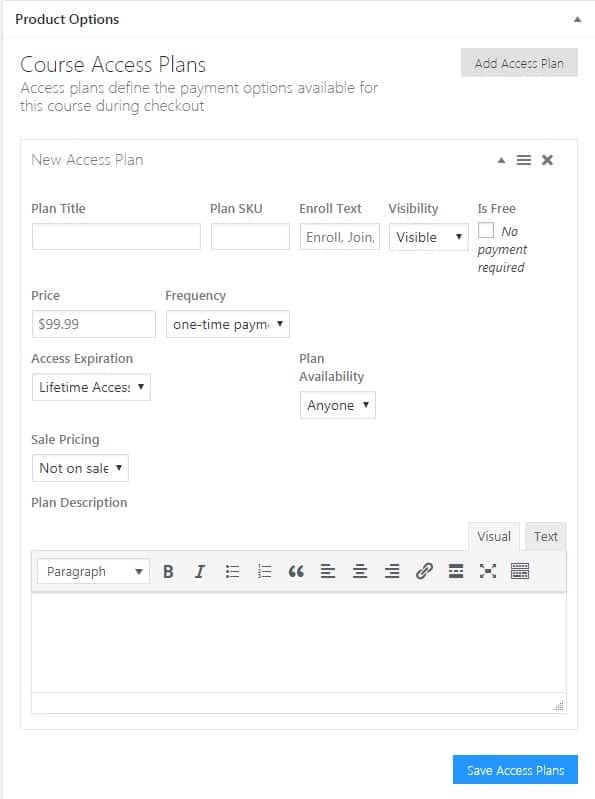
This allows you to configure the payment options available for the course during checkout. You’ll need to fill that out and set up an access plan.
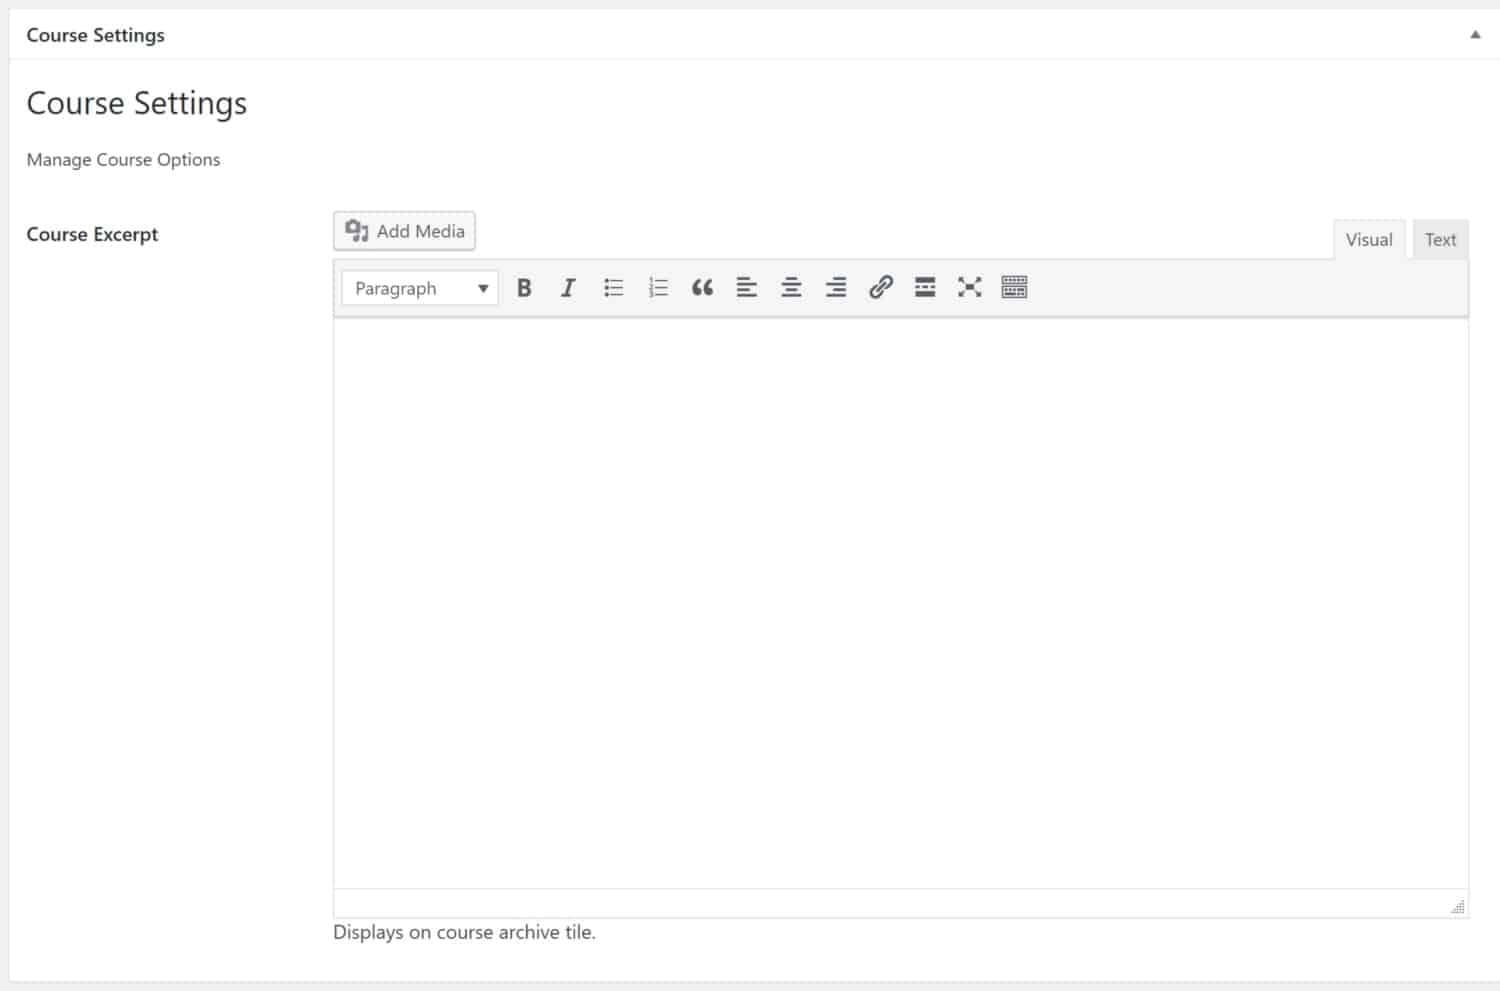
Course Settings
The next box is the course settings box. Here you can add in a course excerpt like shown below:
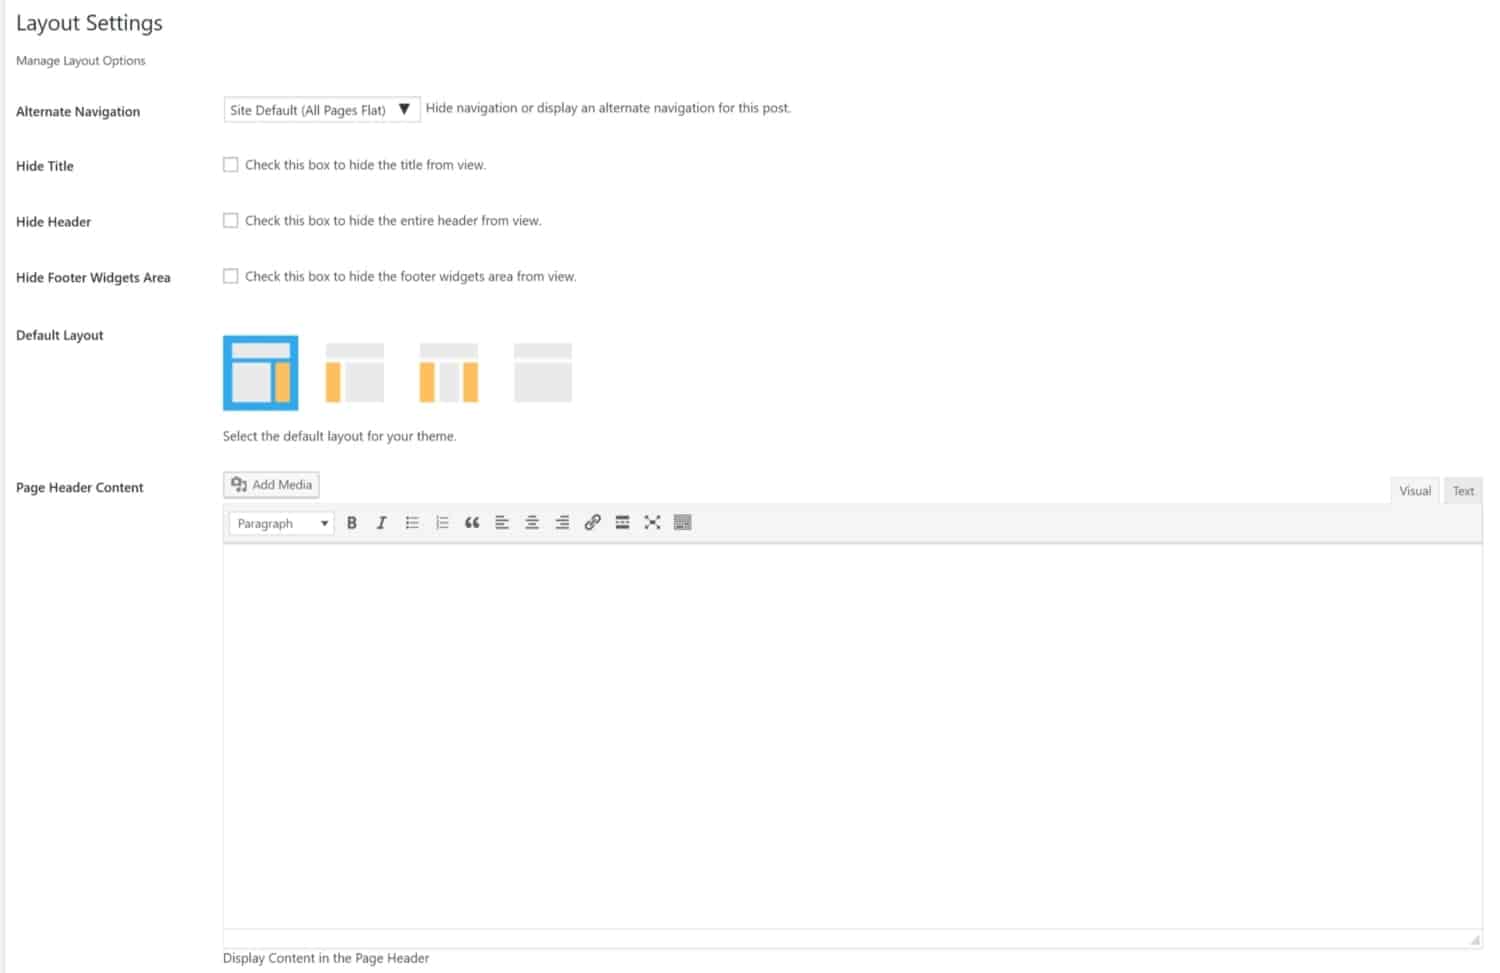
Layout Settings
Next are the Layout Settings. You can choose to have alternate navigation from this page of your site, hide the title, hide the header, or hide the footer widgets area. If you enable all this then your page will not have many links leading off it (this is sometimes done to keep people on your page and keep them reviewing your sales page).
You can also choose from one of the 4 layout options and you can add in page header content. All this is shown in the screenshot below:
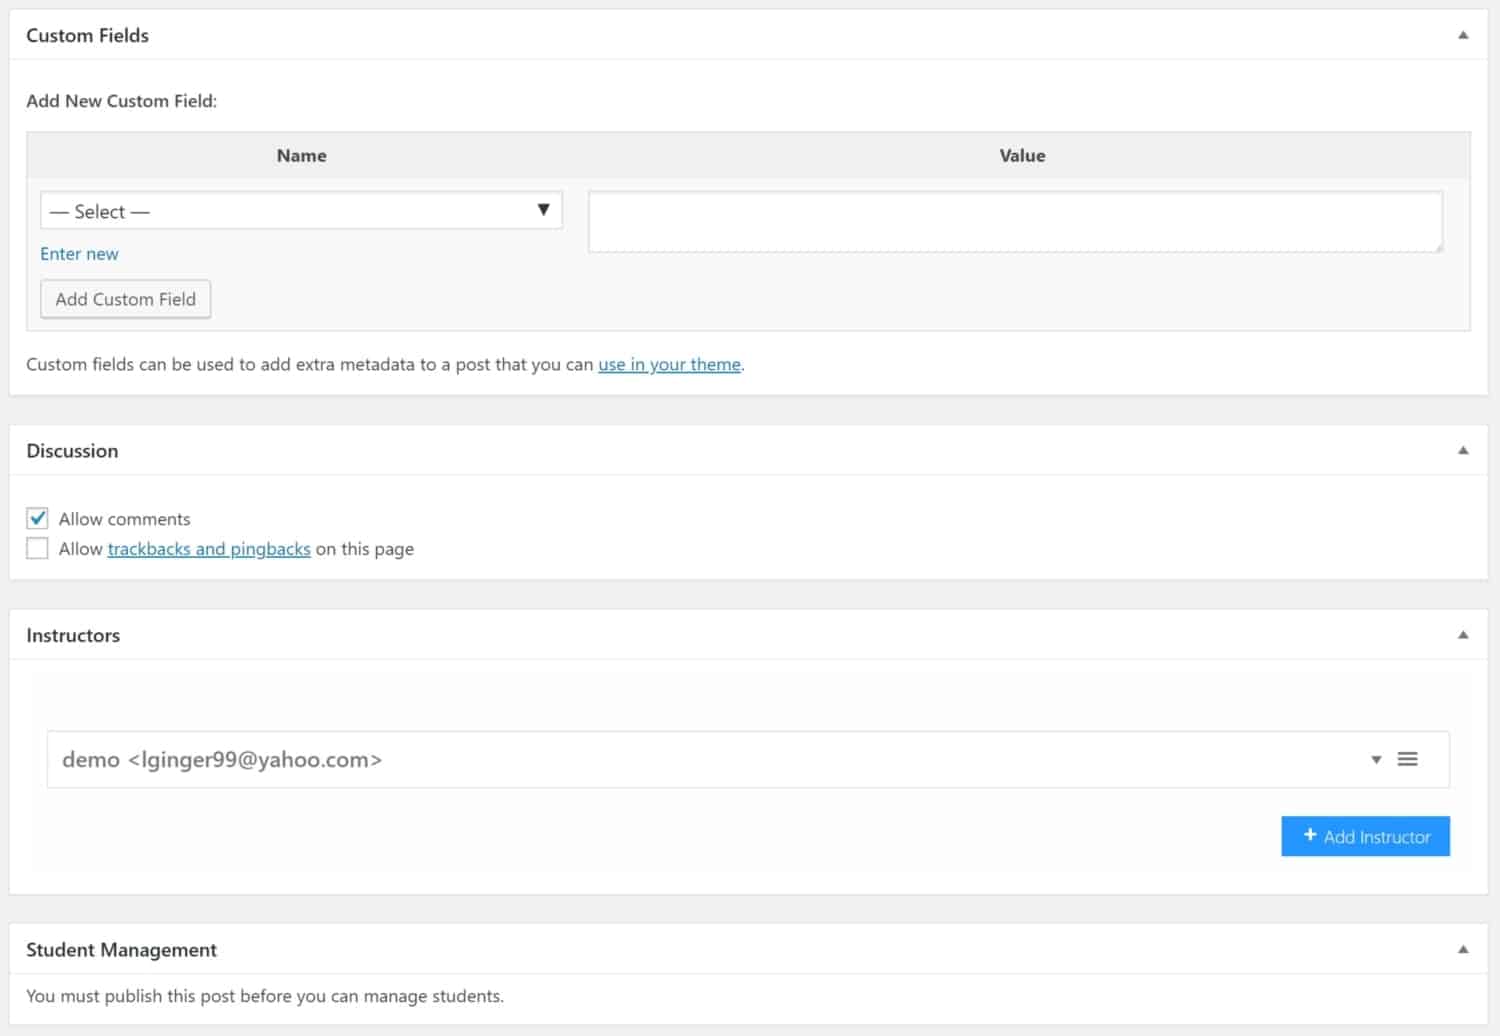
Custom Fields, Discussion, Instructors, and Student Management
You can use custom fields to add extra metadata to your page. The discussion box allows for comments and trackbacks or pingbacks.
Choose the right instructor from the drop-down list. If the post is published, you’ll be able to manage the students who are enrolled within it.
Categories
The categories tab opens up the following screen where you can add in different course categories:
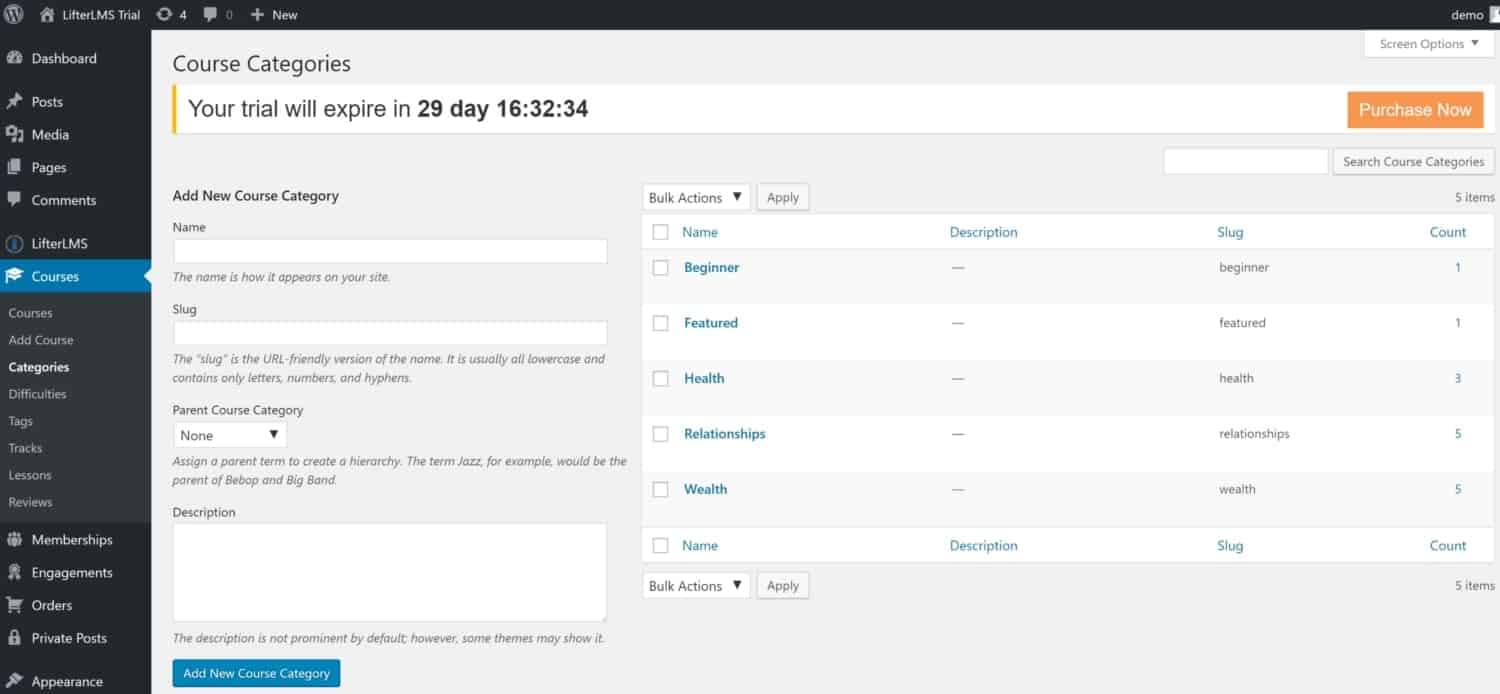
Difficulties
Clicking on the Difficulties tab opens up a screen where you can add in new course difficulty. Advanced, Intermediate, and Beginner are options as well as any custom text you can think of.
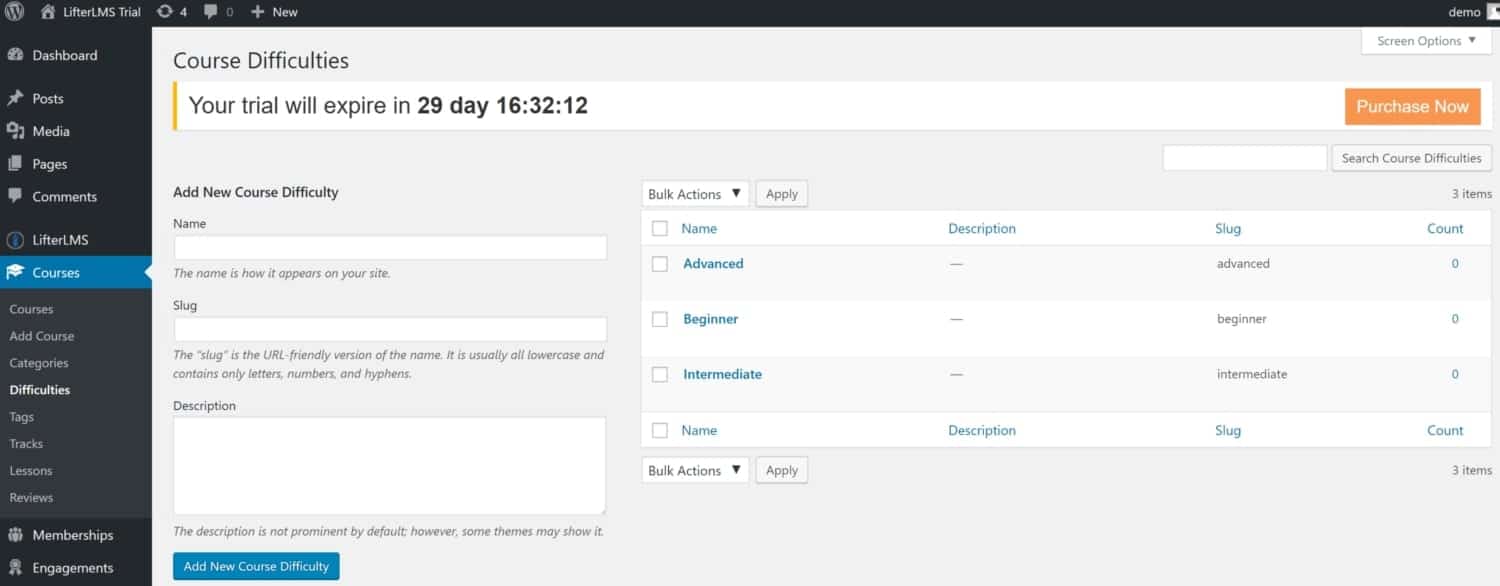
Tags
The Tags tab leads you to the following screen where you can add tags for your courses:
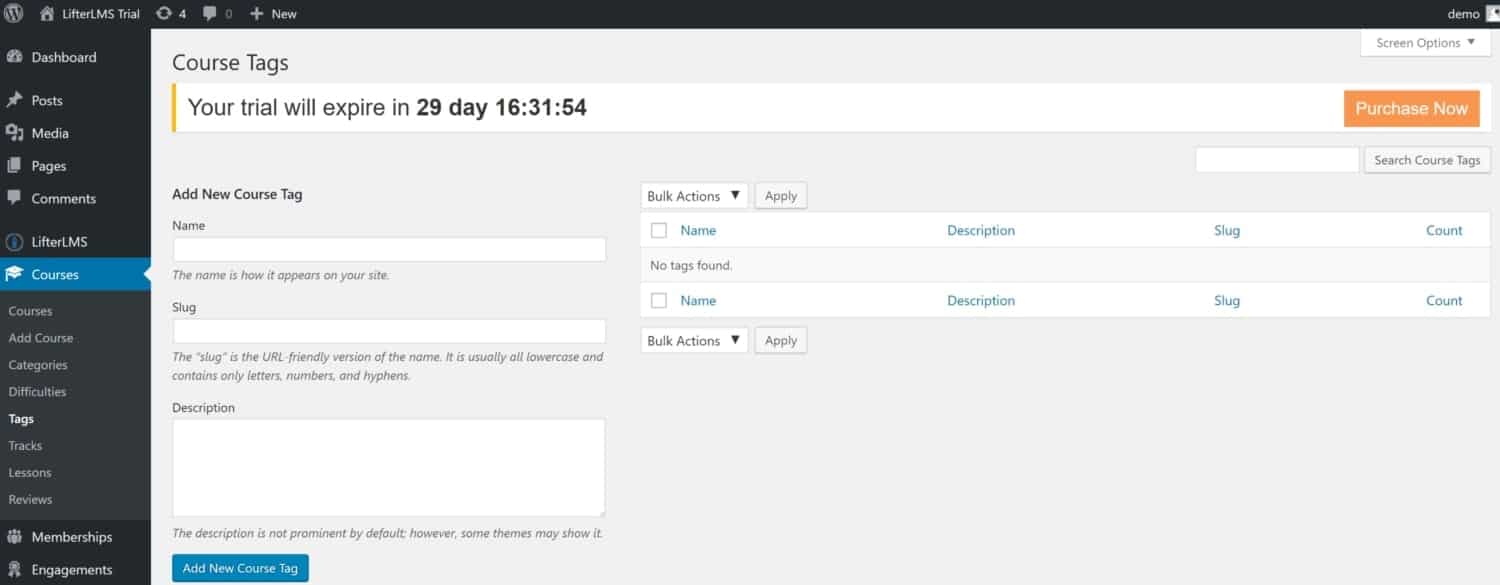
Tracks
The Tracks tab takes you to a page where you can add in course tracks.
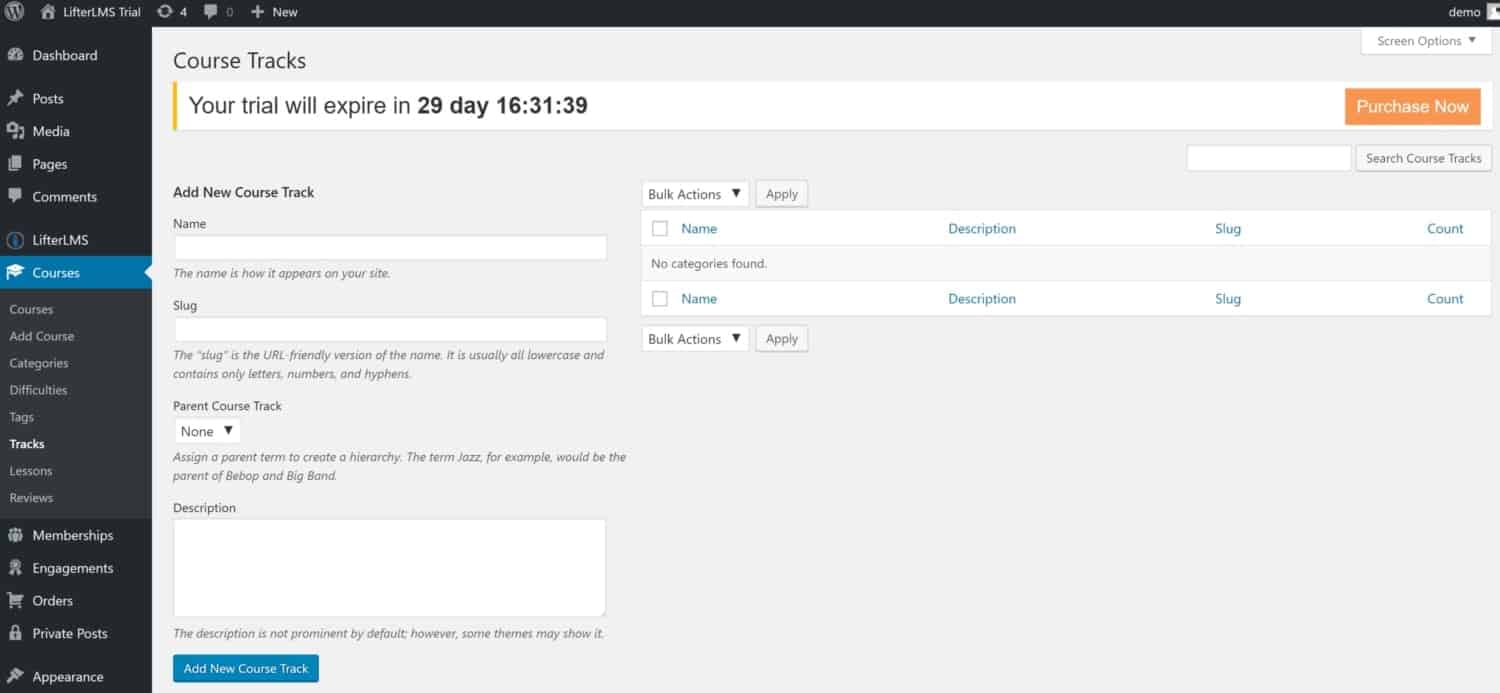
Lessons
The lessons tab allows you to edit and add lessons. If you have a lot of lessons, you can filter them by course as shown below:
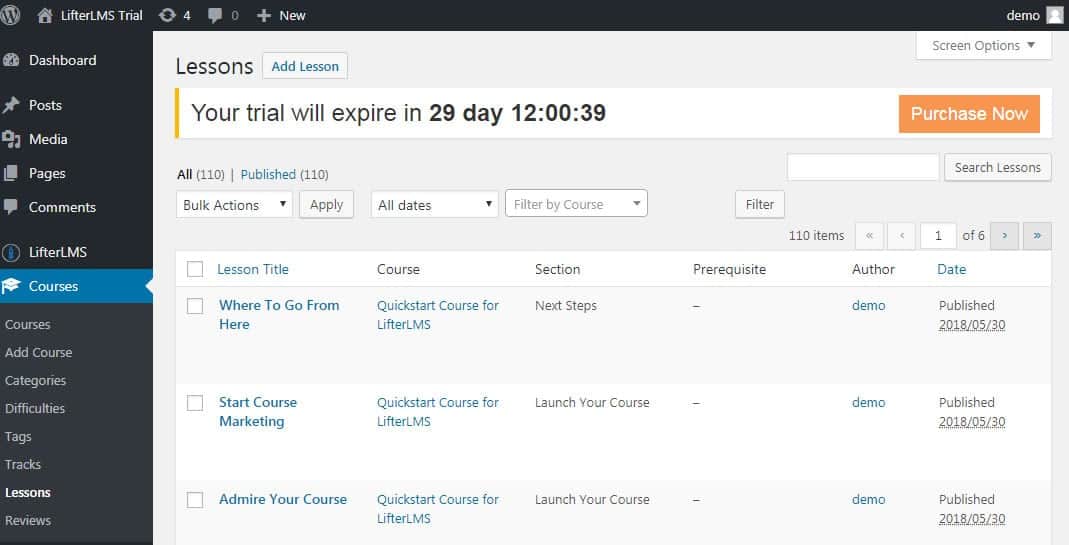
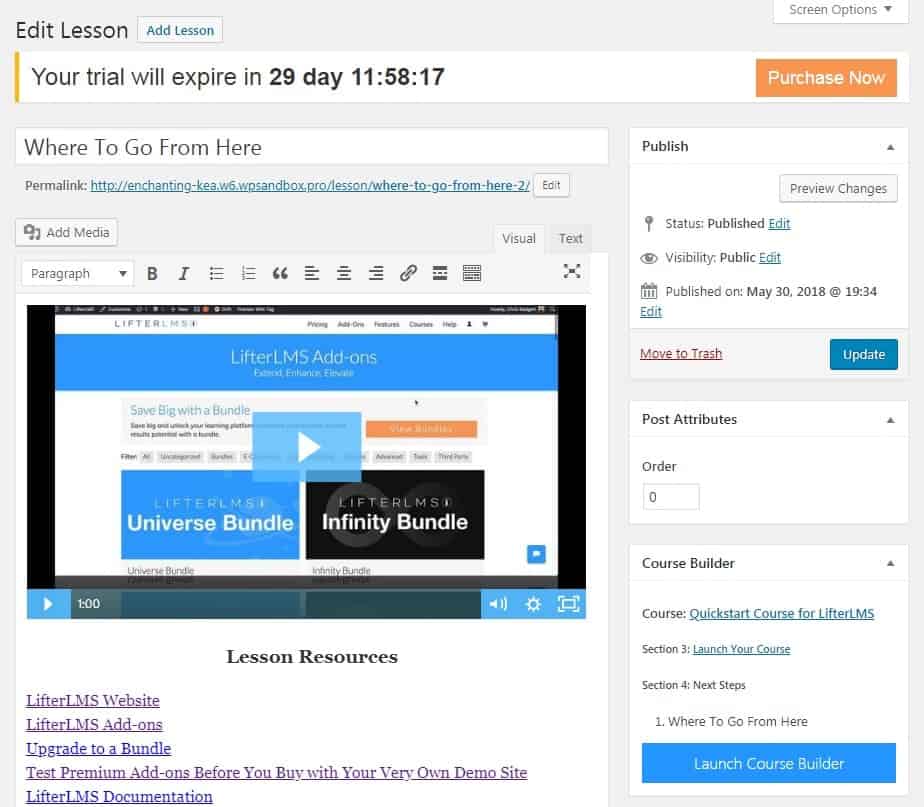
Edit Existing Lesson
You can edit an existing lesson from the lessons tab by clicking on the lesson title. You’ll be taken to that specific lesson page where you can change whatever you want.
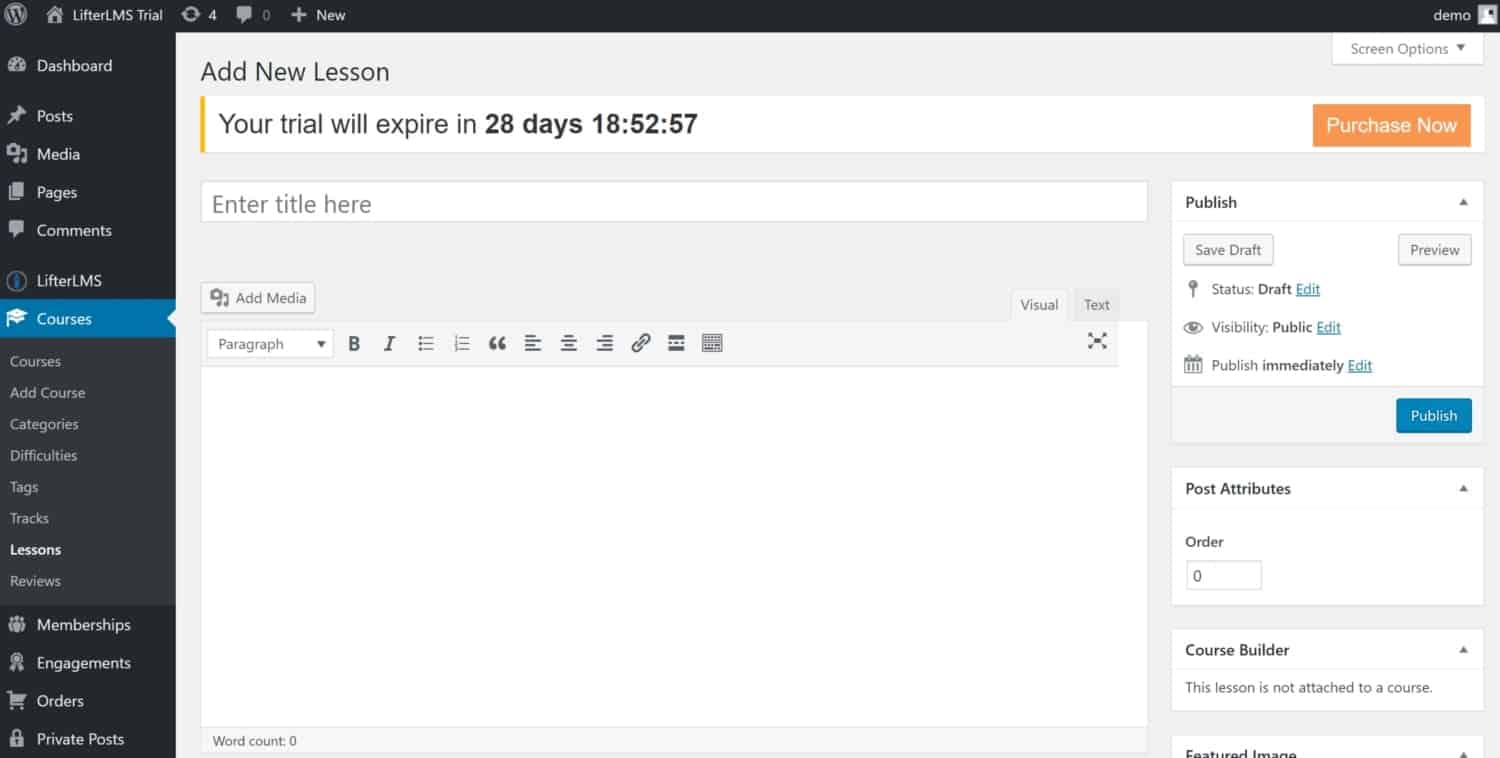
Add Lesson
You can also add a lesson by clicking on the Add Lesson button on the top, left of the screen. This will take you to a page where you can add in your lesson.
This page scrolls for quite a ways. This is how it starts. You can add in your title and some content.
As you scroll down, you’ll get to Lesson Settings where you can embed video and/or audio content. You can also mark the content as a free lesson which means it will be available to logged-out users on the sales page.
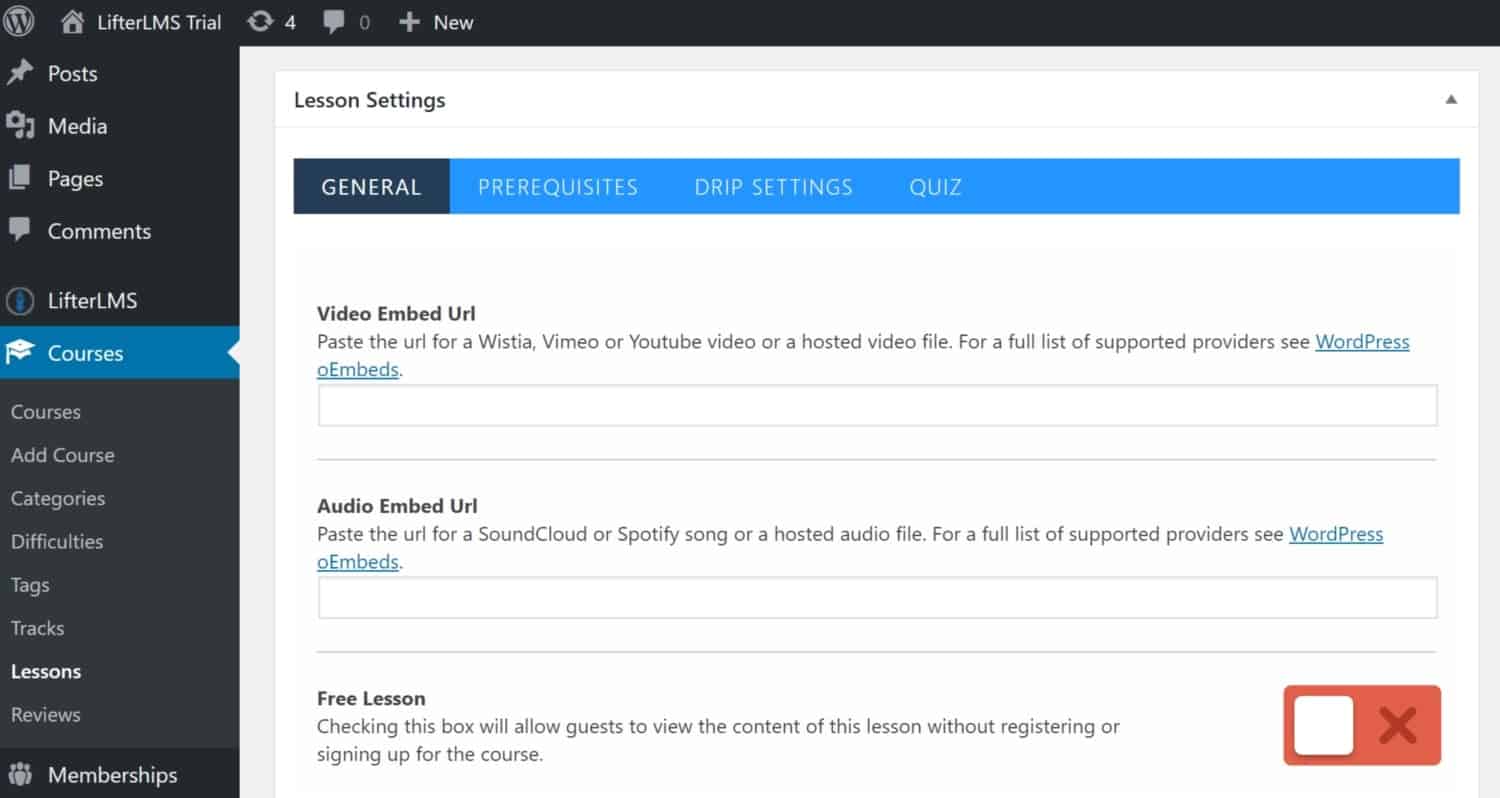
As you move through the tabs under Lesson Settings, you’ll get to Prerequisites. You can toggle this on if you want to choose a prerequisite for the lesson.

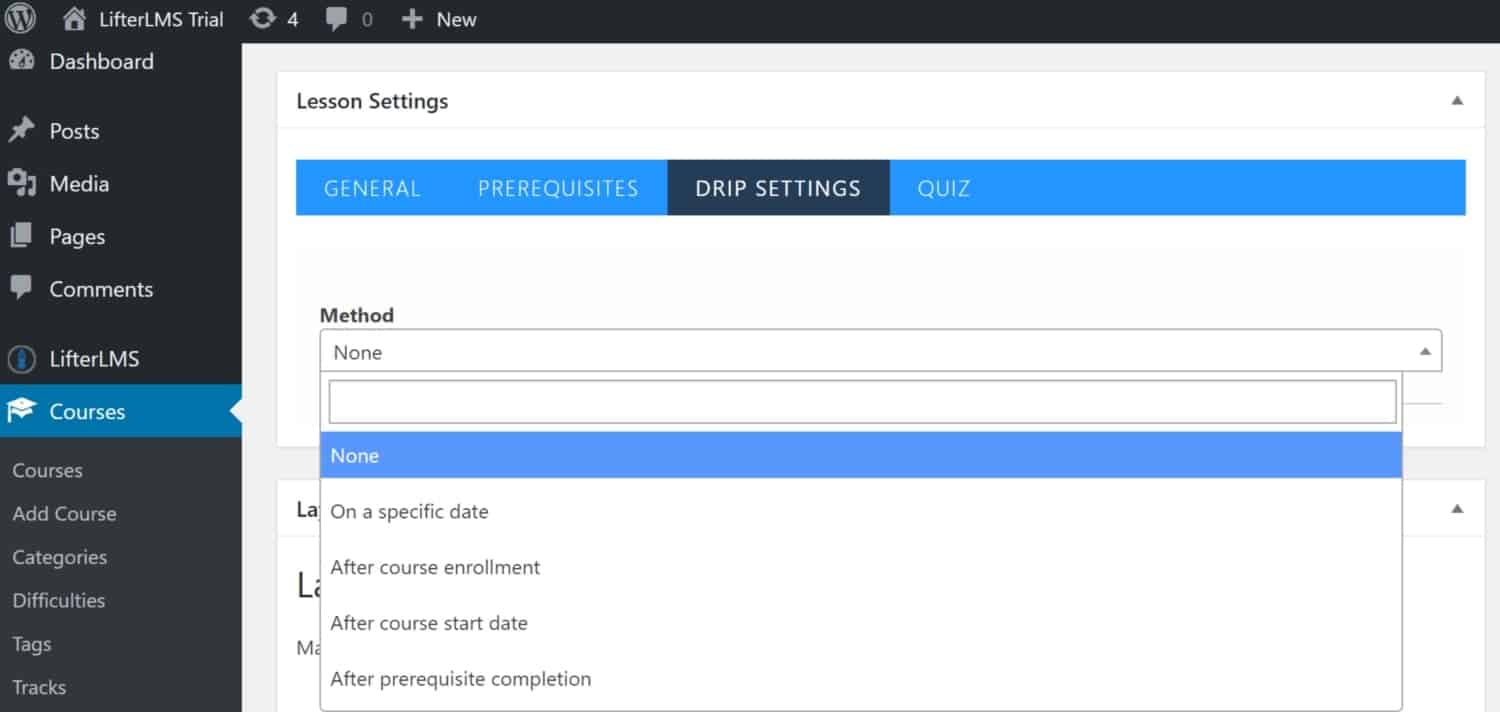
Drip Settings are next. If you’d like to drip this content out on a schedule, you can choose from a few methods. These include publishing the content on a specific date, after course enrollment, after the course start date, and after prerequisite completion.
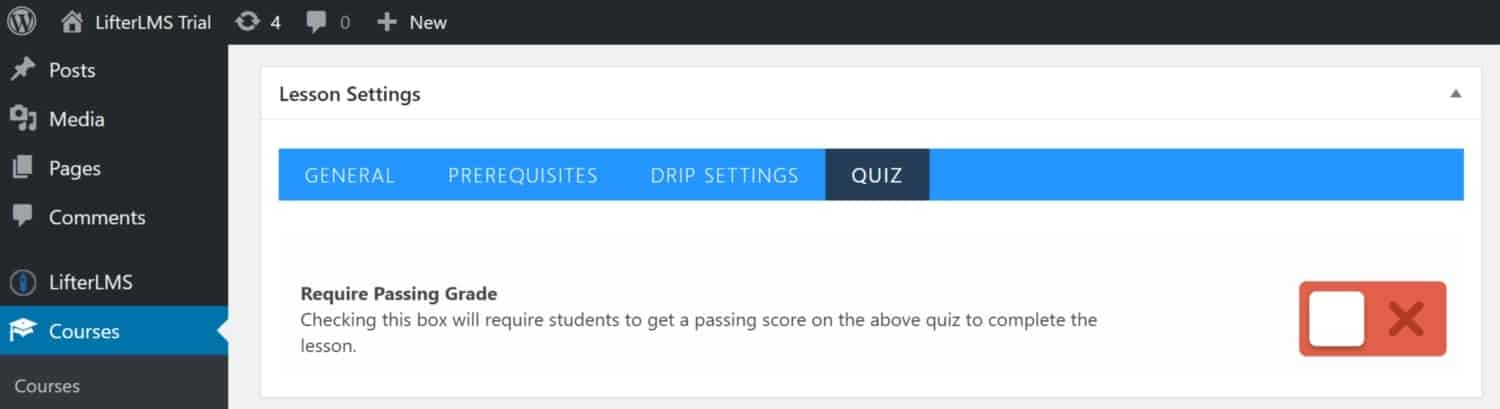
Quiz settings are last. Require a passing grade to consider a lesson completed.
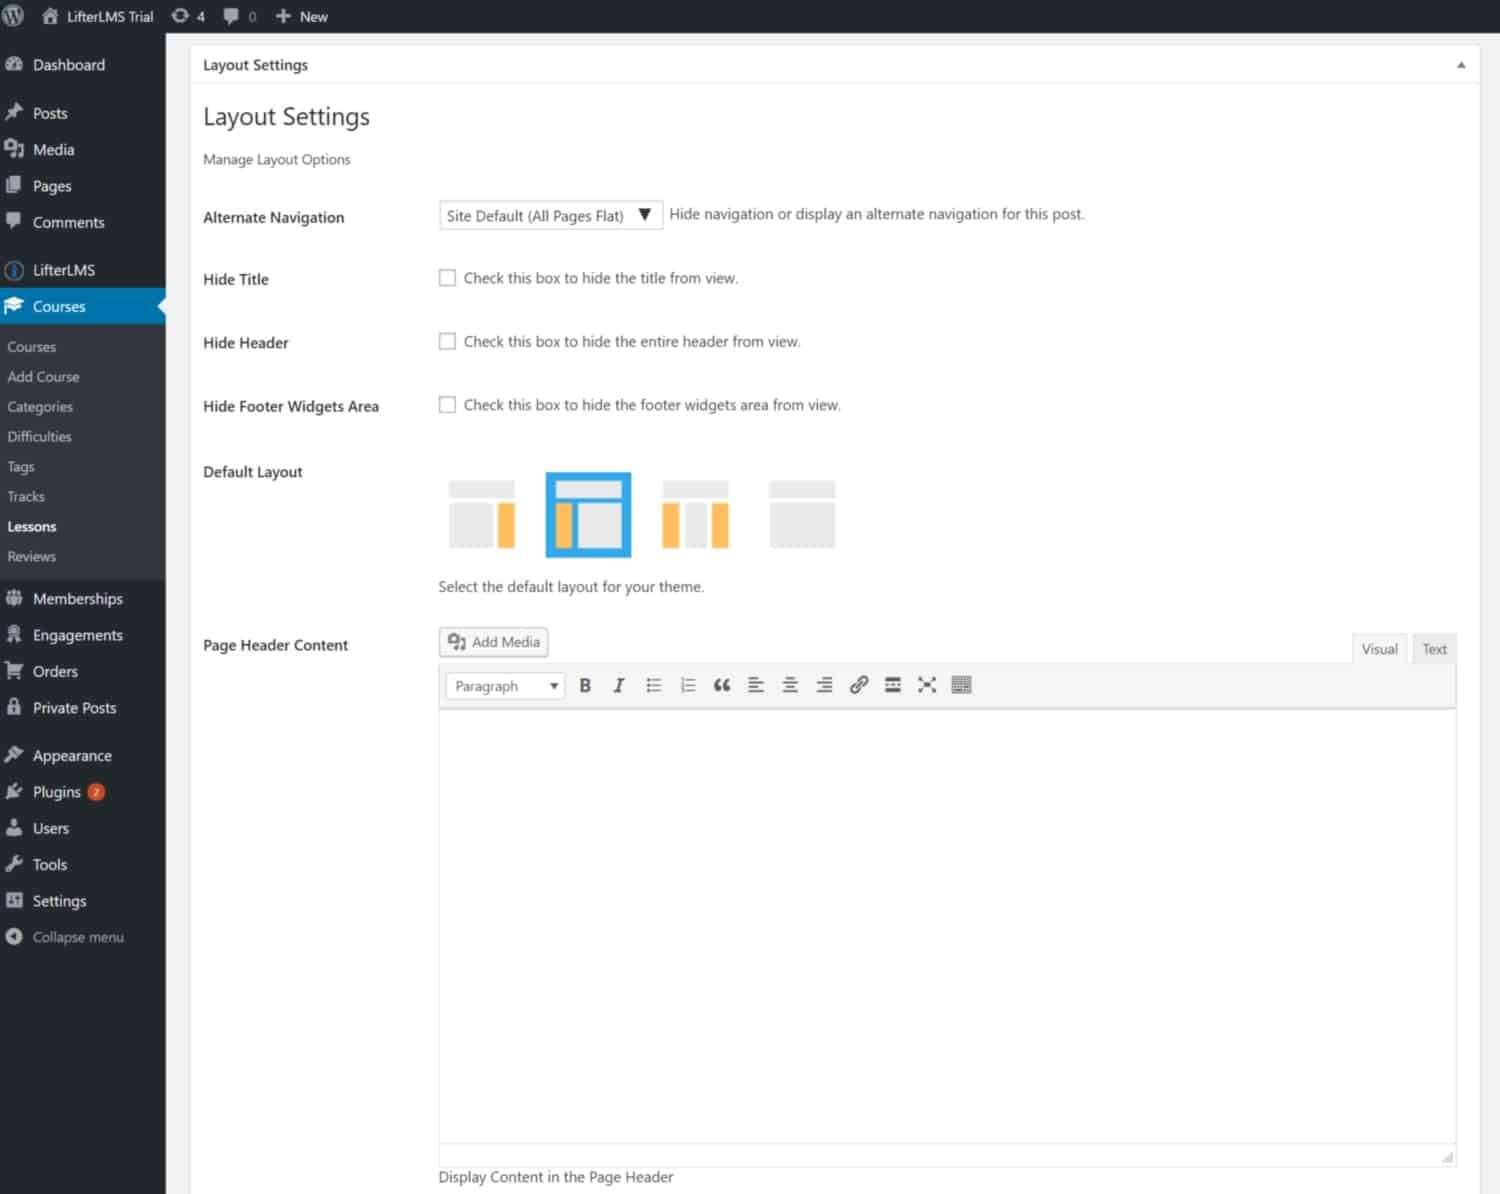
Under the Lesson Settings comes the Layout Settings. This is similar to the course settings where you can choose to have alternate navigation, hide the title, hide the header, and hide the footer widgets area if you choose.
You can also select a default layout and add your content.
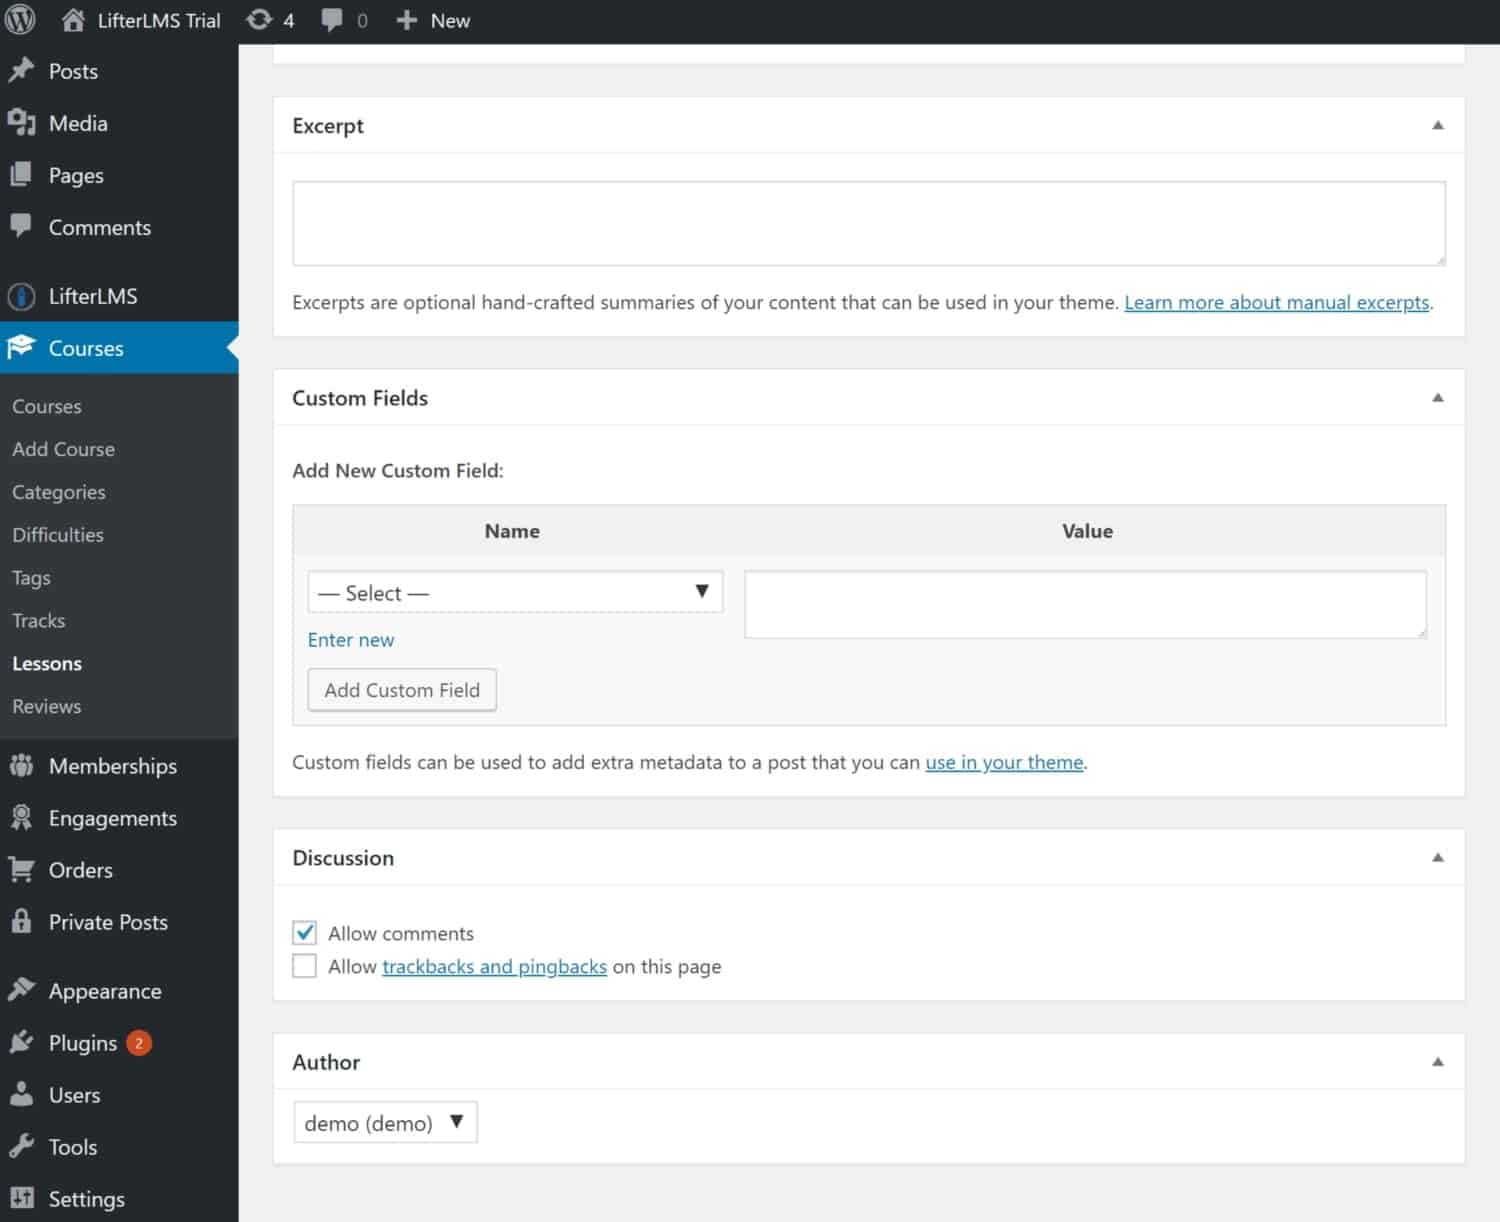
Next comes excerpts. Excerpts are summaries of your content that can be used in your theme. You can add in excerpts for your lesson here. Custom Fields can be used to add extra metadata to your post.
You can allow your learners to leave comments and allow trackbacks and pingbacks on the page. Finally, you can select the course content author.
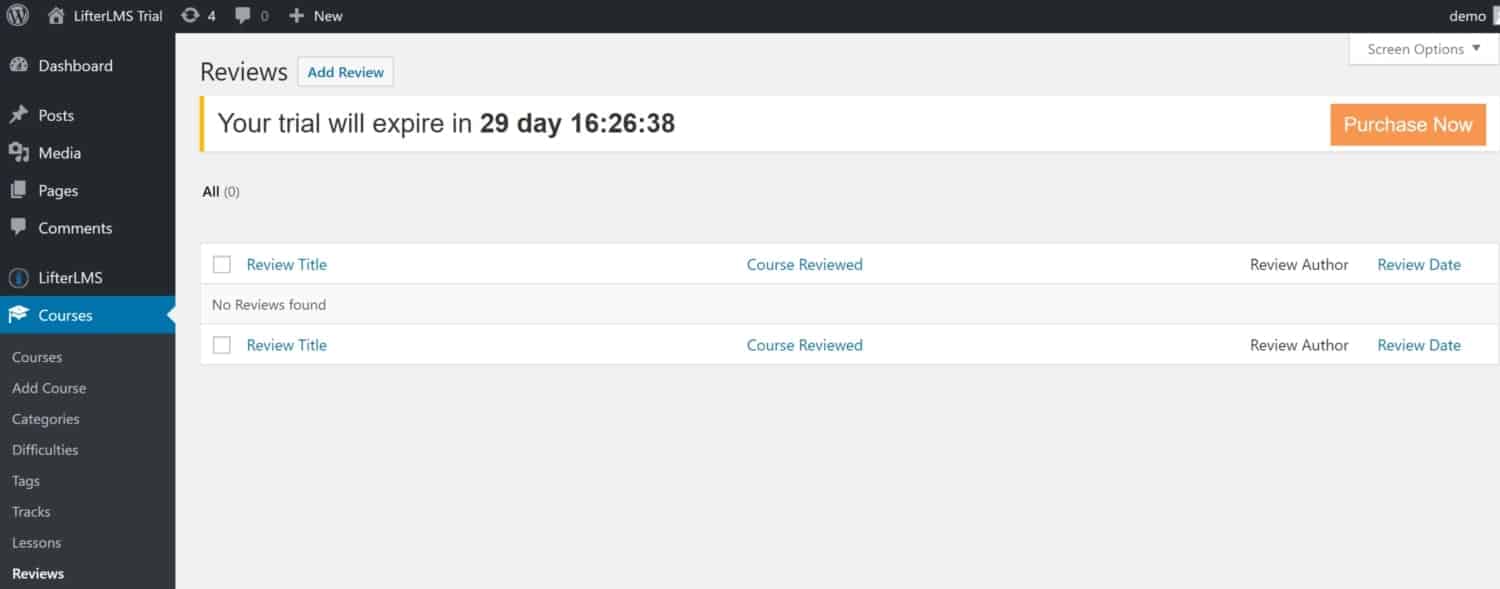
Reviews
You can manage your reviews from here and add a review from this screen as well.
Memberships
This next major tab will allow you to manage your memberships (if you have any).
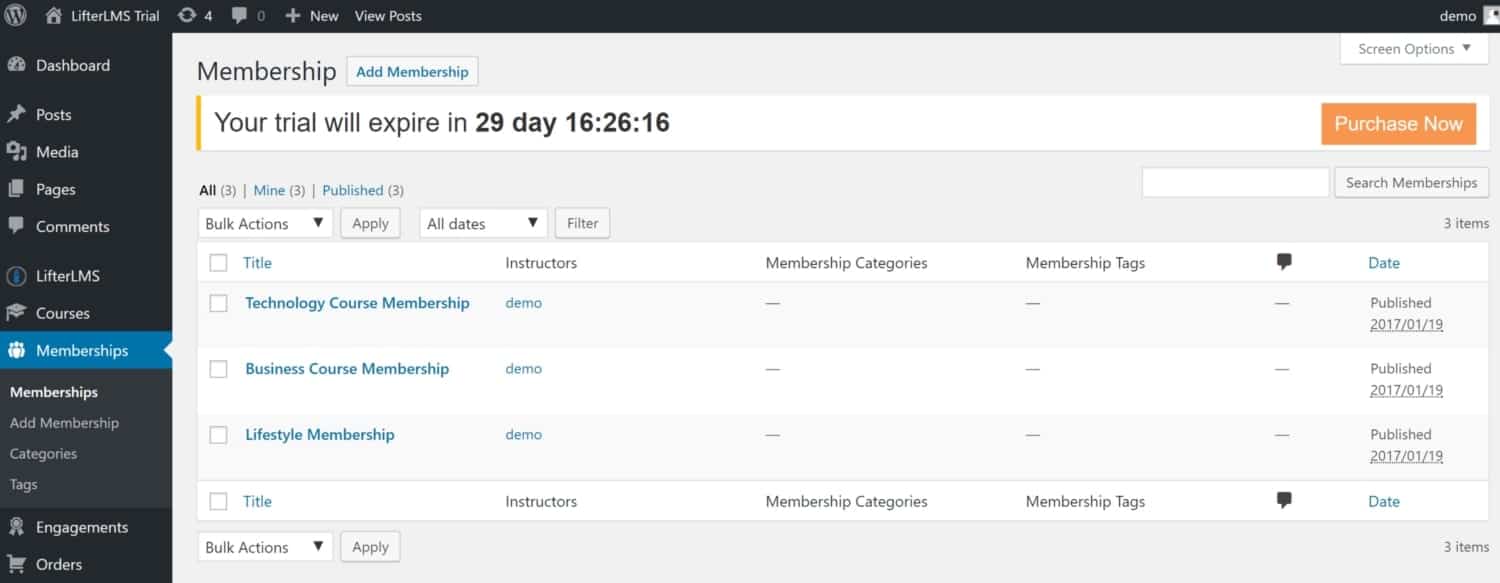
You can edit memberships by clicking on the existing membership link.

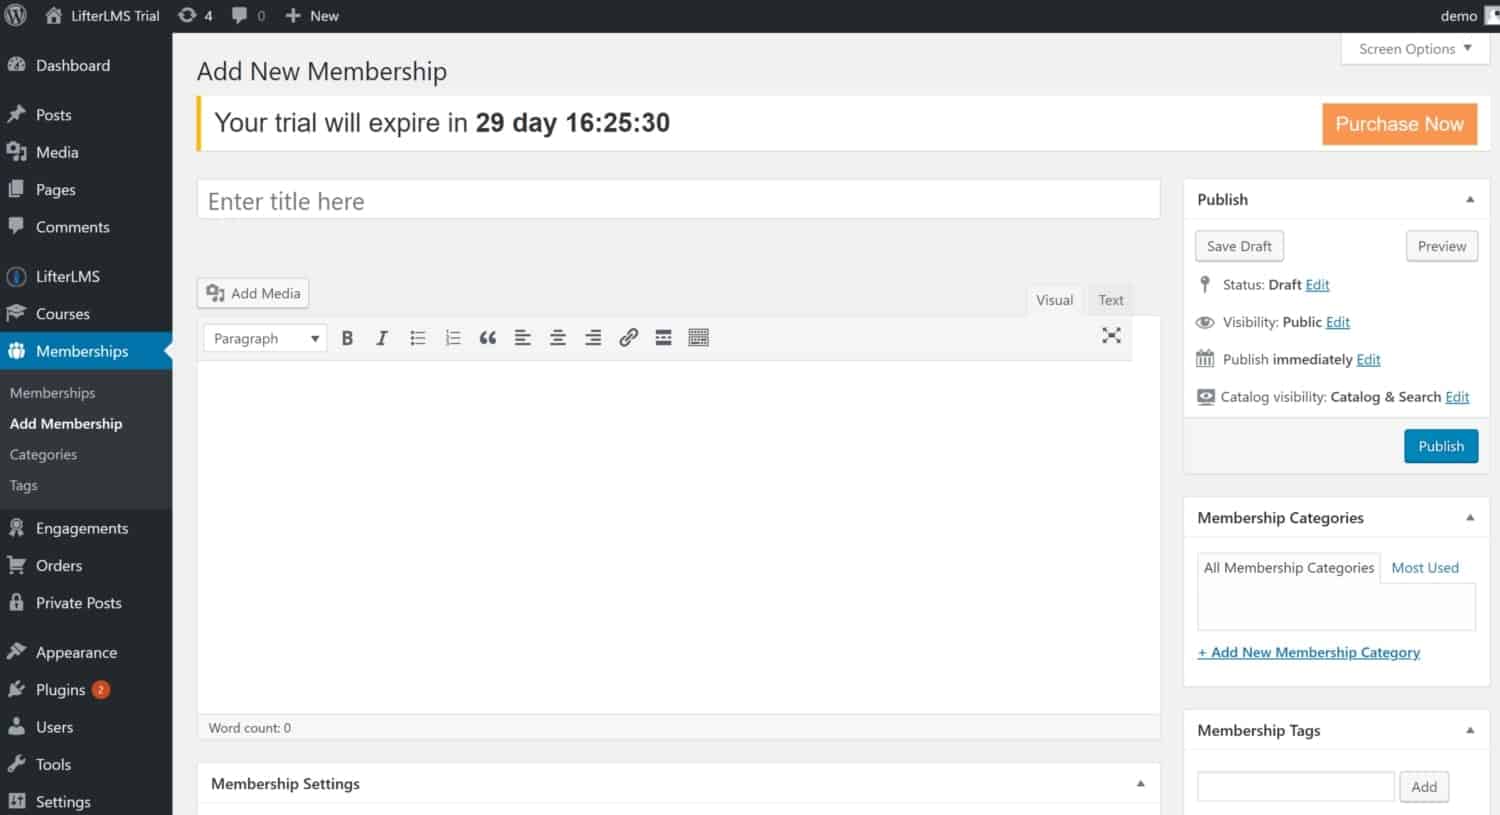
Add Membership
You can also add a new membership which is as simple to do as adding in a new course.
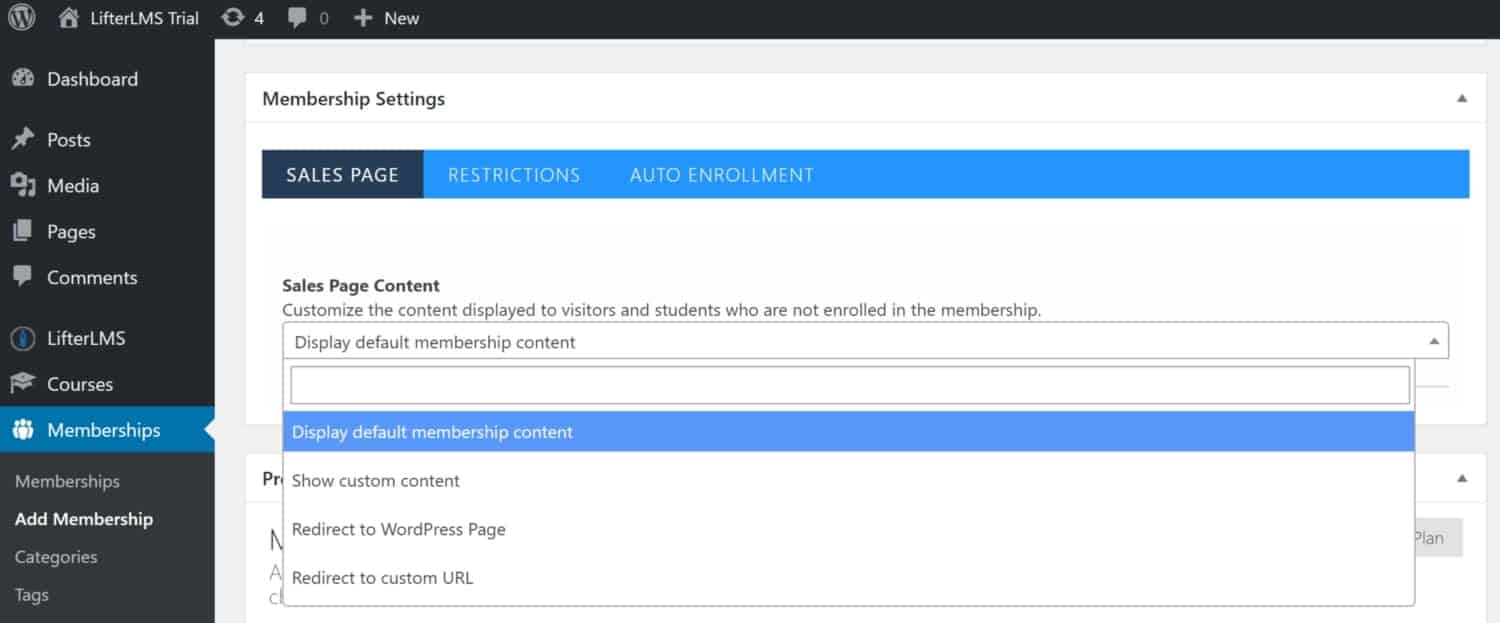
Next comes the Membership Settings box. The first tab in this box is for customizing the sales page content that will be displayed to visitors who are not enrolled in the membership. You can choose to display default membership content, show custom content, redirect to a WordPress page, or redirect to a custom URL.
Next up under Membership Settings comes the Restrictions. You can choose what happens when a non-member attempts to access content restricted to this membership. You can also decide whether to display a message after redirecting non-members trying to access your content and you can select exactly what that message says.
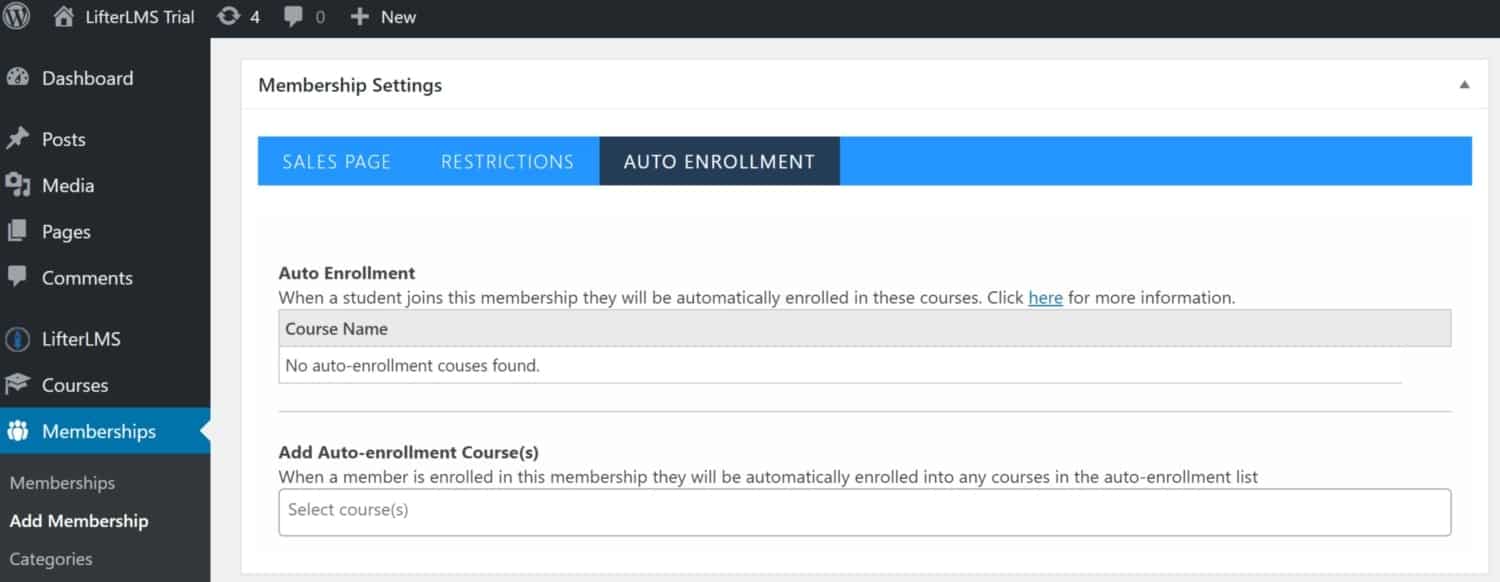
Lastly under Membership Settings is Auto-Enrollment. By joining a particular membership students will be automatically enrolled in certain courses.
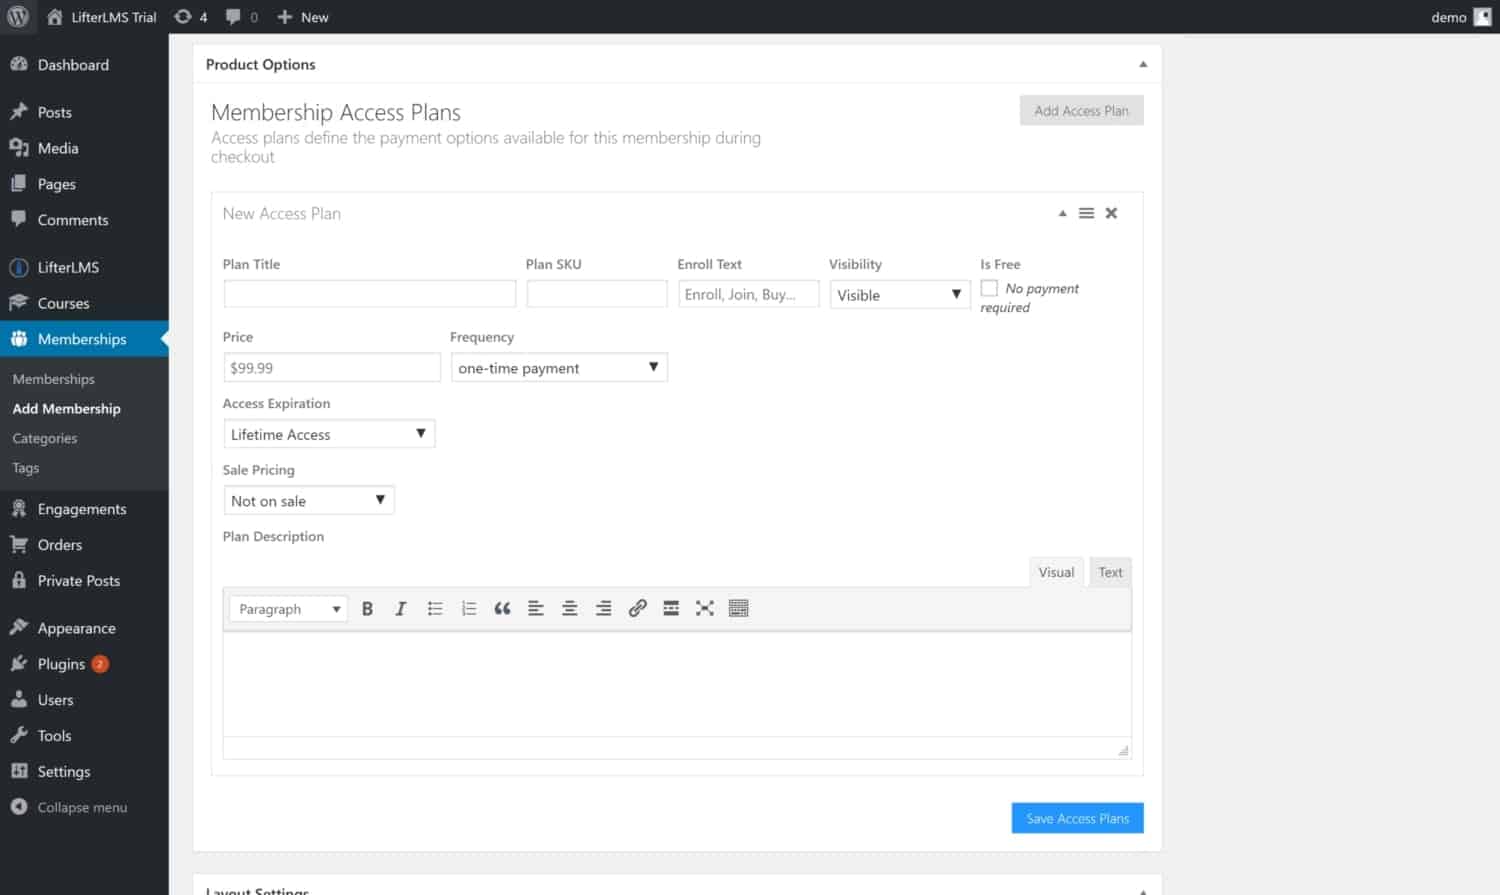
Next up you can choose Membership Access Plans. This covers the payment options available for this particular membership. So you can adjust everything shown in the screenshot below which includes the plan title, price, frequency of the payment (if you’d like to do monthly payments), expiration, and more.
There are also layout settings (just like shown previously) as well as the option to add in custom fields, settings to allow comments, instructor selection, and student management.
Categories
Here you can add in membership categories as well as edit them.

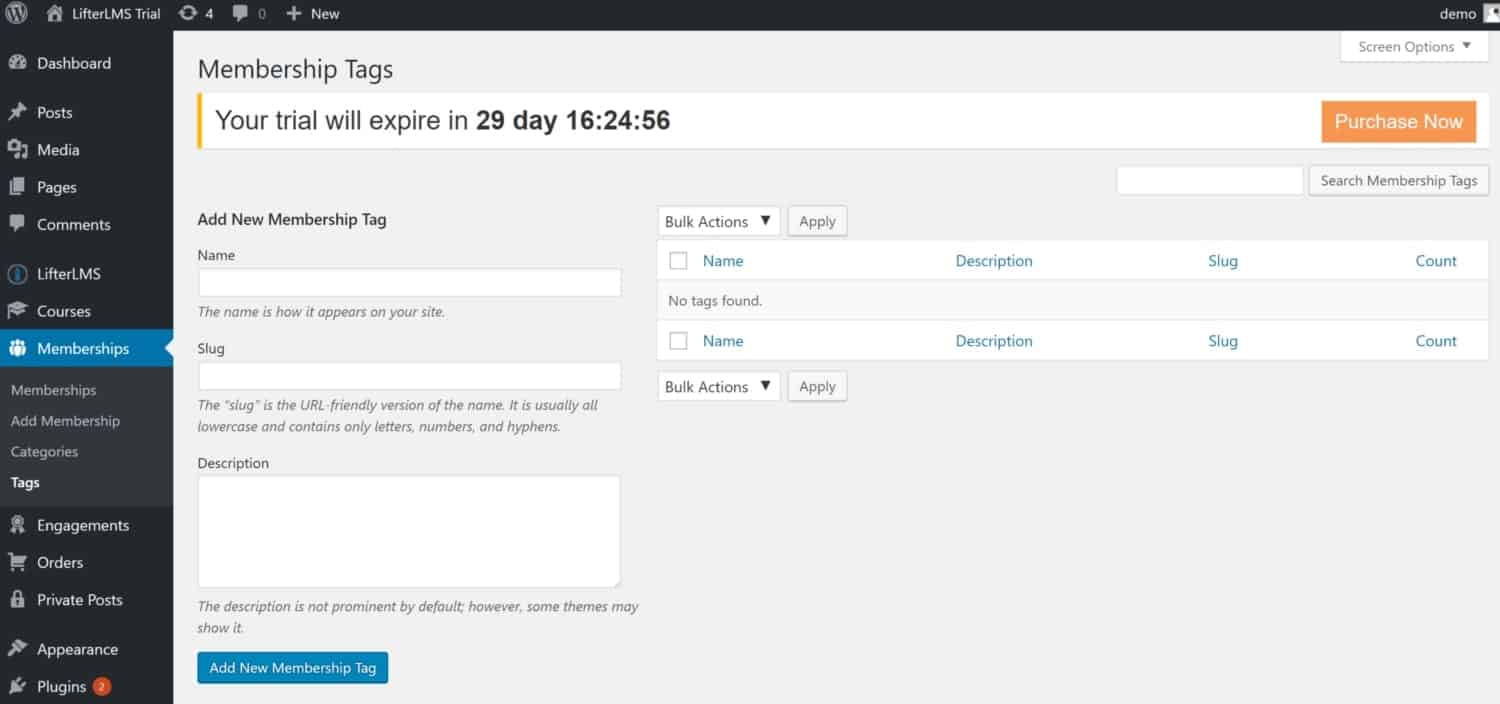
Tags
Next up is the tab where you can add tags to help organize your memberships. Add in or edit tags for your memberships here.
Engagements
The next tab is the Engagements tab. Engagements allow your learners to gain achievements and certificates and can also lead to email begin sent out to your learners. You control what your learners are getting by setting up engagements.
You can edit the engagements by clicking on the one of your choices and changing elements.
Add Engagement
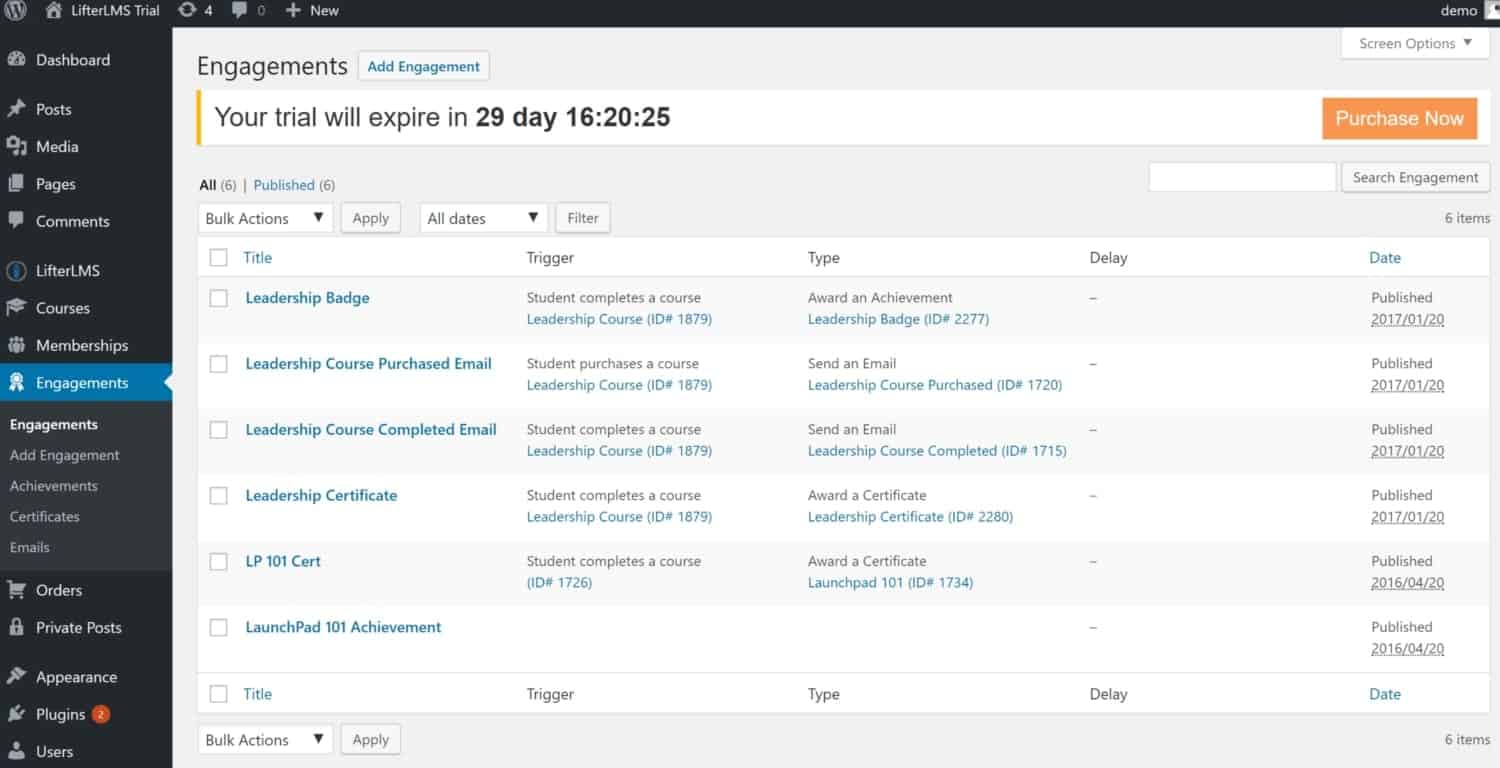
You can also add engagements by clicking on ‘Add Engagement’. This will allow you to enter a title for your engagement and choose from engagement options. These include selecting the triggering event, selecting the engagement type, selecting the engagement, and choosing an engagement delay.
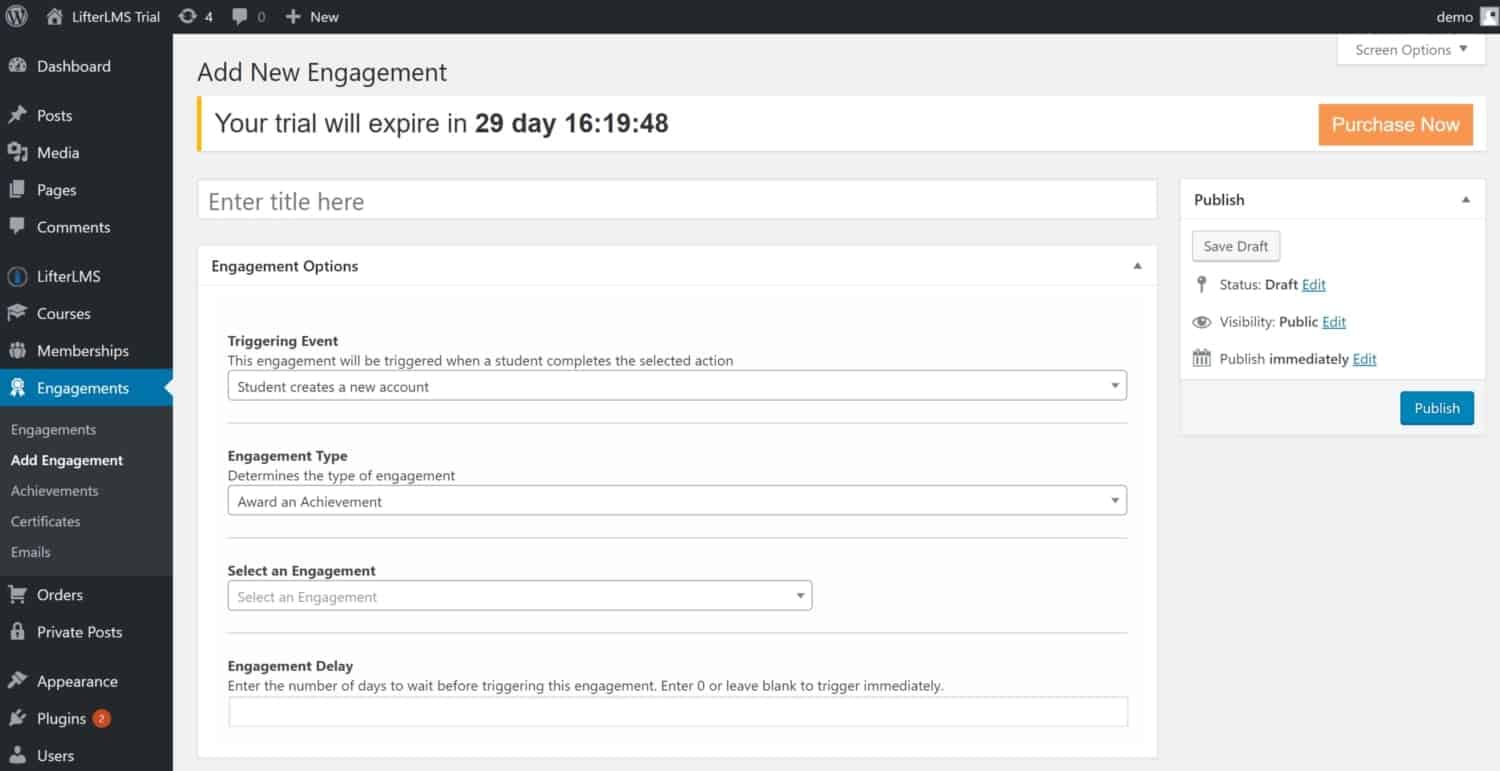
For instance, you can set-up an engagement to take place when a student completes a course. For example, this is on one of the screenshots above and is called Leadership Badge. When the student completes the Leadership course then they are awarded an achievement which is the Leadership badge. Creating that engagement is one of the steps.
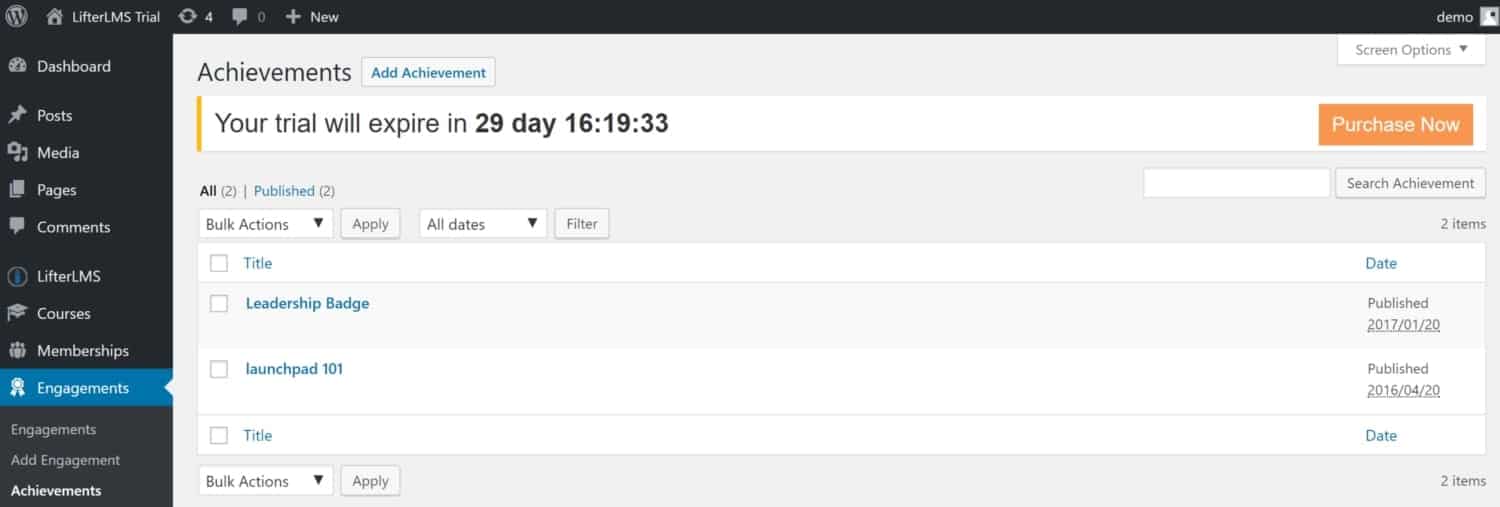
Achievements
You can manage all your achievements from the achievements tab. You can also add a new achievement from here as well.
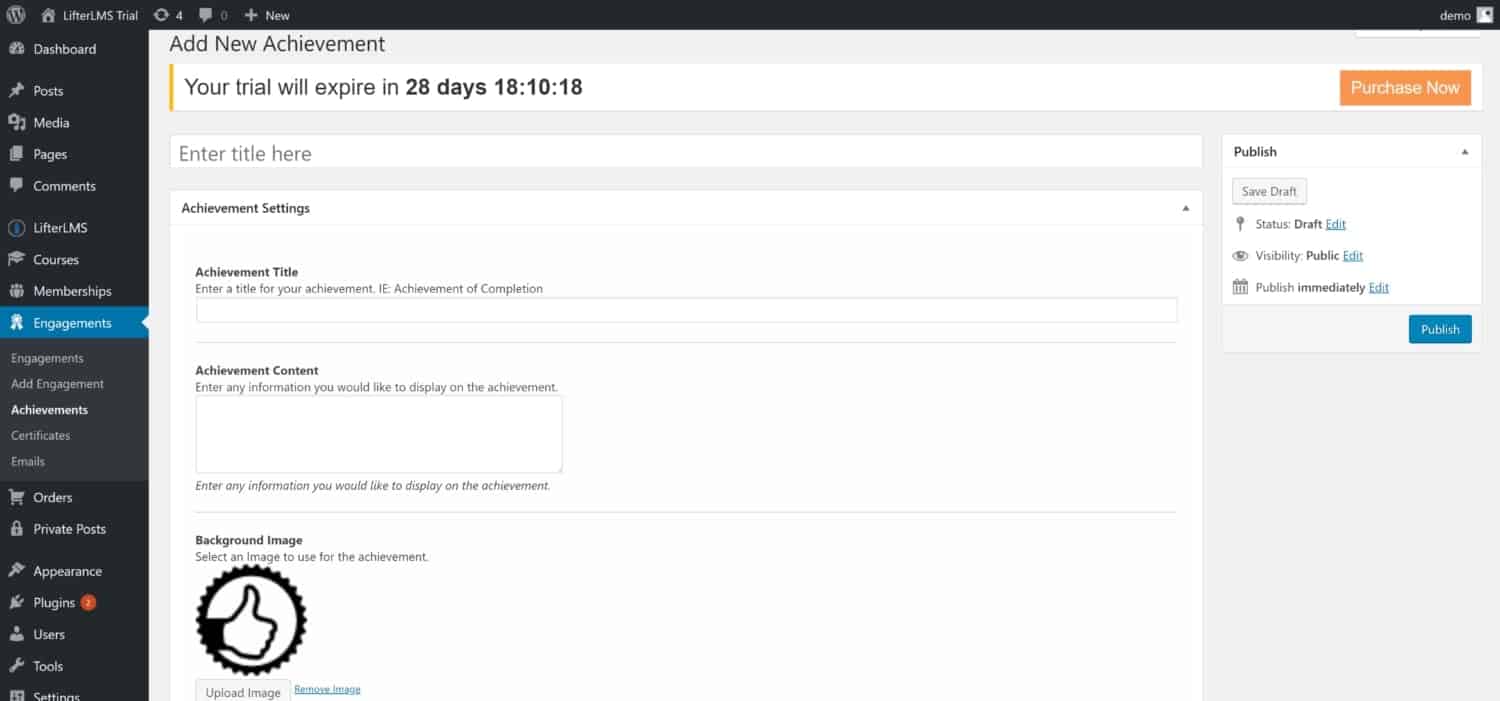
The screenshot below shows what the Add New Achievement screen looks like. You can add in the achievement title, content, and a background image for the achievement.
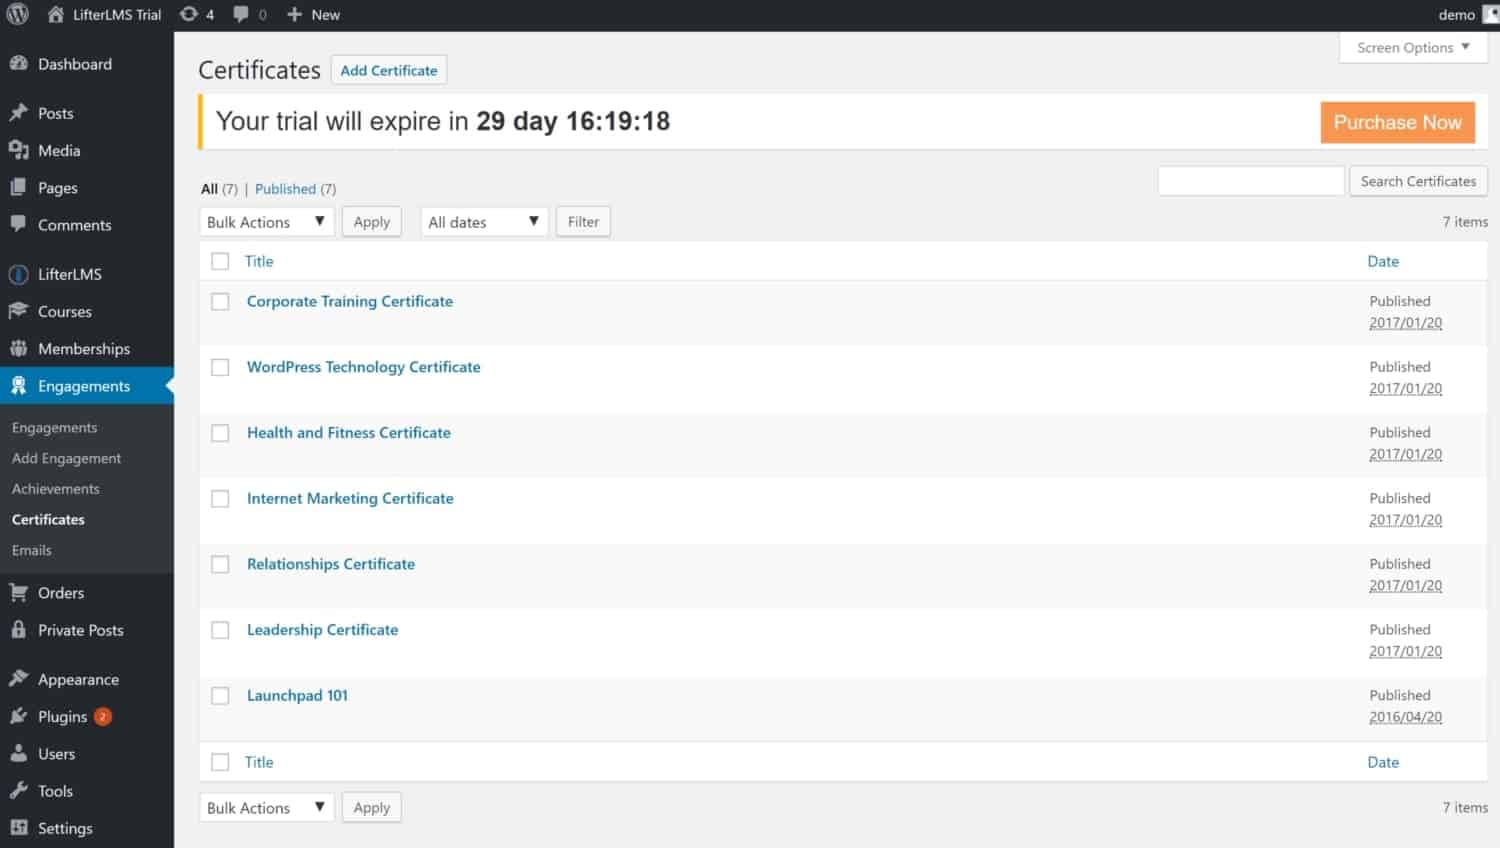
Certificates
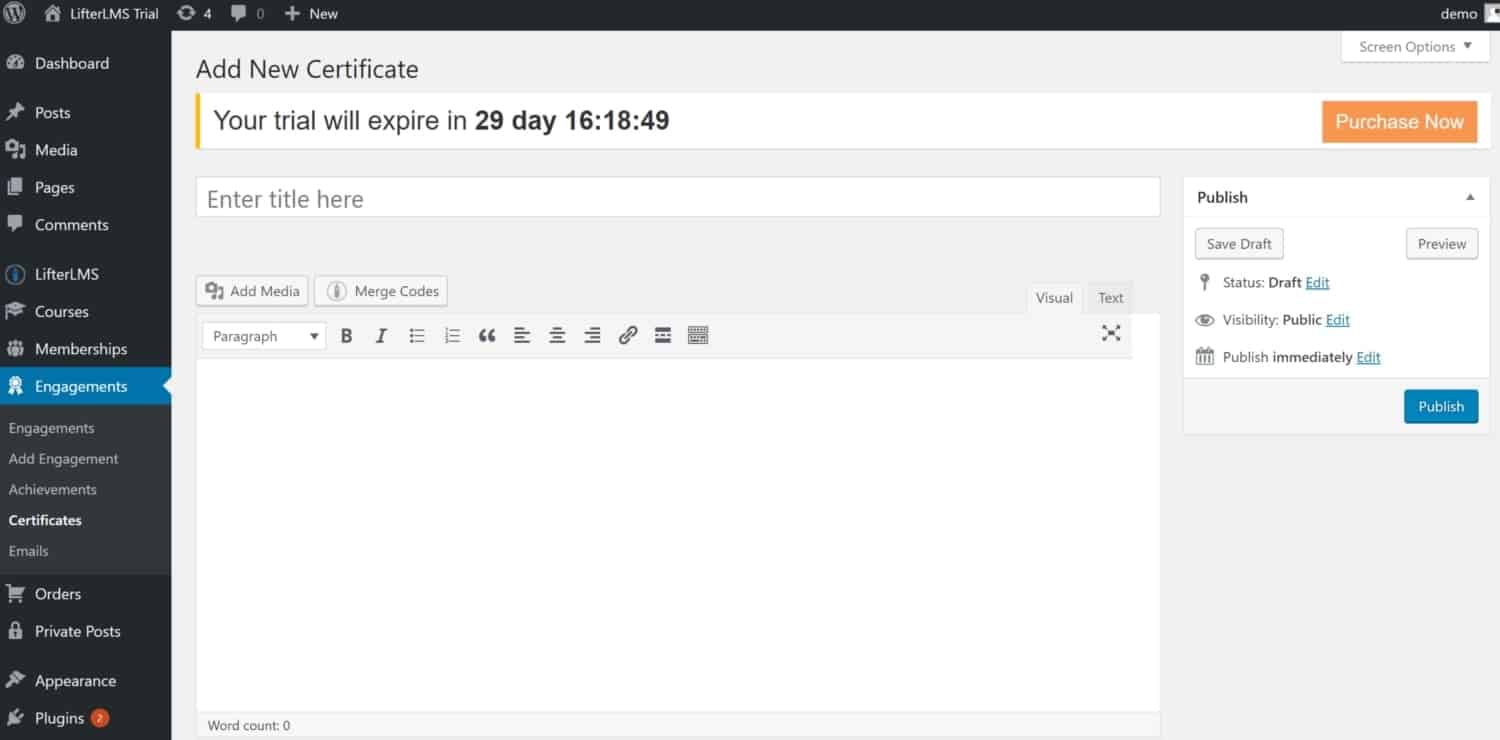
Certificates are the next tab. You can add certificates here as well as edit your existing certificates.
Here’s what the Add New Certificate screen looks like. You can enter the title for your certificate as well as the description and the certificate information itself.
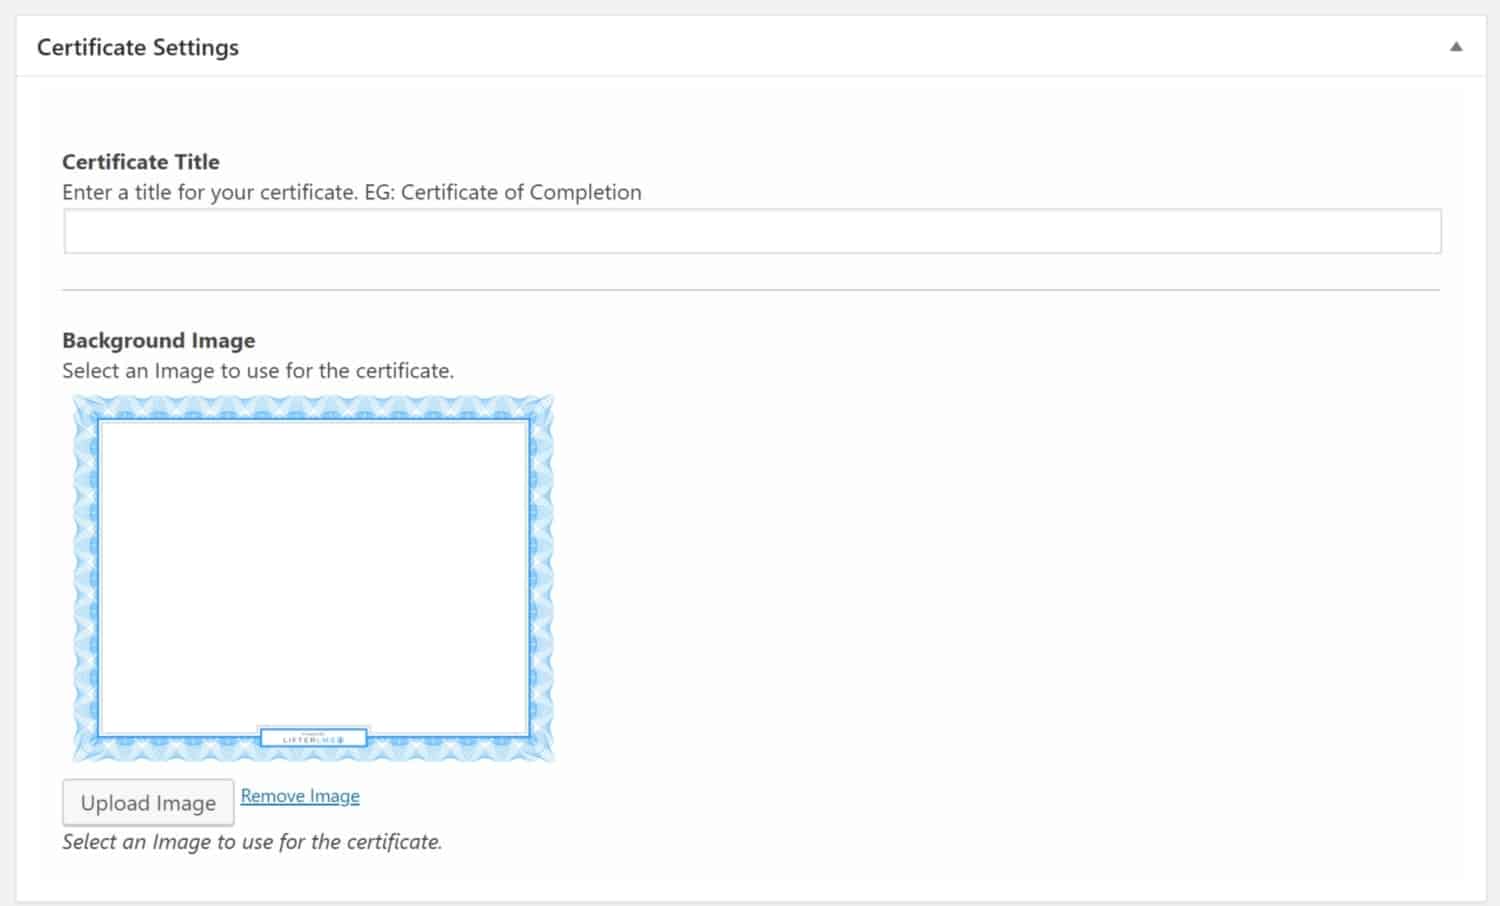
Underneath the standard editor area is the Certificate Settings. You can add the certificate title and a background image.
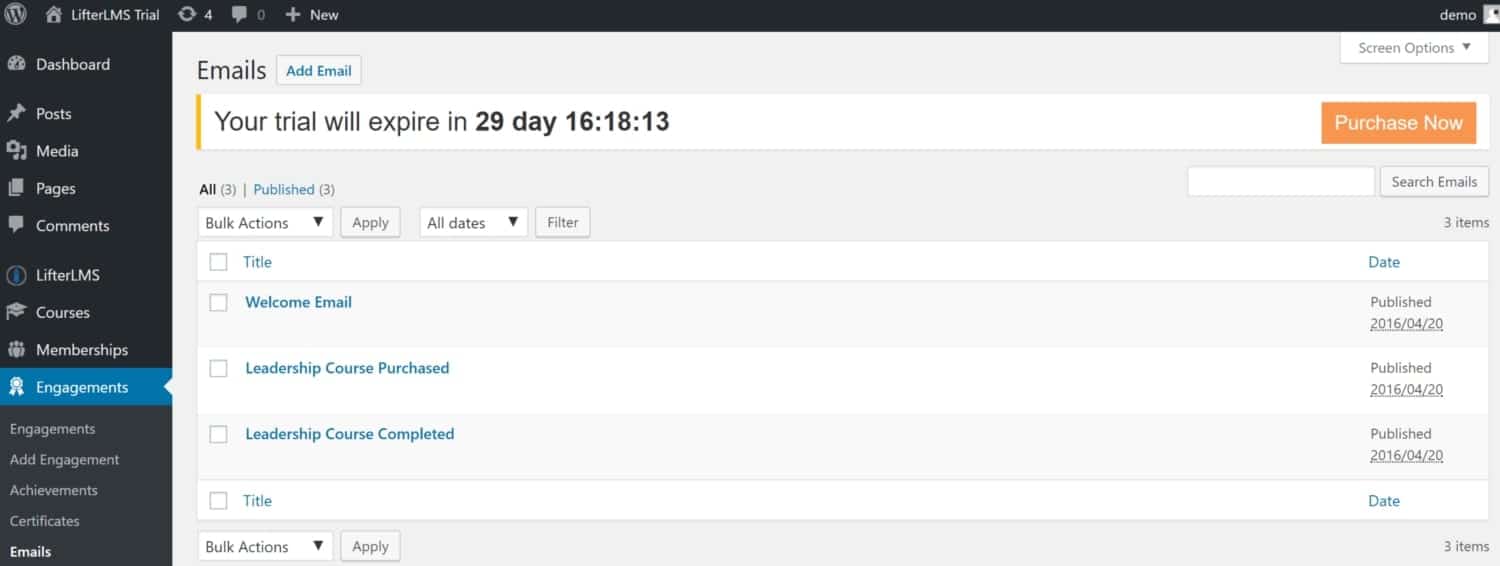
Emails
Emails also fit under the engagements tab. Here you can edit your existing emails as well as add in new emails.
You’ll type the email into a standard WordPress post editor. Underneath the standard post editor are special email settings as shown in the screenshot below:
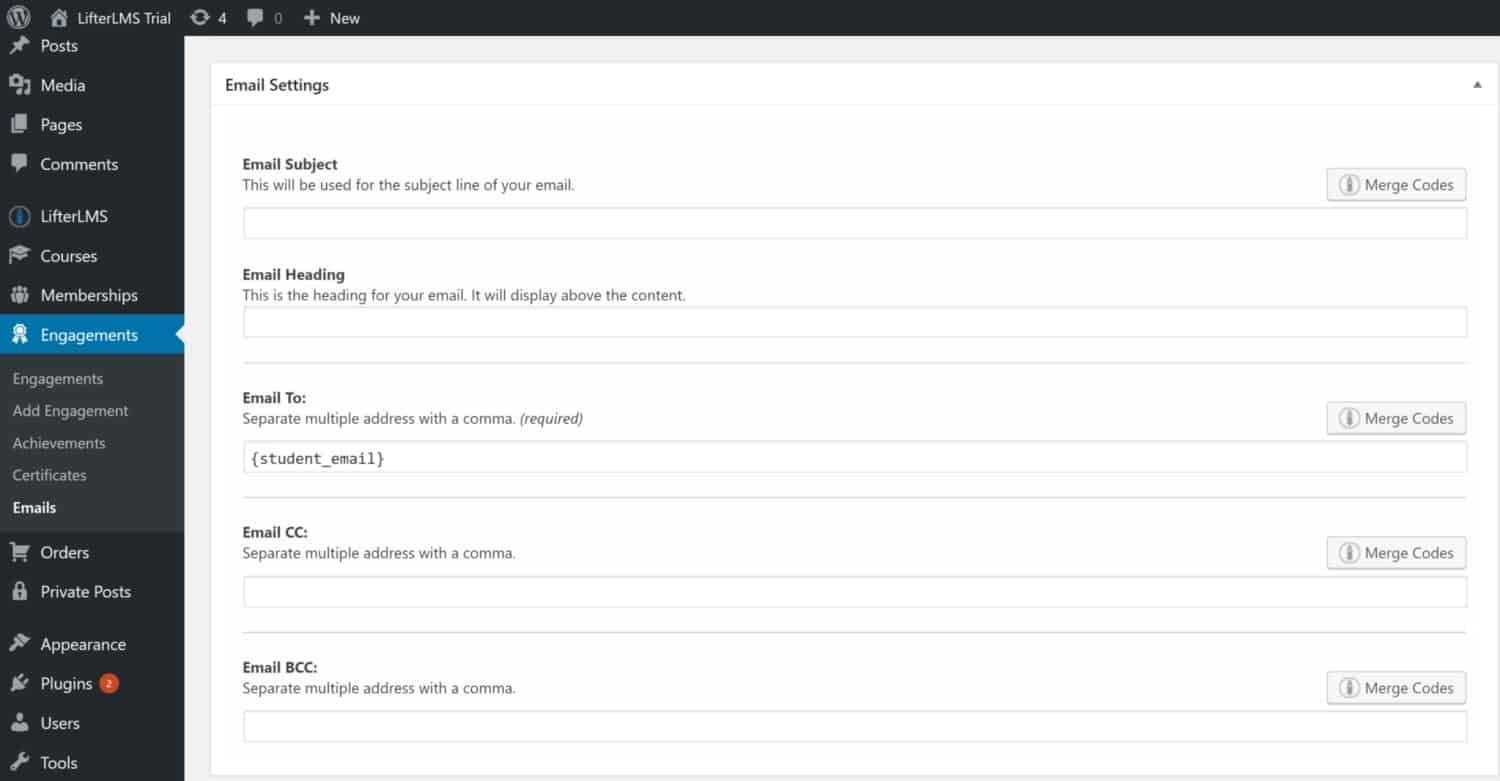
As you can see, you can enter an email subject, the email heading, who it will go to (or use merge codes to make it easier), and a few more settings.
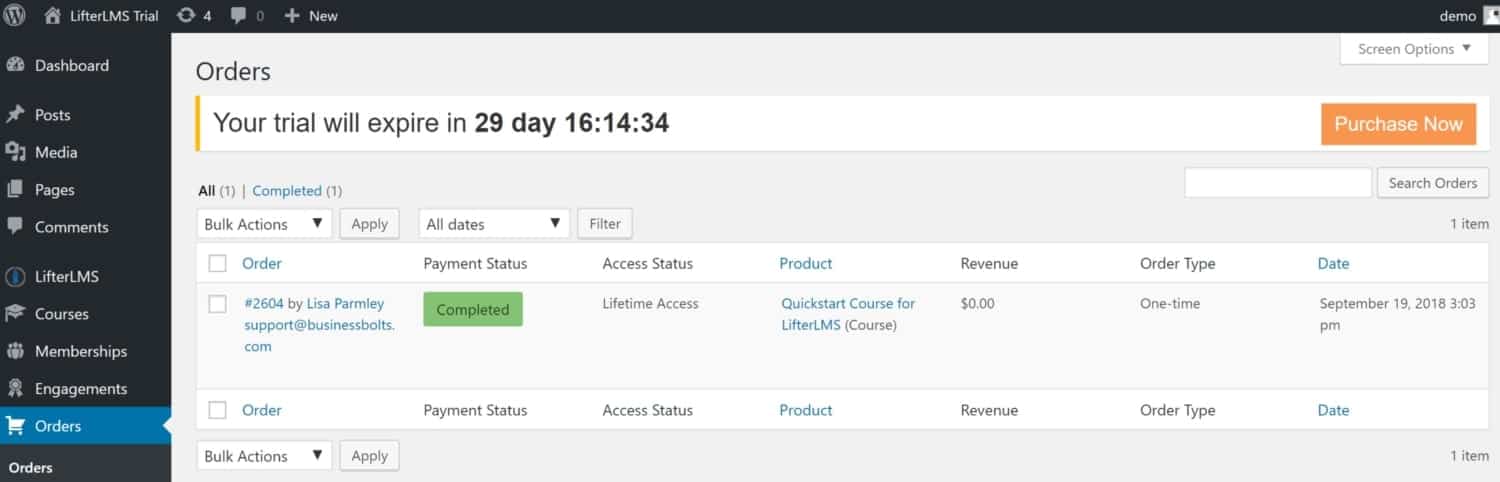
Orders
Order is another main tab with LifterLMS. Clicking on it takes you to the orders screen where you can see all your orders and manage them. With the orders, you can see the name of the individual who ordered, what they ordered, how much they paid, when they placed the order and a few more relevant bits of information.
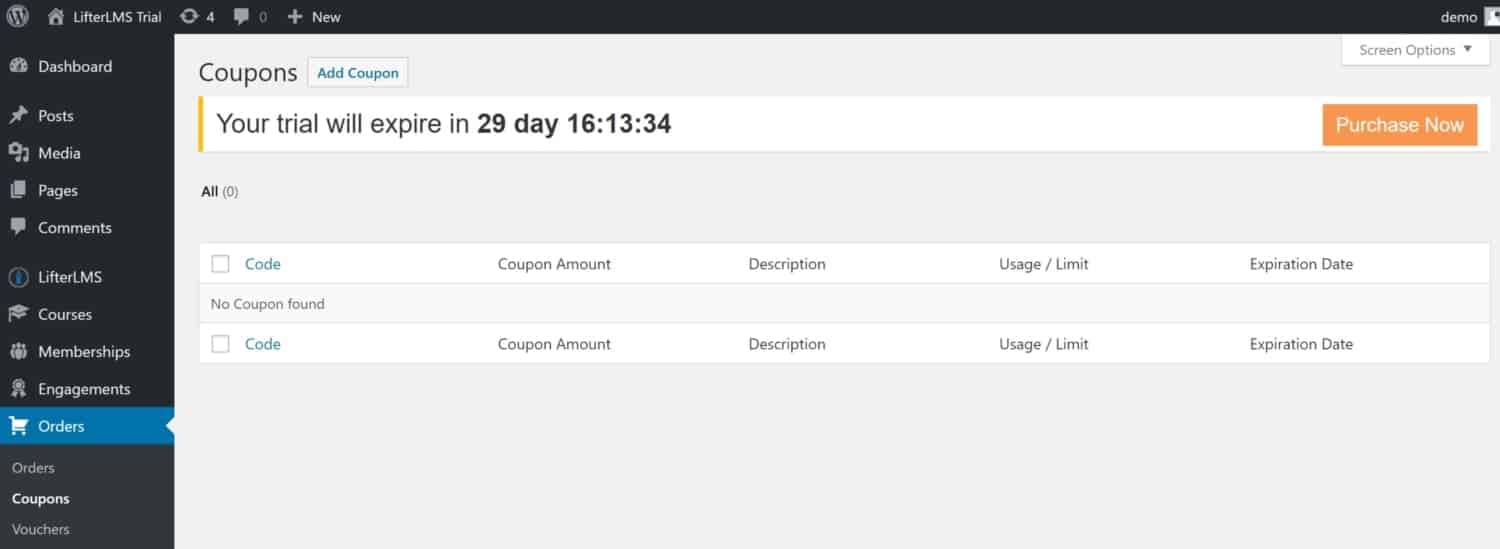
Coupons
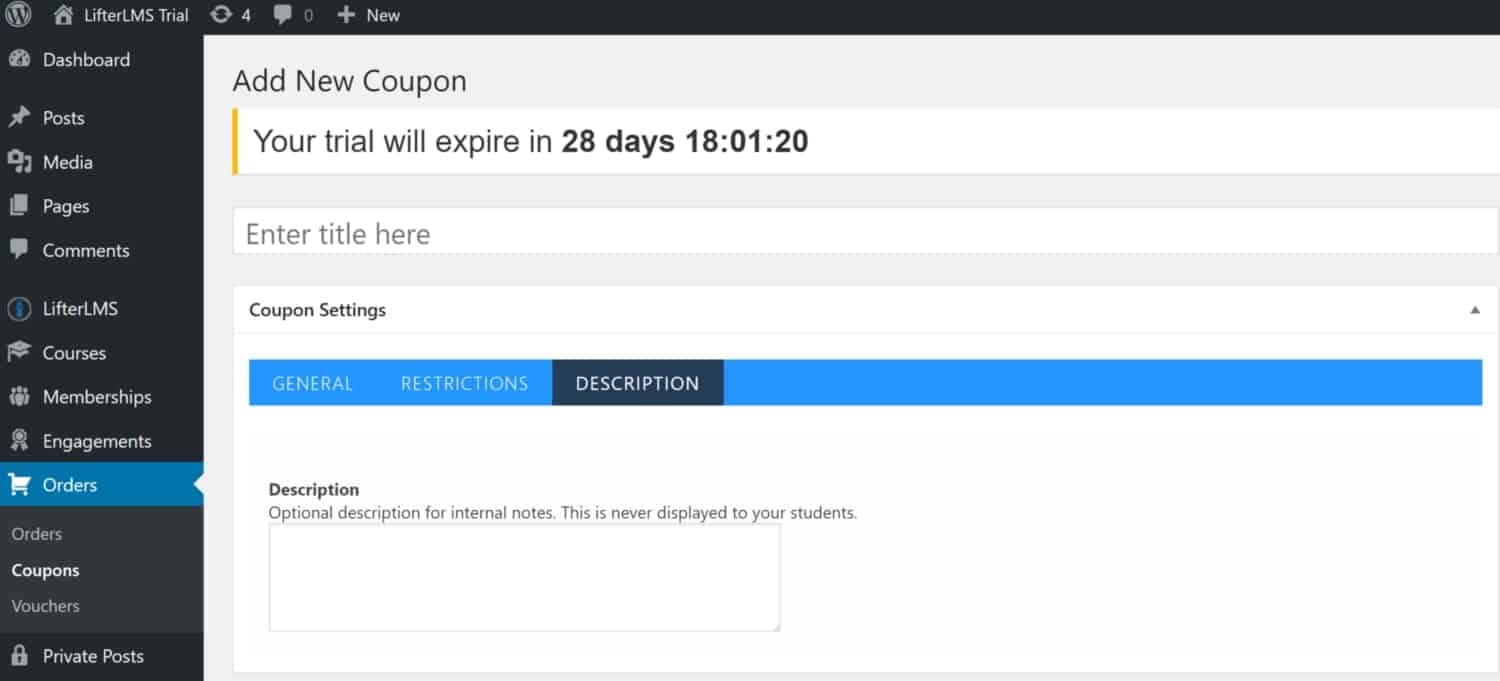
Within the Orders tab, you also have Coupons. This is where you can edit and add new coupons.
Here is what the screen to add new coupons looks like:
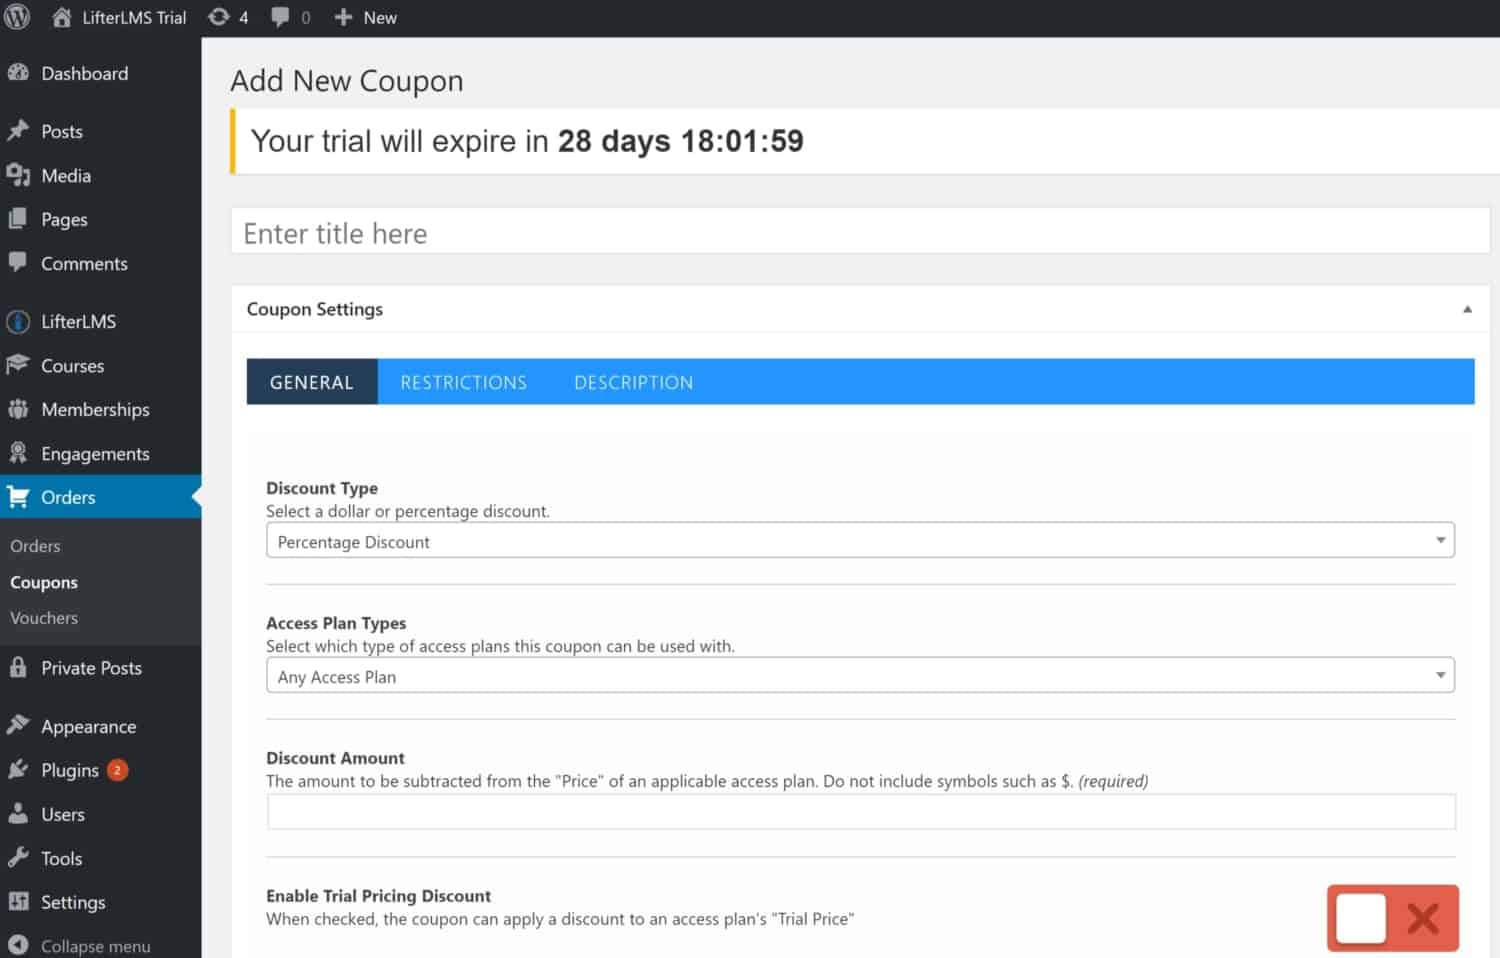
The General settings allow you to select whether the discount will be a dollar or a percentage discount. You can select which type of access plans the coupon can use used with as well as a discount amount. You can also enable a discount to an access plan’s ‘Trial Price’.
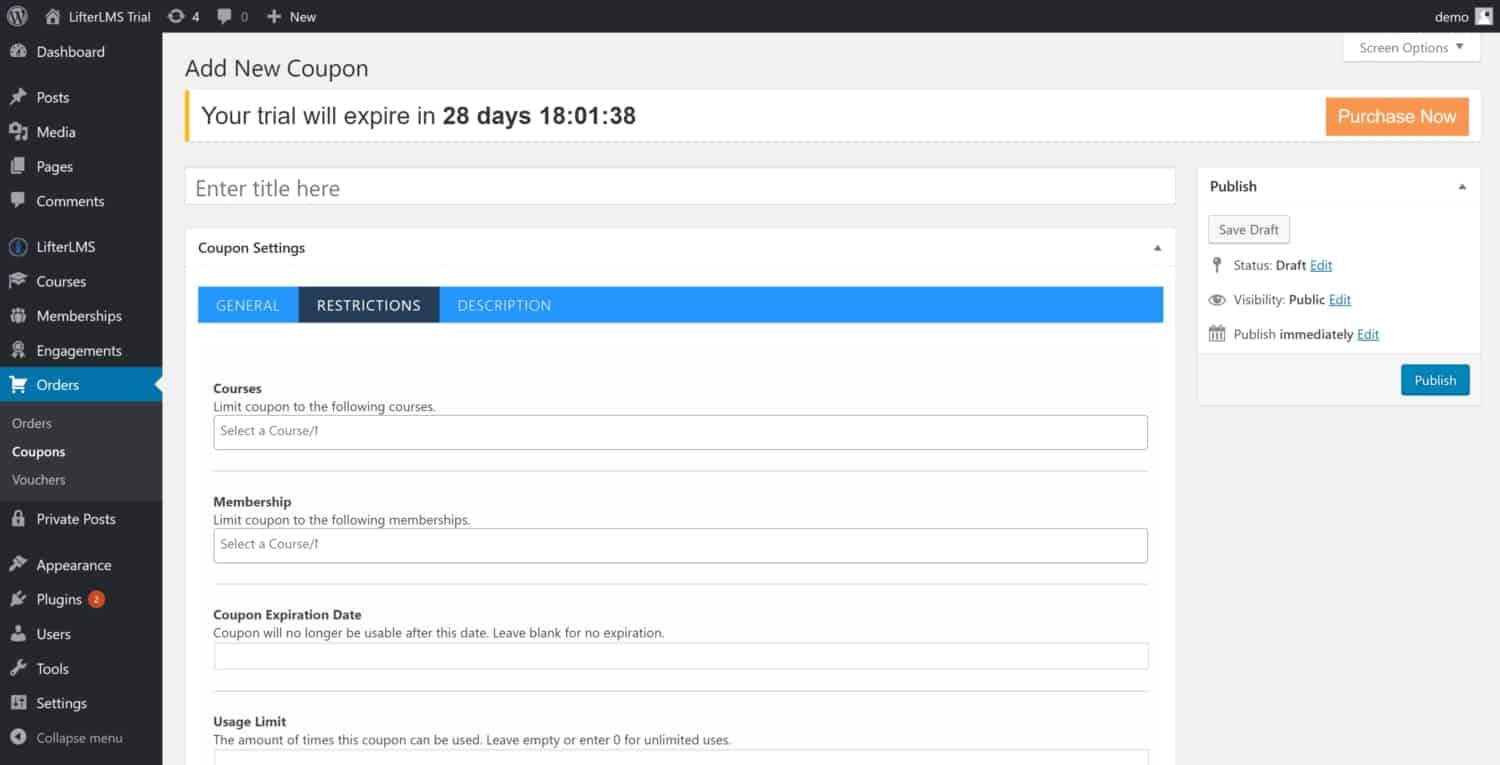
Next up are the Coupon’s Restrictions. These include the ability to limit the coupon to specific courses or memberships. You can also set a coupon expiration date and a usage limit if you’d like one. This will cause the coupon to expire after a certain number of uses.
Finally is the Coupon Description. You can just enter the description for your own internal notes if you’d like.
Vouchers
Here you can edit or add in vouchers. These are like a free give-away of your course.

Here’s what the add new voucher screen looks like:
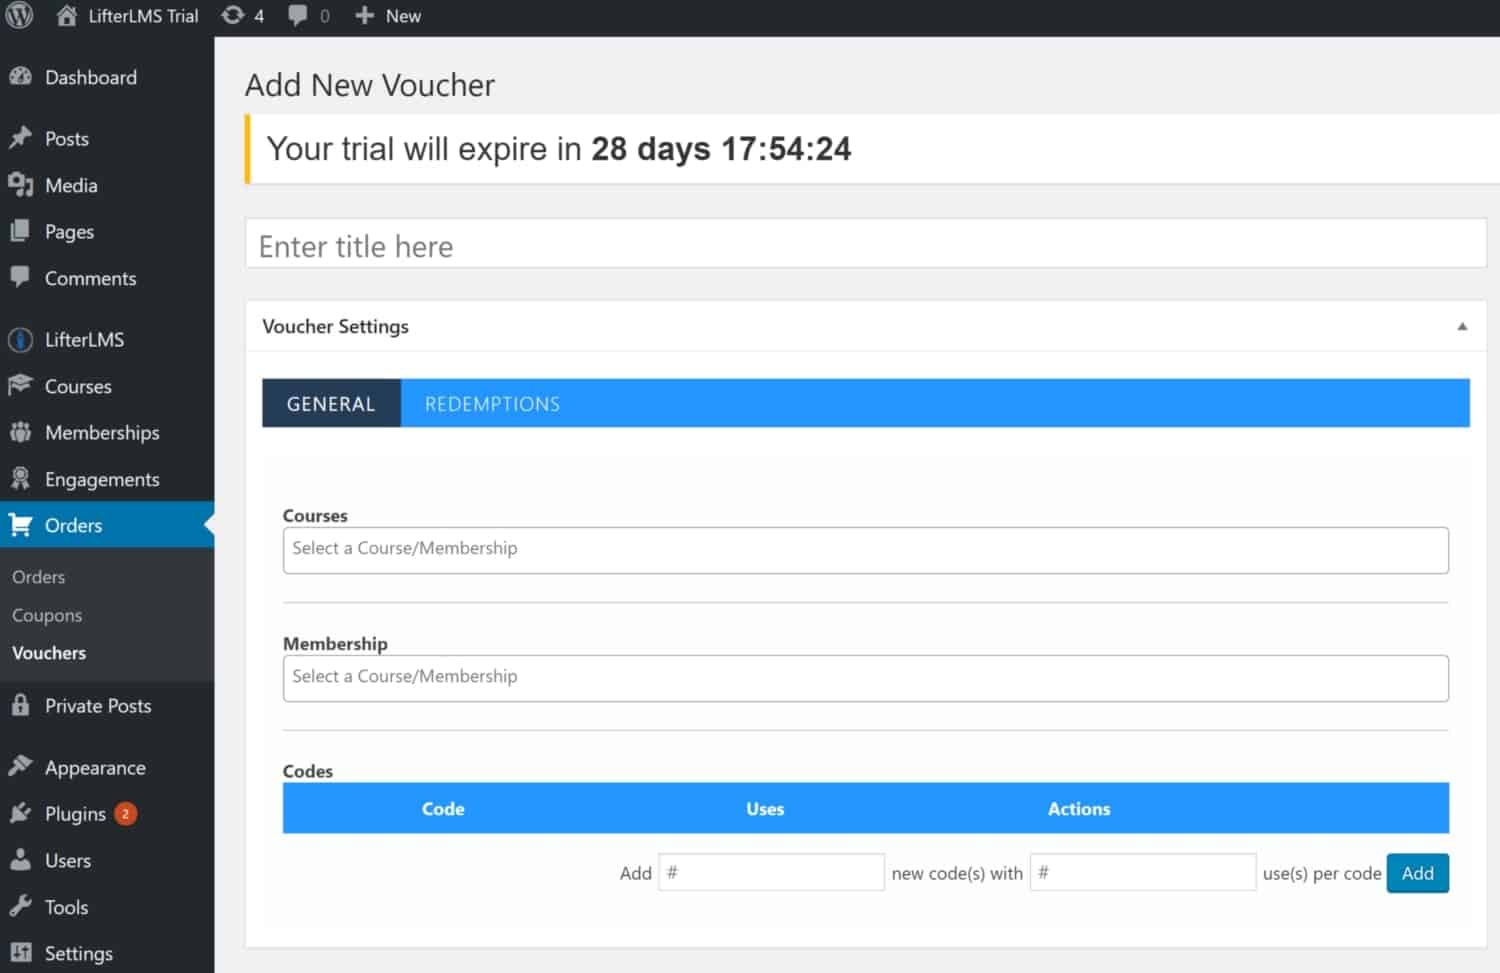
The first tab within the voucher settings is the General Settings. Here you just select a course/membership and add it.
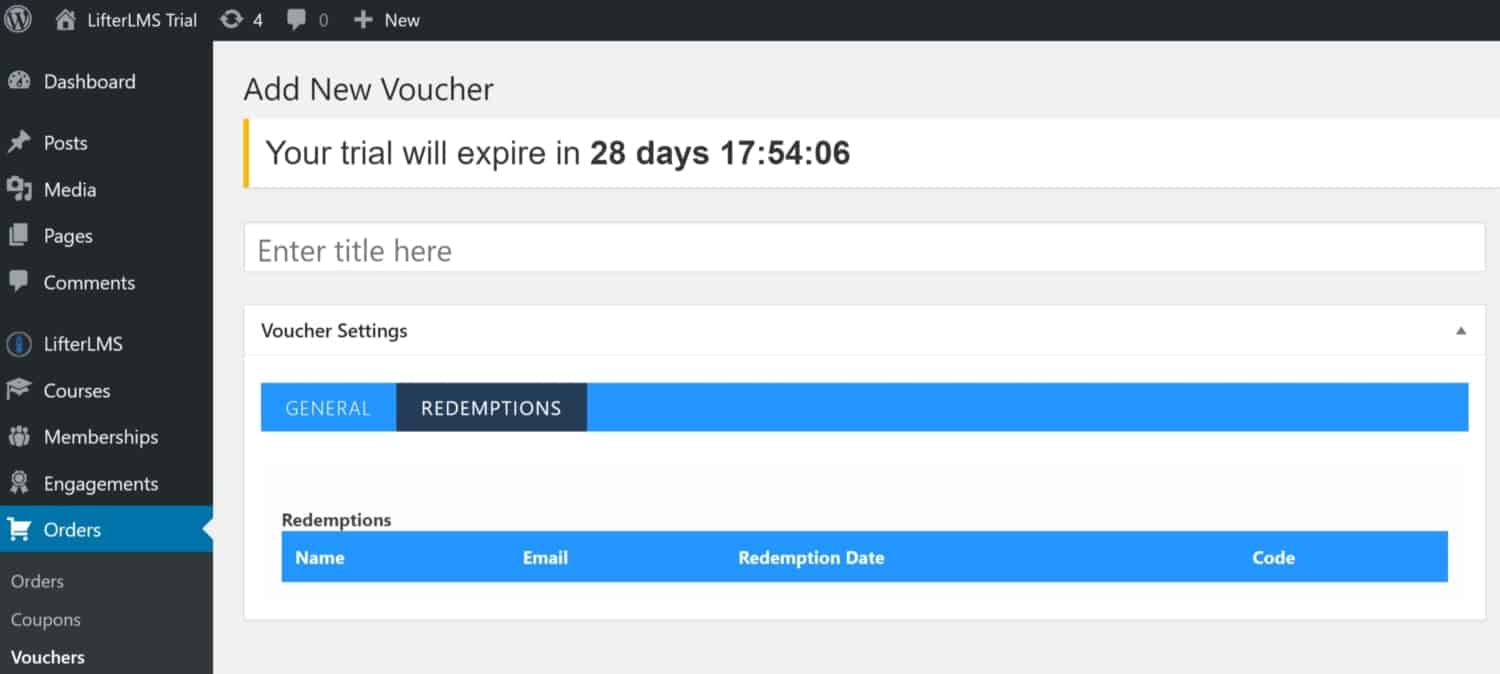
The redemptions tab keeps a list of all the vouchers used.
Private Posts
The Private Posts tab is the last tab for LifterLMS. Here you can edit existing private posts as well as add in new private posts.
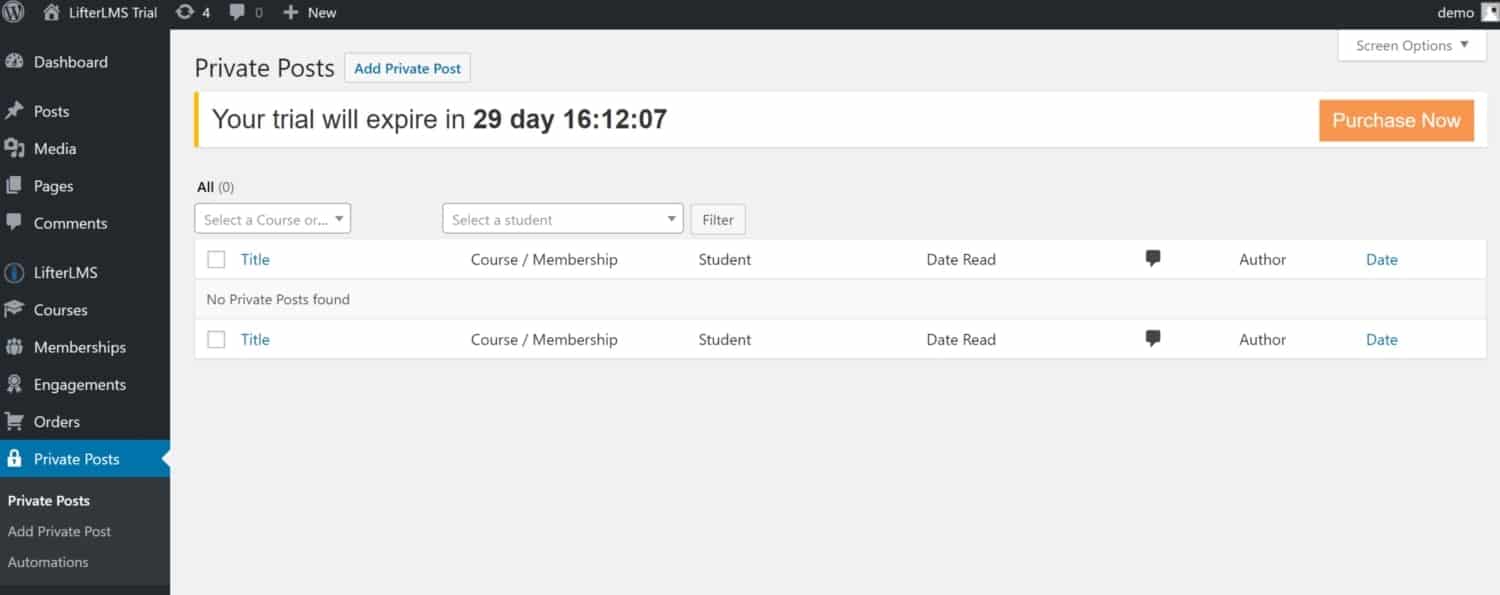
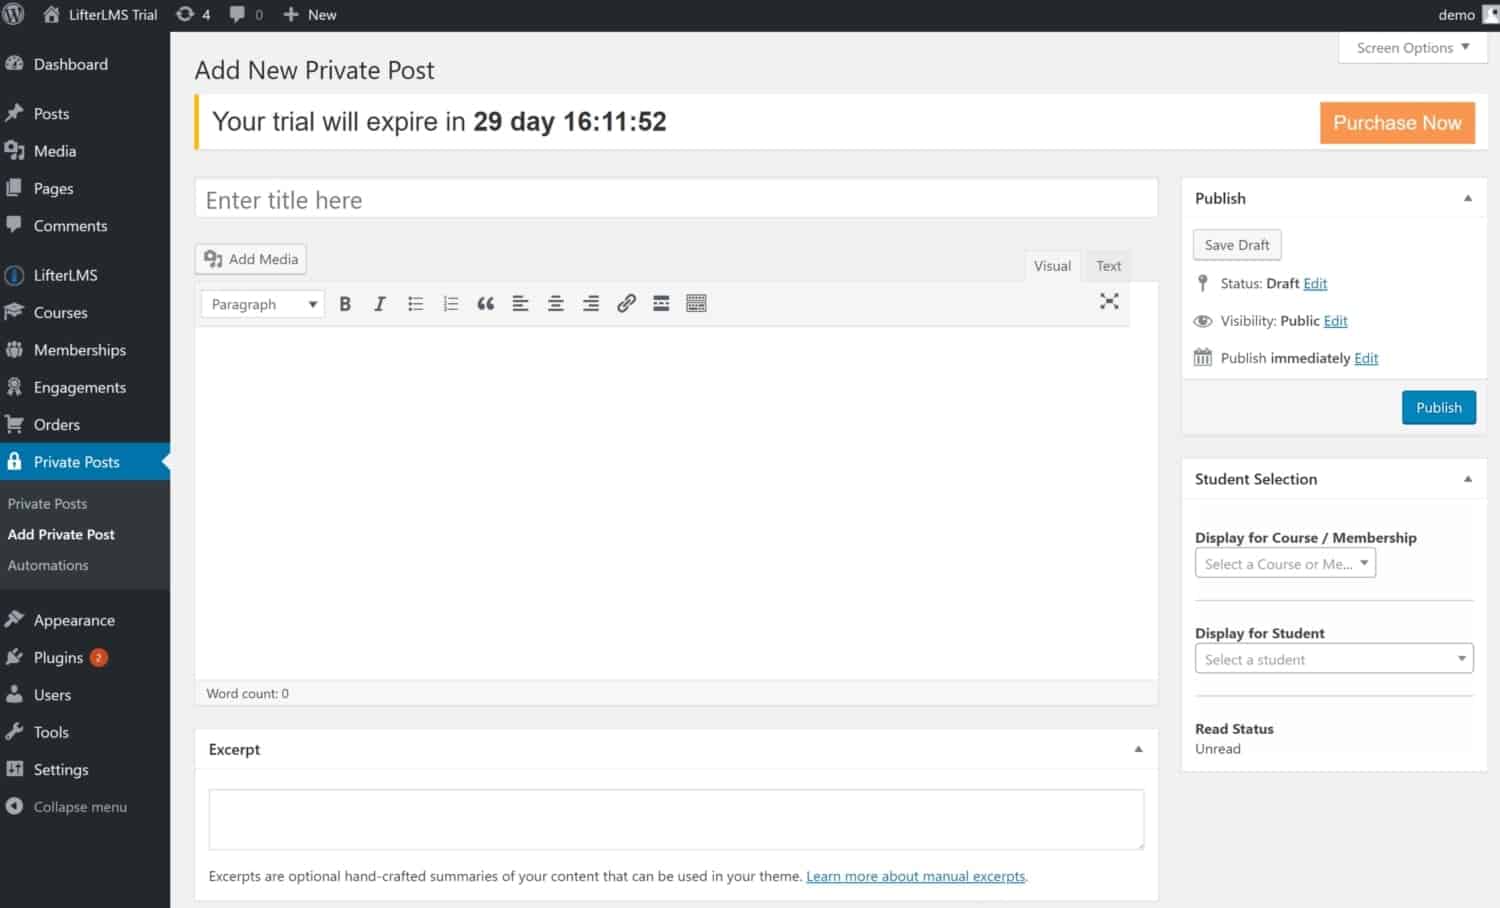
Add Private Post
A private post looks just like any other post. However, over on the right under Student Selection, you can choose to display this post for a specific course or membership and even select which students can see it.
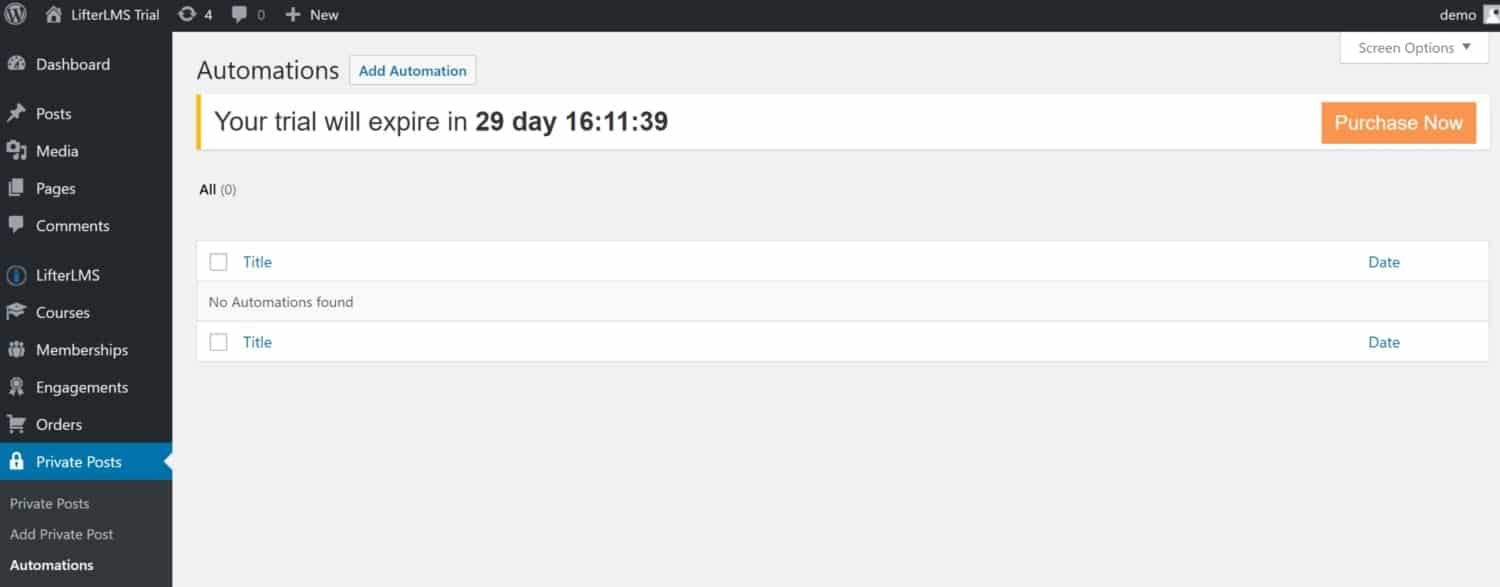
Automations
You can set up private post templates and then use automation during engagement triggers. This last screen is where you can edit and add new automations.
More on LifterLMS
As you can see, there’s a lot LifterLMS can do! You can customize just about anything you want with this online course platform. With this WordPress LMS plugin, you’ll be able to run your entire course business from a central WordPress admin area. You can add blog posts, regular pages, sales pages, and your course pages. You’ll be able to customize your course settings, manage payments, orders, and students all from within WordPress.
That’s it for the tutorial, you can also check out the LifterLMS review for more help deciding if this WordPress LMS plugin is right for you. Or visit LifterLMS online and give the 30-day demo a try.
