Our content is reader supported, which means when you buy from links you click on, we may earn a commission.
How to Make a Picture Transparent in PowerPoint

Are you interested in learning how to make a picture transparent in PowerPoint?
It’s a great technique allowing you to overlay text on a lightened image.
The nice thing is, It’s not too difficult do.
This tutorial will walk you through the steps no matter which version of PowerPoint you’re using.
Why Make an Image Transparent in PowerPoint?
Often times, you’ll change your PowerPoint picture transparency to create a soft look.
You may want to have text over the image.
Often that means you’ll need to make the image more transparent in order for the text to be readable. The best way to do this is fade the background image which is otherwise known as making it transparent.
There are many different types of transparent overlays like full coverage overlays, shape overlays, and band overlays. There’s a whole science and art to overlays and image transparency.
You may also want to overlay more than one image on top of the other, creating a cool effect.
You can always make a picture transparent by using a graphic design program, but you may not want to invest in the additional expense. In addition, it takes time to learn how to use any new program.
It can also be inconvenient to open up a new program, make adjustments to an image, and then save it. Once the image has been created in a different program, then you’ll have to import that image into PowerPoint. That can be too many steps when it’s possible to do all this right in PowerPoint.
Lastly, sometimes it’s hard to gauge how transparent you want your image while it’s in another program. Ultimately, having it right in your slide will enable you to make it perfect.
Different Options for Making an Image Transparent in PowerPoint
Here’s the different ways to make an image transparent right in PowerPoint. No other tools required!
Option 1: Fill a Shape with a Picture and Adjust the Transparency.
This method works in all versions of PowerPoint.
In this technique you’ll insert a shape, then fill the shape with a picture. From there, you can adjust the transparency. You have to go through these extra steps because there’s no way to add transparency to a picture. However, you can add transparency quite easily with shapes.
Here’s a step-by-step breakdown of how to accomplish this technique:
First, add a shape to the slide:
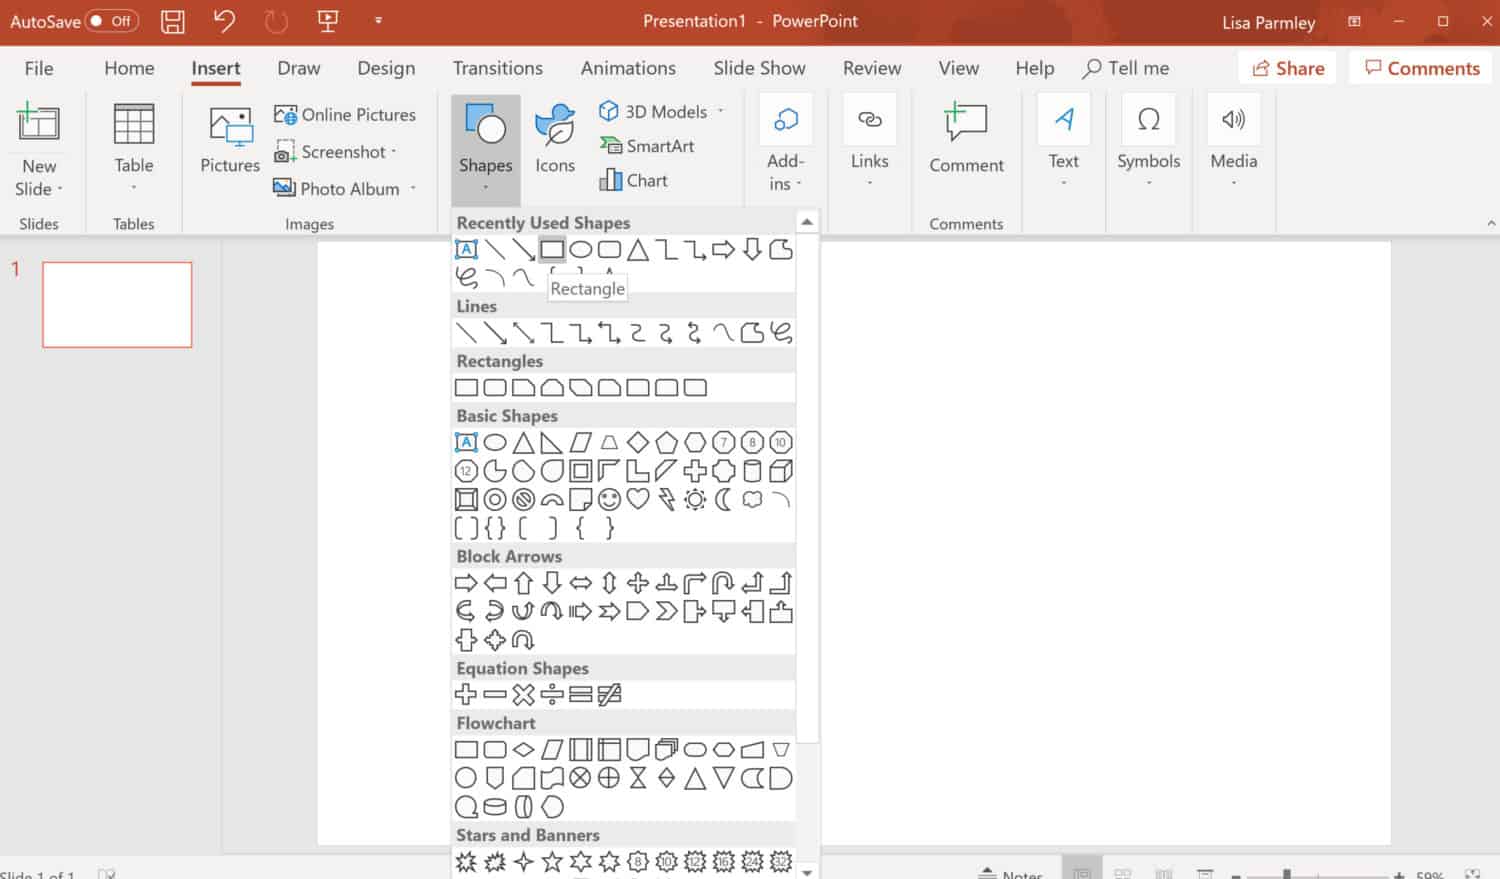
A rectangular shape will due the trick in many cases.
You need to make the shape the same size or at least the same proportions as your picture. Make sure to do that first otherwise your picture might end up looking warped and stretched out.
In the example, I just made my shape the same size as my PowerPoint slide. We’ll see how that turns out.
Right-click on the Shape and then click on Format Shape:
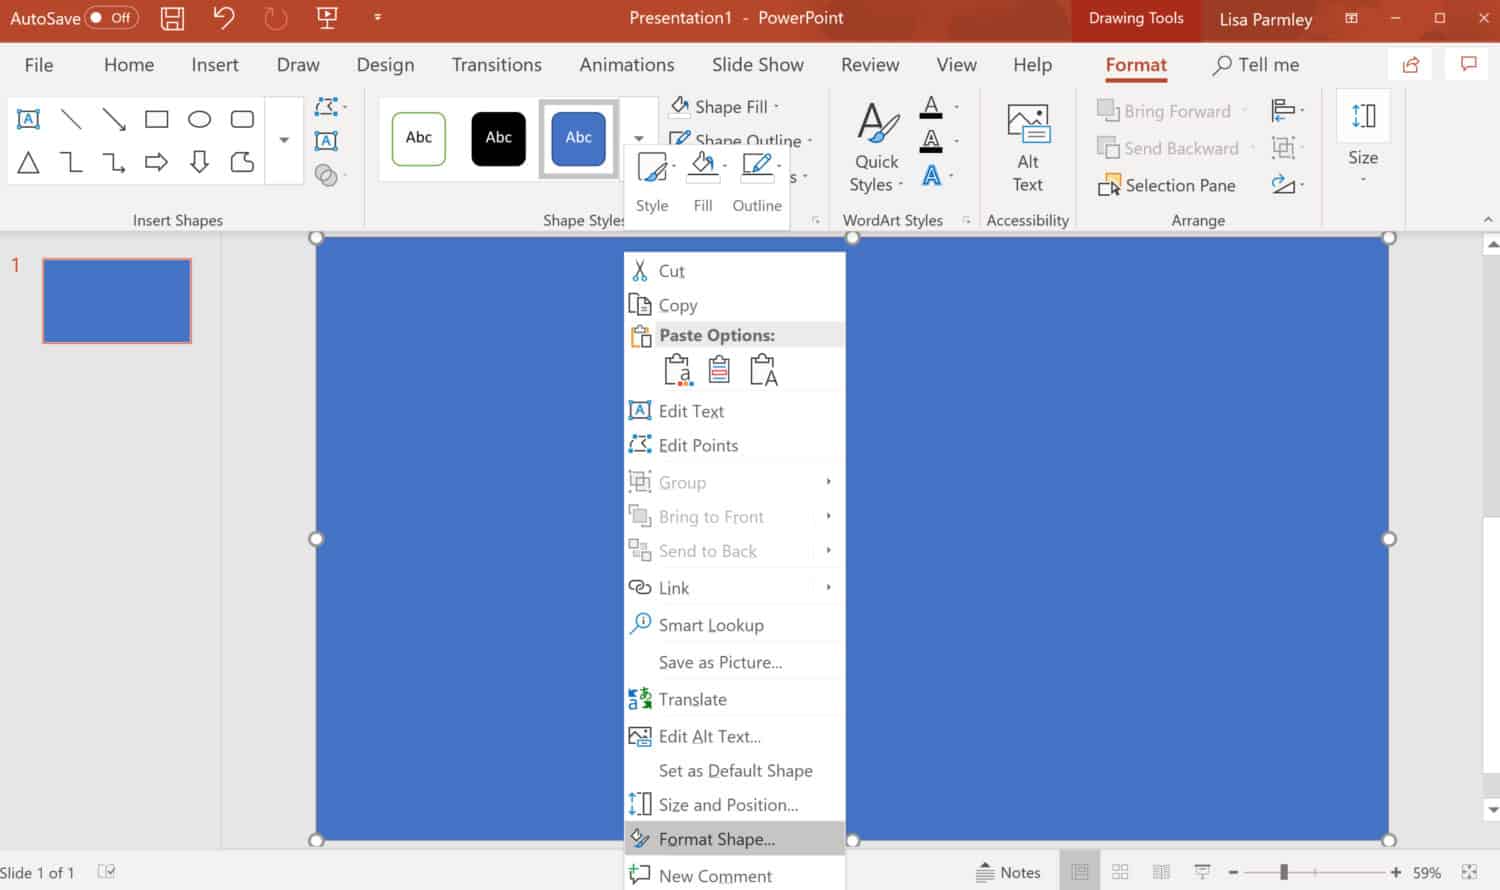
That will allow you to format the picture from within the Format Picture box.
From there, under the Fill heading, select Picture or texture fill.
Then beneath that go to Insert picture from, then select File and choose your image:
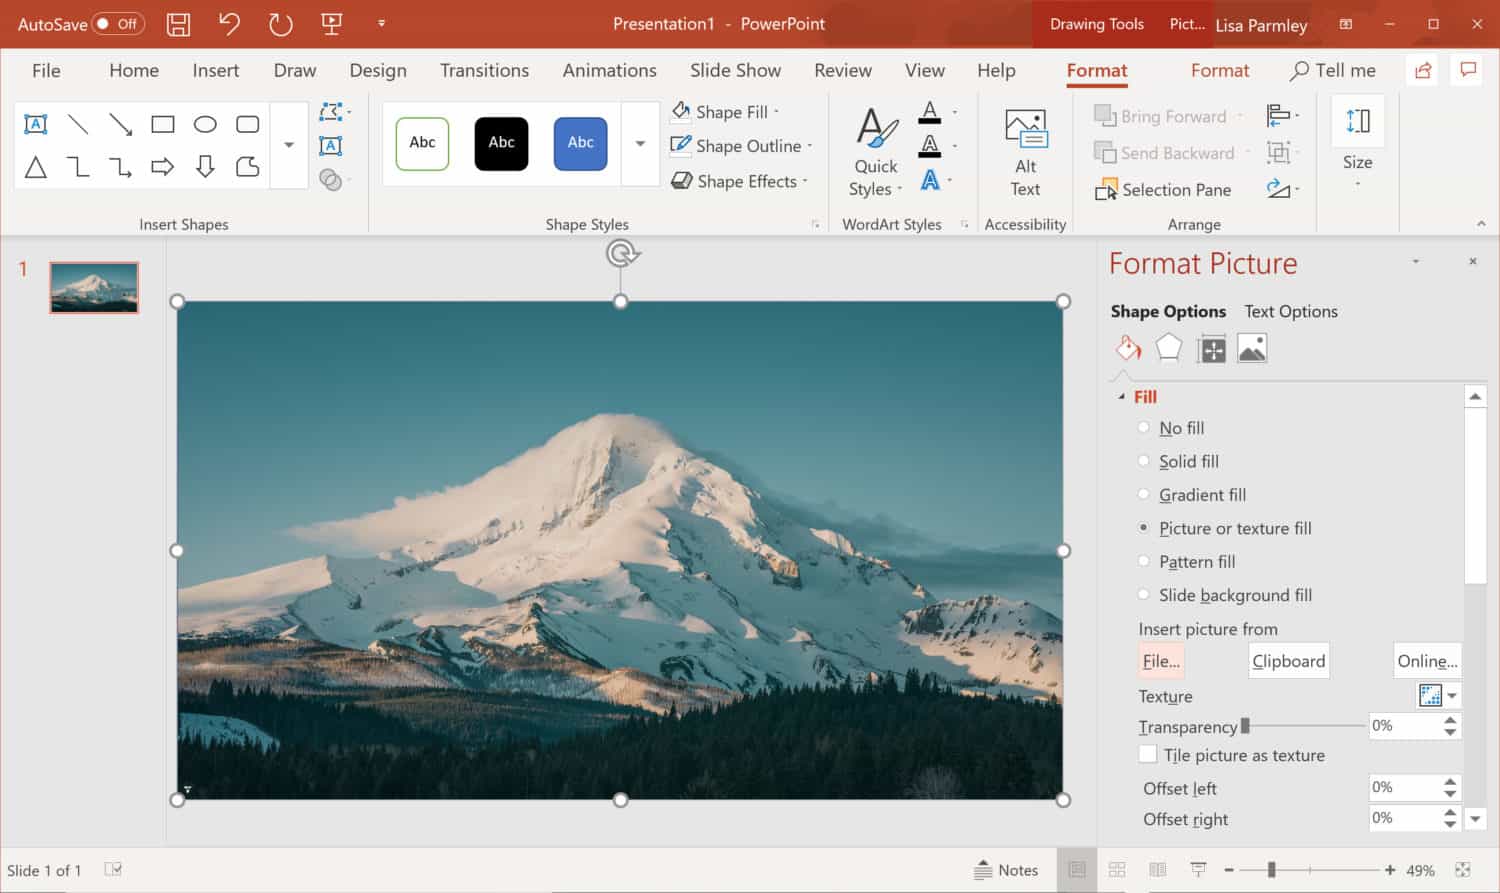
Alternately, you can insert your picture onto your slide and copy and paste it into your shape.
Once the image is inserted into the slide, you can use the Transparency slider to make your picture as transparent as you’d like.
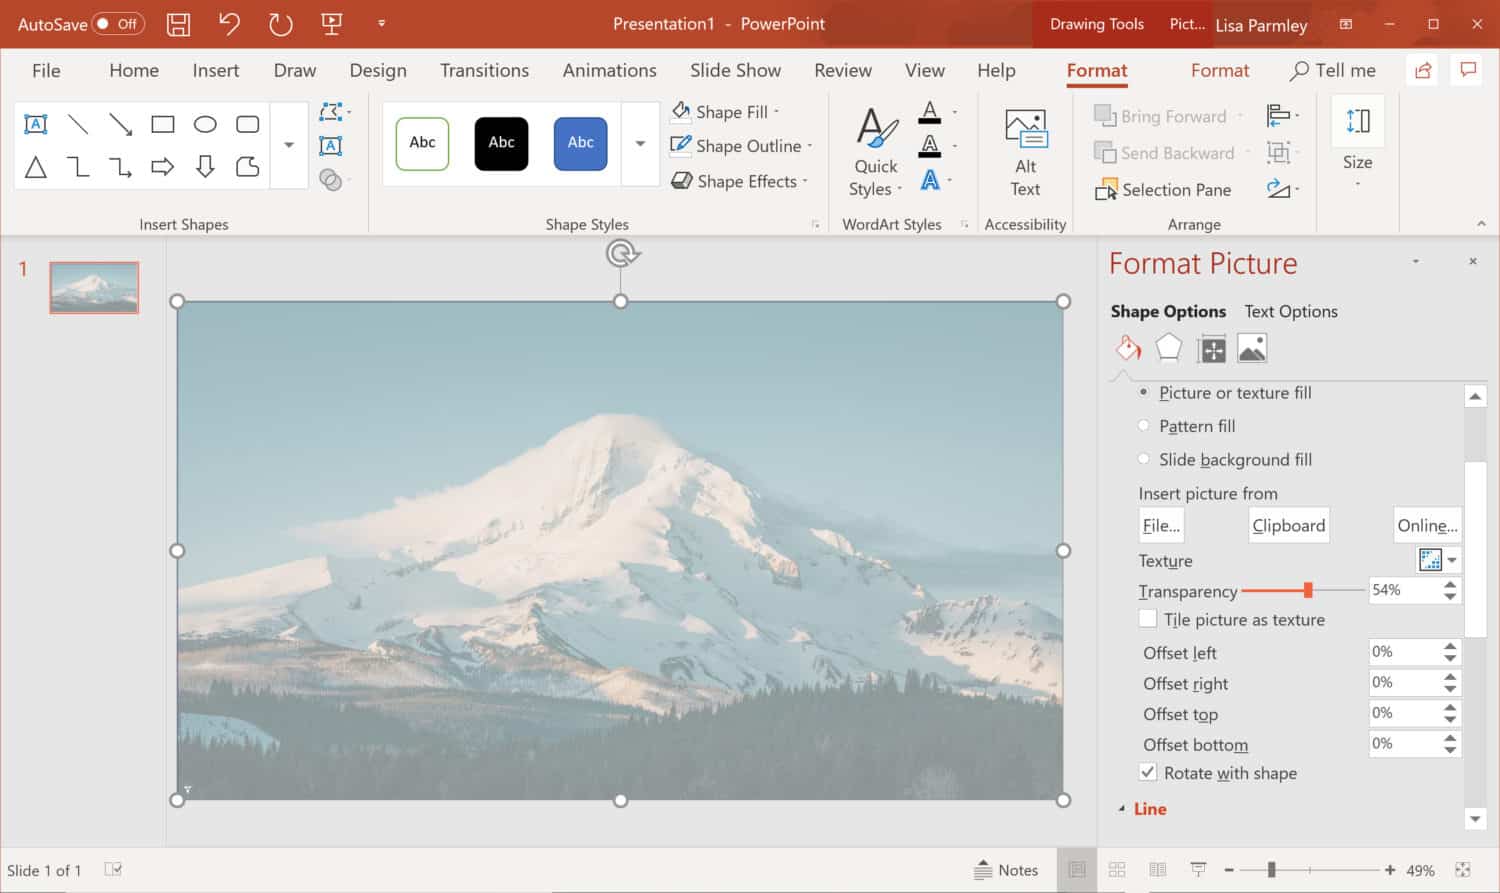
That’s it!
Option 2: Use Transparency for Pictures.
This method will work in the Office 365 version of PowerPoint only.
In this latest version of PowerPoint, there is a transparency option for pictures. So you just need to insert your picture and then make it as transparent as you want.
Here’s how to accomplish this …
First, insert your picture into the slide:
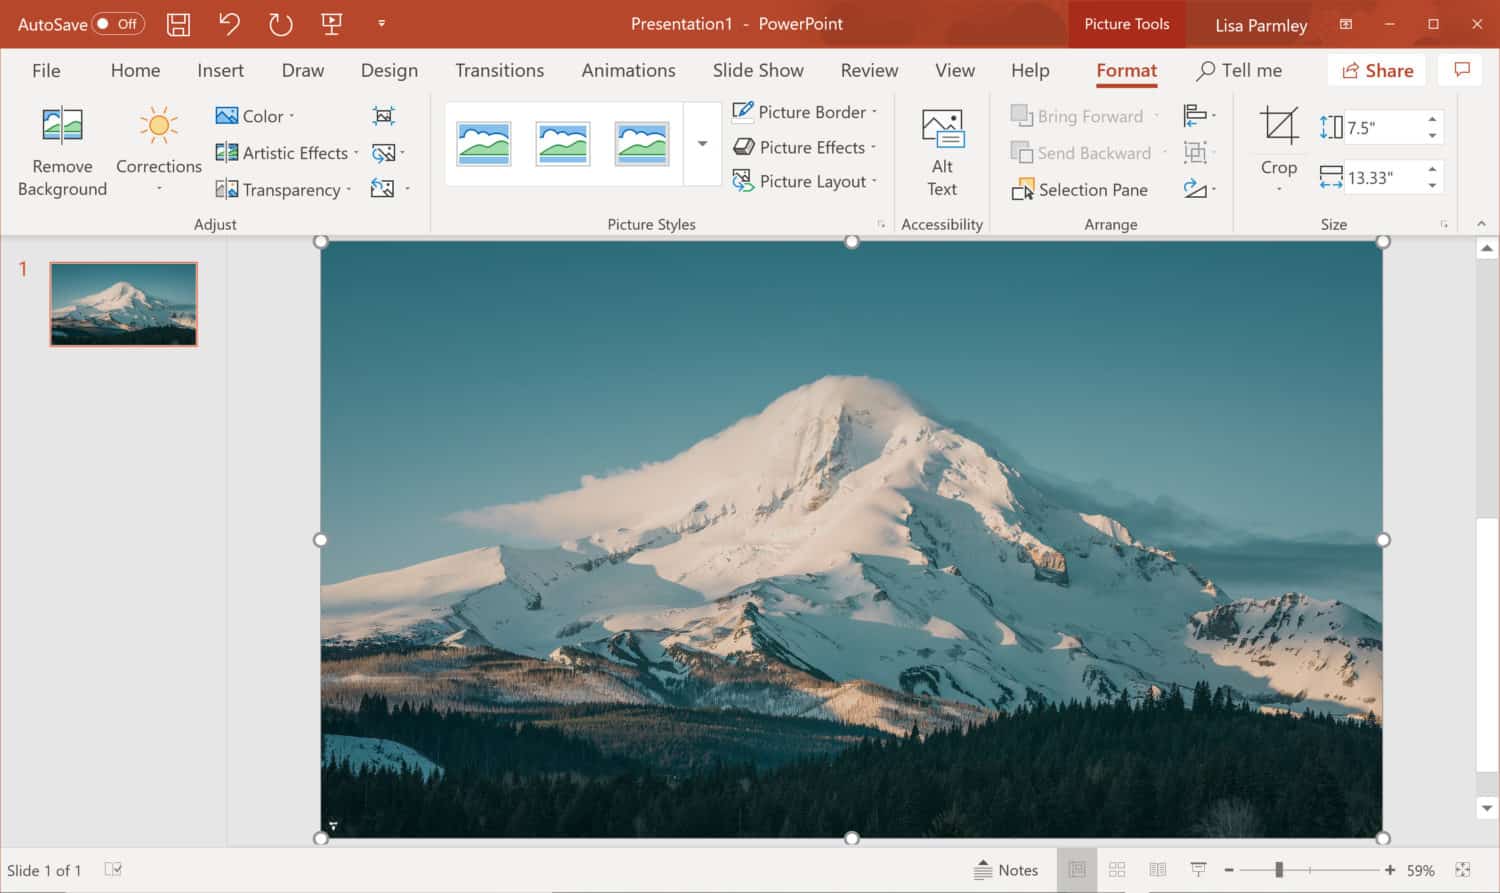
Then click on Transparency:
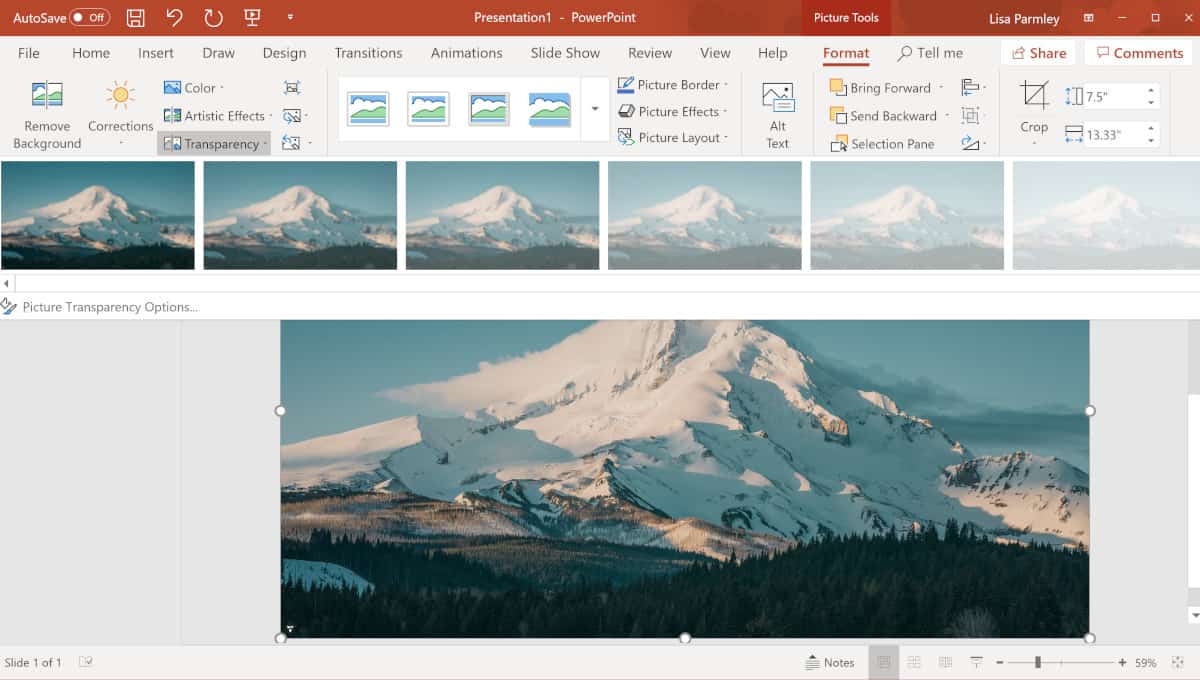
Boxes of transparent options will show up. If you don’t like one of the options shown, then you can click on the Picture Transparency Options link under the image transparency displays.
That will take you here where you have a Transparency slider:
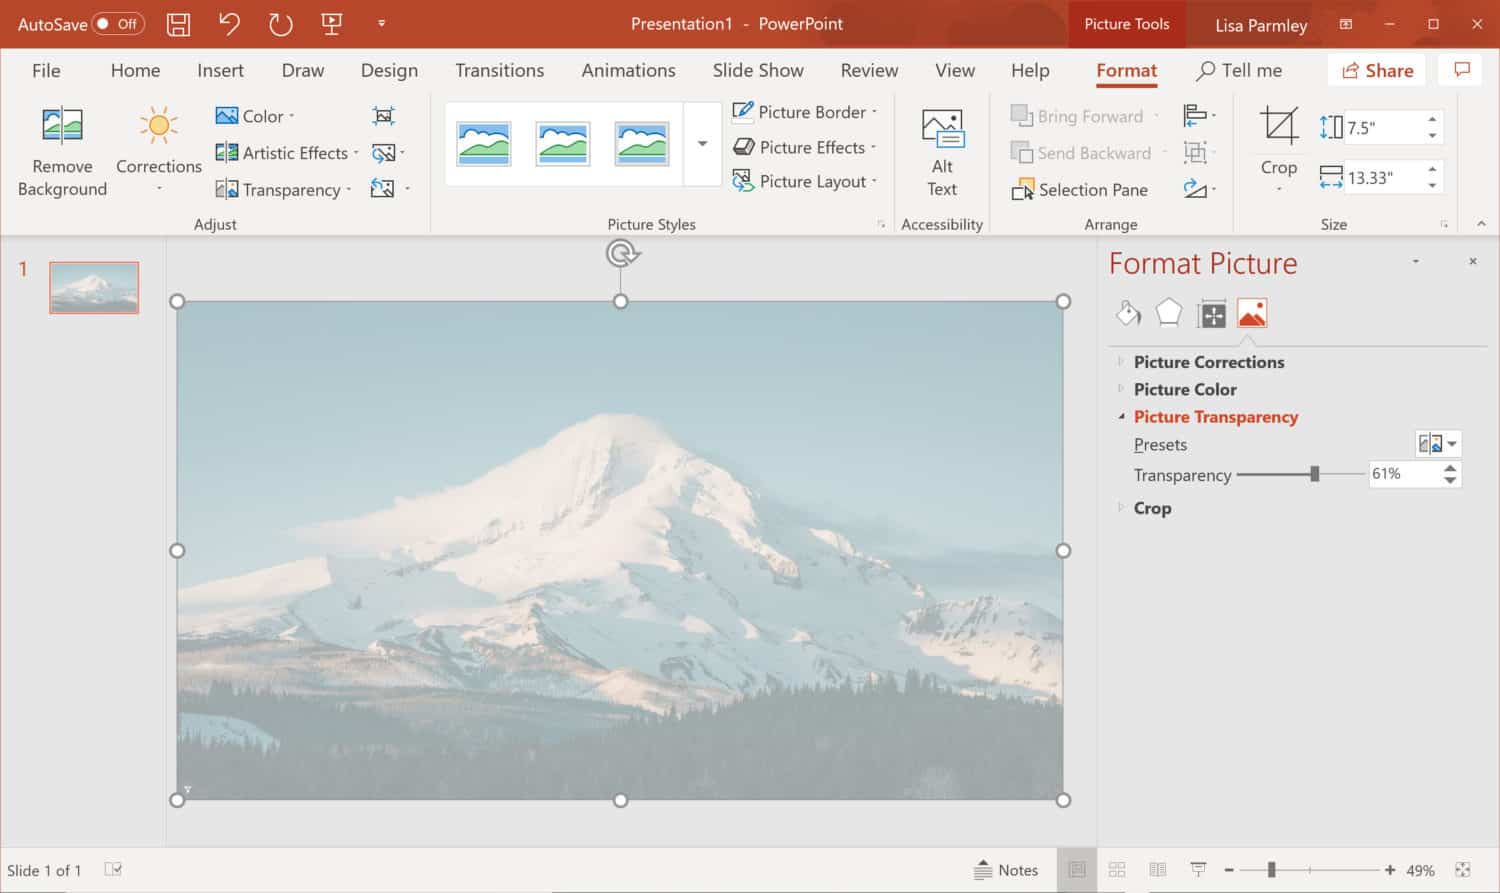
Using the Transparency slider you can select the exact level of transparency that you’d like.
Option 3: Transparency with Animation.
This option will work in every version of PowerPoint.
This animation will take your image in it’s regular form and turn it into a transparent version. It changes from full to transparent immediately. There’s no transition. So it’s not really a great way to get a transparent image, but I’ll include it for you just in case you need it for anything.
Here’s how to do it …
First insert your image into the slide:
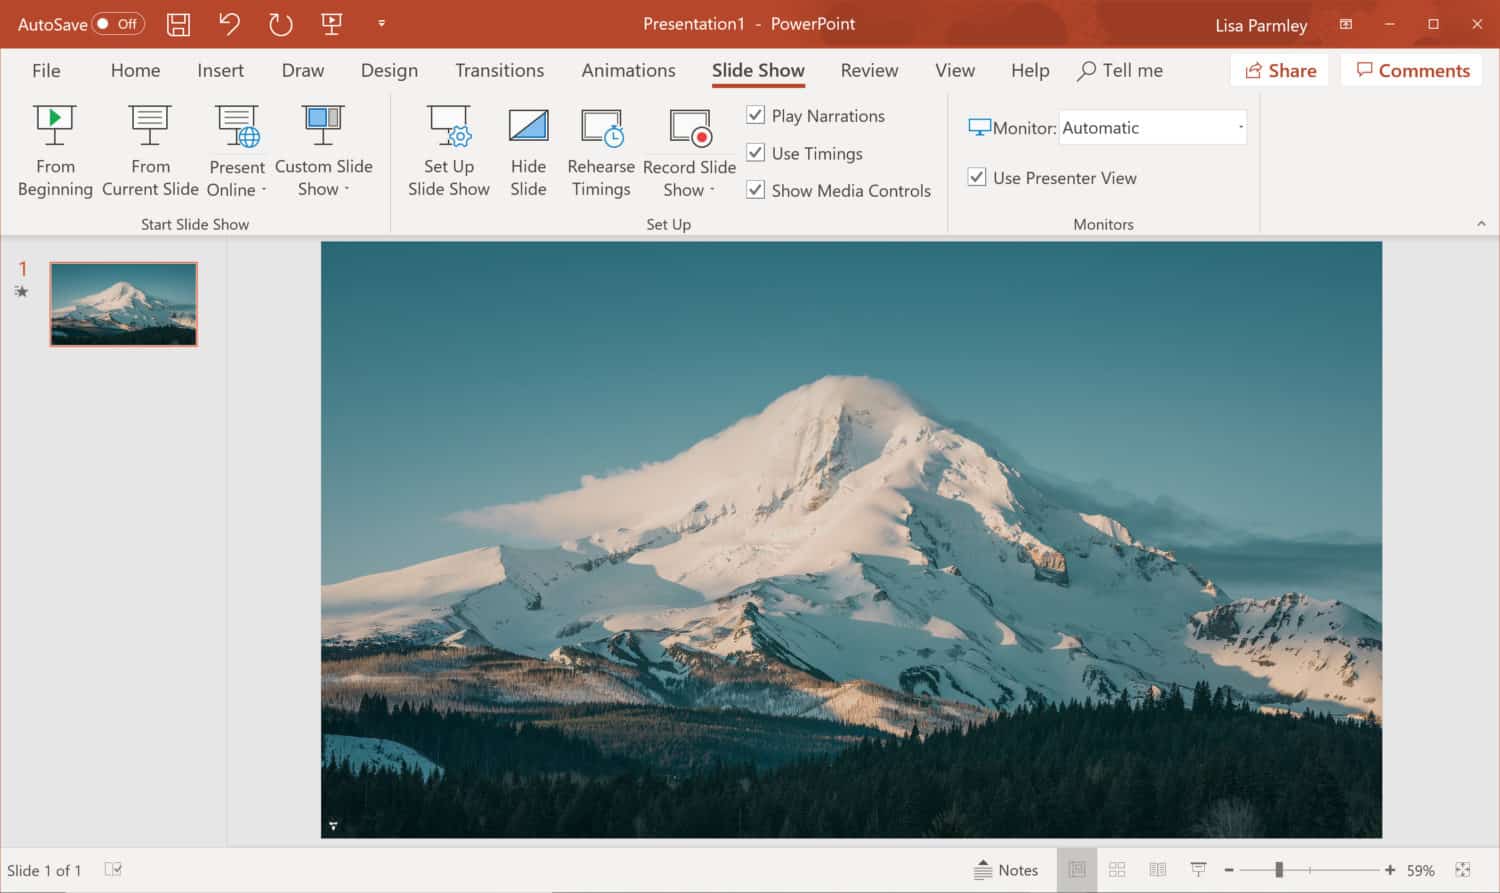
Next, go up to the Animations tab, select your image, and then click on Add Animation.
There is an option to add Transparency under the Emphasis section so select that:
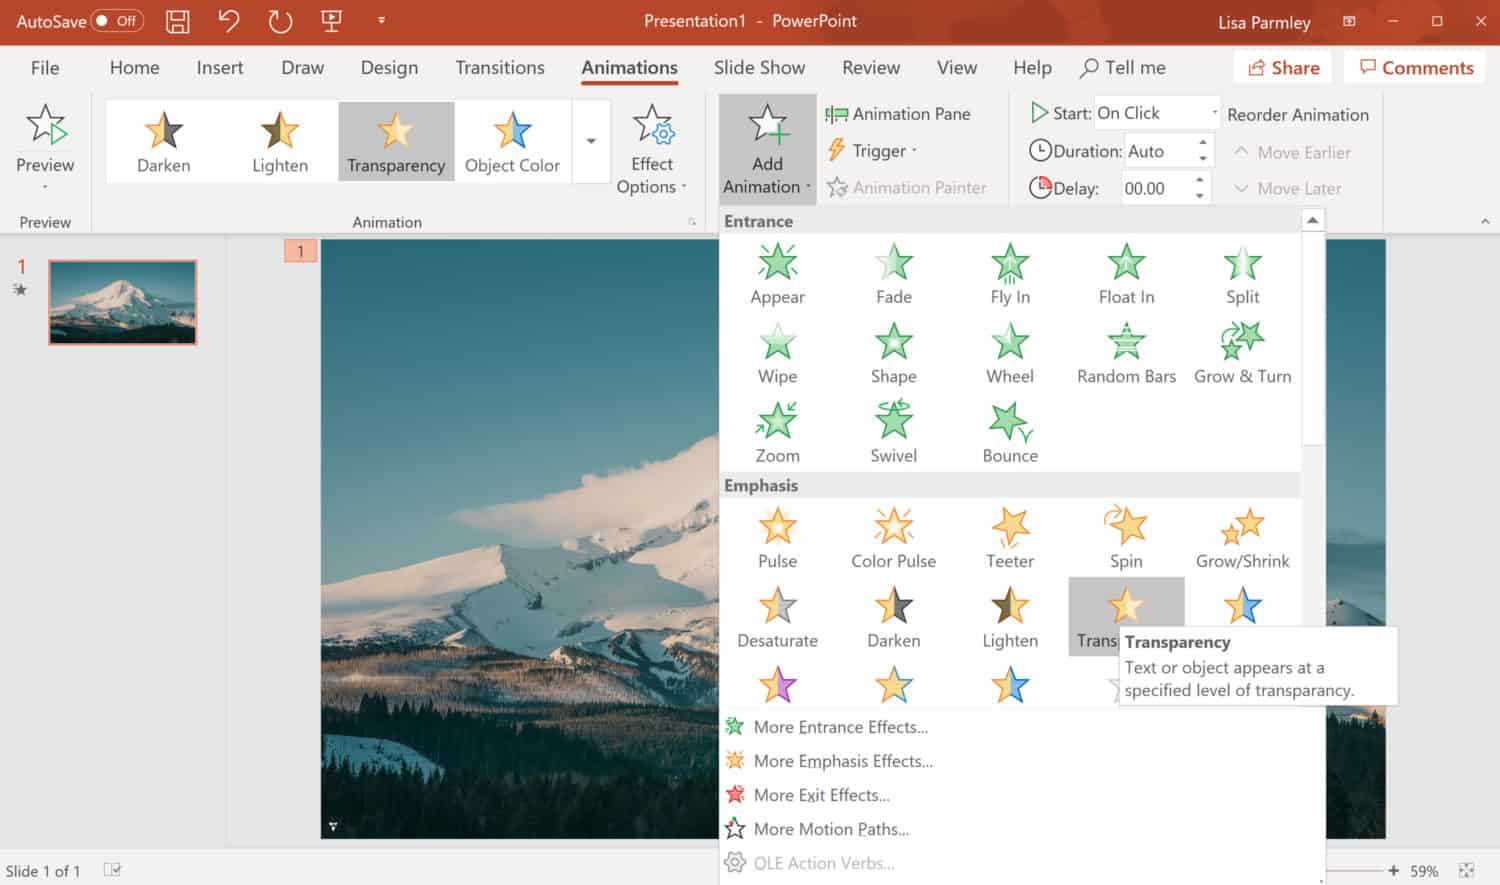
You’re done! You can adjust the timing of the animation, but other than that there’s nothing else to do.
When you run your slideshow, you’ll first see the non-transparent image and when you start forwarding through the slideshow, you’ll see the transparent version:

The image will start off with the regular version of the image and then change to the transparent version.
Best Uses for Making a Picture Transparent in PowerPoint
Transparency is great when you want the picture to accentuate the text on the slide.
Using transparency, you can fade the image to the background while the text pops out.
With the transparency options shown in this tutorial, you can have a transparent image which will be a light color and then overlay darker text on top of it.
This adds to the design of your presentation as opposed to just having text on a white background. In addition, including an image behind the text may help your learners recall the specific information.
If you’d like to take transparent pictures to another level, you can combine them with PowerPoint borders to make your slides even more interesting. In addition, you may want to consider removing the background from a picture in PowerPoint.
Conclusion
Follow along with this tutorial to learn how to make an image transparent in PowerPoint. It’s a great technique to use for blending images and text on a slide.
Please share this tutorial if you know anyone else who would find it useful for making great presentations.
As always we appreciate your support!