Our content is reader supported, which means when you buy from links you click on, we may earn a commission.
How to Loop a PowerPoint

Are you trying to figure out how to loop a PowerPoint?
There’s a lot you can do with PowerPoint so it can be confusing to get through all the features.
The good thing is, looping a PowerPoint slide show is easy to accomplish once you’ve seen how it works.
I’ll cover exactly how to make a PowerPoint loop in this tutorial. It’s a very quick process that you can set-up in about 60 seconds once you learn how.
What is a Looping PowerPoint?
A looping PowerPoint slide show is one where once you get to the last slide it automatically starts over from the beginning.
Many looping slide shows also show each slide for a set time. Once the time is up, the slide show progresses to the next slide automatically.
Why Would You Need a PowerPoint Slide Show to Loop?
If you want your PowerPoint presentation to run unattended then you’ll need to set up a looping PowerPoint.
To make your presentation loop, you’ll have to set timings for transitions from slide to slide as well as animations. It must all be programmed to run automatically.
Another alternative is to film the slide show, then play the video of it. This way you can also add in a voice over if that’s a benefit to people watching it.
If you’re attending a trade-show, have a booth, a kiosk, or at a convention then a looping PowerPoint is probably exactly what you need. That way you can set up your slide show and it will be on display for visitors. You won’t have to manually click through for it to run. Instead, you can spend your time connecting with visitors while your slide show plays on auto-pilot.
Method for Looping a PowerPoint
There’s only one way to loop a PowerPoint and it involves the same basic steps no matter which version of the software you’re using.
Step 1: Loop Settings
The first step is to go to the Slide Show tab. Then click on Set Up Slide Show like shown below:
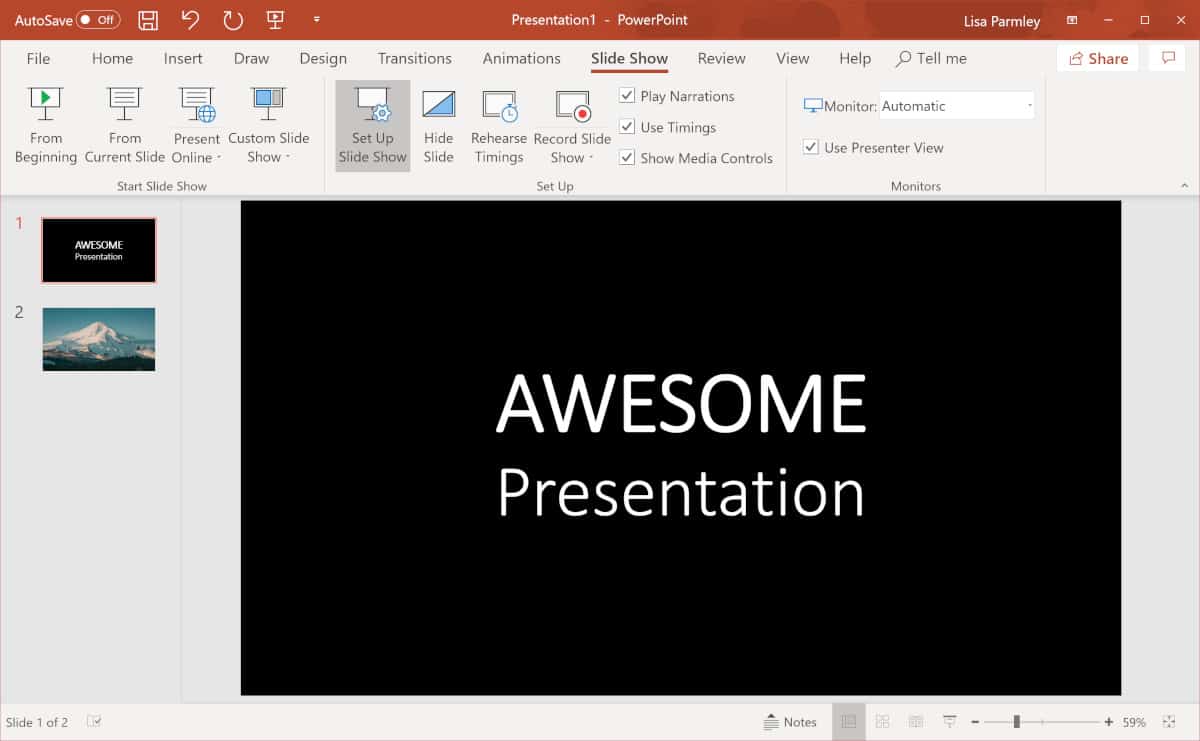
From there a dialog box will pop-up like the one below:
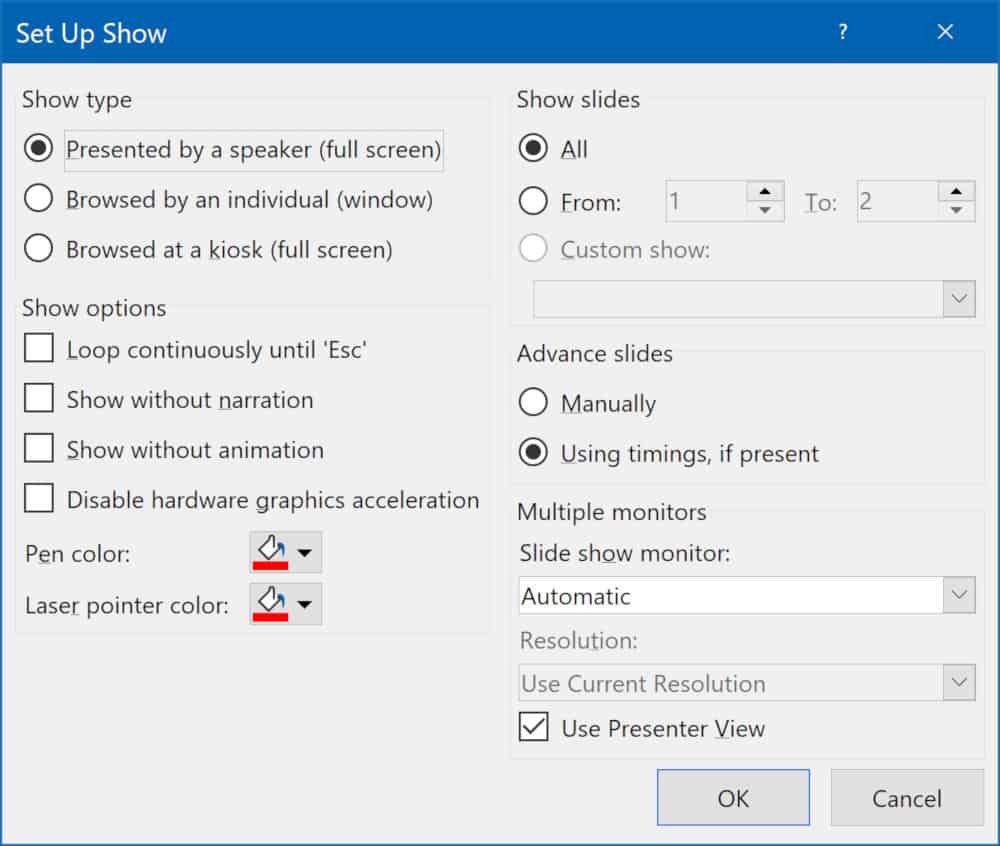
From the dialog box, click Loop continuously until ‘ESC’. You can find this option under Show options. Click OK. Here’s what the dialog box should look like when you’re done:
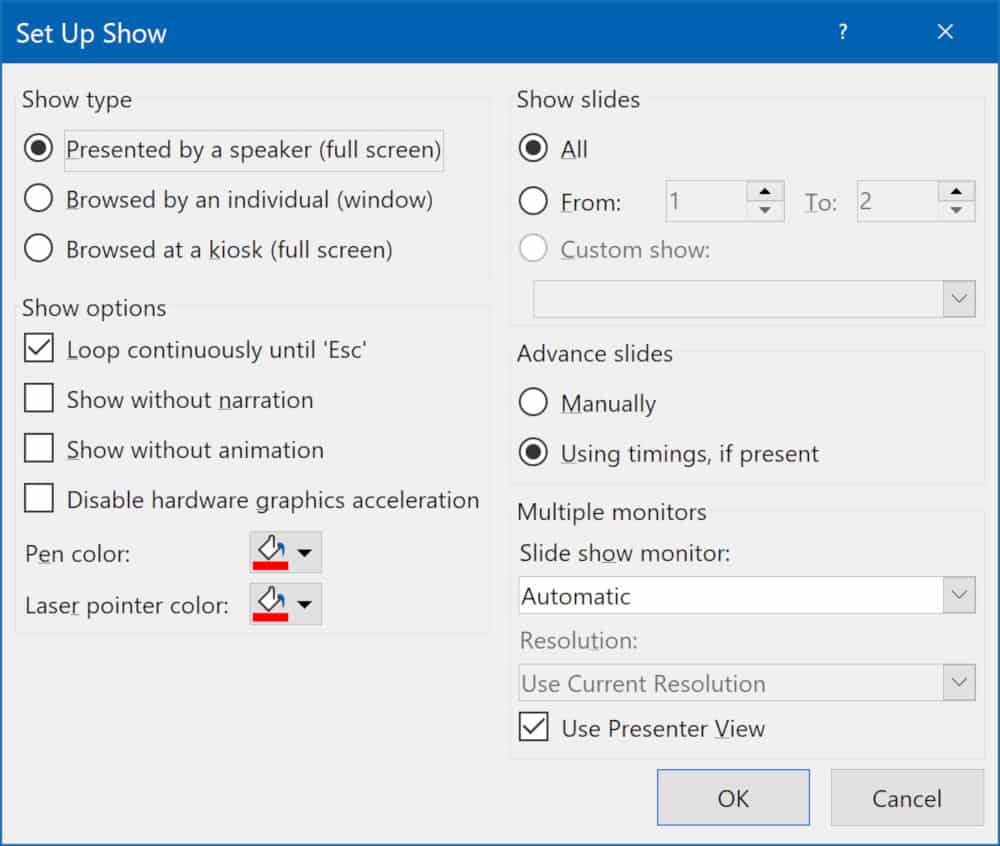
Now your PowerPoint show is all set-up to loop once it gets to the last slide.
However, your presentation will only advance to the next slide when you click on the mouse. You don’t want to have to babysit it like this so you need to set it up where each slide advances automatically.
Step 2: Make Each Slide Advance Automatically
To do this you can select all the slides in the navigation pane (alternately, if each slide needs a different length of time, you’ll have to repeat the following steps for each slide individually).
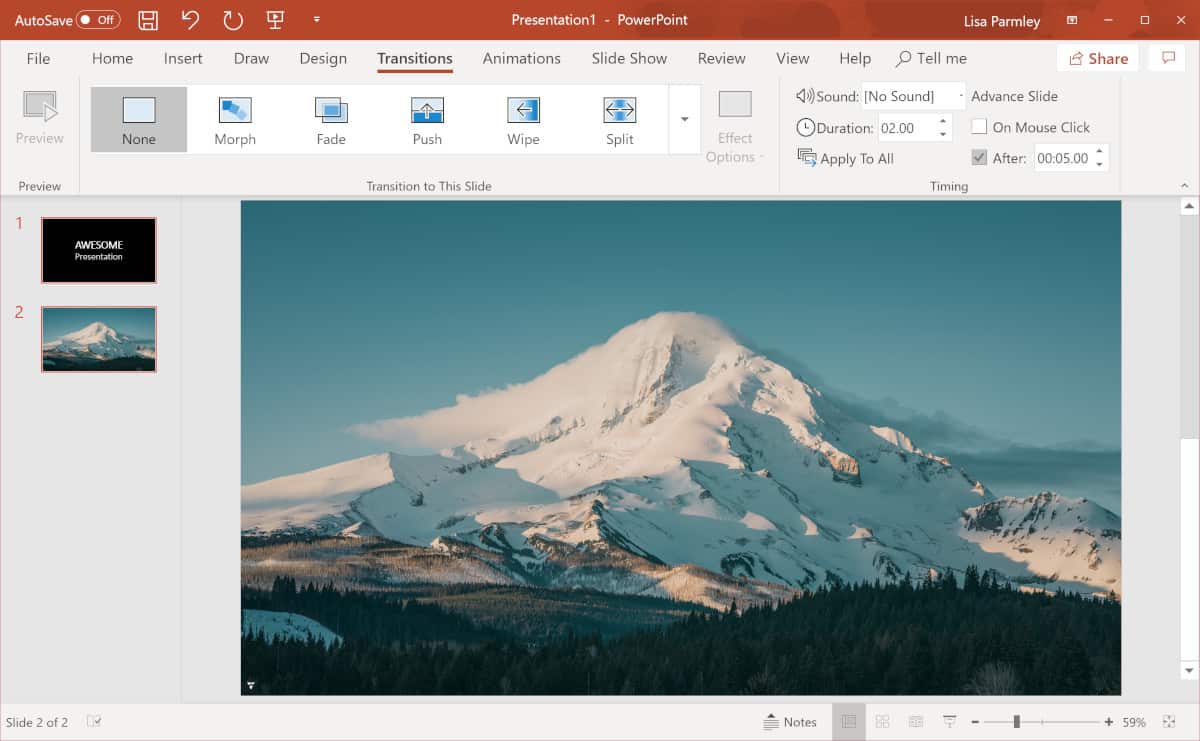
Go to the Transitions tab. Over on the right, in the Timing group, un-check On Mouse click, and instead check After.
Adjust the time next to After. This is the length of time you want each slide to display. Here’s how I set it up in the example:
Once you’ve set a time for each slide to play, you need to view the presentation to make sure the looping and timing is working. You should only have to click one time to get the presentation started. After that, the slide show should advance on its own if you set it up right. Here’s how to test your slide show …
Step 3: Check It
To play your presentation, go to the Slide Show tab. Then click on From Beginning and your presentation should start and continuously play, even looping back to the first slide once it gets to the end.
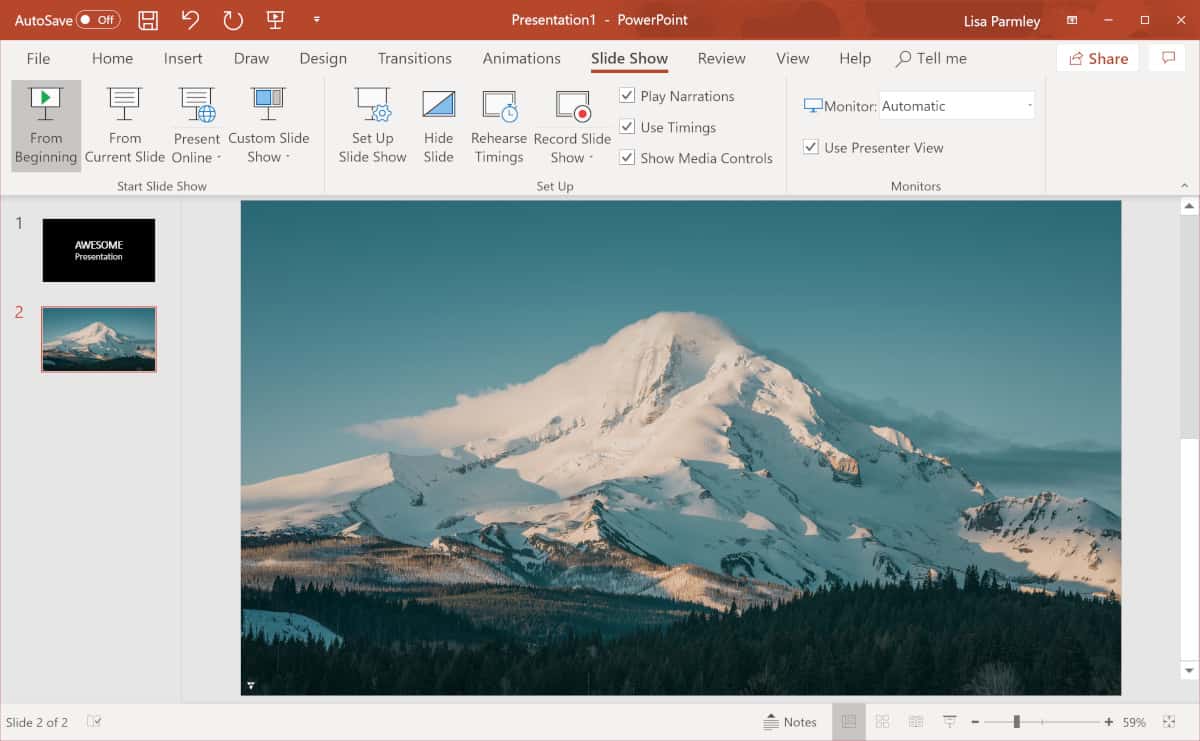
That’s it! You’ve now created a looping PowerPoint and can walk away from your presentation.
Best Practices
Trade-shows and conventions are loud so you’ll probably need to stick with a slide show without sound if you’re planning to bring your presentation to those venues.
If you’re going to run your PowerPoint presentation without sound, then you need to make sure you craft your presentation to be effective with ONLY visuals on the slides. That means viewers have to be able to understand the connection between the slides without any additional explanation.
It’s a different type of slide show than one where you plan to present or add a voice over and can fill in the gaps between what’s on the screen and what the viewer needs to know. If you plan your presentation this way from the beginning then you’ll be much more likely to create a presentation people will feel is worth watching.
Conclusion
As you can see from this tutorial, looping a PowerPoint is pretty easy to do. There are really only a few steps to it. Once you’ve learned the process you’ll be able to set your slide show to run on autopilot and can walk away. Your entire presentation will be automated!
This is perfect for trade-shows and other venues where you may have a booth set-up.
If you’re providing hand-outs for viewers of your presentation, you may consider adding in slide numbers to your PowerPoint. That way viewers will be able to pick up on where they’re at even if they show up part of the way through the presentation.
If you have any questions, please leave them in the comments. Otherwise, I hope this tutorial helps you get your next PowerPoint presentation set up quickly and easily!