Our content is reader supported, which means when you buy from links you click on, we may earn a commission.
Speed Ramping Techniques Using Popular Software

Are you looking to experiment with time and make spectacular dramatic sequences in your clip? As an online course creator, speed ramps are an excellent way to highlight key project events. This article will teach you what speed ramping means, the software, and the techniques.
To perform speed ranking, you’ll need video editing software. The software market could increase to 3.24 billion US dollars by 2030. And they seem to upgrade each passing year.
What Is Speed Ramping?
Speed ramping is your video clip’s steady increase or decrease. If you’re a lover of movies, you can see speed ramping in innumerable sports and action movies as the action switches between fast, ordinary speed, and slow motion.
You could compare speed ramping to flick books where the speed of flicks determines the motion.
This approach highlights specific areas of your video, making an impression on your trimming. It adds that extra touch to keep your followers engaged and thrilled.
How Does Speed Ramping Work?
At times synonymous with the Matrix effect, it allows you to easily shift between rapid and slow motion. You can also customize the pace of switching between the two rates, selecting between a progressive and smooth slowing or a swift and immediate flip.
Speed ramping can produce fantastic results when using a camera with significantly higher frames per second. It contributes to the most striking impression. The gradual variation in video clip pace over time adds tension and delight to the outcome.
Understanding Frame Rates When Working With Speed
Video, whether analog or digital, is a series of static pictures that produce the illusion of motion when you watch sequentially at a given pace. Each of the pictures is a “frame.” The higher the frame rate, the smoother the motion in the video will appear.
Frames per second, or FPS, refers to the rate of speed. So, if you record a video and play it back at 24 frames per second, every second of the clip has 24 different still pictures.
A frame rate affects everything from the viewing experience of your viewers to the size of your clip, so understanding them is critical.
Speed Ramping Premiere Pro
Speed ramping, or time remapping for Adobe’s Premiere Pro, helps generate a distinctive look by moving between super-low and super-fast video. You could easily add a speed ramp to any video in Adobe Premiere Pro.
The best experience needs a desktop. Statistics show that desktops lead the mobile platform in market share with a compound annual growth rate (CAGR) of 5.2%.
Here’s how to do it:
1. Begin by Changing Your View
To do so, right-click on the video you wish to combine with the speed ramp and select Show Clip Keyframes. After that, pick the time, Remapping, and Speed. You may now observe changes in speed in your video.
2. Design a Keyframe
Start by picking Pen from the toolbar or hitting P. Next, press the white line on your movie track at the point you wish the speed ramp to begin. And also where you desire it to stop. This should generate keyframes that will allow you to change the pace between the two spots.
3. Adjust the Speed
Drag the white line to divide the two keyframes up or down to adjust the speed. This should make the movie quicker or slower. The more you pull, the greater the temporal shift.
4. Streamline the Transitions
Pick the Selection tool and pull one section of the keyframe indicator on your video to smooth the transitions into fast or slow motion. This renders the transitions more fluid—similarly, the more the distance between the keyframes you dragged, the more fluid the transition.
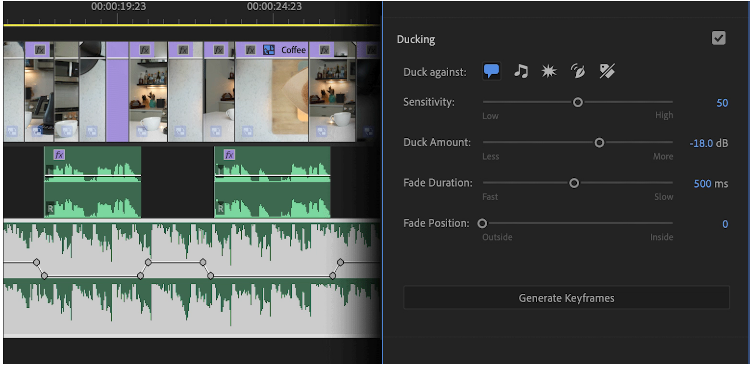
Speed Ramping for Davinci Resolve
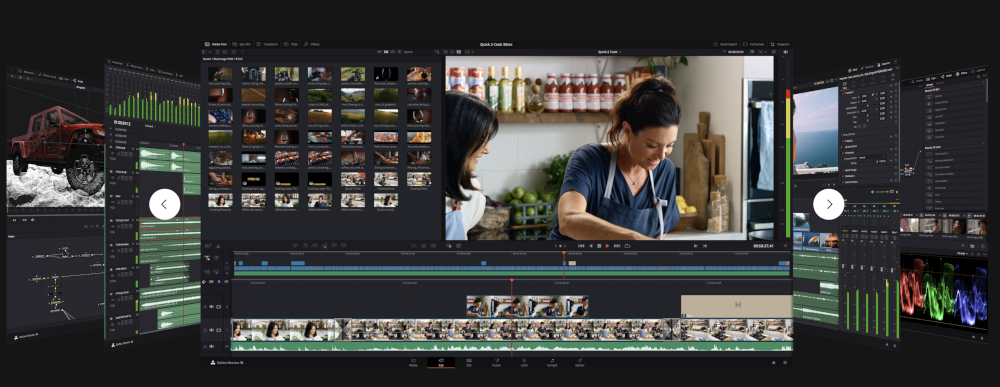
Should you want to speed ram for Davinci Resolve, here’s how:
- Select your clip and then choose Retime controls. A speed change effect will now be visible over your video in the timeline. Or you can alternatively use Control plus R shortcut.
- Set your play head where you would like the speed ramp to begin, And then select the menu on the overlay adjacent to the 100 percent. This displays the pace of your video. Then pick the alternative to include the speed point.
- Adding a speed point means you’re creating two distinct segments that you may alter the tempo of independently. If you need to have one speedy area and one sluggish one, you separate them using various speed points.
- After establishing all the speed points to make your clips, hit the drop-down menu and choose the option to alter the speed. Enter the percentage you would like the video to play at. And if you prefer something slower, use a lower %.
- Slipping the bottom handle may also alter your speed points’ duration. Also, you could change the tempo of your speed levels by pulling the higher handle.
- You may apply a gentle fade at the section that divides your speed points by left-clicking your video clip and selecting Retime curve. Next, you will see a Retime Frame popup, then tick the retime frame option box. Select Retime speed, then tweak the keyframes.
Speed Ramping for Final Cut Pro
Final Cut Pro is yet another notable editing program among online course creators.
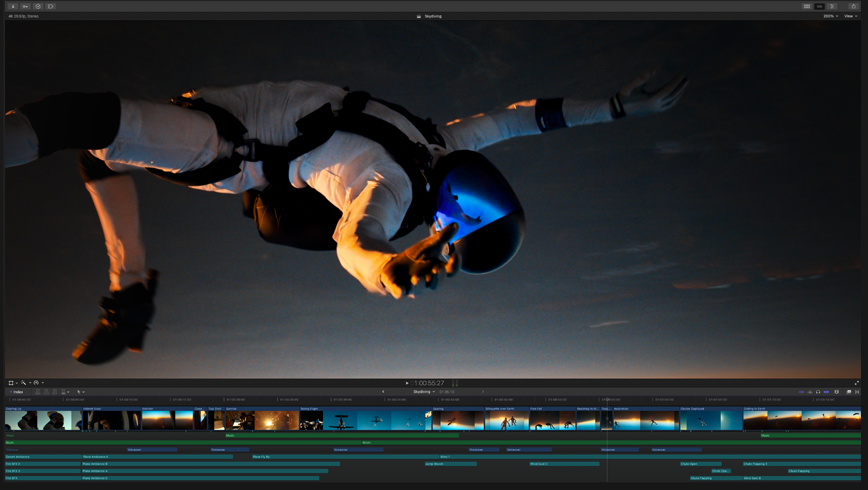
To understand how to speed ramp in final cut pro, you may begin a speed ramp through any clip by choosing it in your timeline. Follow this by executing the Shift + B shortcut. And this is similar to Davinci Resolve. It will layer speed ramps on your video.
To generate distinct speed ramp images, instead of applying keyframes to your video, drag the play head to the clip’s end, and you need to modify the speed. So press Shift + B once more. This will result in two different speed ramp components that you can adjust independently.
You could change the speed of your clips, click the menu beside the default is 100%, and select Slow or Fast. If you choose fast, you can double the clip’s pace.
When you choose fast, you may choose between accelerating the clip up to 20x as an initial point and dragging the clip’s handles to slow down or speed up from there.
Move the grips of the gray columns that serve as crossovers between your clips at varied speeds to change the gradual fade. You may move them closer together to compress the transitions or away to make the changes more smooth.
Should you wish to adjust the position of the speed ramp feature, click the gray bar control that emerges between videos. You may then drag and change the length of the individual clips as needed.
Advanced Speed Ramping Techniques
Speed ramping can help you create a sense of tension, emotion, or drama in a scene. Let’s explore some advanced speed ramping techniques that can attract more audiences for your clips.
Speed Ramp Transition
What is a speed ramp transition? It’s a technique that smoothly switches between two shots with varied playback speeds.
Video editing software like Final Cut will enable you to adjust the playback speed of individual clips. You could use the transition to create a sense of continuity from one frame to the next. Or you can highlight a specific moment in a scene.
If you want to create a speed ramp transition, one way is to start with a shot at regular speed and then slowly reduce its speed as you change to the next shot. To accomplish this, adjust the playback speed of the first shot over time and then match the speed of the second frame to the first.
The result will be a smooth transition between the two shots.
Alternatively, create a speed ramp transition by starting with a shot at normal speed. Follow this by slowly increasing the pace as you transition to the next shot. The transition will trigger a sense of urgency or excitement in a scene if it’s the excitement you’re looking for.
How To Freeze Frame With Speed Ramp
The freeze-frame technique creates a dramatic stop in your video by halting it for some seconds. Creating this effect is as simple as using the slow-motion component. To freeze-frame your film, perform these steps:
- Bring the video you want to edit into the editing software we mentioned earlier
- Move the video to the primary timeline by dragging it there.
- Over the timeline, select the “Tools” menu.
- Choose “Action Camera Center”
- On your left side, select Freeze Frame.
- Place the play head at the point where you want the freeze-frame to appear in the footage.
How To Make Slow Motion Video With Speed Ramp
Slow motion is a technique you can use to stretch out the time in a shot, making it appear to move more slowly.
A simple method to intensify the situation and keep viewers on the edge of their seats, anticipating what comes next, is by including slow motion in your film.
Begin by importing your footage and moving it over to the editing tracks. Then, from the “Tools” menu, pick “Action Camera Center.”
Follow this by clicking “Create Time Shift” on the “Effect” option at the highest point of the window. You’ll see that the time shift border will show up at the top of the timeline. From here, you can move it to cover the timeframe in your clip that you wish to slow down.
