Our content is reader supported, which means when you buy from links you click on, we may earn a commission.
How to Increase Volume in Audacity: Multiple Methods Covered
Audacity is an audio editing platform with over 100 million downloads. It’s a free app that’s easy to use and great for your next audio project.
We’ll go over how to increase volume in Audacity, including an entire audio clip and a section of audio. You’ll also explore the difference between the Amplify and Normalize features. Read on to learn everything you need about editing audio levels with Audacity.
Increase the Volume of an Entire Track in Audacity
There are multiple ways to adjust Audacity volume, so you’ll want to consider each of these to determine which works best for your purposes.
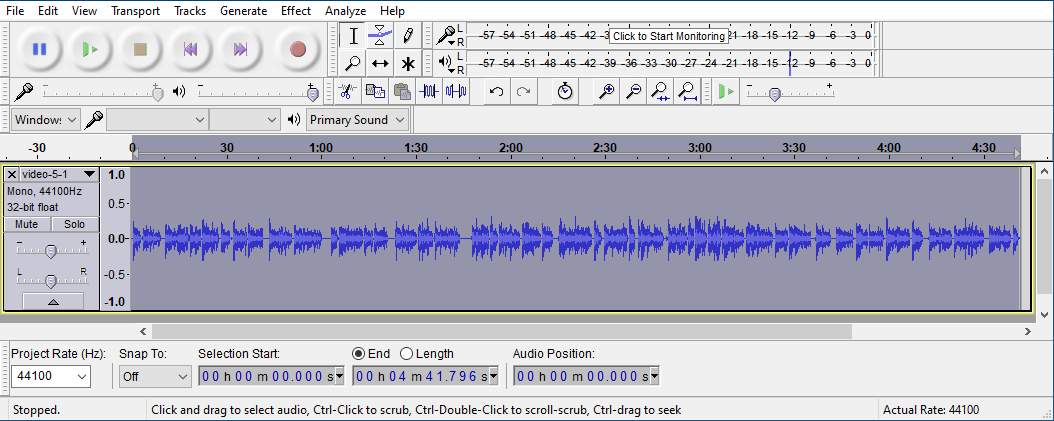
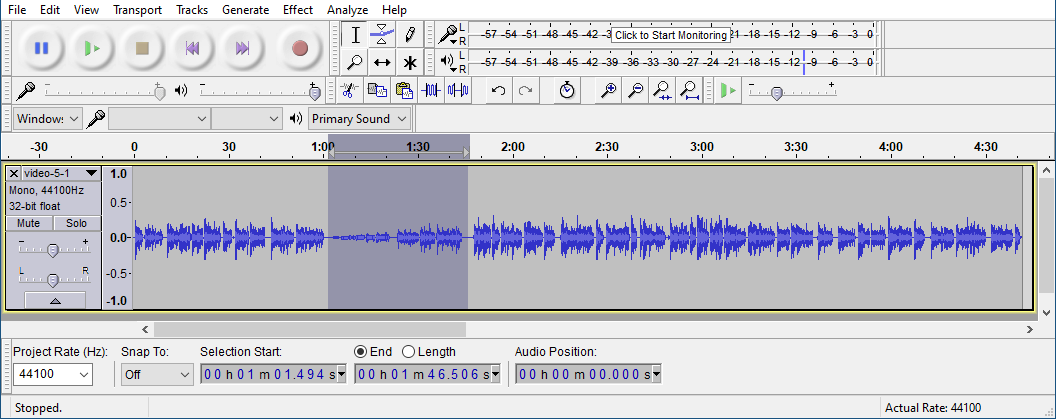
To start, hover your cursor over the music waveform to increase Audacity’s overall volume quickly. Select the portion of audio you wish to amplify by clicking and dragging, which should be the entirety of the audio clip in this instance.
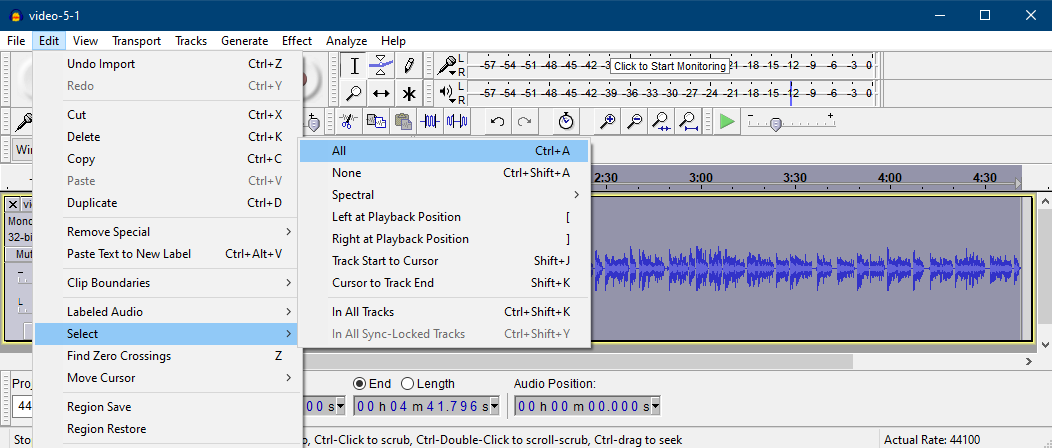
Alternatively, you can head to the Edit bar on the top left of your screen and press the Select button, then the All button.
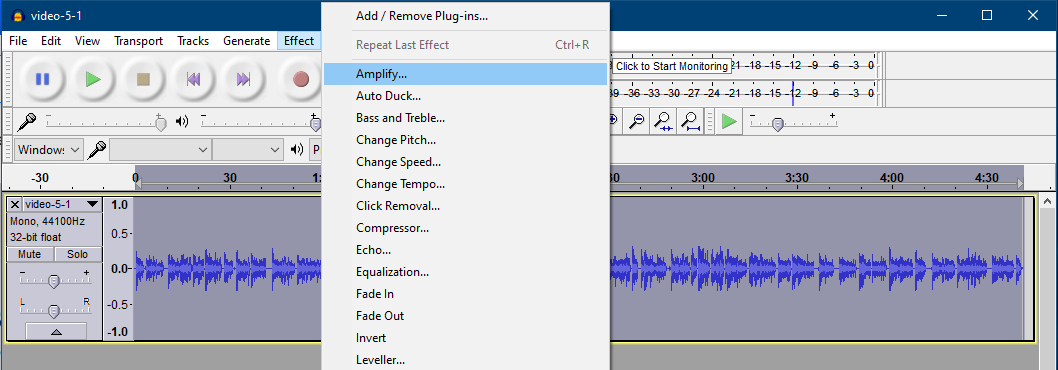
Once you have your audio highlighted, you are ready for the next step. From there, click Effect and Amplify.
Now you can adjust the sound by changing the amplification numbers until the waveform expands to fill closer to the top and bottom of the window.
You can also use the Normalize feature.
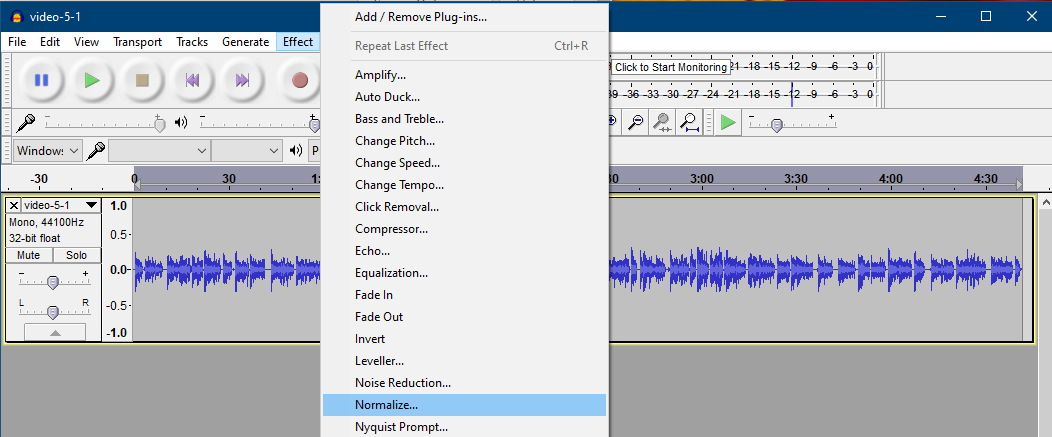
Hit Normalize under the Effect bar and apply the method to your entire clip, and you can boost your sound to a certain level.
You may wonder about the difference between normalize and amplify, so we’ll go over that next.
Difference Between Normalize and Amplify
Normalize and Amplify are both helpful tools when figuring out how to increase volume in Audacity.
The effects of Normalize and Amplify are similar for a simple mono track. However, there are several key differences between the two features. For instance, the Normalize effect can help you edit two audio clips to have the same volume level. In contrast, Amplify only raises your audio by a certain amount.
Amplify
Amplify increases the audio level by a certain amount. The Amplify feature lets you set a new peak amplitude and increase your volumes in an interdependent way. It is distinct from the Normalize feature, which raises all audio to a specified level in a rudimentary fashion.
You can access the Amplify effect feature by selecting your preferred audio clip with the click and drag tools. Then, press Effect > Amplify.
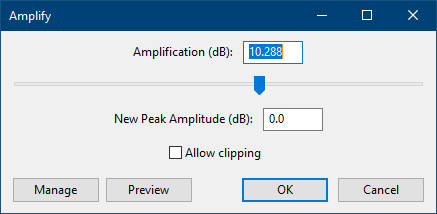
An Amplification task box will appear. Set your new Amplification dB level, and the New Peak Amplitude will adjust accordingly. You’ll be well on your way to increasing your audio.
Normalize
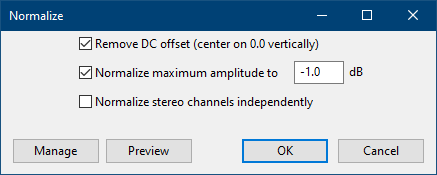
The Normalize tool allows you to set the volume of multiple tracks and remove any DC offset from your tracks.
Hit Effects > Normalize to access the Normalize menu.
A task box will appear and let you set a peak level of the audio clip up to 0 dB. You can select the same peak level for two tracks to have the same volume.
Increase the Volume of a Specific Part of a Track in Audacity
Sometimes you don’t need to raise the volume of an entire audio clip. To increase the sound of a specific piece of audio, you’ll need to split the audio into a smaller soundbite. Then, you can change the sound level of each clip.
We’ll walk you through a step-by-step process and teach you how to raise the volume of a specific audio clip.
Split Audio in Audacity
Go to the selection tool in Audacity. Click Edit, then Clip Boundaries, allowing you to specify a single audio clip for editing.
A pop-up menu will appear at this stage. Click on the Split button on the pop-up menu, and your selected audio will separate from the rest of the clip.
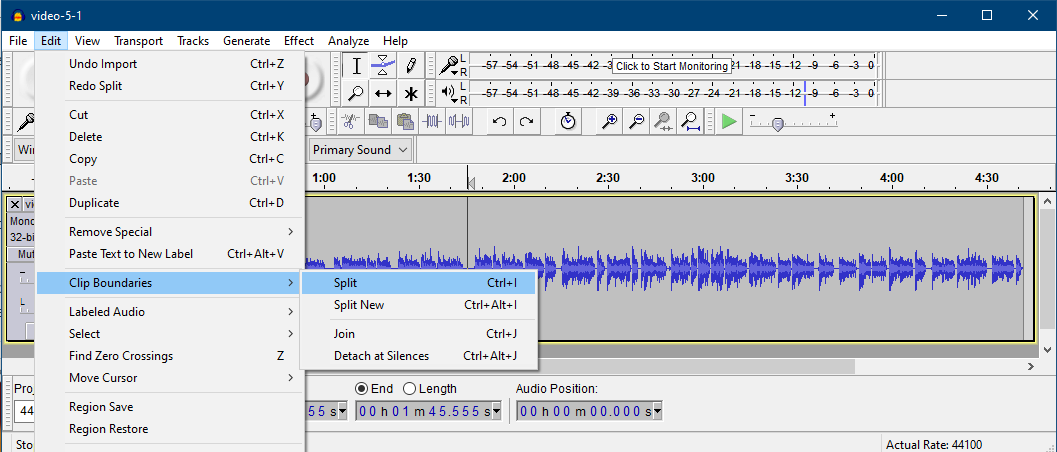
You can also use several helpful keyboard shortcuts to split audio easily. You can hit Control + I on a PC or Command + I on a Mac device.
Increase the Volume of a Specific Part of a Track
You now have a new clip of audio at this point. Its volume can be increased or decreased by using the techniques above.
You can select the entire clip with Edit > Select > All. From there, you can choose either the Amplify or Normalize options.
Remove Silence in Audacity
Do you need to remove silence from an audio clip? Some audio has sections of unwanted silence, but don’t worry. There’s an easy way to get rid of the silence on Audacity.
Audacity doesn’t have a feature for deleting silence from an audio clip. However, you can combat this issue by reducing the audio clip to zero seconds, effectively deleting it.
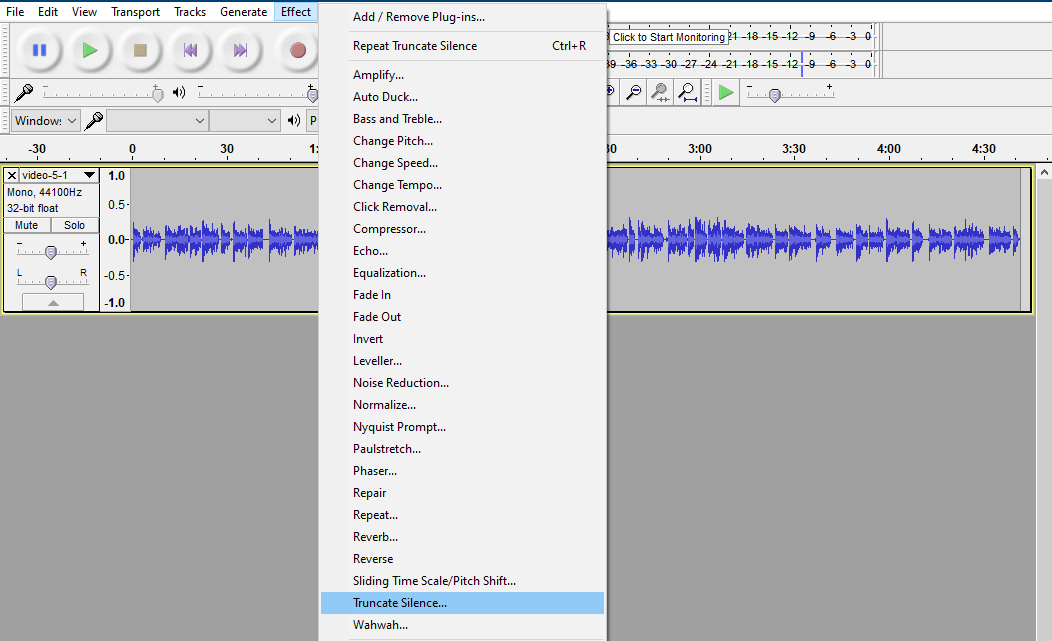
Use the Truncate Silence effect to reduce quiet sections. Hover your mouse over the Effect bar and head to the Truncate Silence option.
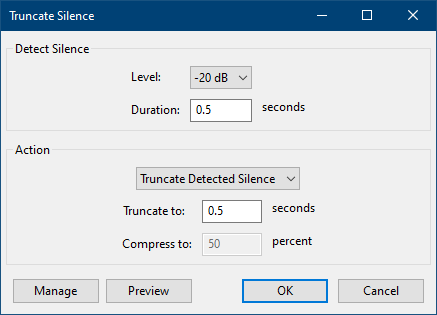
Next, reduce the time ‘Truncate to’ time to zero. Audacity automatically detects areas of silence, so you don’t have to select specific sections.
You can also create a Crossfade effect to shorten the time between audio sections. Click and drag two tracks and overlap the bits of audio. You will delete any area of silence between the clips and overlap the two sections of audio.
How To Fade Volume
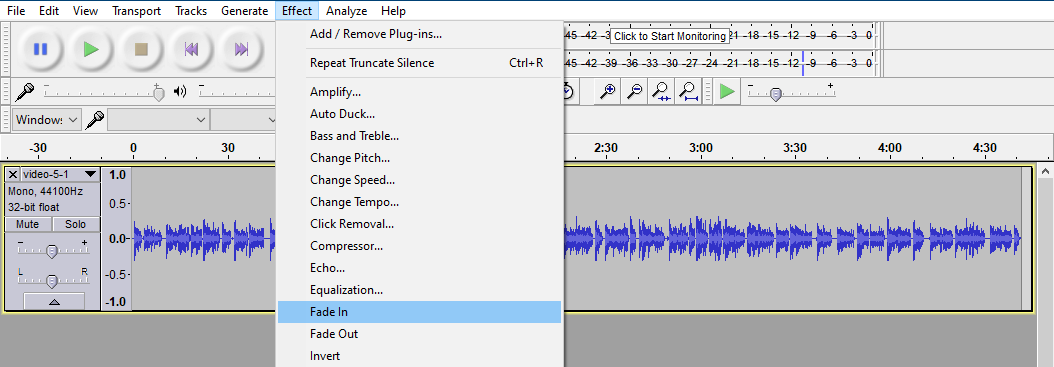
Go to the Effects menu on your Audacity web page and locate the Fade In and Fade Out buttons. These allow you to raise and lower volume quickly. You can use different fade lengths for a minimal or maximal effect.
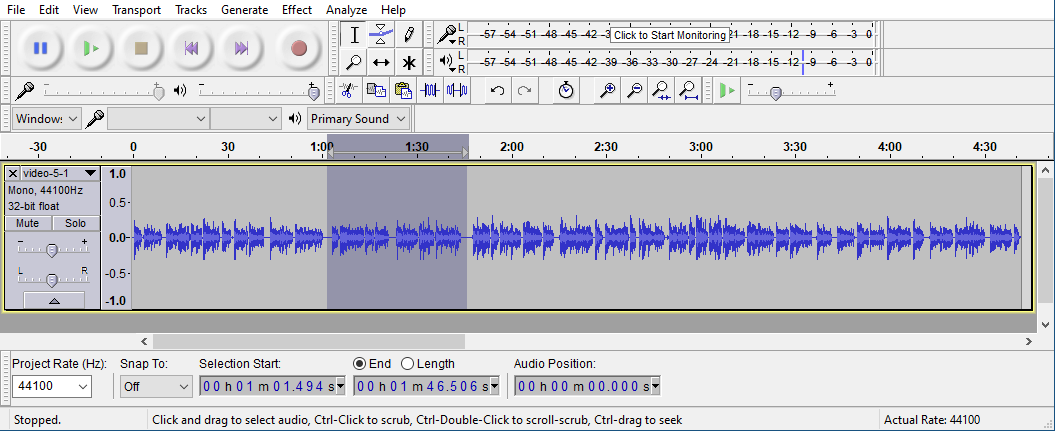
To Fade In or Fade Out, select the length of an audio track. Use your cursor to click and drag, highlighting the area of audio you wish to edit.
Next, hit the Effects menu and Fade In to increase the audio of the select portion.
Once you’ve hit that, you will see your audio track lower in volume (if you used the ‘Fade In’ effect).
Alternatively, you can press Effects > Fade Out to gradually decrease the clip’s volume, creating a tapering effect.
Conclusion
Knowing how to increase volume in Audacity will become second nature by following these quick and easy tips. You can utilize several Audacity features to find the perfect volume adjustment for your audio track.
